Getting Started
Installing the POSpro Admin Panel: A Step-by-Step Setup Guide
- Uploaded Date: 23-June-2024
- Project: POS Pro
- Author: Acnoo
- Email: acnooteam@gmail.com
Thank you for purchasing our product. If you have any questions that are beyond the scope of this documentation file, please feel free to email us via our user page contact form or directly to email at acnooteam@gmail.com
Requirements
- PHP >= 8.1
- Ctype PHP Extension
- cURL PHP Extension
- DOM PHP Extension
- Fileinfo PHP Extension
- Filter PHP Extension
- Hash PHP Extension
- Mbstring PHP Extension
- OpenSSL PHP Extension
- PCRE PHP Extension
- PDO PHP Extension
- Session PHP Extension
- Tokenizer PHP Extension
- XML PHP Extension
For more information about deployment see the Laravel documentation here https://laravel.com/docs/10.x/deployment
Download Project from Envato
After successfully purchase POSpro download the project from Envato download page
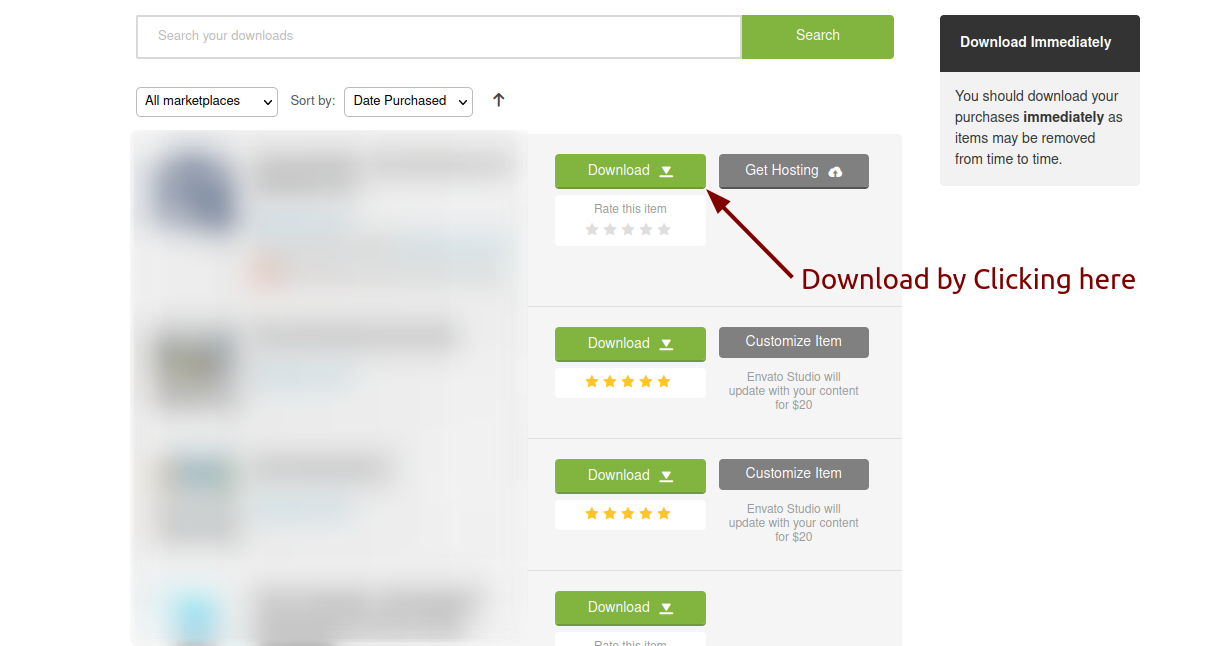
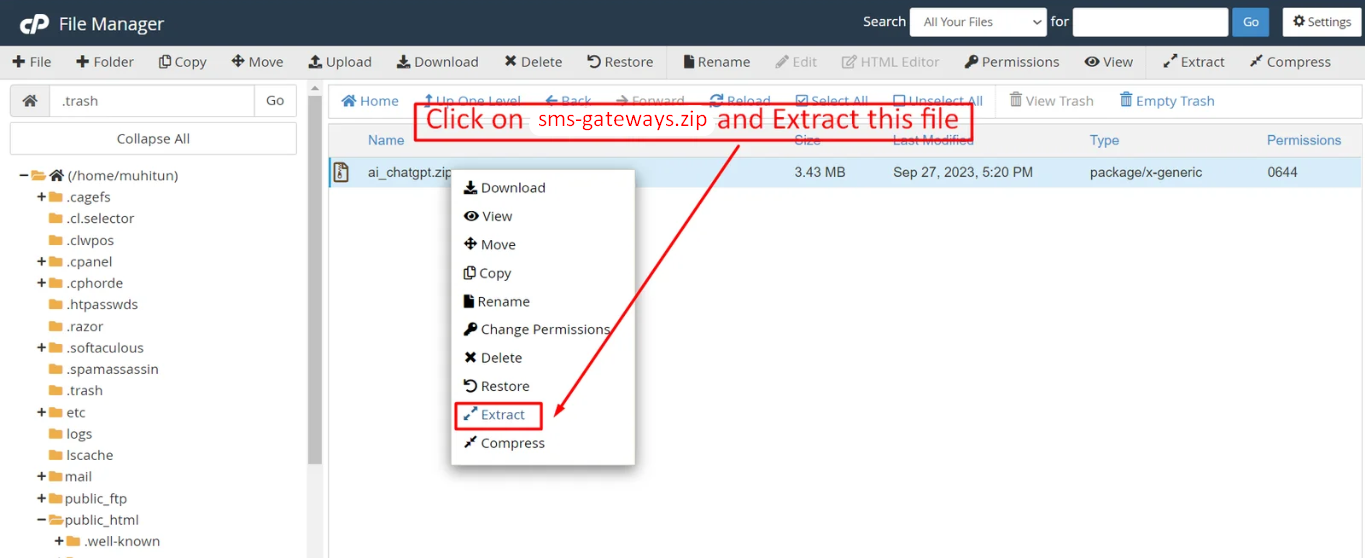
Extract the downloaded file. You will have another zip file named Super-Admin.zip containing the main project's files and a documentation folder. You are reading this documentation, that means you already have theme both.
Creating Database
Before installing, you will need to create a new database. If you already know how to do this or have already created one, skip to the next step.
Note: Please use empty database. In most cases you should be able to create a database from your cpanel.
Login to your cPanel by entering this in your browser url
yourdomian.com/cpanel
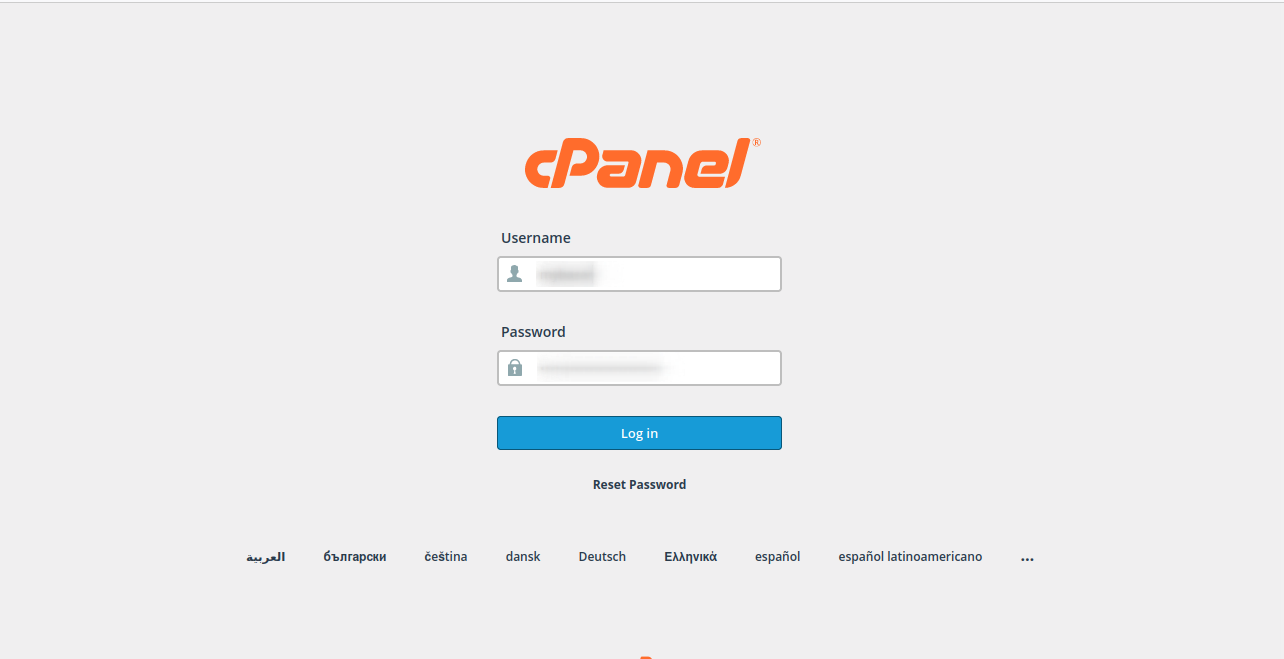
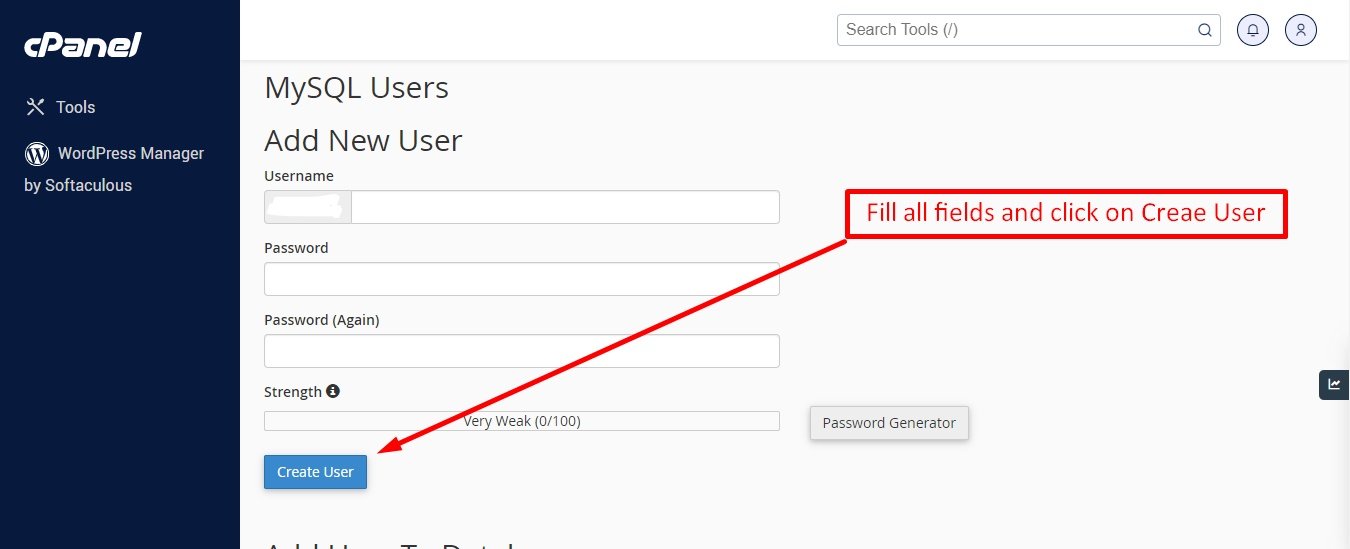
Step: 1
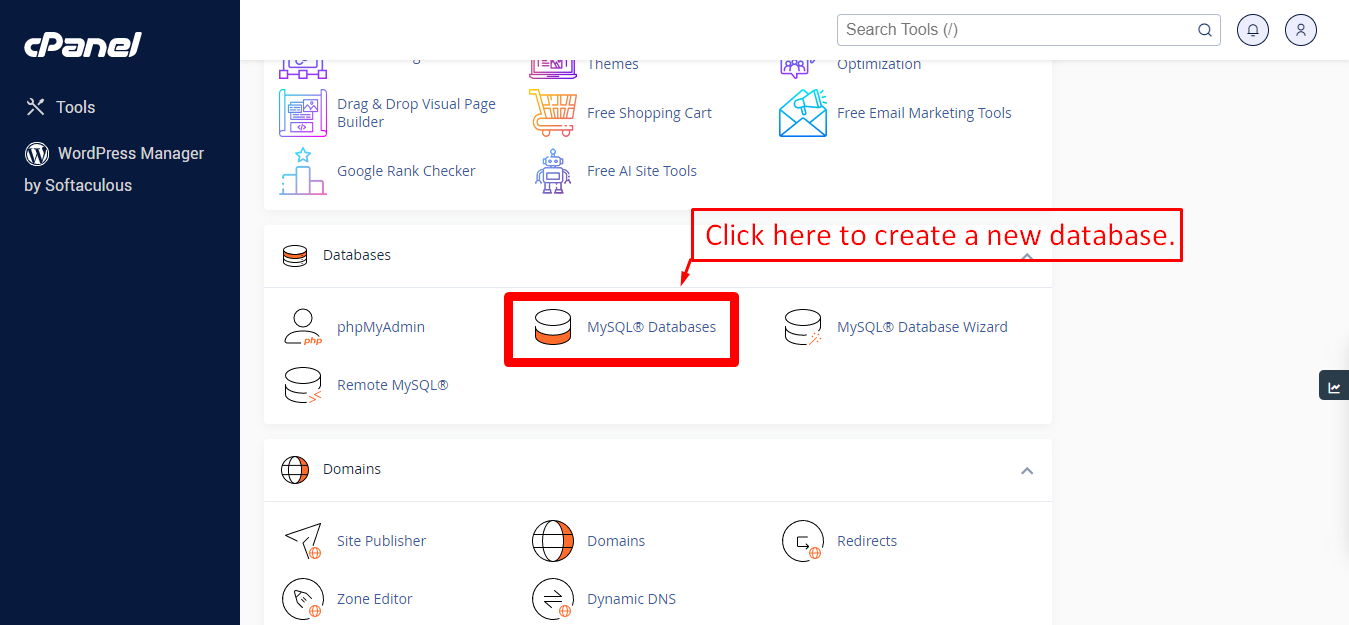
Step: 2
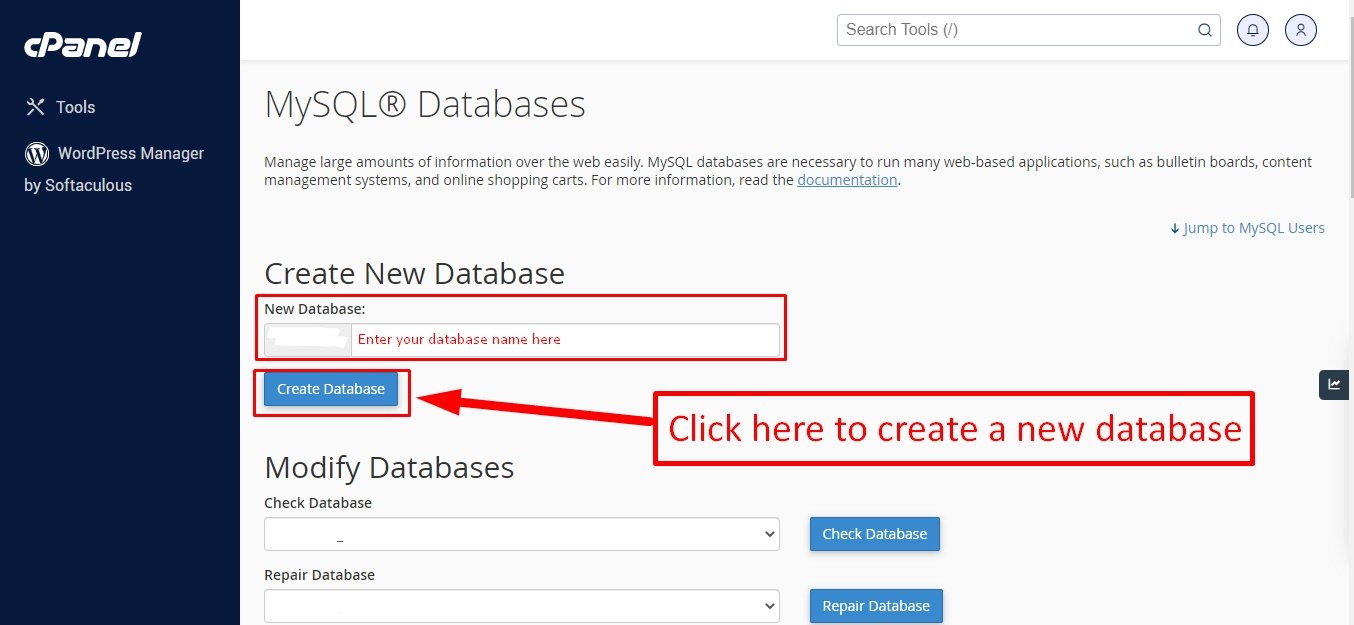
Step: 3
Now you need to create a new user. On the same page go to create a new database user
Step: 4
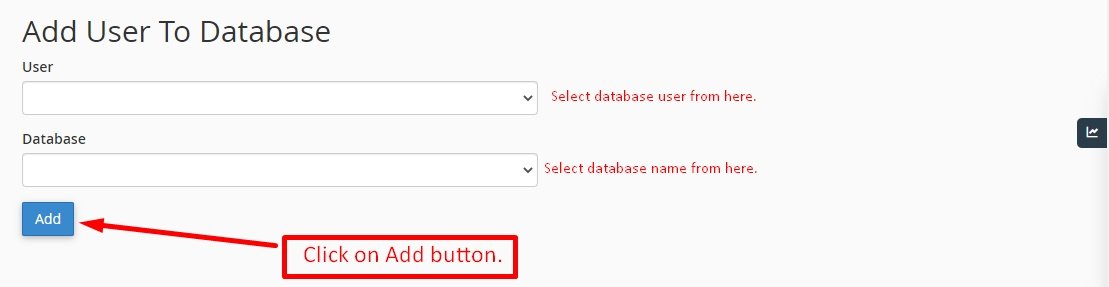
Now add the user to the database
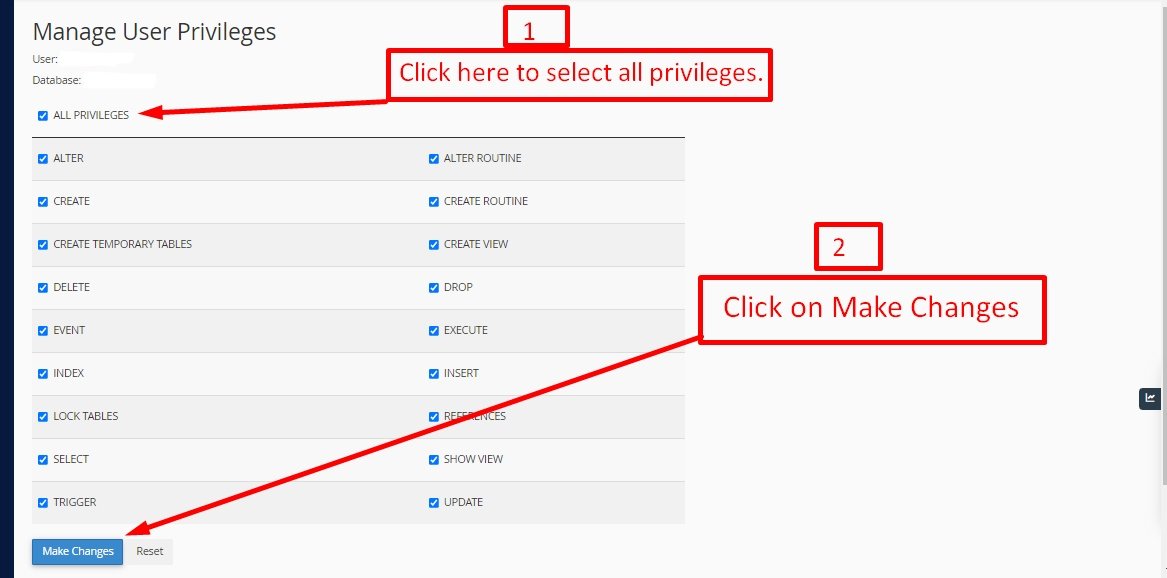
Step: 5
And select full permissions on the database to that user
Uploading Files
On some operating systems, the dotfiles are hidden by default. Before starting to upload the files, please make sure your file explorer has the option to view hidden files turned on.
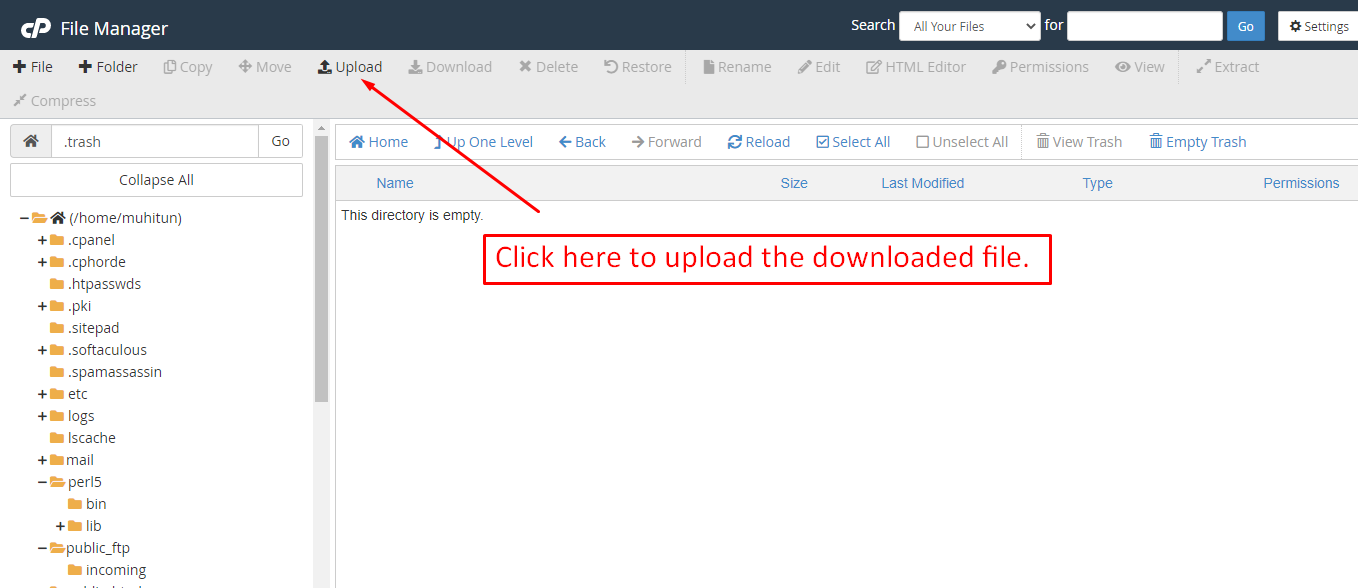
After creating a database, Upload the Super-Admin.zip file on the web root folder of your domain. This folder is generally called public_html, html, or example.com, but depending on your server's configuration, it might be named differently.
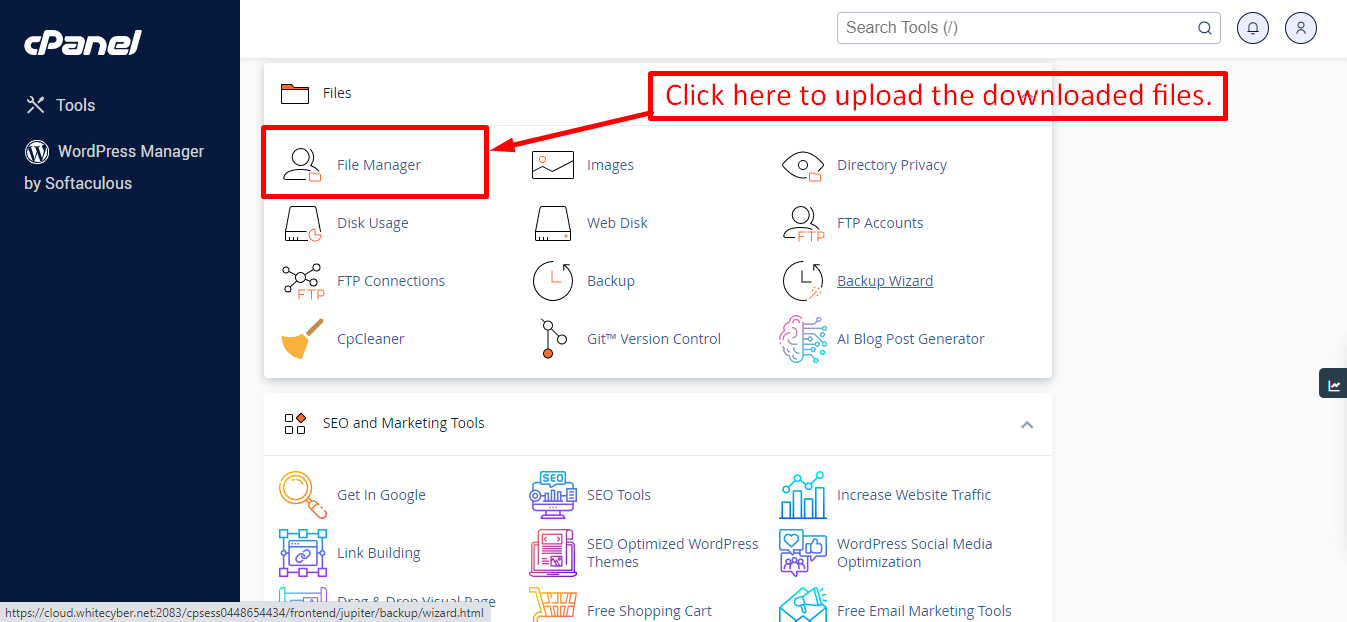
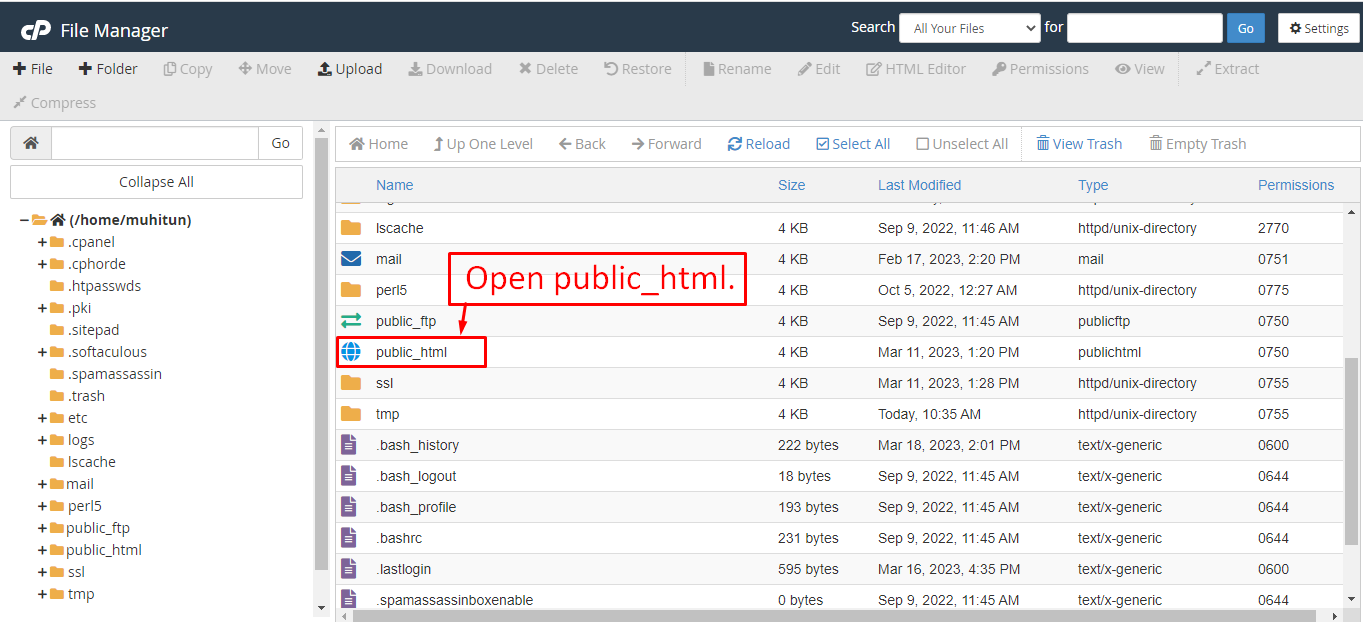
After that in the public_html directory upload the downloaded file.
Note: Important Make sure that you have .env file in your folder.
Note: Make sure that .htaccess file got copied properly from the download to your server.
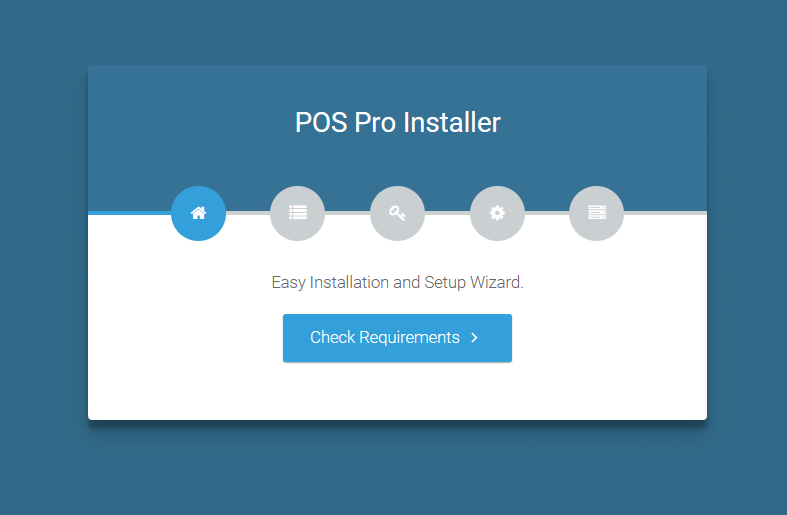
Installation Wizard
Go to your website address, then you'll see an installation wizard. To open the installer. Visit
yourdomain.com/install
Now the installer will show up.The First screen will be Welcome Screen
Note : If you are not able to access the website by accessing yourdomain.com/install, but you are able to access it via yourdomain.com/index.php/install, this means that you probably don't have Apache mod_rewrite installed and enabled.
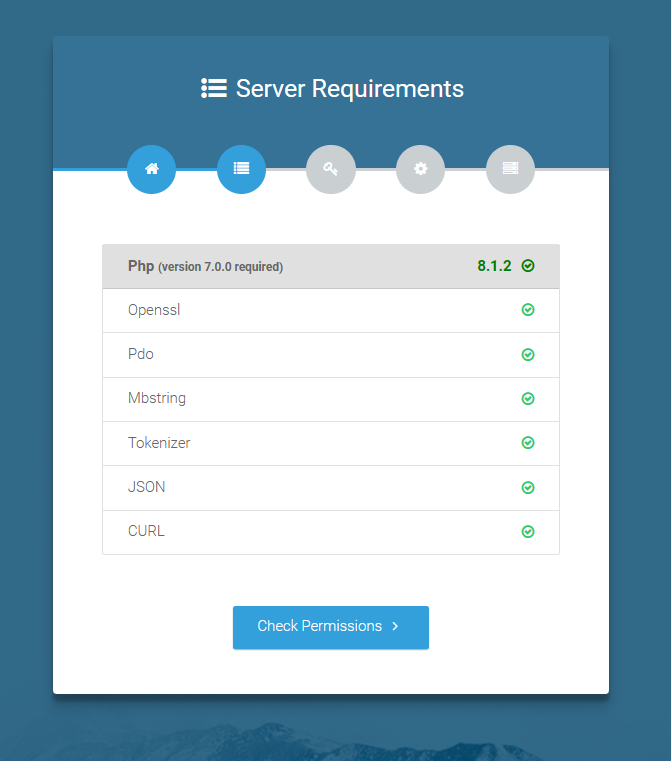
Server Requirements
After clicking on "Check requirement" button, you will be redirected to System Requirements step during the installation wizard, System Requirements.
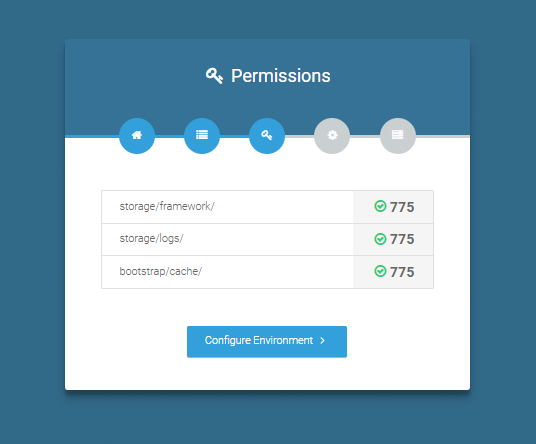
Directory Permissions
After successfully enabling and installing all required PHP extensions, next step is to set the appropriate permissions for some system folders that shows on below picture.
For giving permissions please open your terminal window. and type command
sudo
                            chmod
                            777 directory_name
for example sudo chmod 777 app
Note : If your control panel has no terminal window, then go to public_html or the directory where you have uploaded the project. now give permission for some system folders that show on Installer. For example, we have demonstrated storage/framework directory permission in the below image.
Open required directory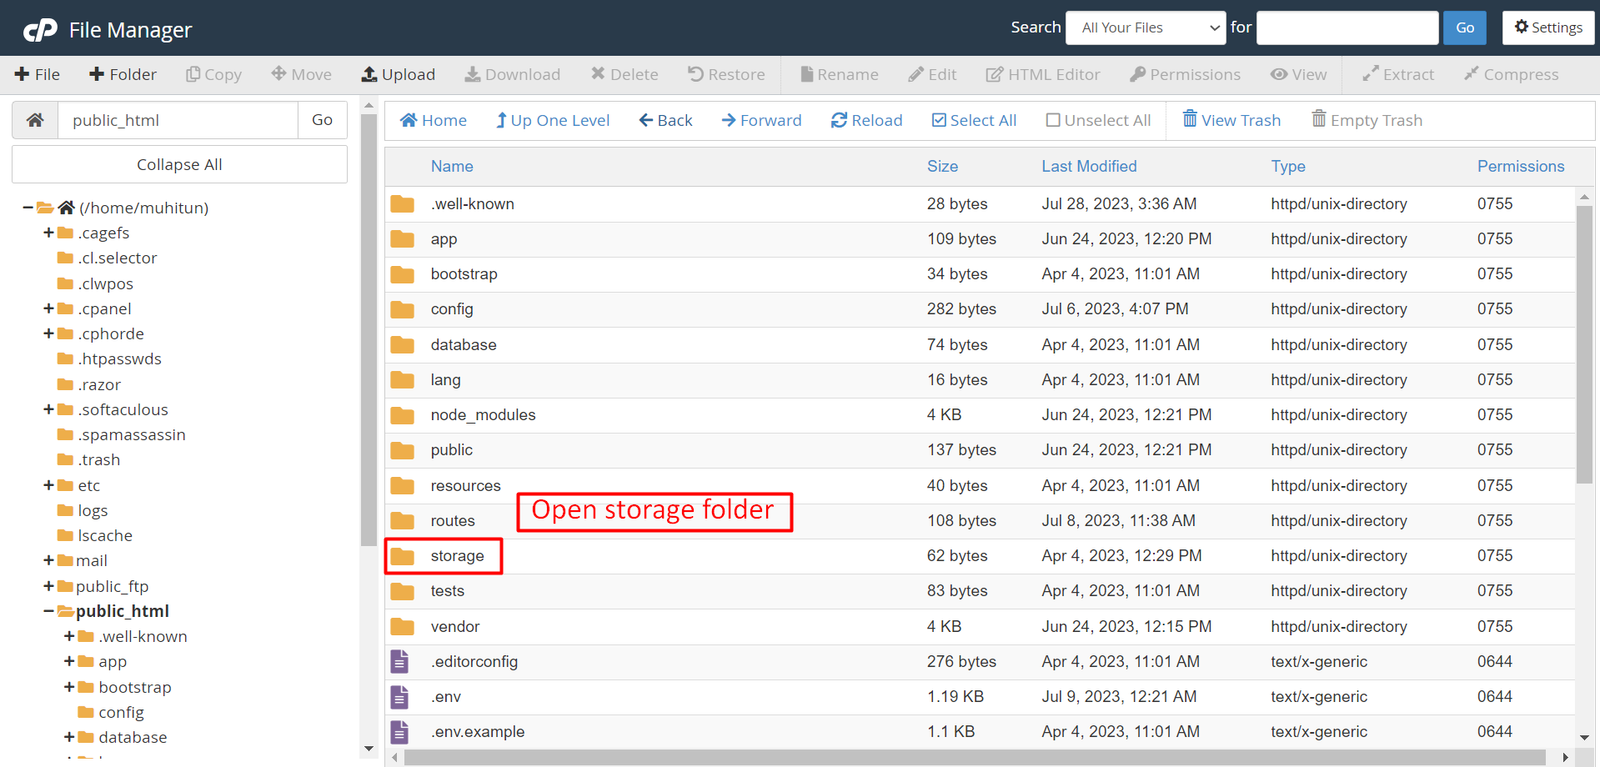 Change permissions for specific directory
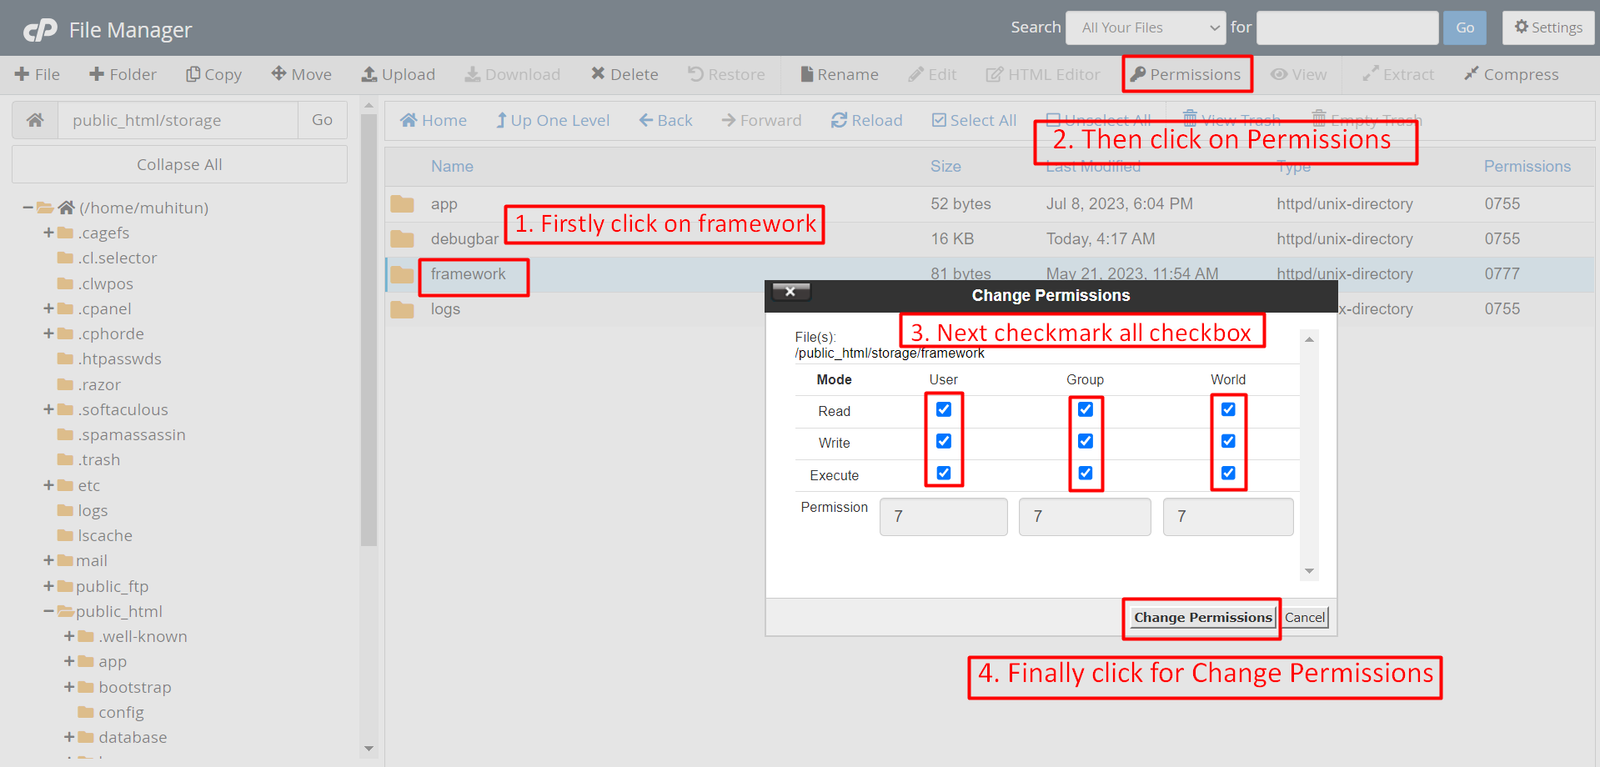
Note: You have to change the directory permissions for the storage/logs and
bootstrap/cache folders as shown in the image. If these folders do not have
the correct permissions, please adjust them accordingly.
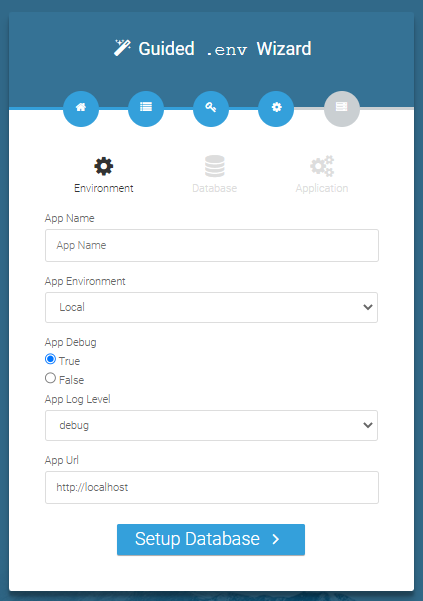
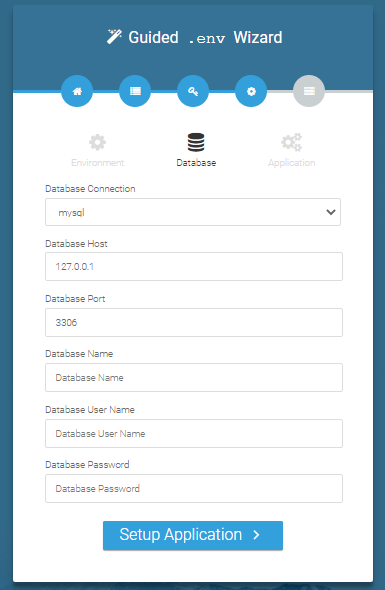
Database/Environment Setting
You have to fill in your database credentials
Exit
The last step is exit step.

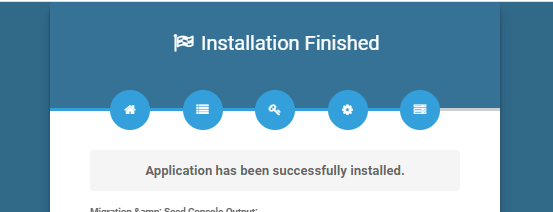
Congratulations you have successfully installed this project on your server. 😀
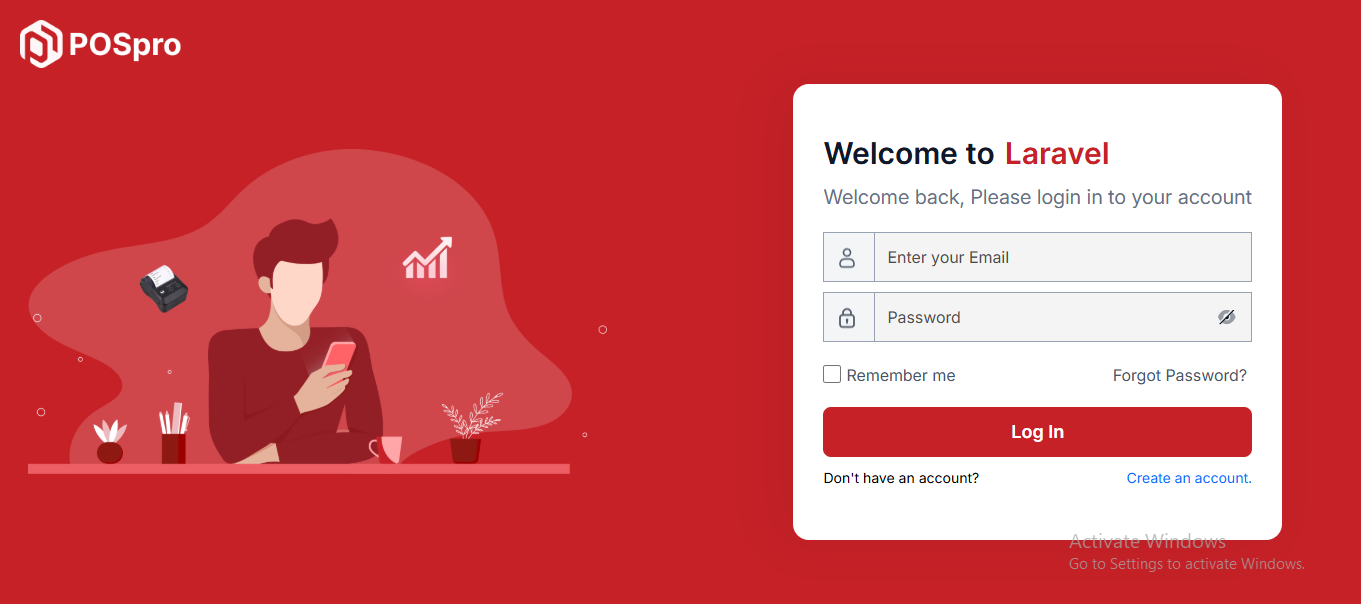
Default Password
You can login using several methods depending on your role.
Super Admin
superadmin@superadmin.com
superadmin
Admin
admin@admin.com
admin
Manager
manager@manager.com
manager
In this project, different modules are assigned based on user roles: Super Admin, Admin, Manager. Each role has distinct responsibilities tailored to their specific tasks and permissions. Below, we will discuss how each user role operates within the system.
Dashboard
This is the admin dashboard page. The essential information regarding the project are displayed here.

Advertising Section
This list allows you to see the current advertising campaigns with status. To create a new advertise, you can click on the "Create Banner" button at the top right of the screenshot. A pop-up window will open, where you can add an image and change the status.

Business List
This appears to be a screenshot of a business list page. Business list functionalities typically allow users to collect and organize information about businesses. By clicking the "View" button, you can see the details of each business. You can also create a new business by clicking the "Add New Business" button. Below, we'll describe how you can create a new business.
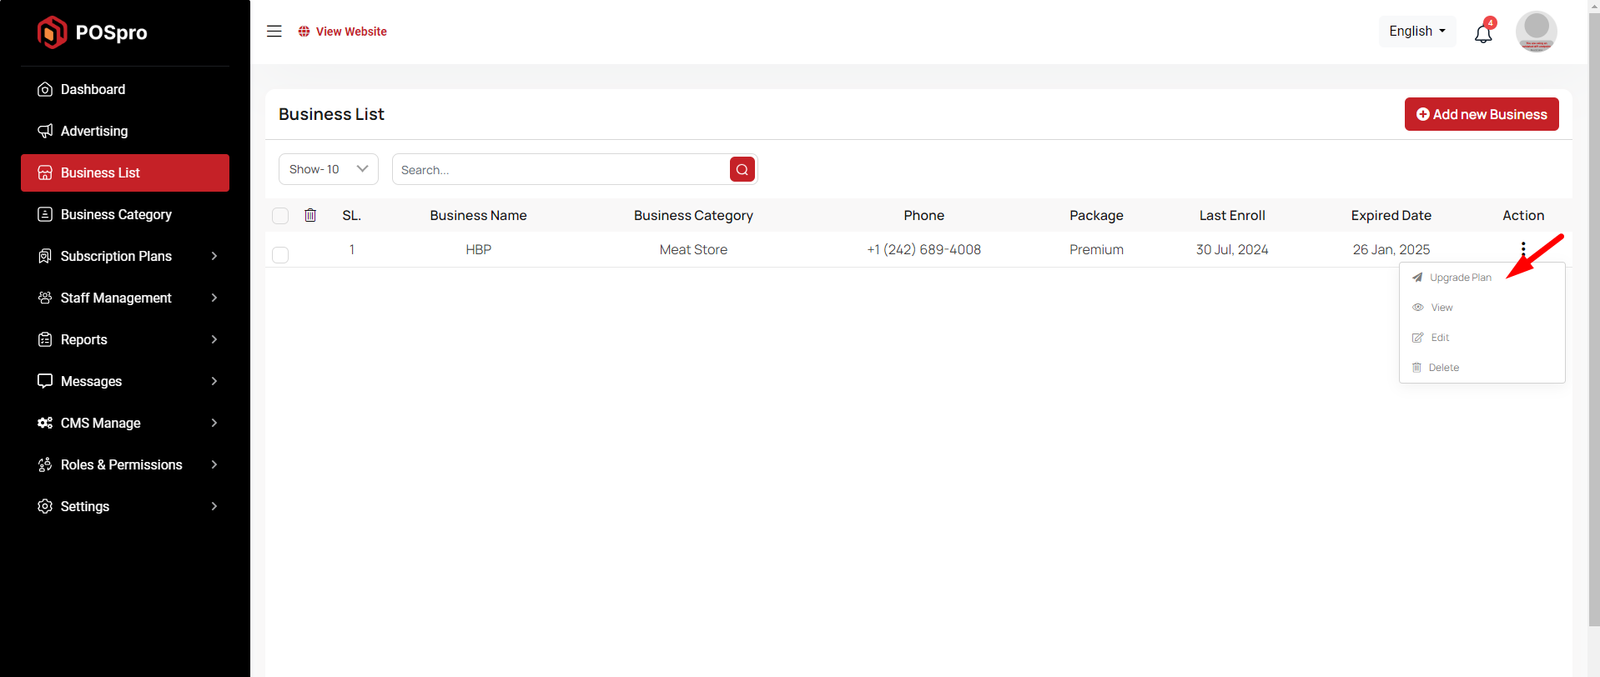
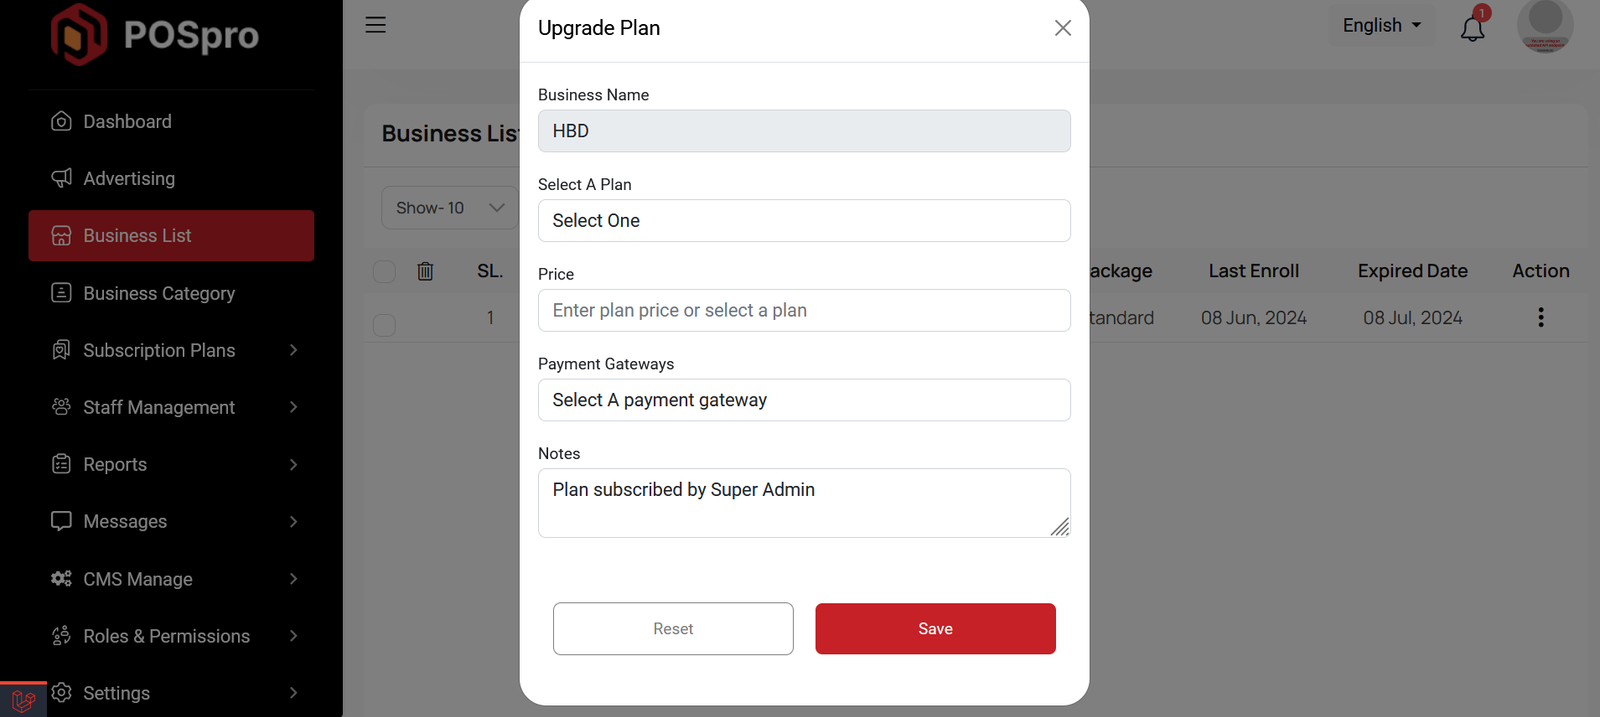
Upgrade Plan
If you need to upgrade the plan for any business, click on the "Upgrade Plan" button. You will likely see a popup for this. Here, you can update the plan, gateway, price, and notes. When you select a plan, the price input field will automatically fill in according to the selected plan, but you can also change the price manually. If desired, you can add a note by filling in the notes input field.
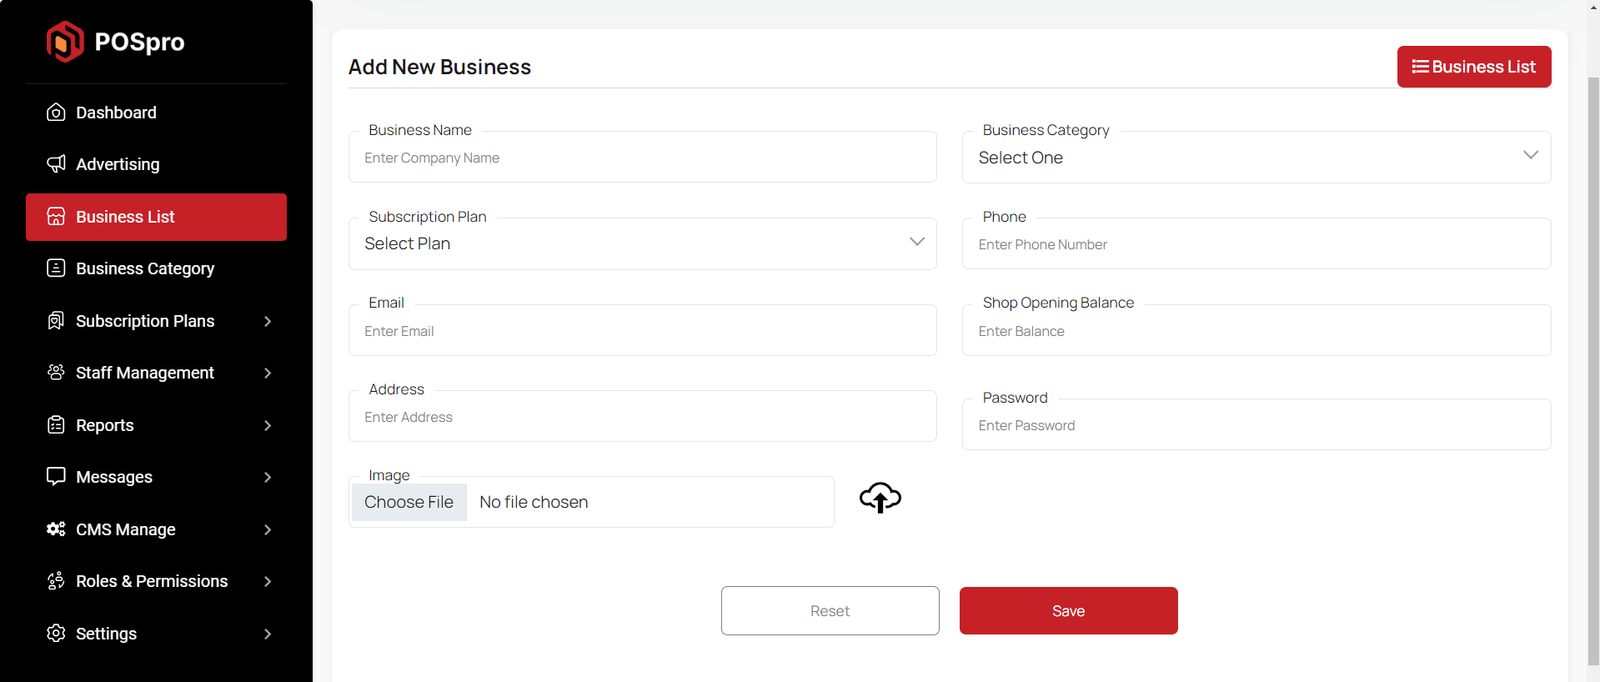
Create Business
By clicking on the "Add New Business" button, you can create a new business. You will need to fill in the necessary fields. Here is the screenshot of the create business page.
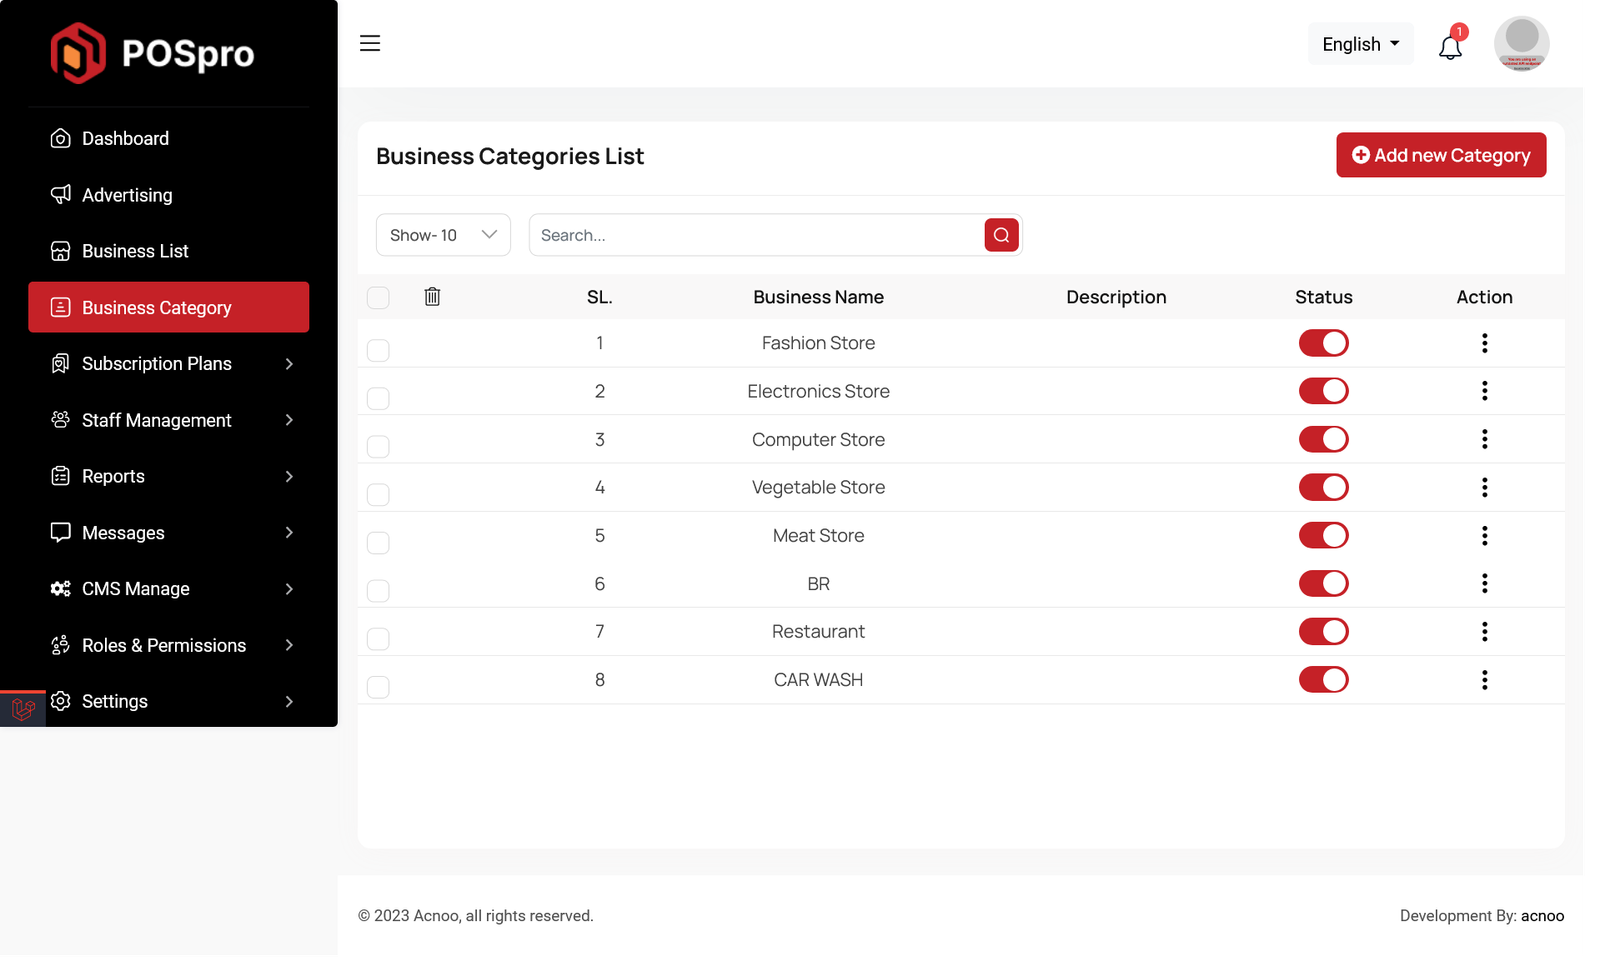
Business Category List
This appears to be a screenshot of a business categories list. Here, you can filter business categories, as well as edit, delete, or multi-delete them. There is also an "Add New" button for adding new business categories. To add a new business category, fill in the necessary fields. You need to enter the business name, and the description field is optional. You can also update the status from this page.
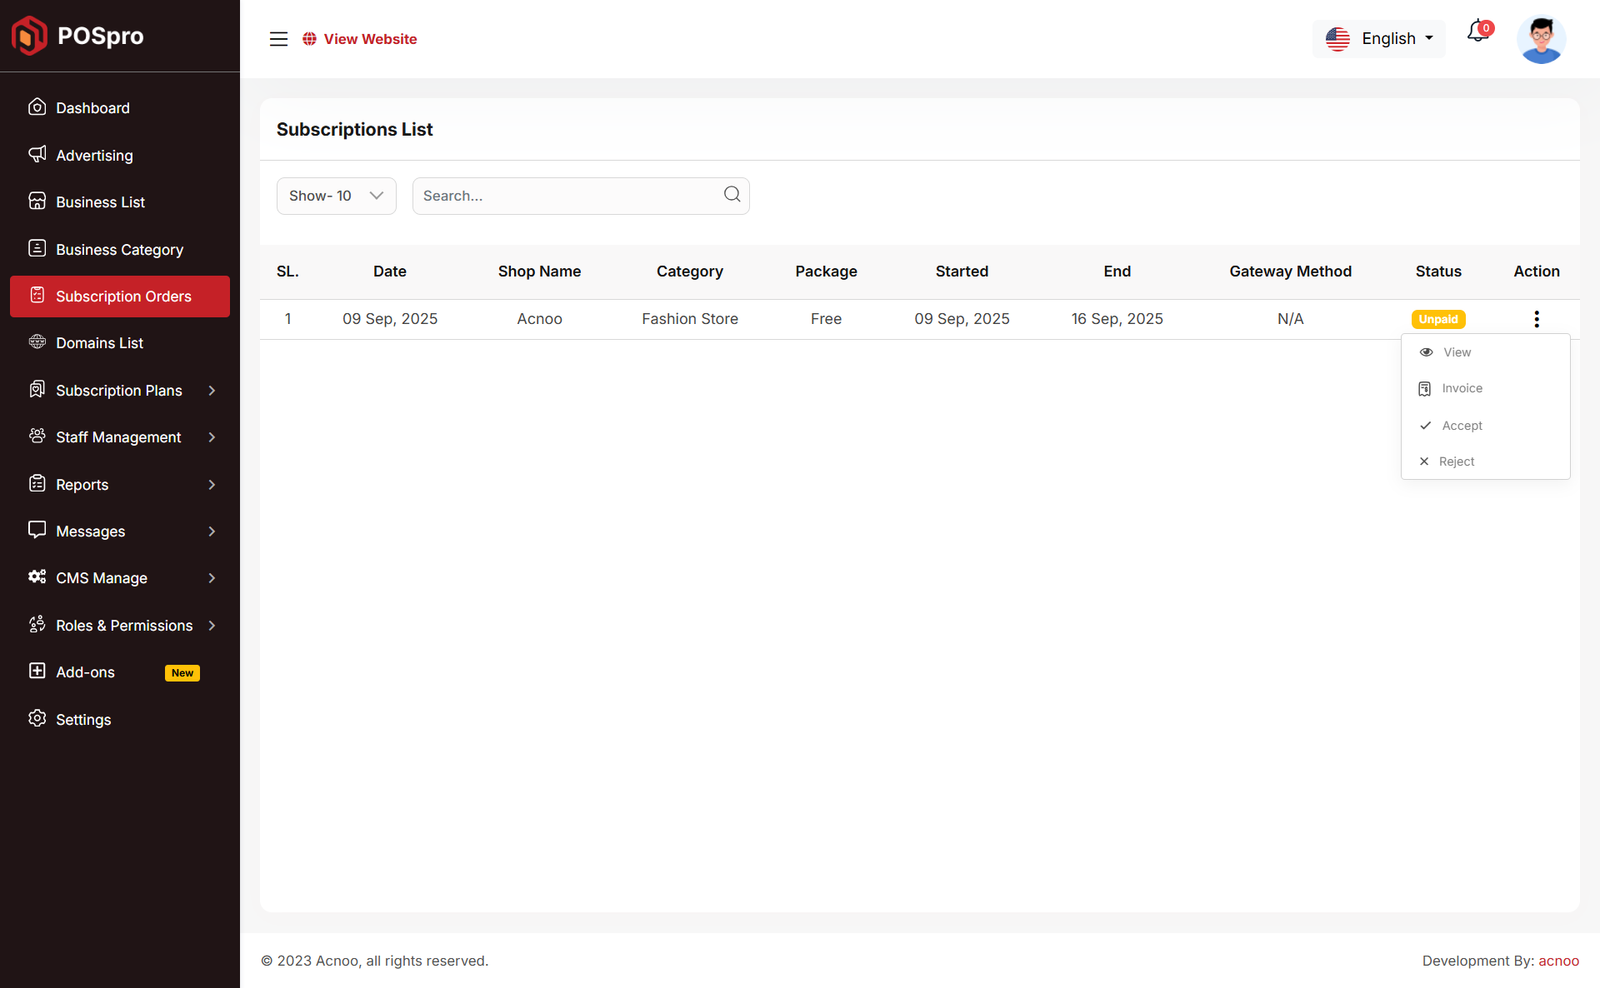
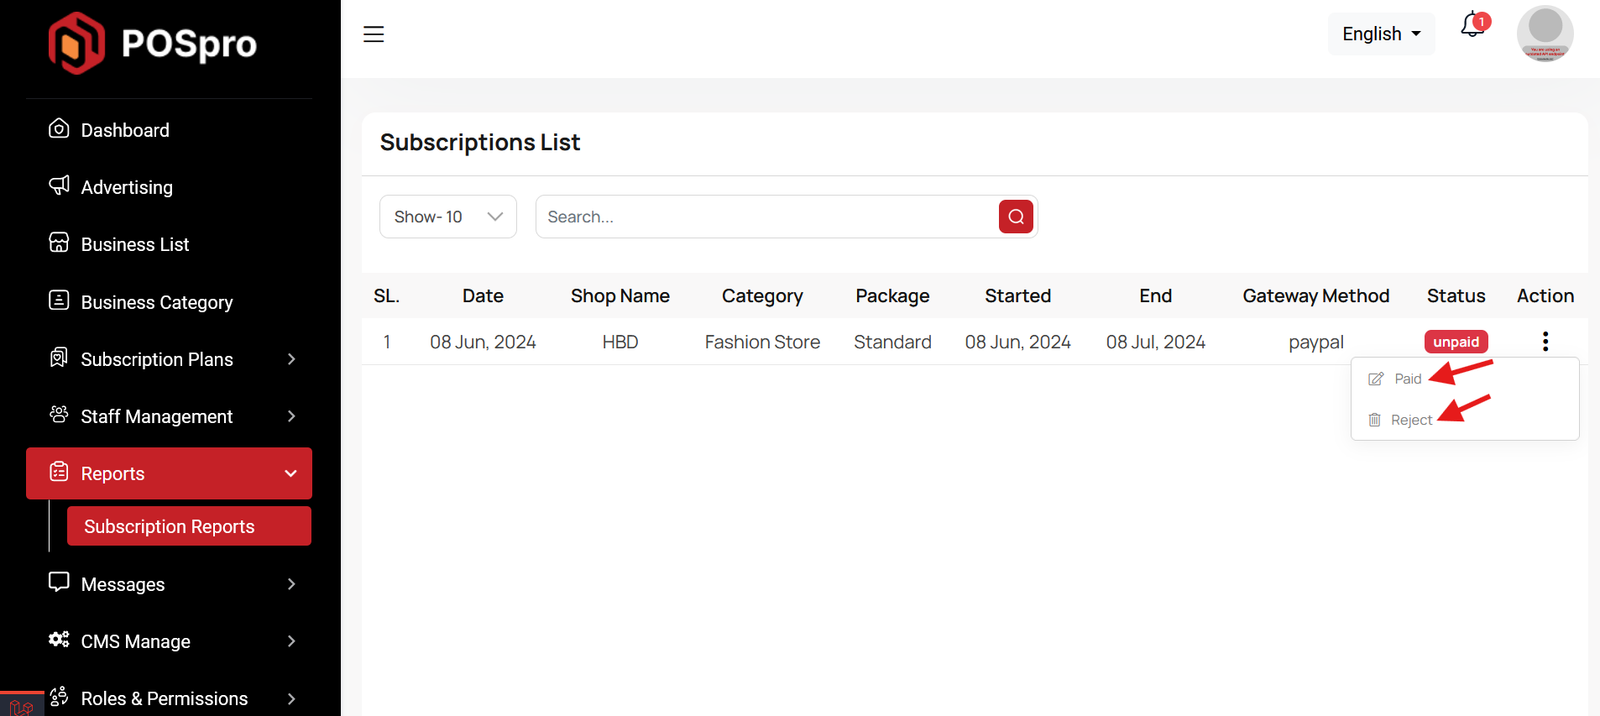
Subscription Order List
This is a screenshot of the subscription order list. It shows how many businesses have subscribed to a plan. If a business subscribes to multiple plans, all of them will appear here. You can filter the list using the input field, or by Name, Category, Package, or Payment Method. From the Actions column, you can view details, see invoices, mark as paid, or reject a subscription.
Custom Domain List
This is a screenshot of the domain list. Here you can see all the domains created by businesses. From this section, users can edit, delete, multi-delete, filter records using per_page, or search by name using the input field.
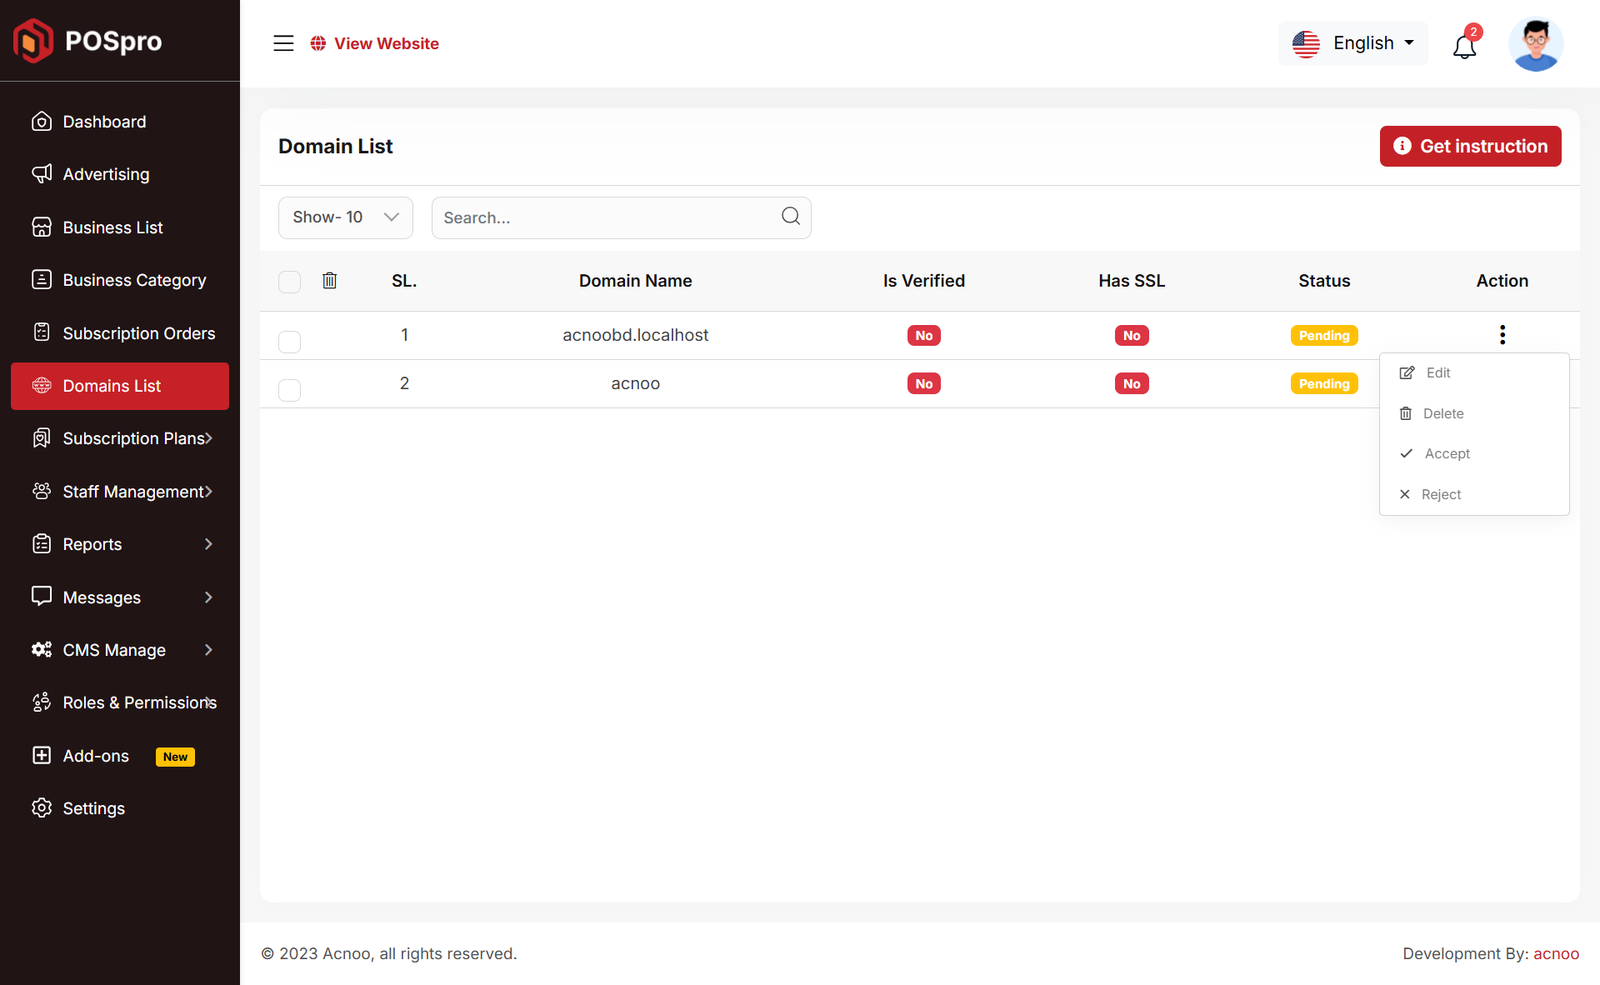
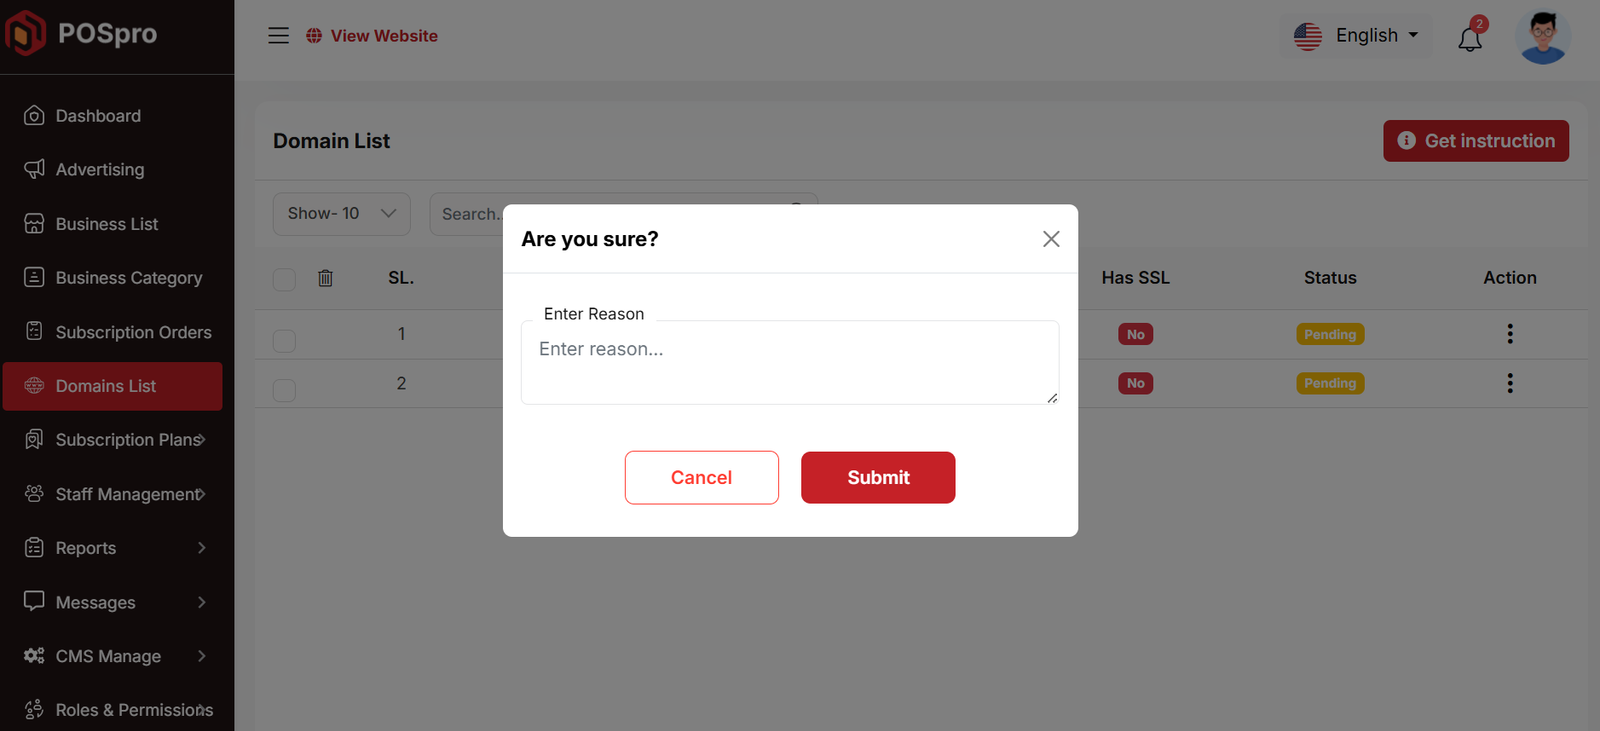
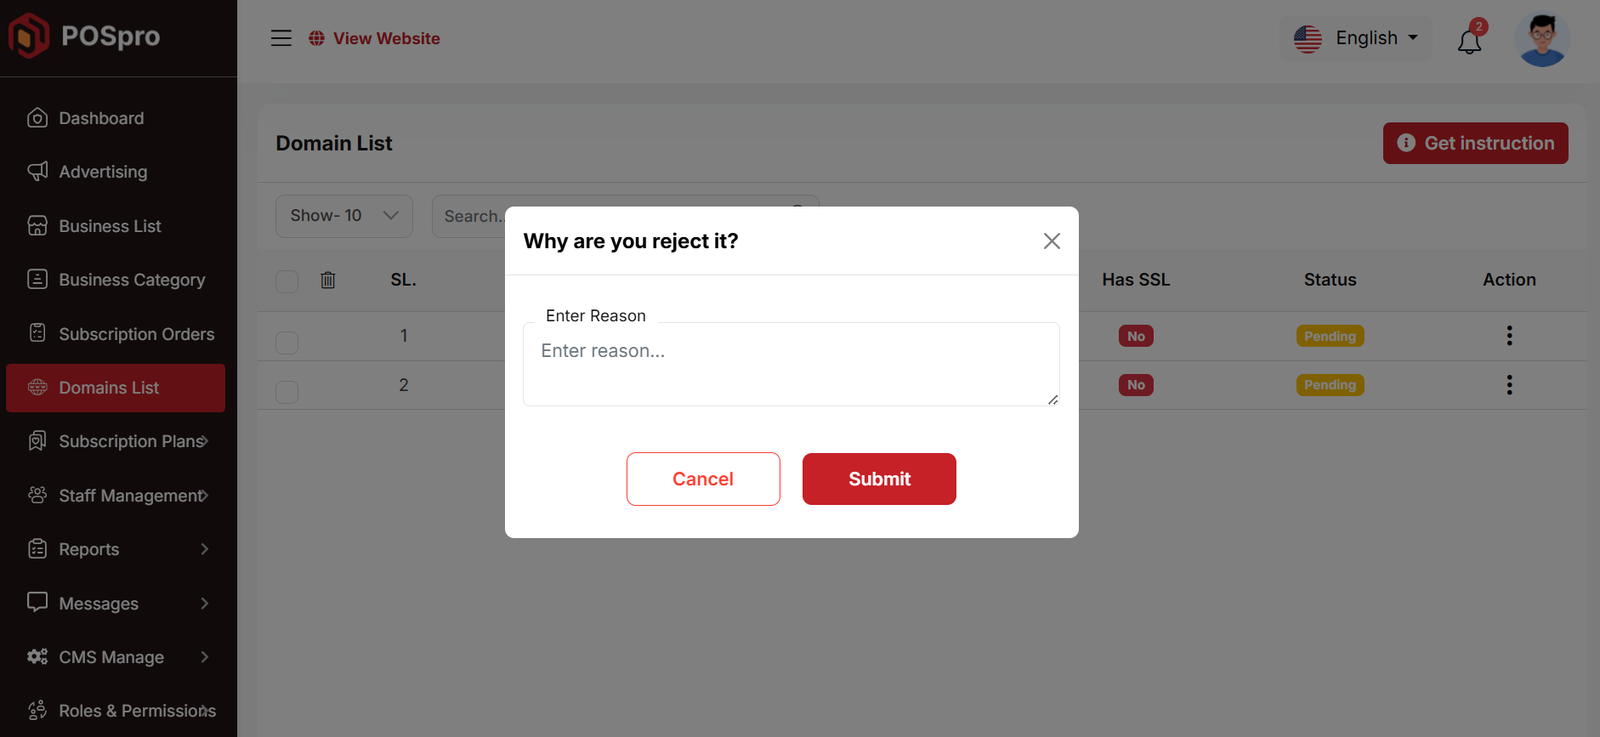
Most importantly, the user can accept or reject a domain. From the Action column, there are Accept and Reject buttons.
- If the user clicks Accept, a modal will appear with an input field where the user can write notes for accepting the domain.
- Similarly, if the user clicks Reject, a modal will appear where the user can also write notes for rejecting the domain.
Below, I have added images for both acceptance and rejection actions so you can clearly understand the process.
Plan List
Here, you can view a list of available plans with filtering options. You can also change the plan status from this page. Additionally, options to view, edit, delete, and multi-delete plans are available.

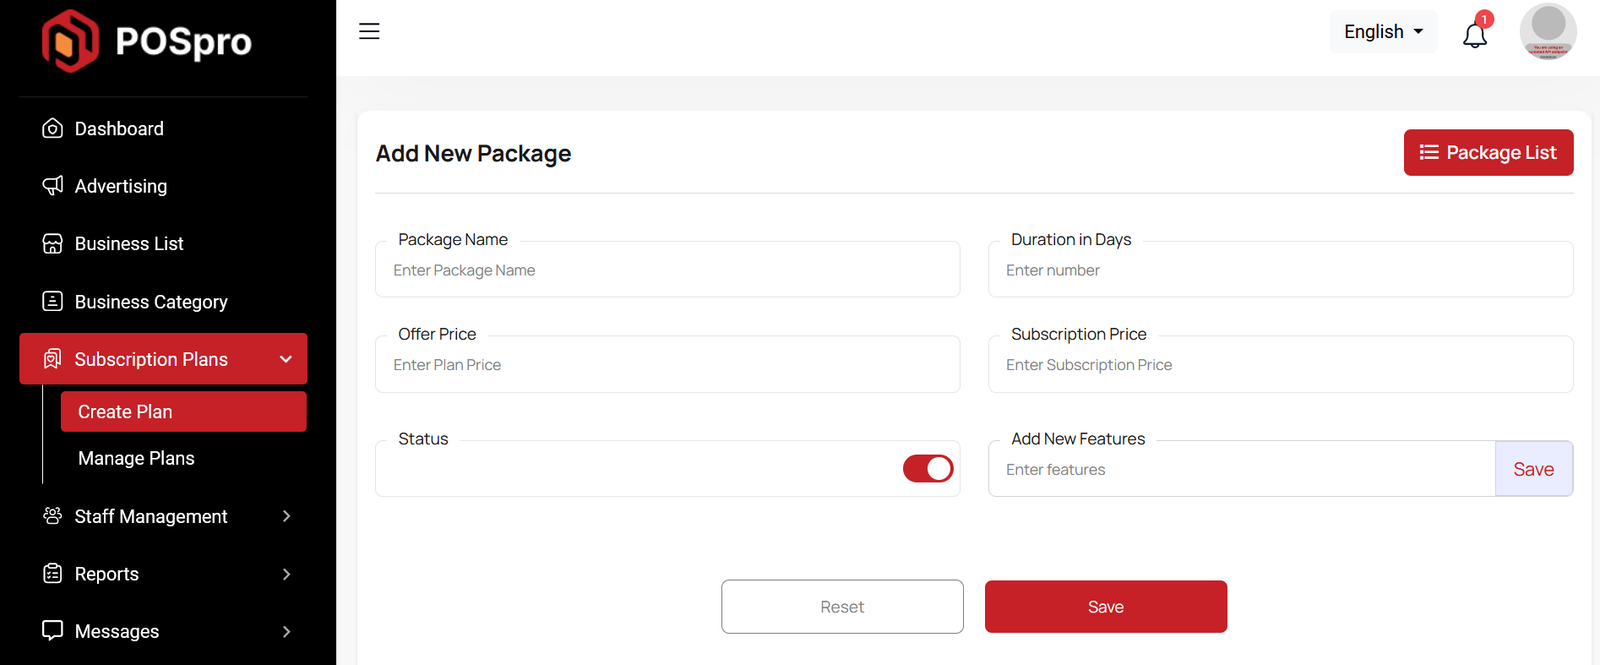
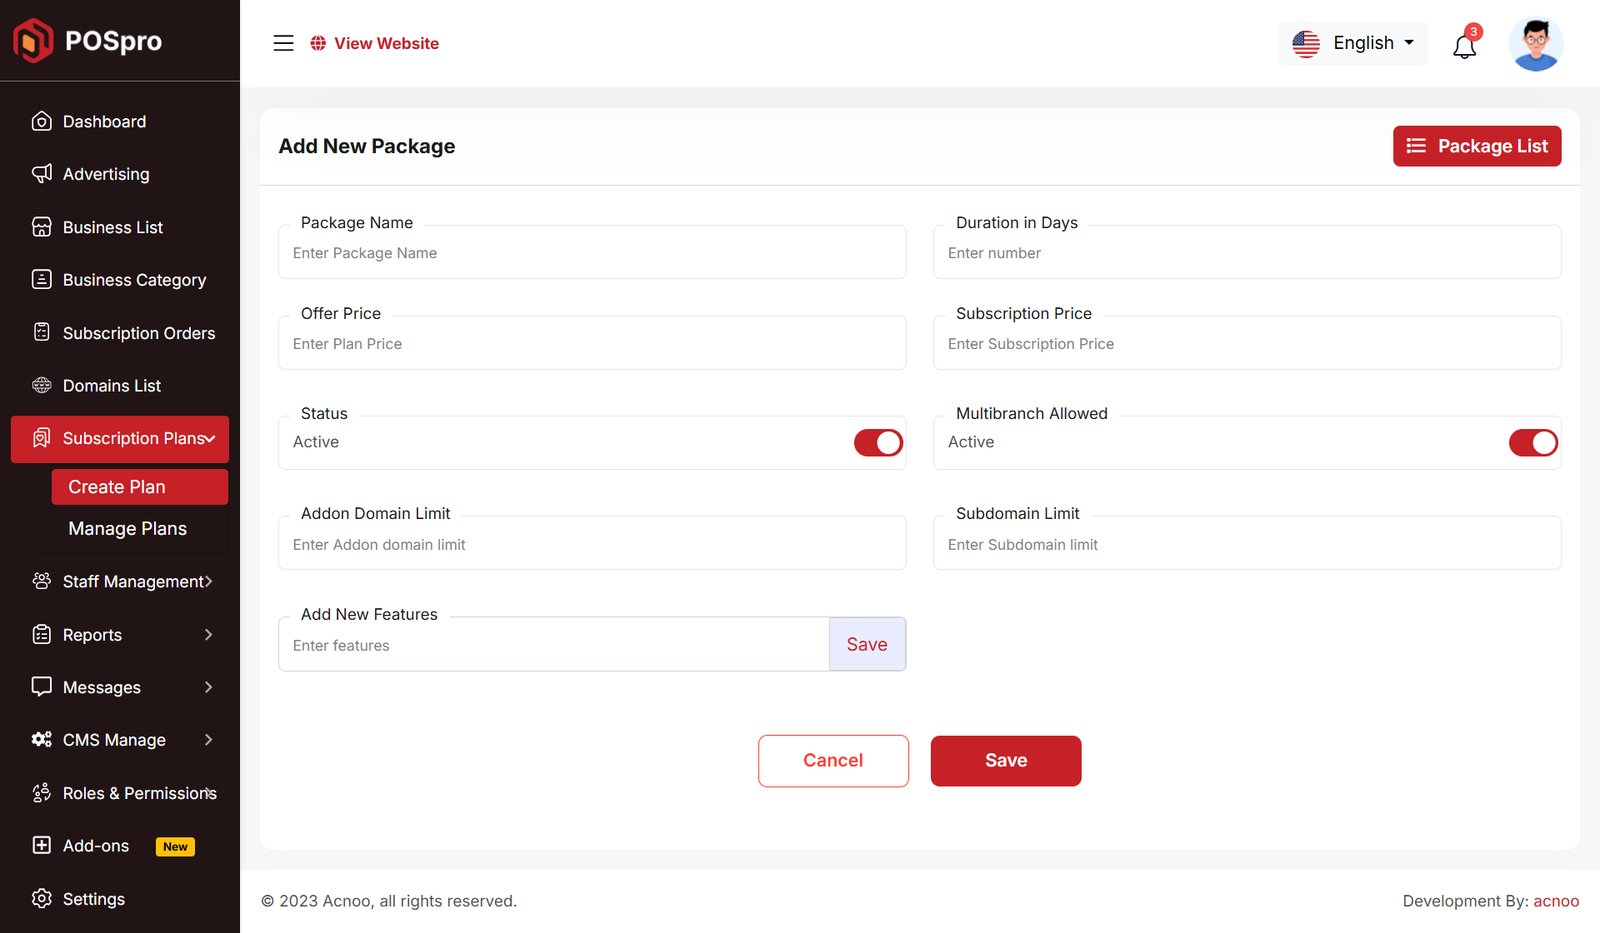
Create Plan
Here, you have the option to create a plan according to your preferences. You can also add multiple features using the "Add New Feature" input field. Once you have completed filling out the form, simply click the "Save" button.
By buying or installing the Multi-Branch Add-on, you get an input field to enable or disable branches. With the Custom Domain Add-on, you can add a field to set domain limits. See the screenshot below for reference.
Edit Plan
On the plan edit page, you will see an "Allow Existing Subscribers" button. If you enable this option, your current subscribers will also get the updated features (Multibranch Access, Addon Domain Limit & Subdomain Limit). By default, this option will remain disabled.

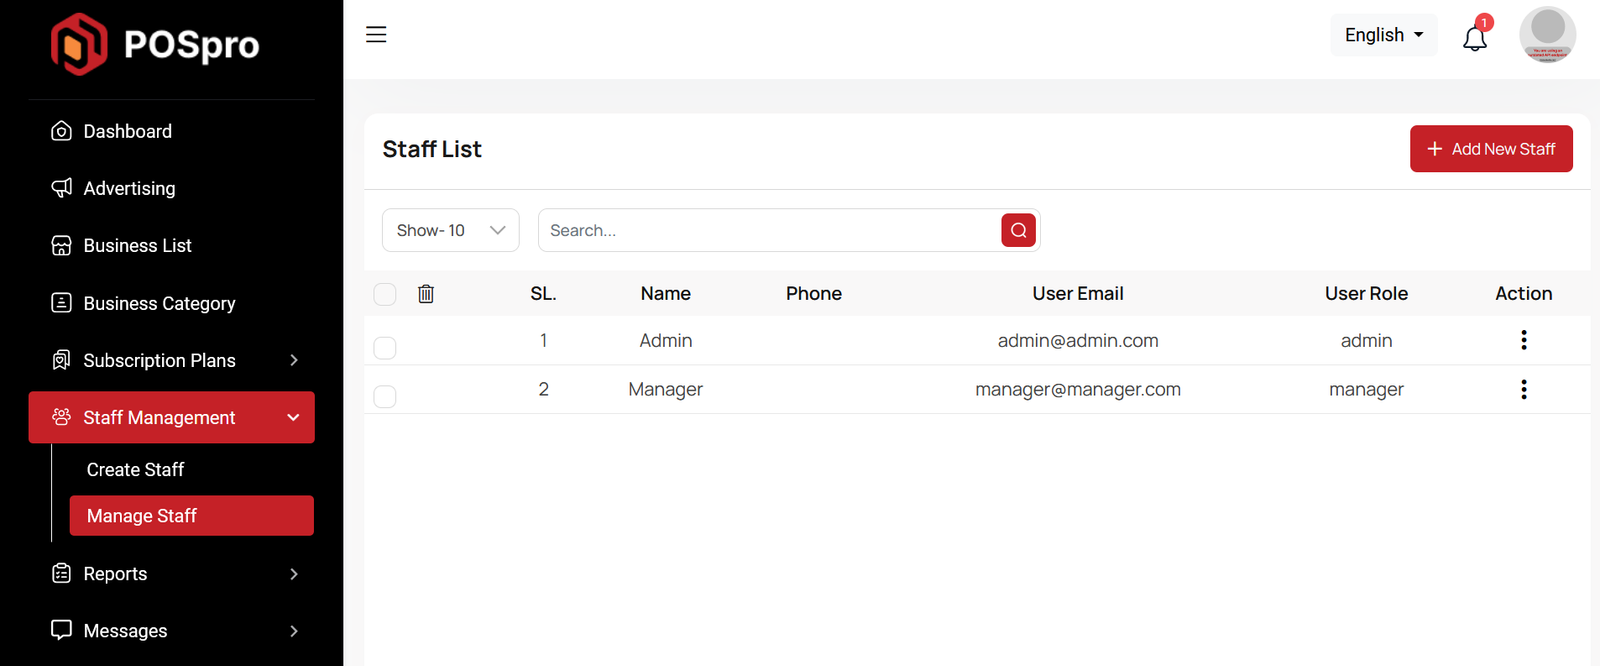
Staff List
Here, you can view the list of staff members along with a search filter. Additionally, you have the option to edit, delete individual entries, and perform multi-delete operations.
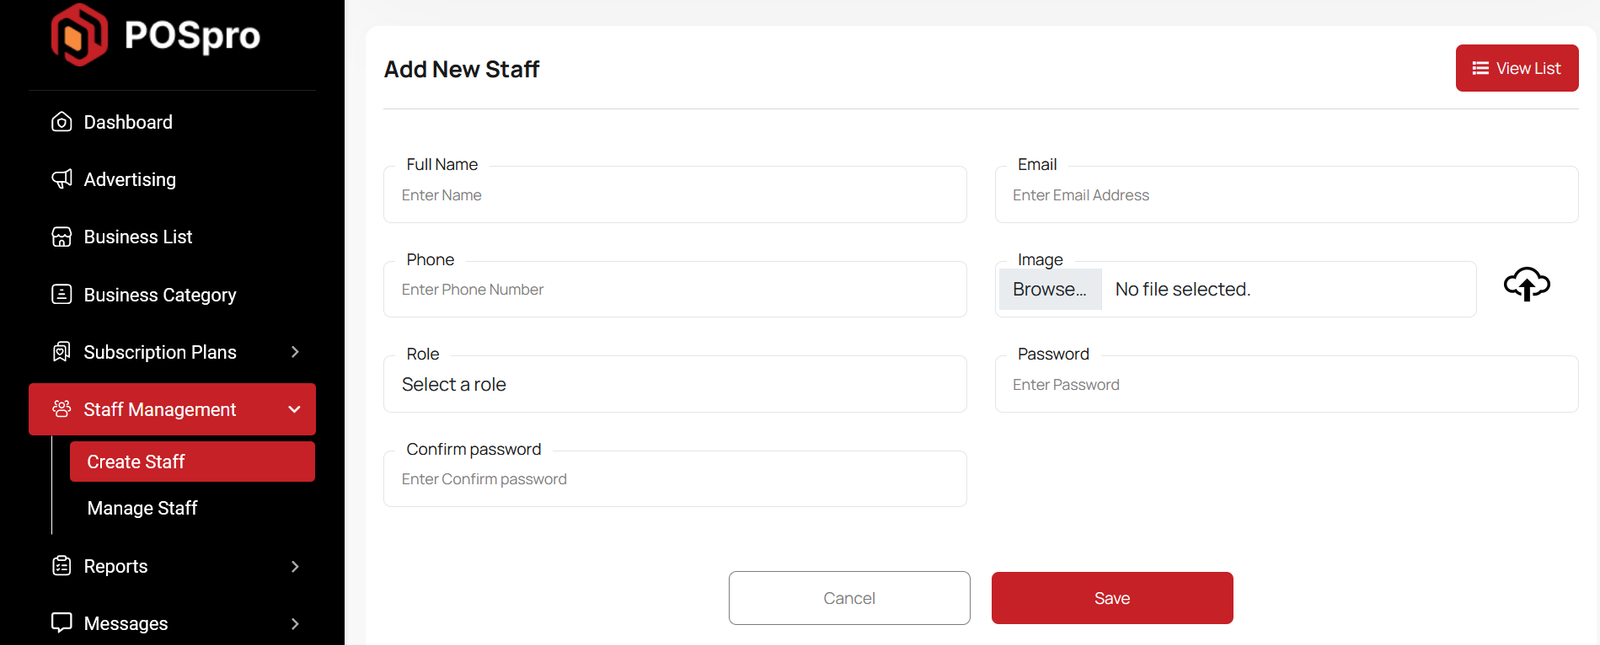
Create Staff
You can create a staff member here by completing the necessary fields.
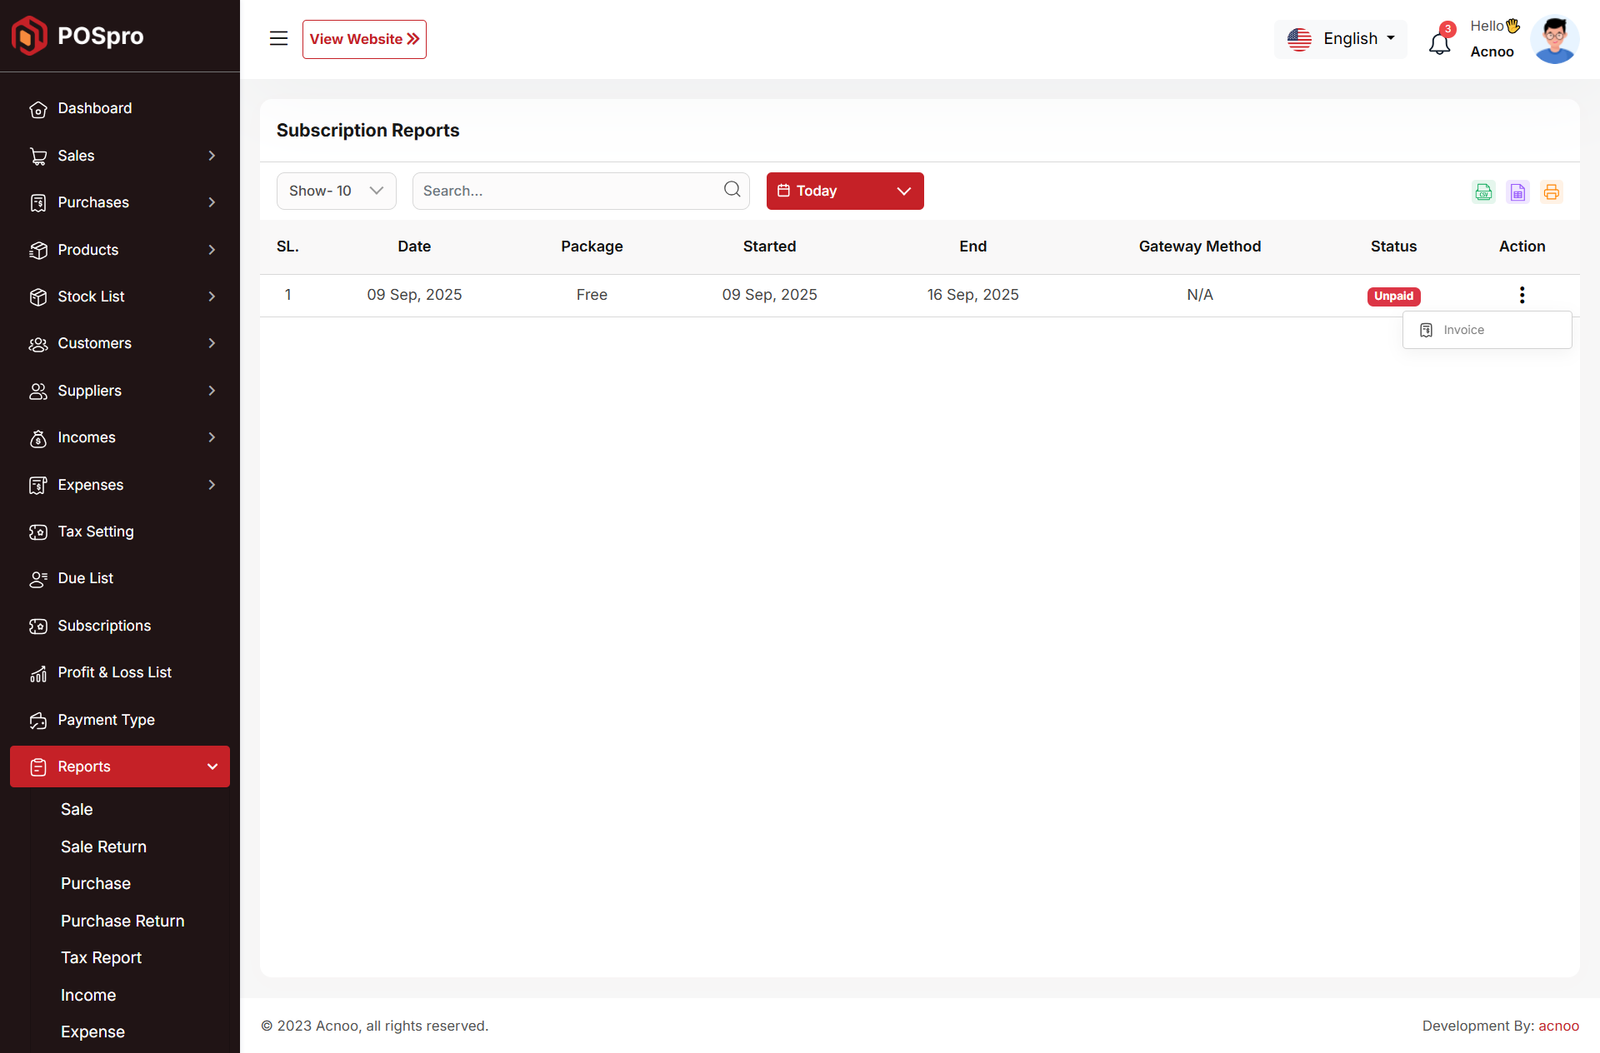
Subscription Report
The Subscription Reports section allows users to track their current subscriptions. Here, you can filter by category, shop name, package, gateway method, and also control results per page. Additionally, date-based filtering is available from the dropdown — you can search by today, yesterday, other preset ranges, or specify custom date ranges.
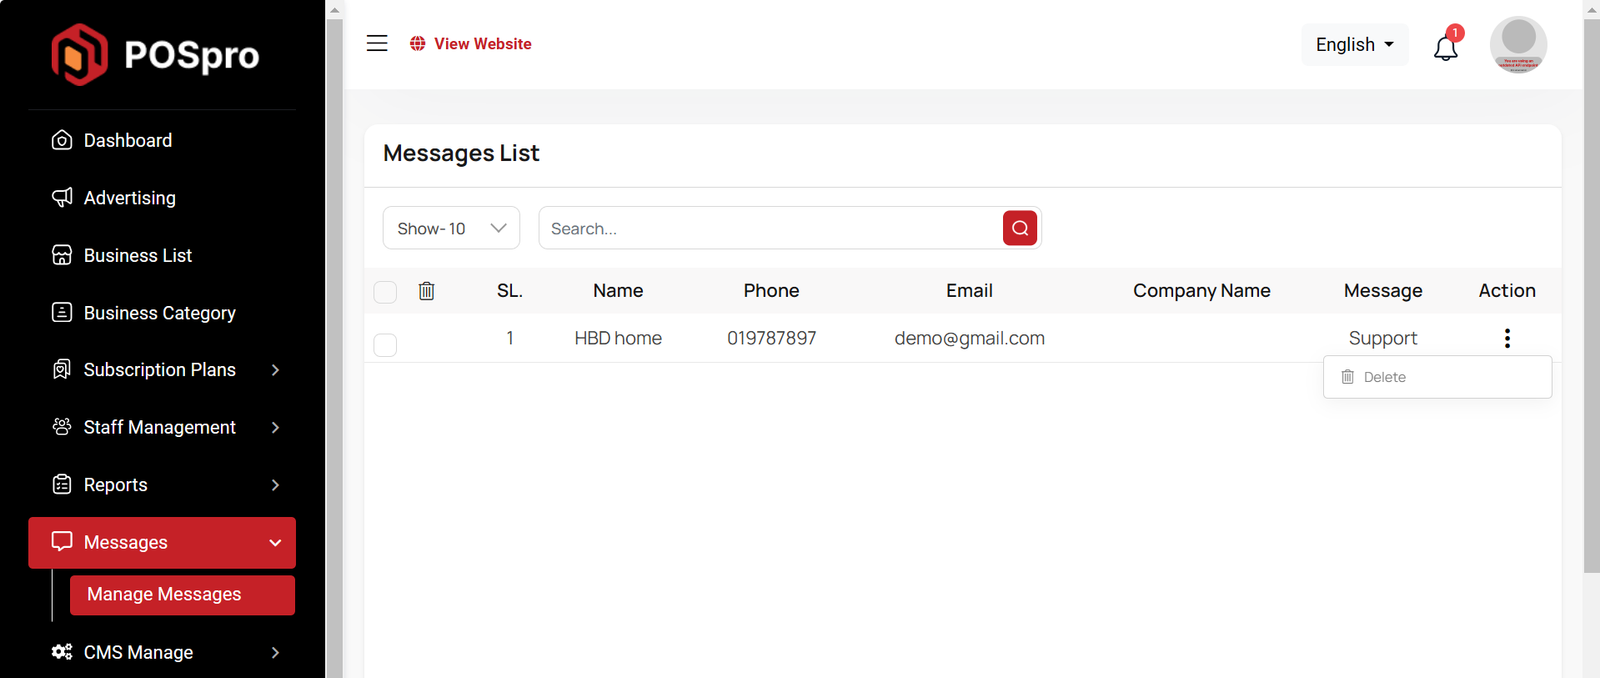
Message List
Here you can view messages sent to users from the website. You can filter messages and use options to delete or delete multiple messages simultaneously.
CMS Manage
Here you have the ability to perform various actions including handling Pages, Terms & Condition, Privacy & Policy, FAQs, Testimonials, Features, Interface and Manage Blogs.
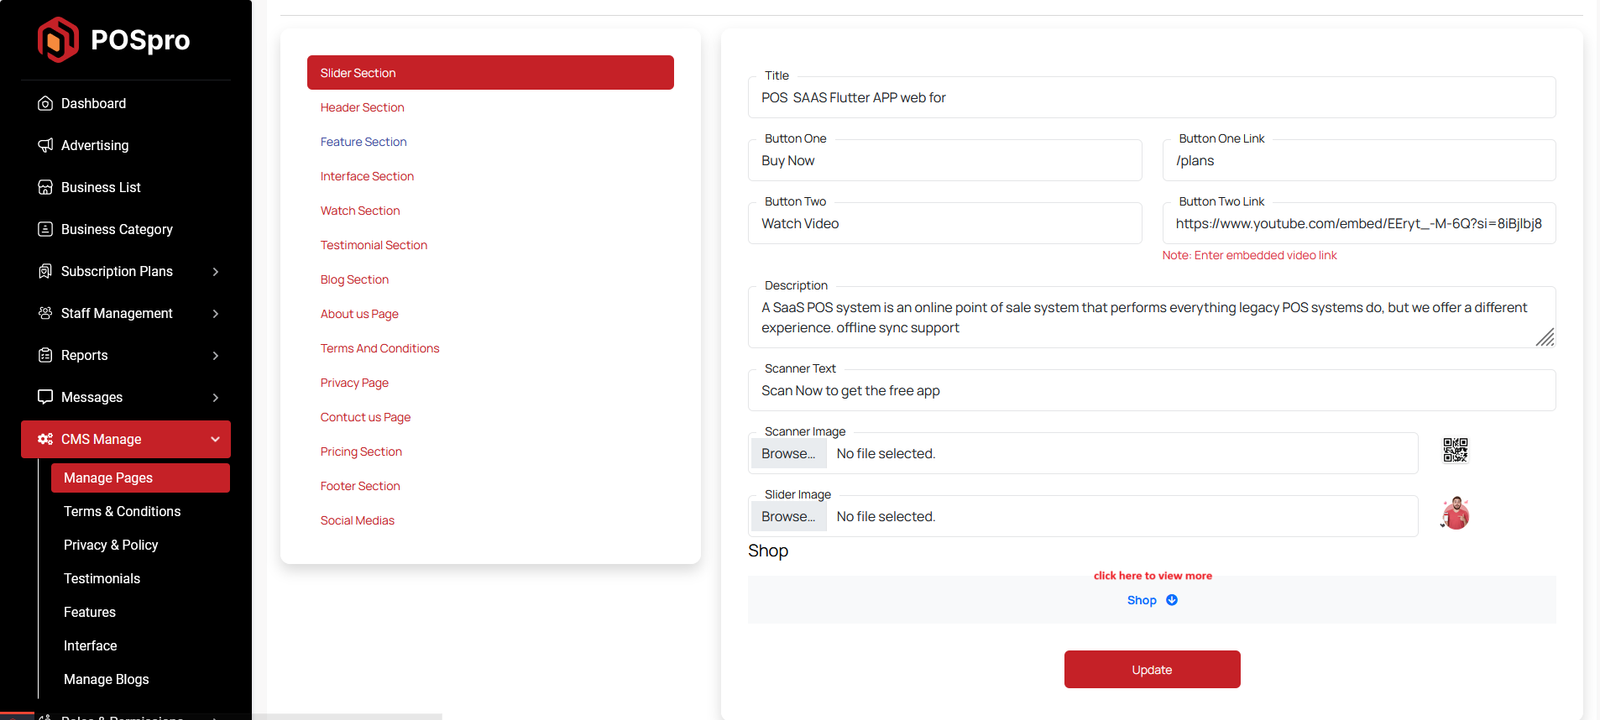
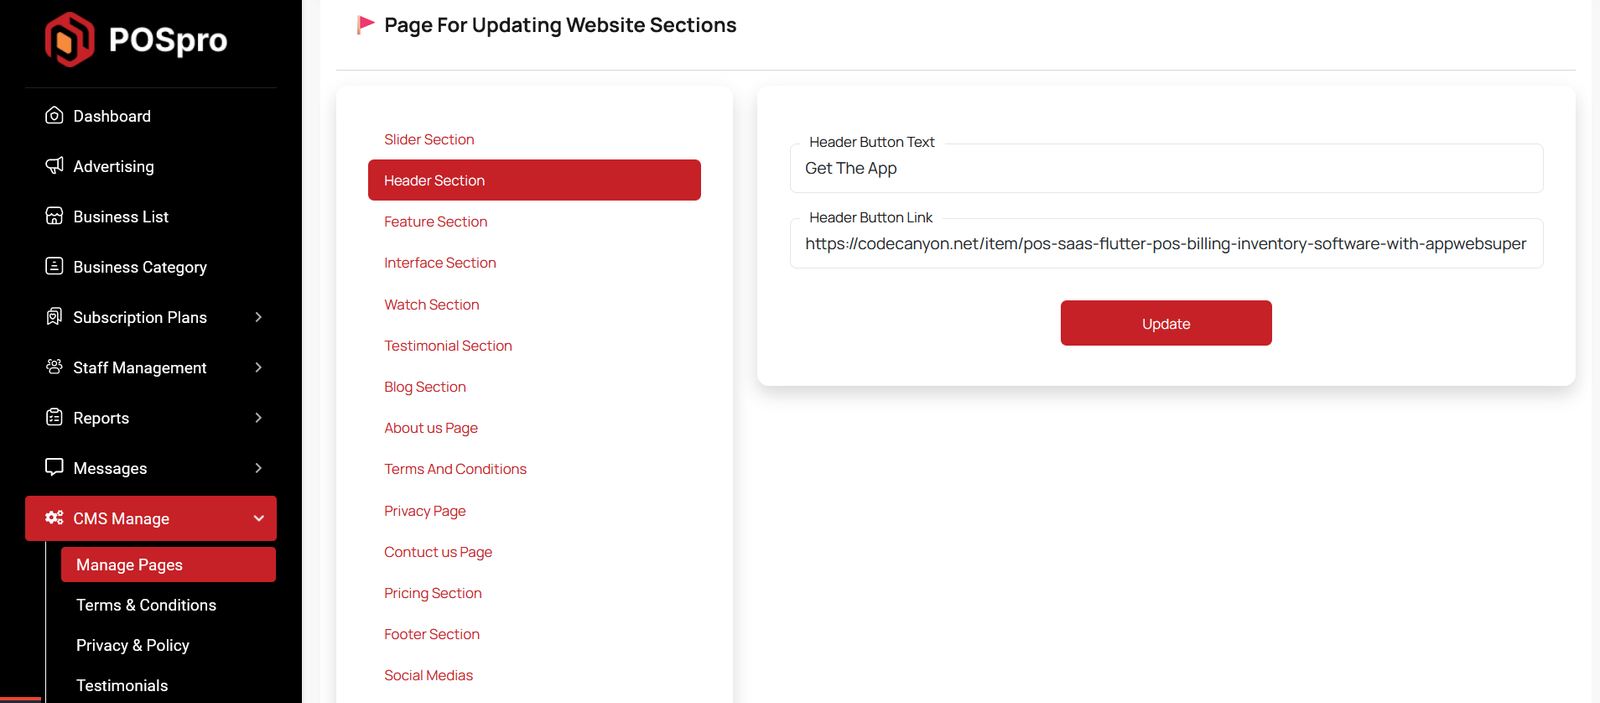
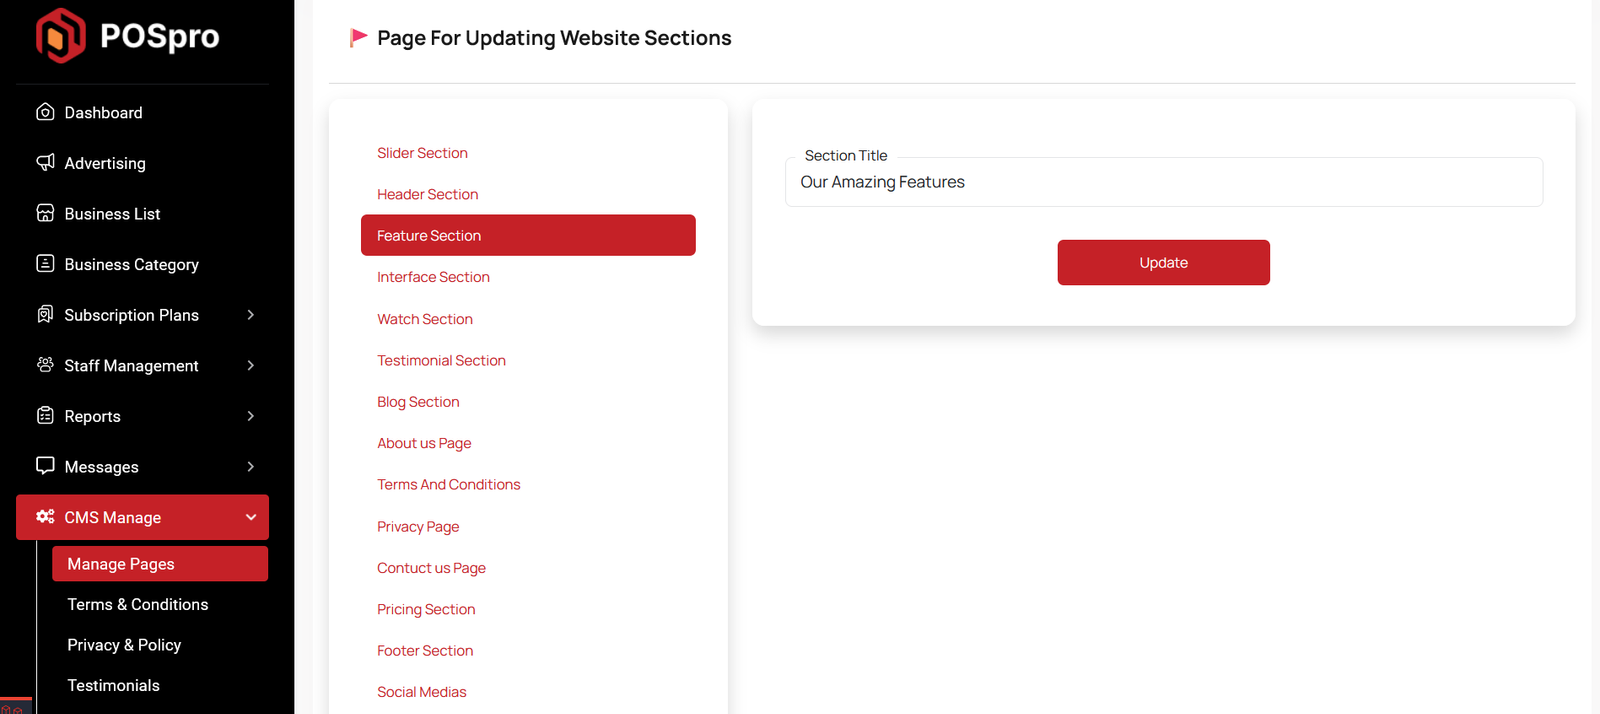
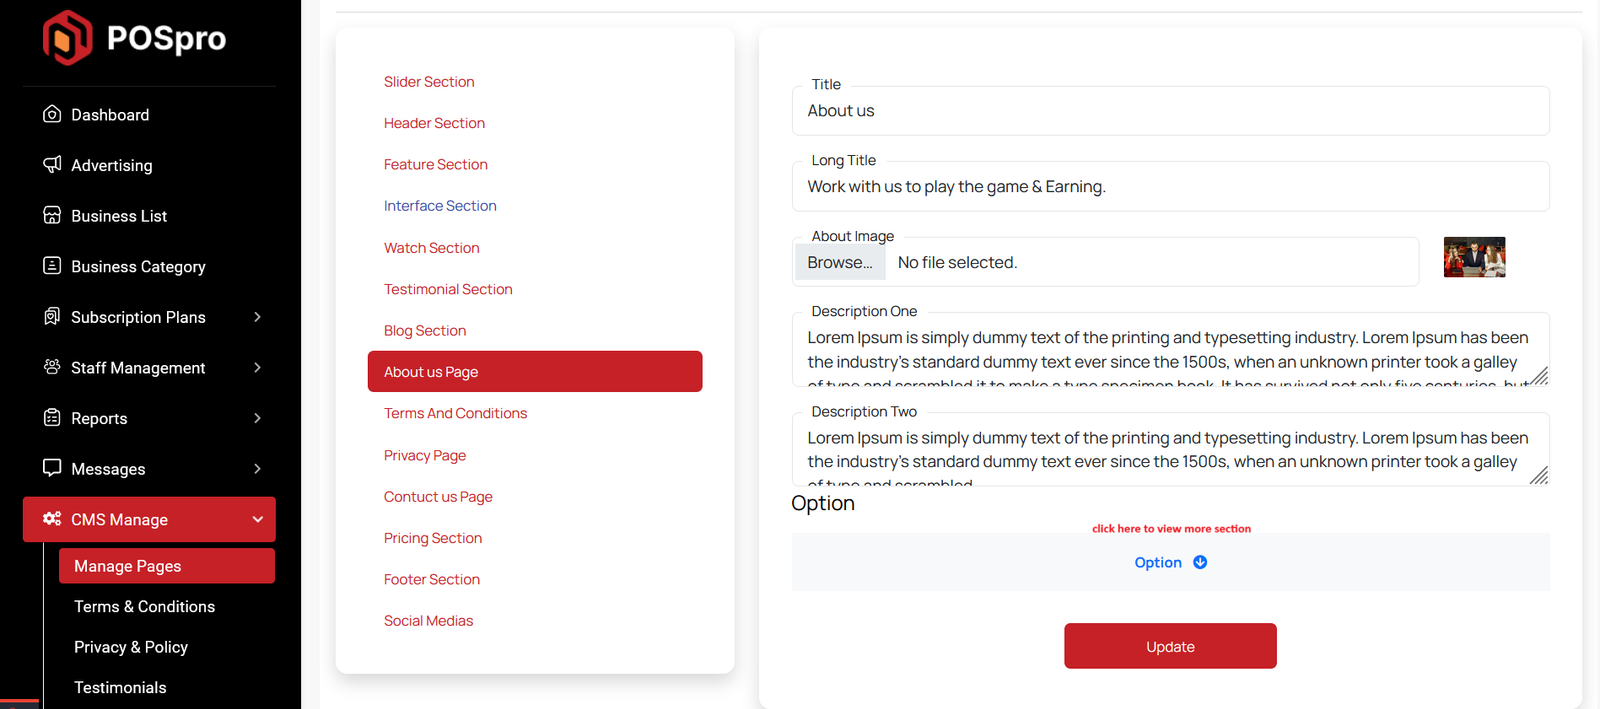
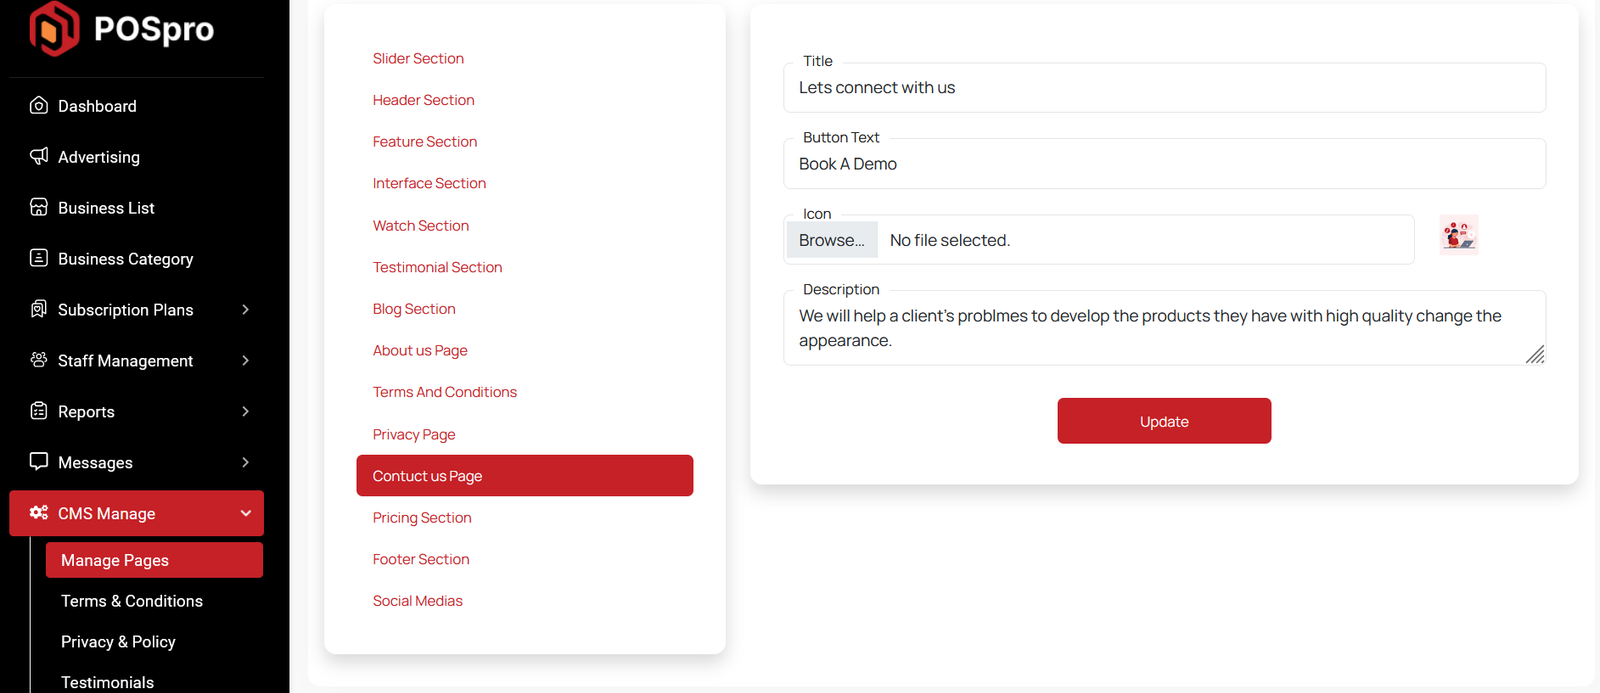
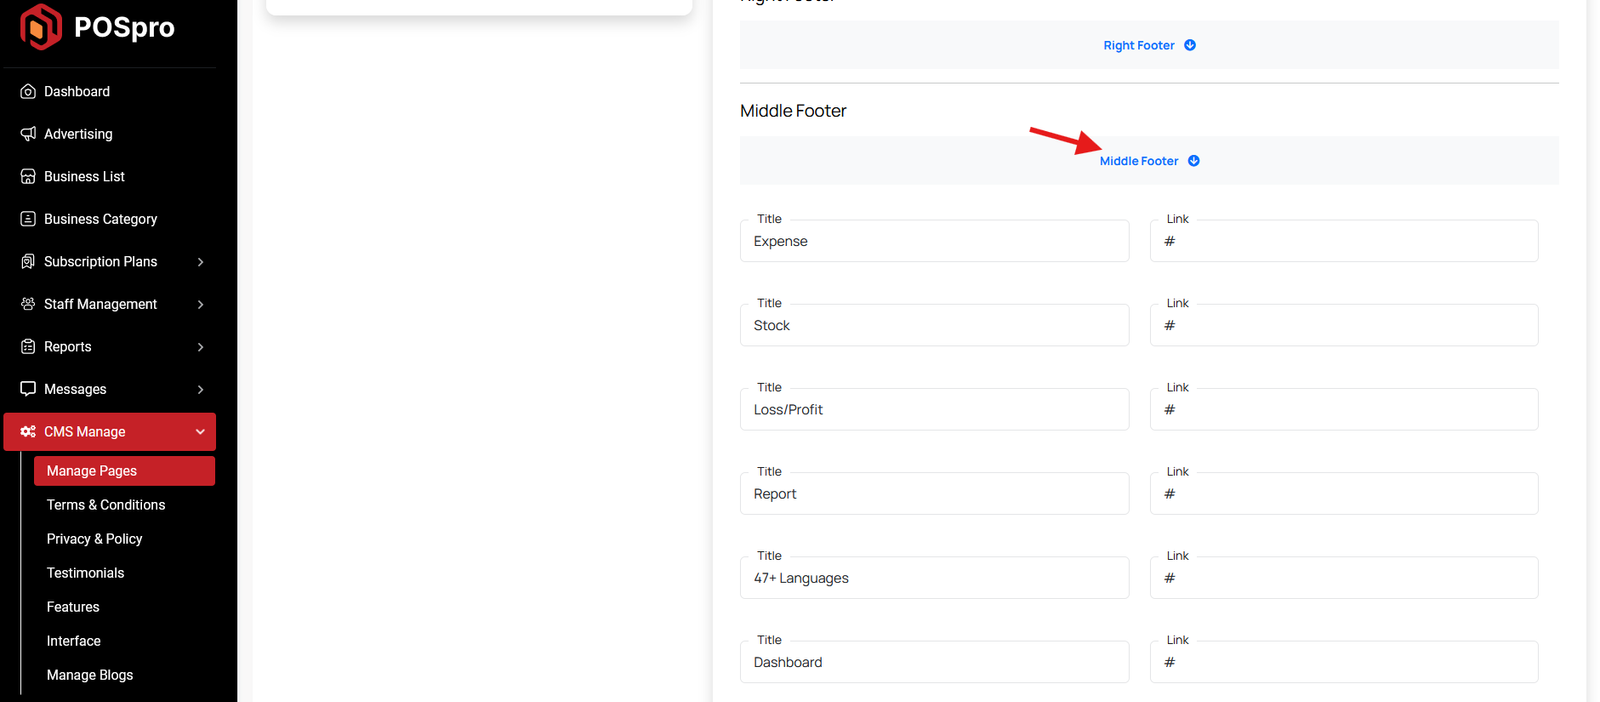
Manage Pages
You can modify various sections of the pages, including the slider,header,features, interface, watch, testimonial, blog, about us contuct us, pricing, footer, socila media.
You can update the header "button" and its link of your landing page.
Here, you can update the feature title of the Home page.
Here, you can update the interface title and description of the Home Page.

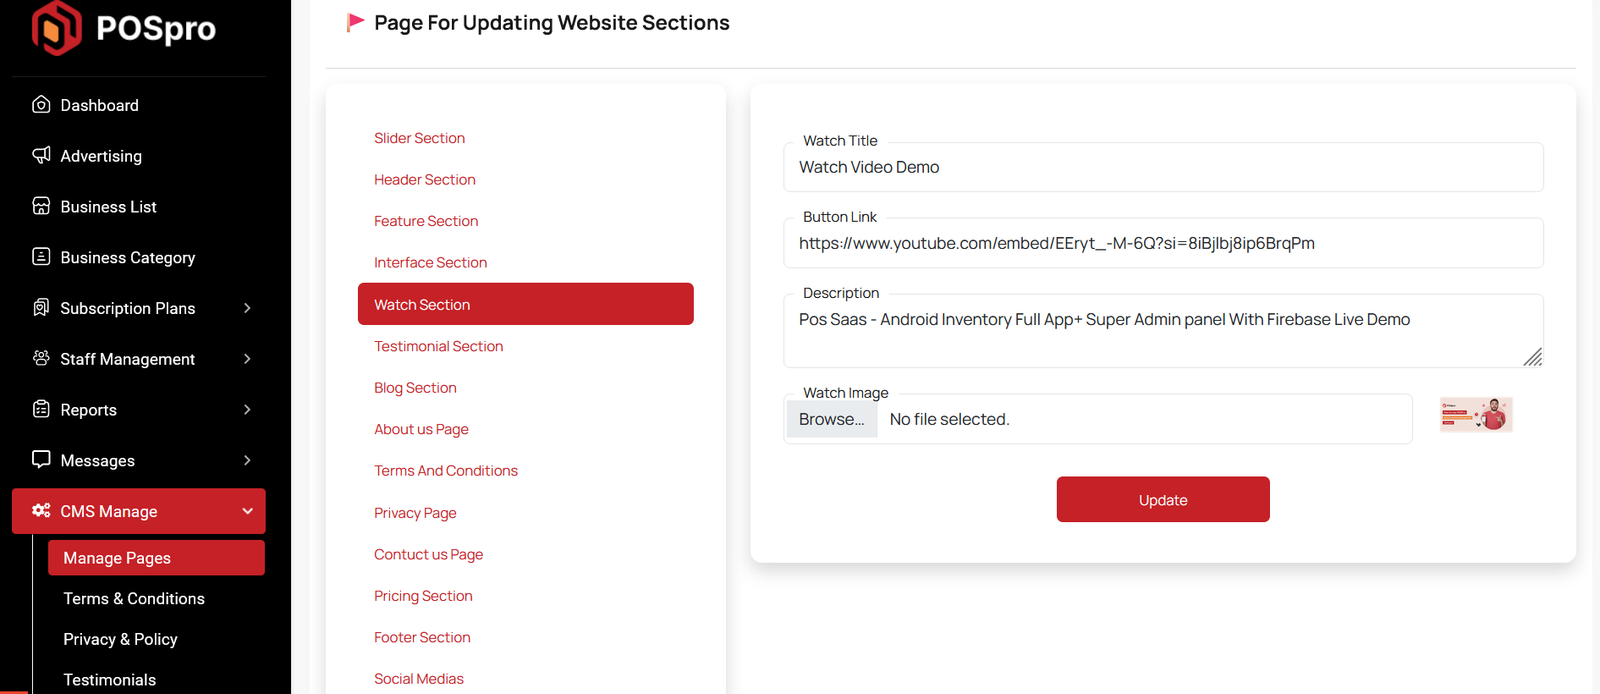
You can add this section to the Home page by filling out the required information.
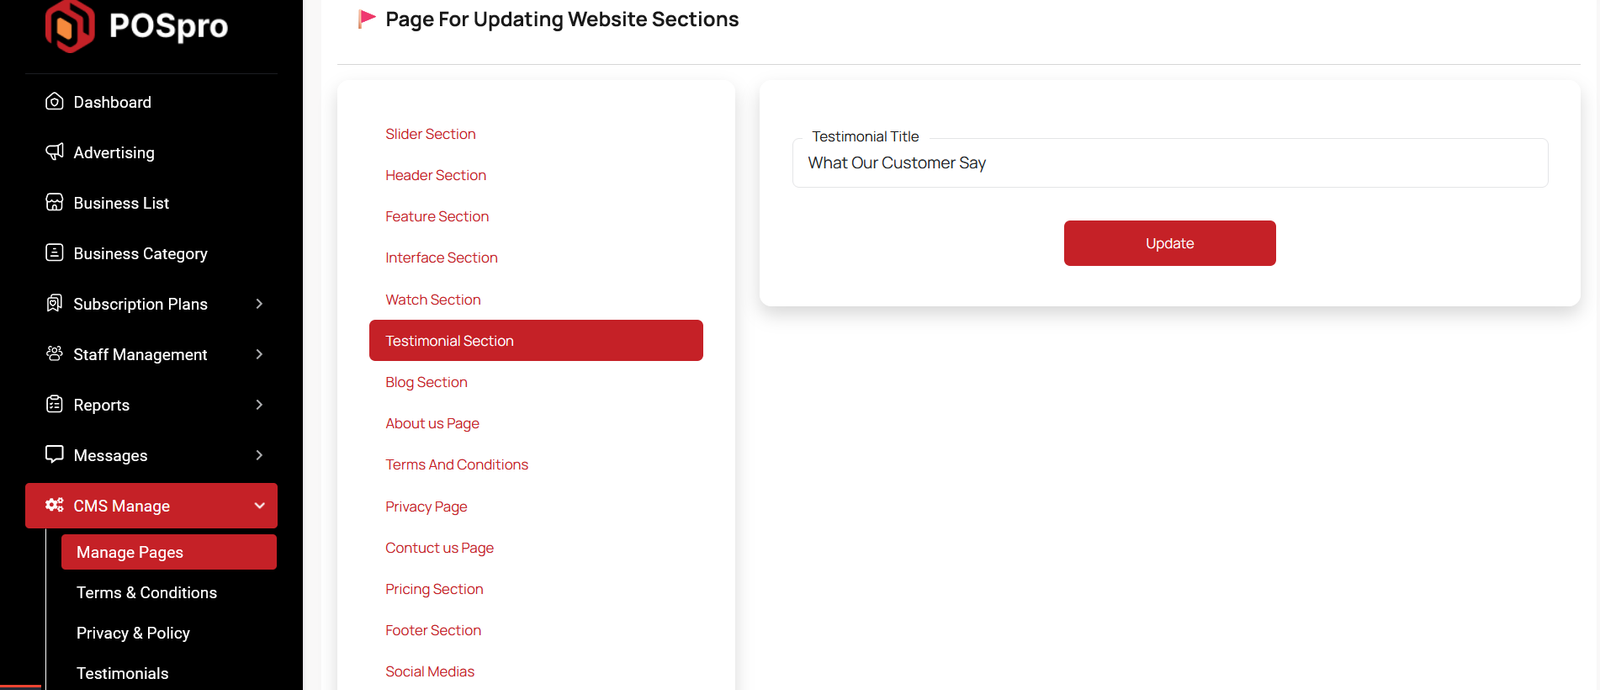
Here, you can update the testimonial section's title of the Home page.
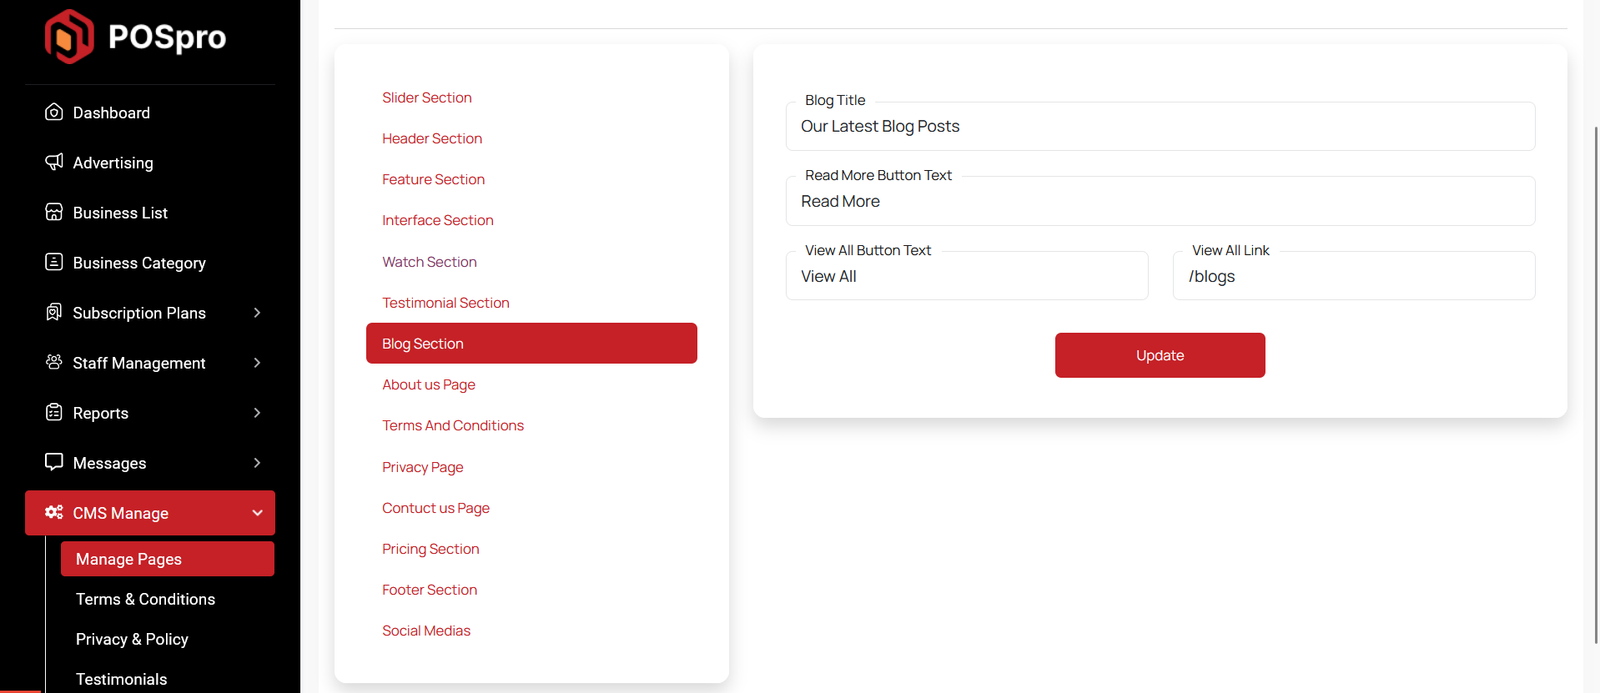
Here, you can update some information of your Blog page.
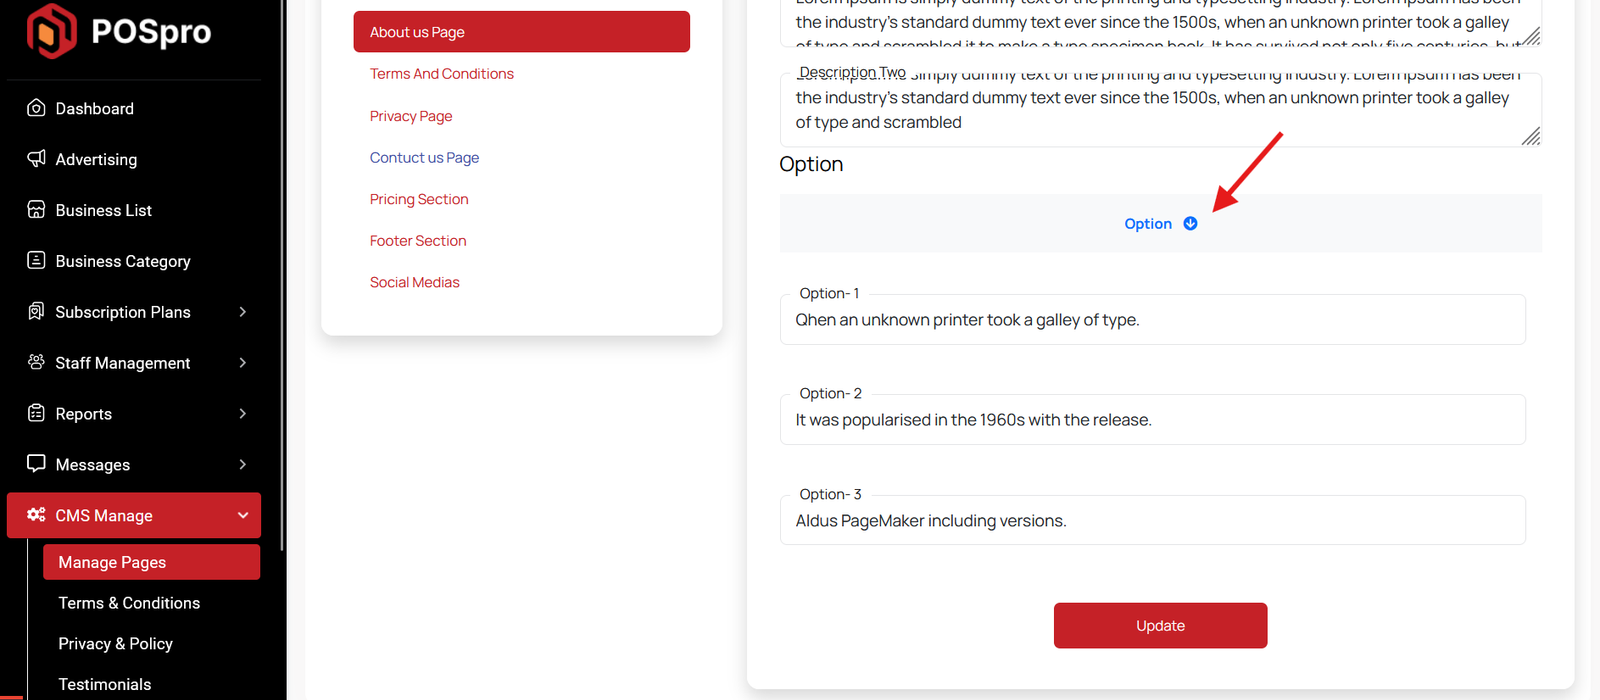
Here, you can update information of your About us page.
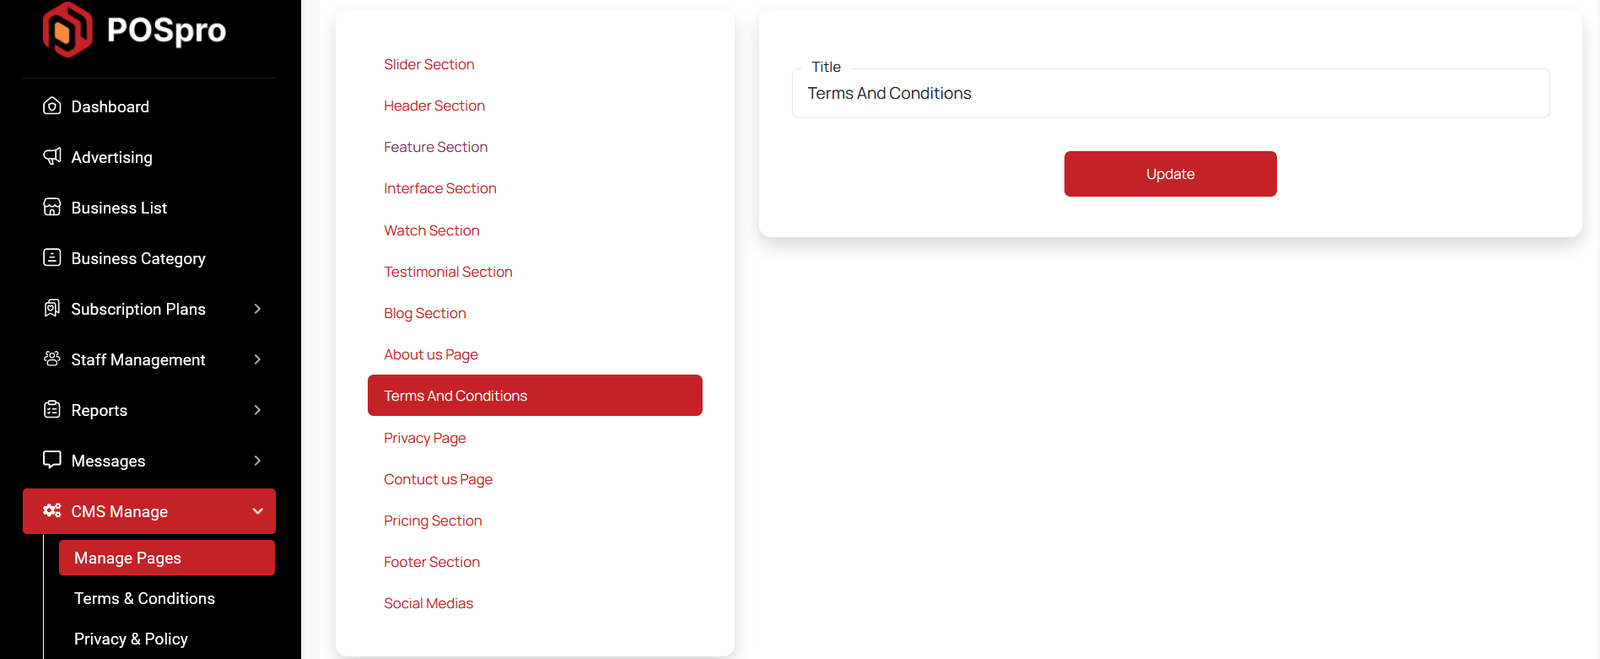
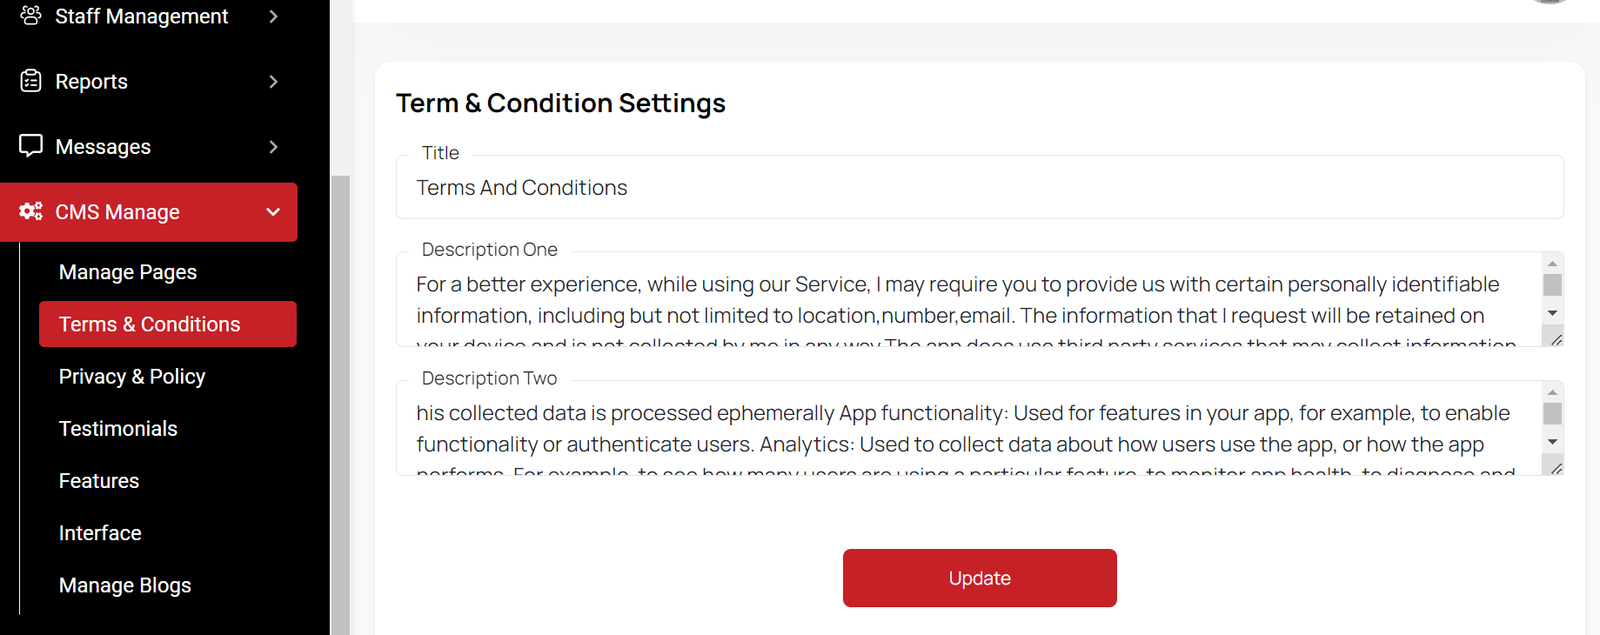
You can update your term and condition "title" in this section.
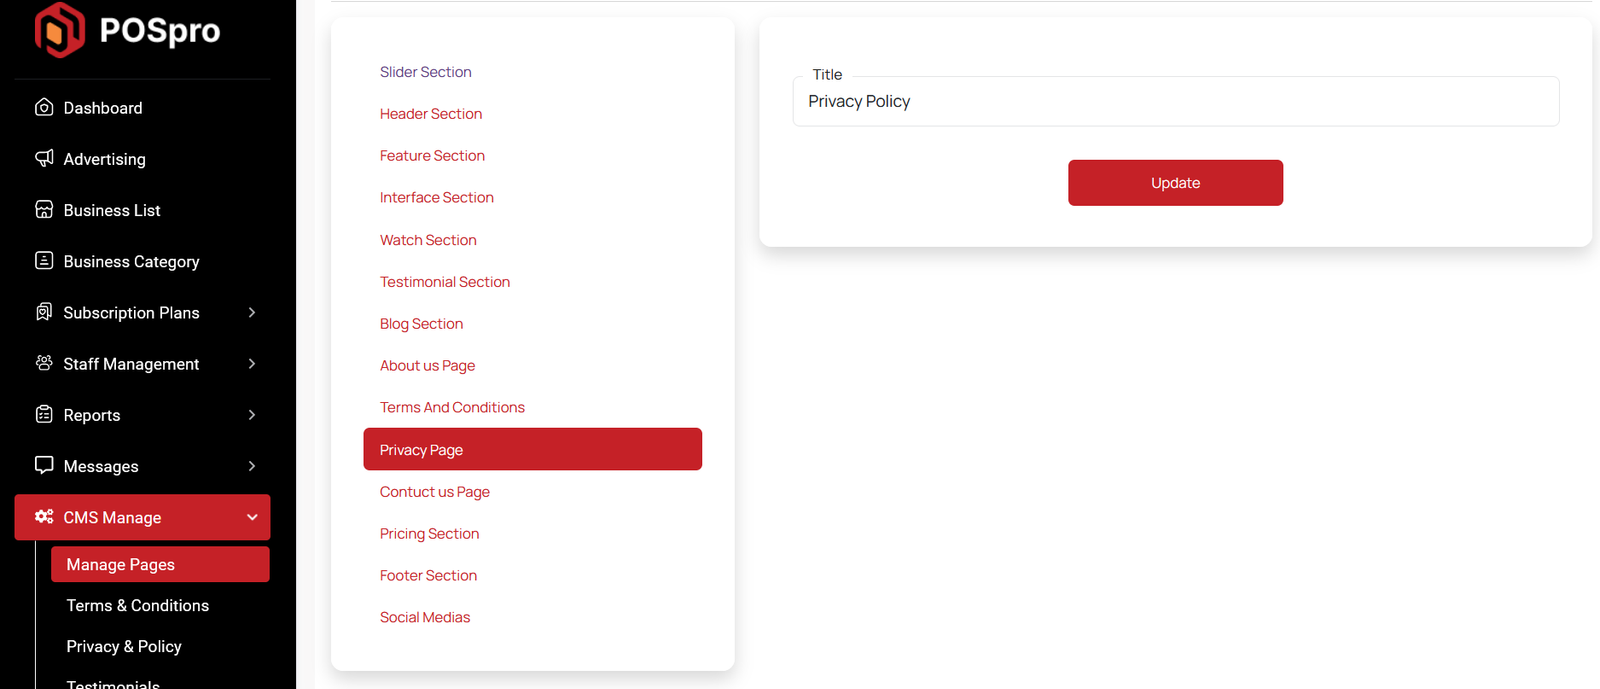
You can update your privacy and policy "title" in this section.
You can update your contact us pages's title, button, description in this section.
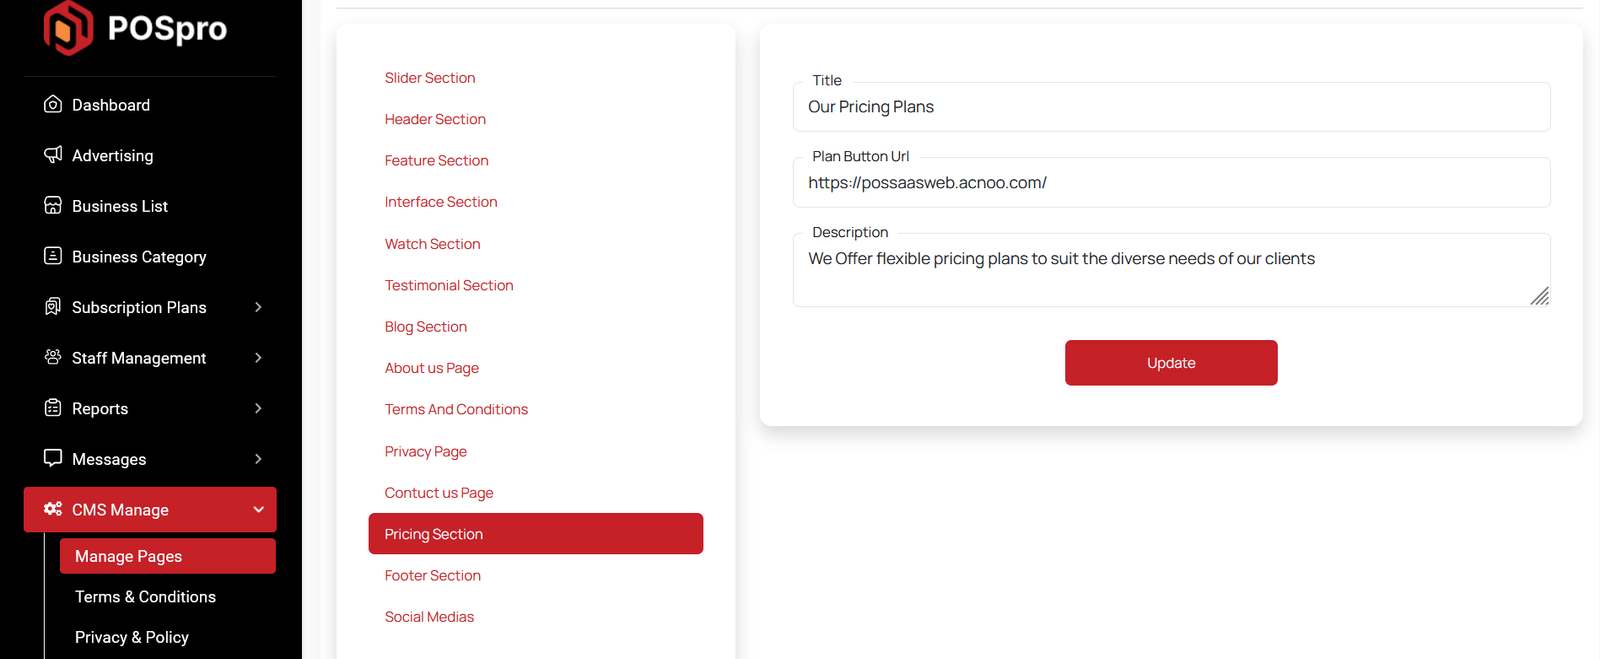
You can update your Pricing page's title, button, description in this section.
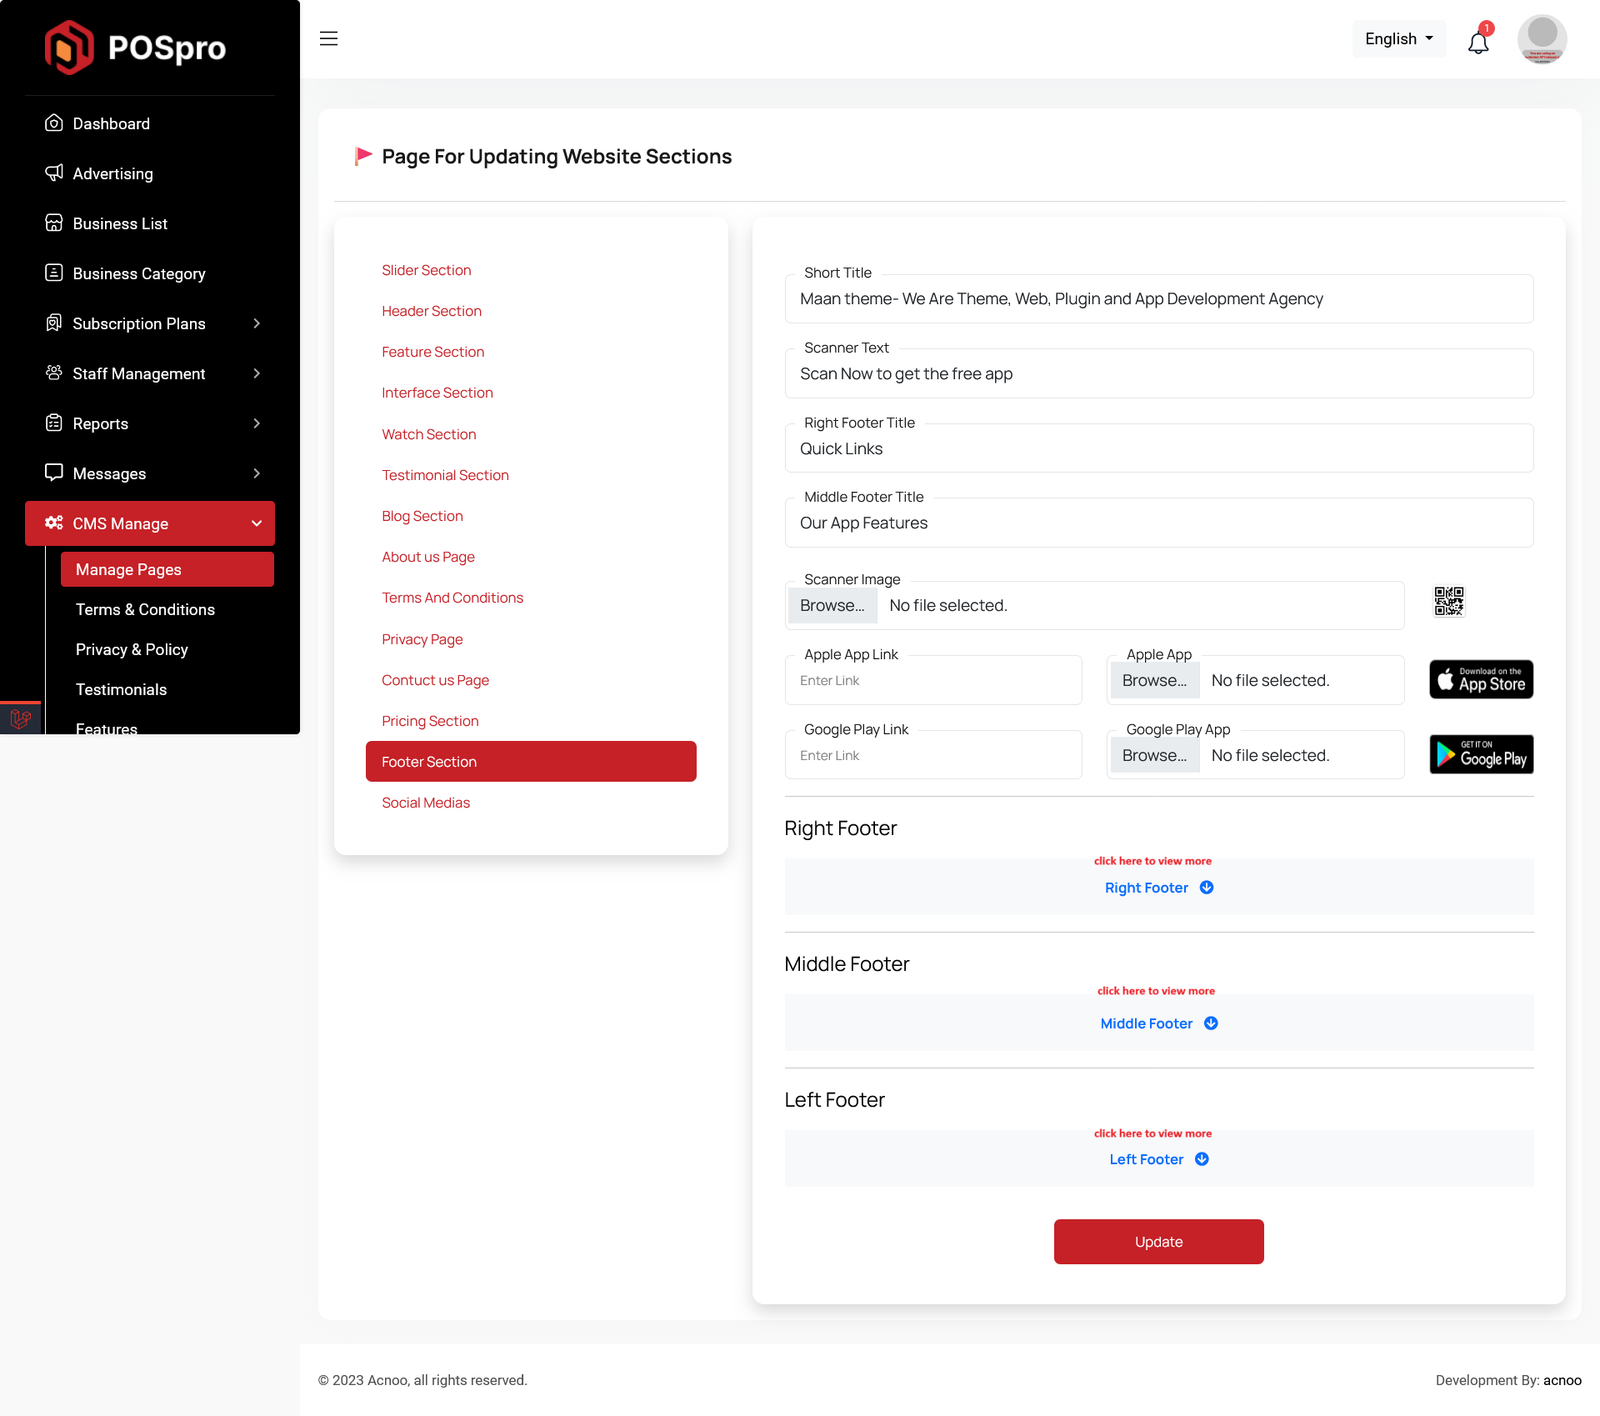
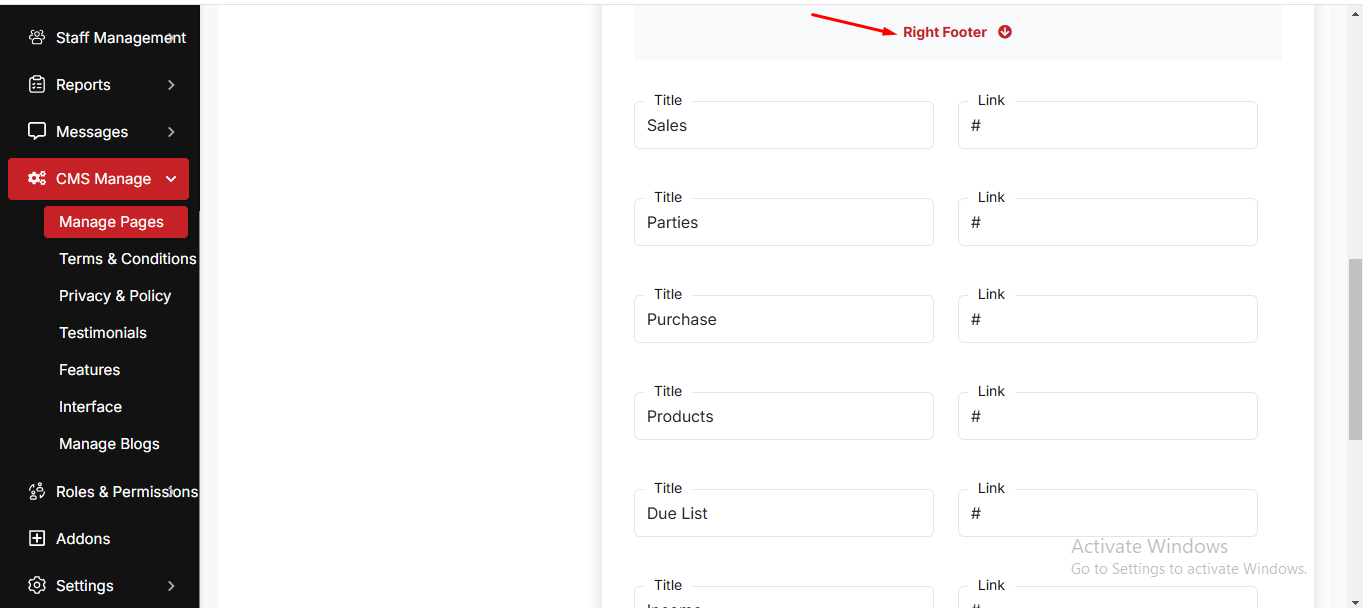
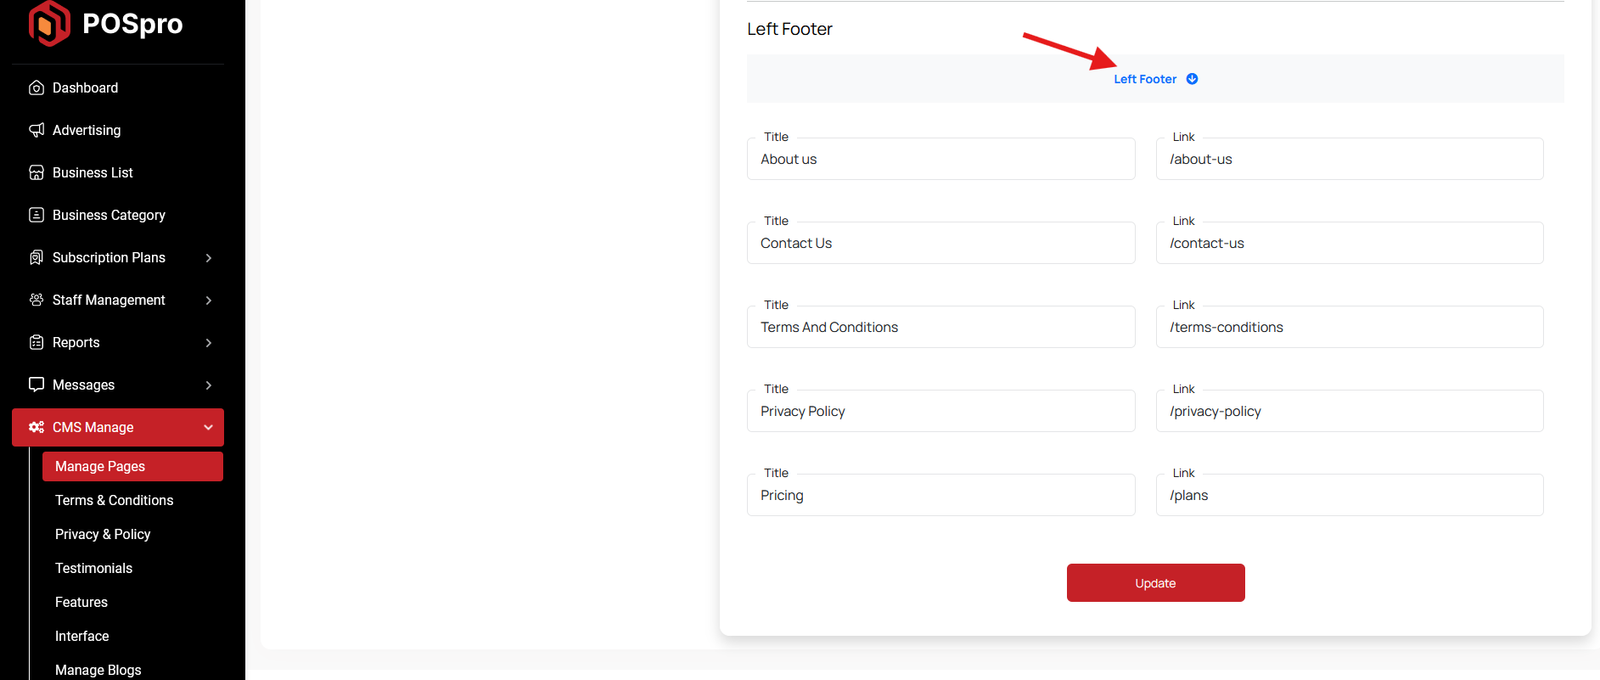
Here, you can view all parts of the footer section of the landing page. You can update them according to your needs.
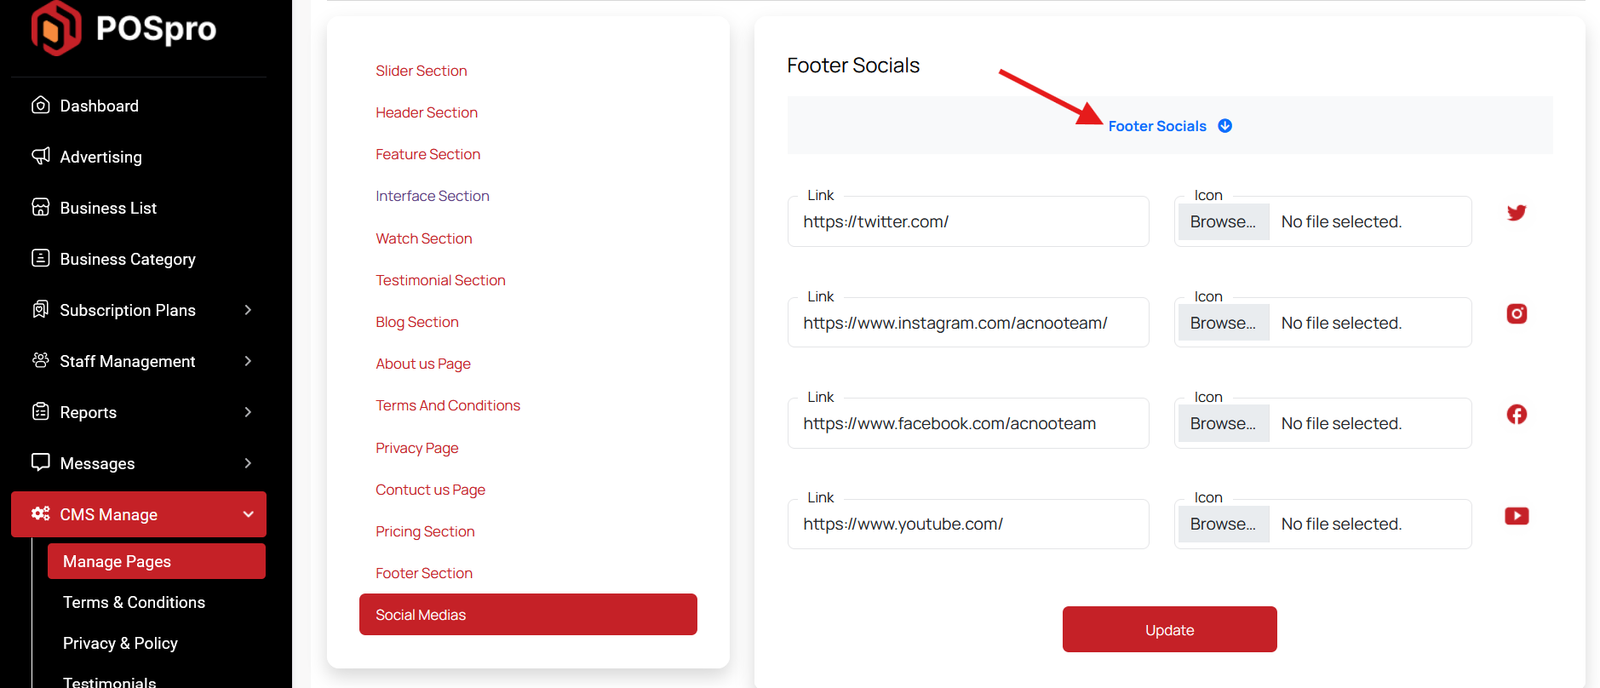
You can update social icon for footer section of landing page according to your needs.
Term & Condition
Here are the updated terms and conditions for your software.
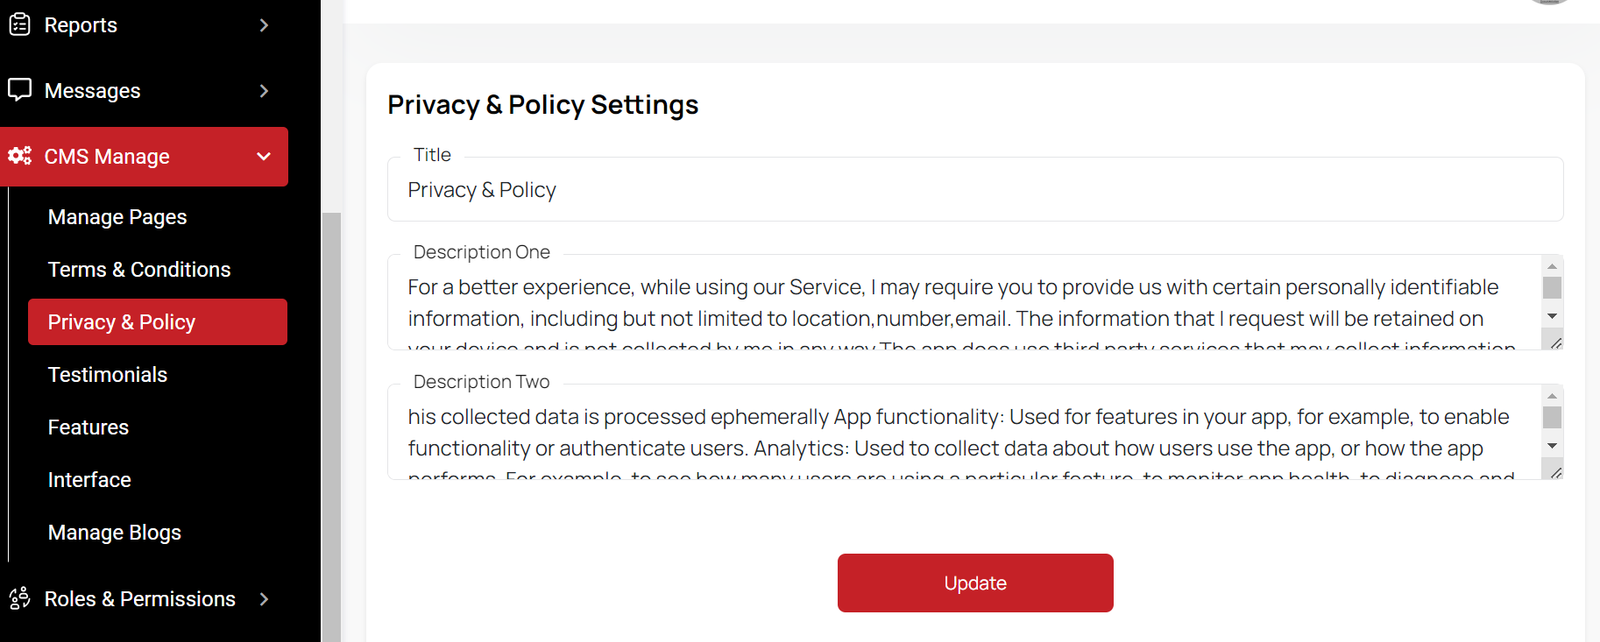
Privacy & Policy
We need a privacy policy for our software. You can update the policy in this section.
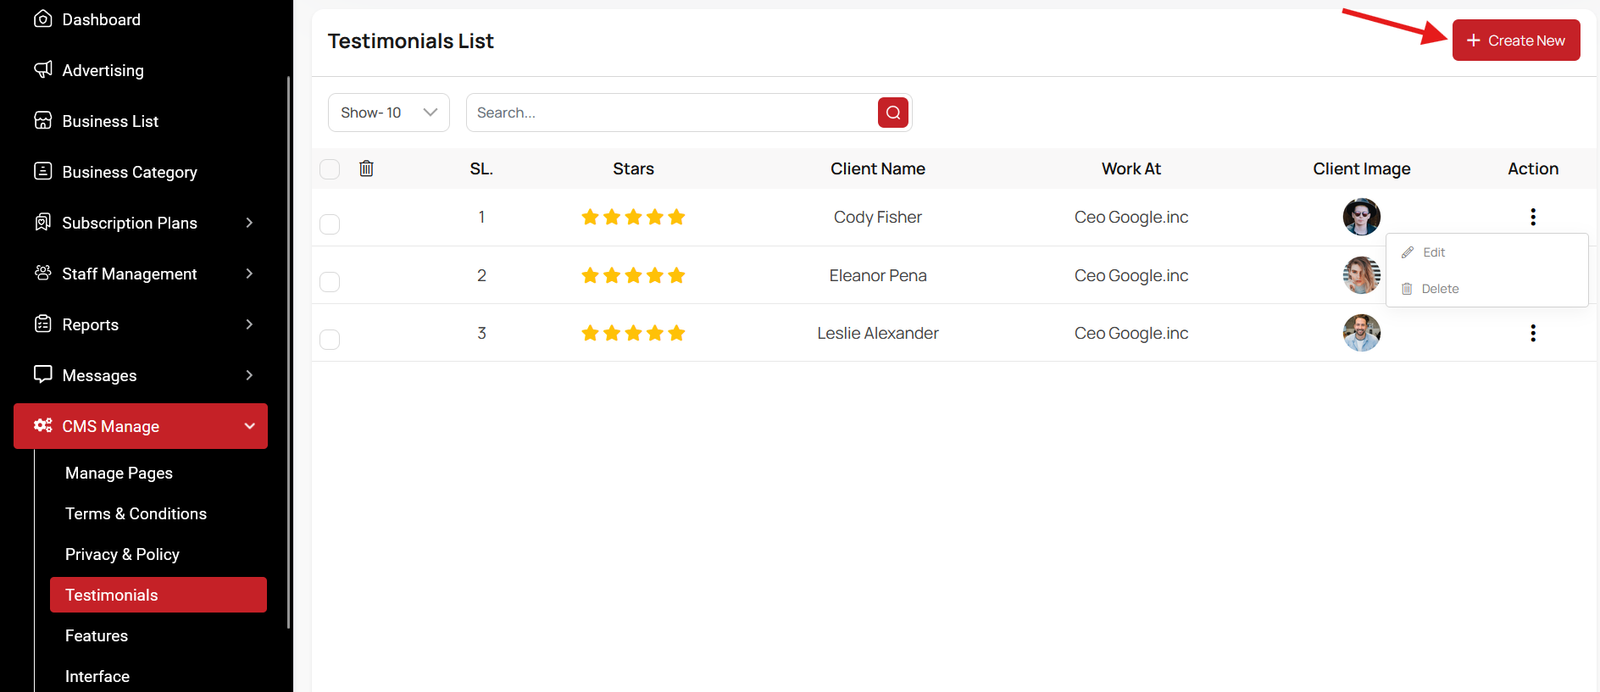
Testimonial List
Here, you have the option to view the testimonial list with update and delete options available. Search and multi-delete options are also provided. After clicking the "Create New" button, you will be taken to a new page where you can add a testimonial by filling in the necessary fields.Here, you can provide the client's name, their workplace, the review, and select a star rating from the existing list. You can also add an image.
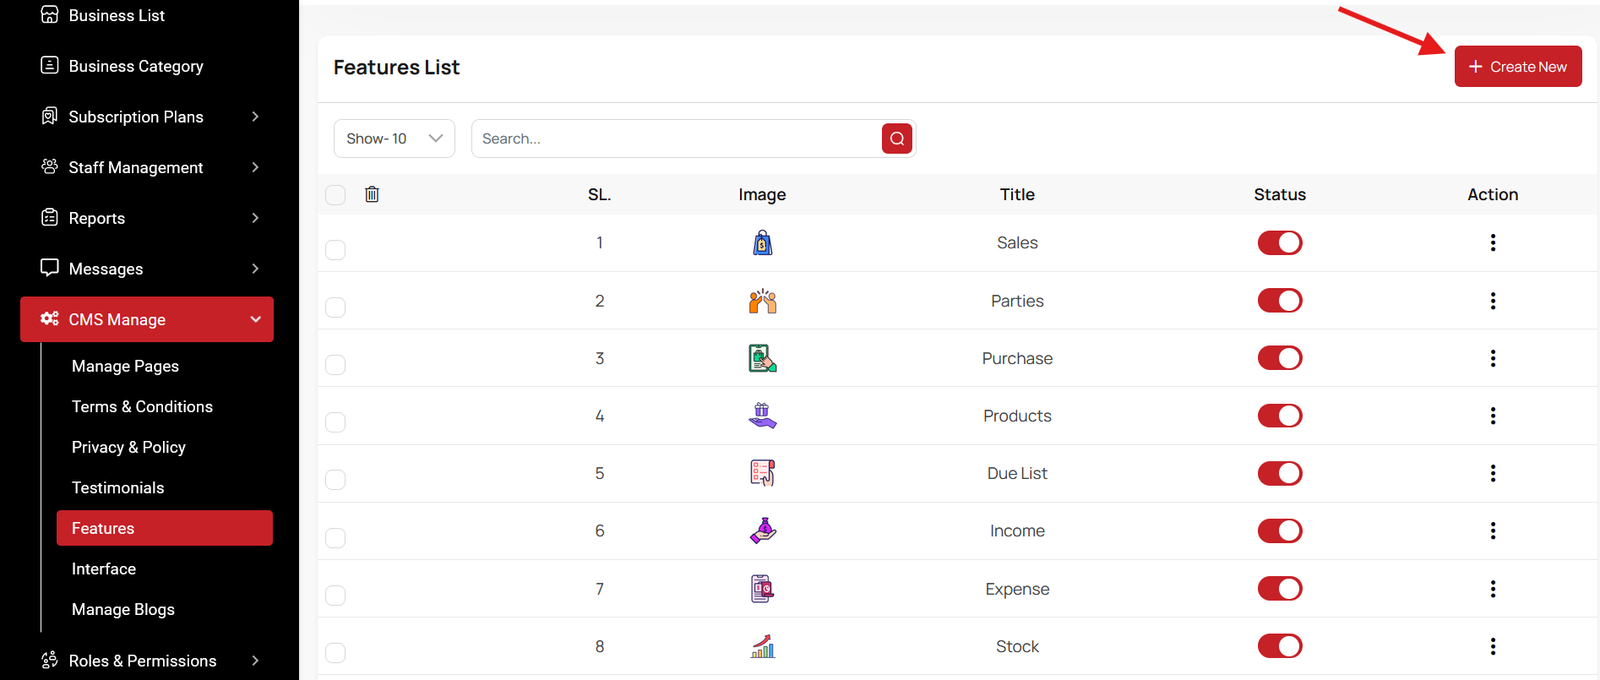
Features List
The features section appears to be a list of features in a software application.Users can add new features by clicking the "Create New" Feature button.The Action column may allow users to perform actions on features, such as "editing" or "deleting" them.
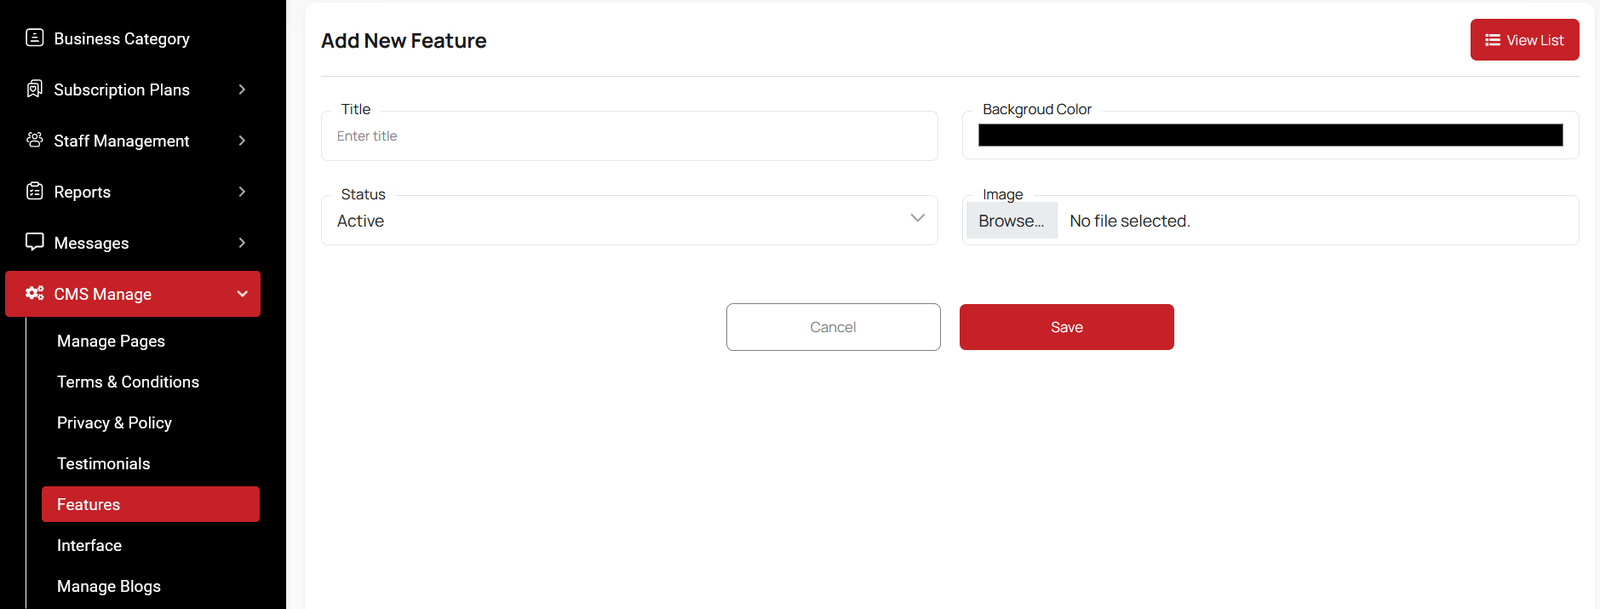
Create Feature
Here you can see some fields, such as 'Title,' 'Status,' and others, for creating new features.
Interface List
Here, you can view the Interfaces List with filtering options. You can change the status for each interface, as well as edit, delete, or multi-delete them.

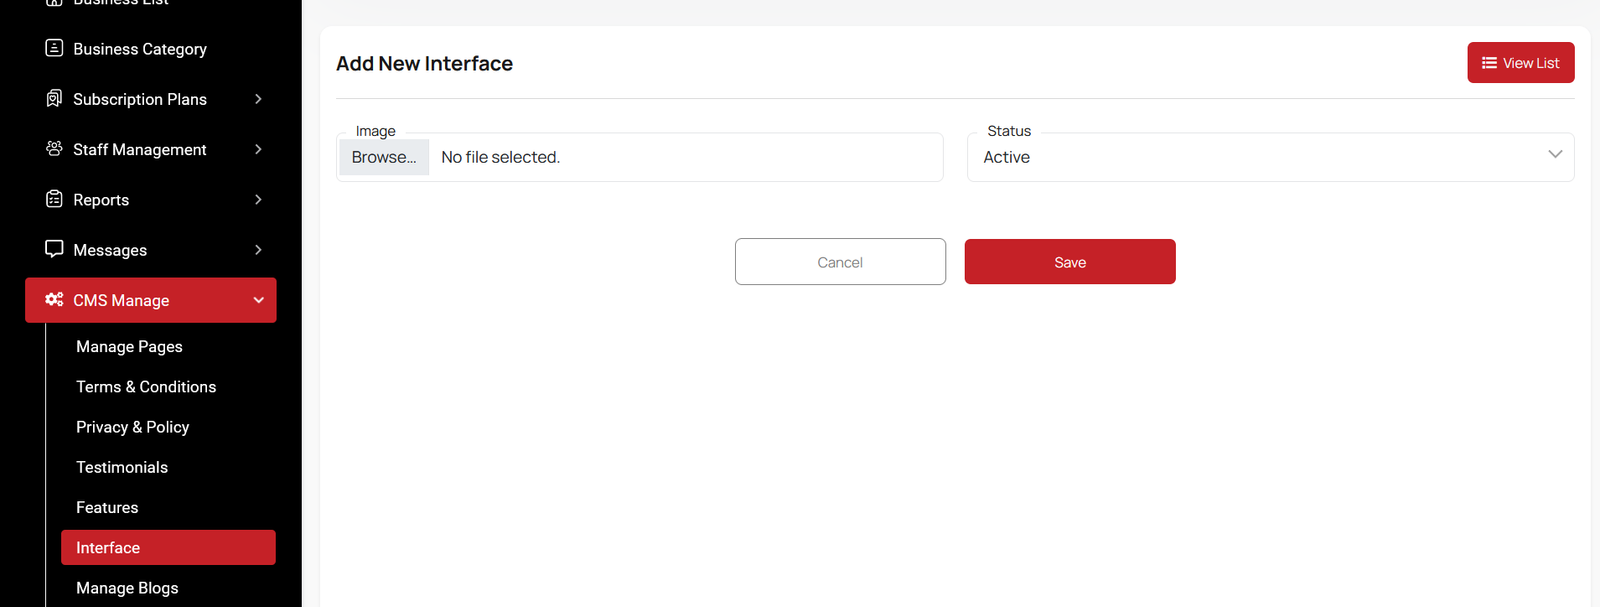
Create Interface
Use images to create a visual representation of the interface within the landing page.
Create Testimonial
Here you create Testimonial to fill required field.

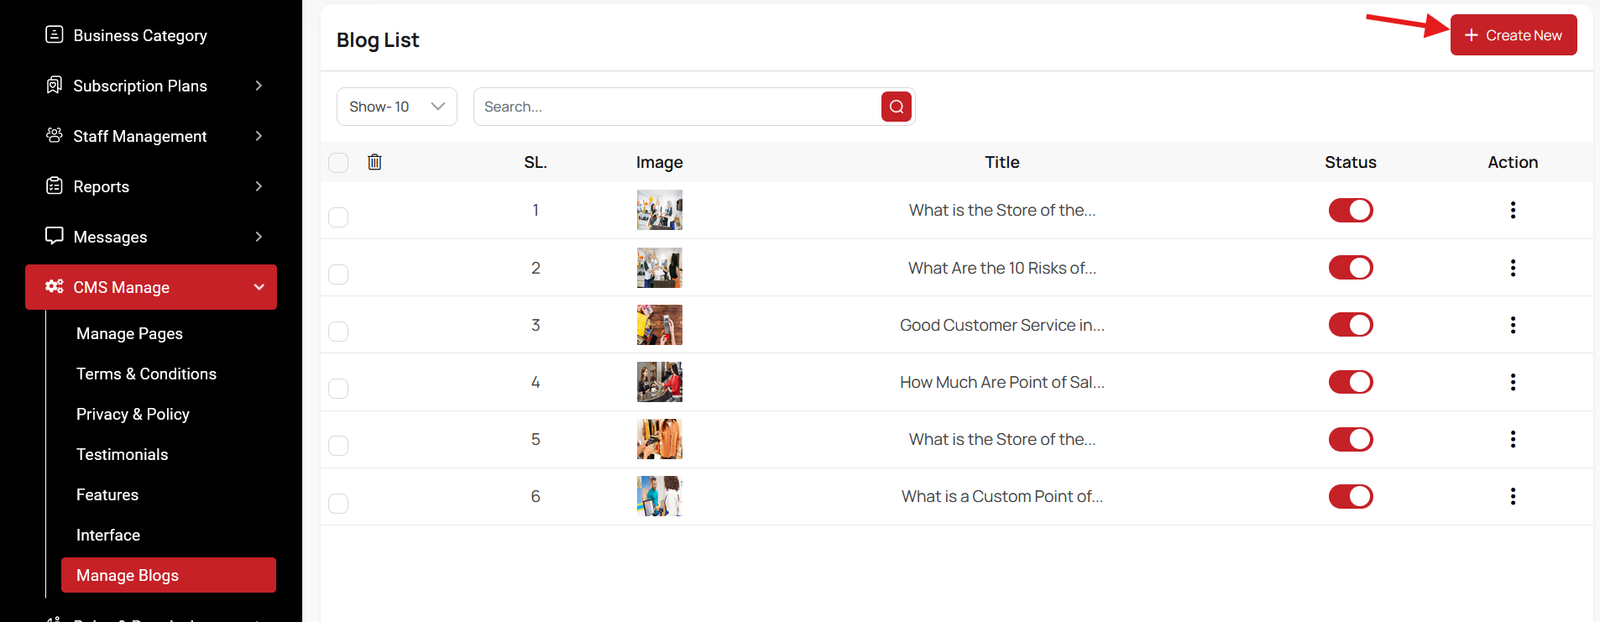
Blog List
Here you have the option to view the blog and comment lists. Additionally, editing and updating options are available. You can also search for specific items, and multi-delete functionality is also provided.
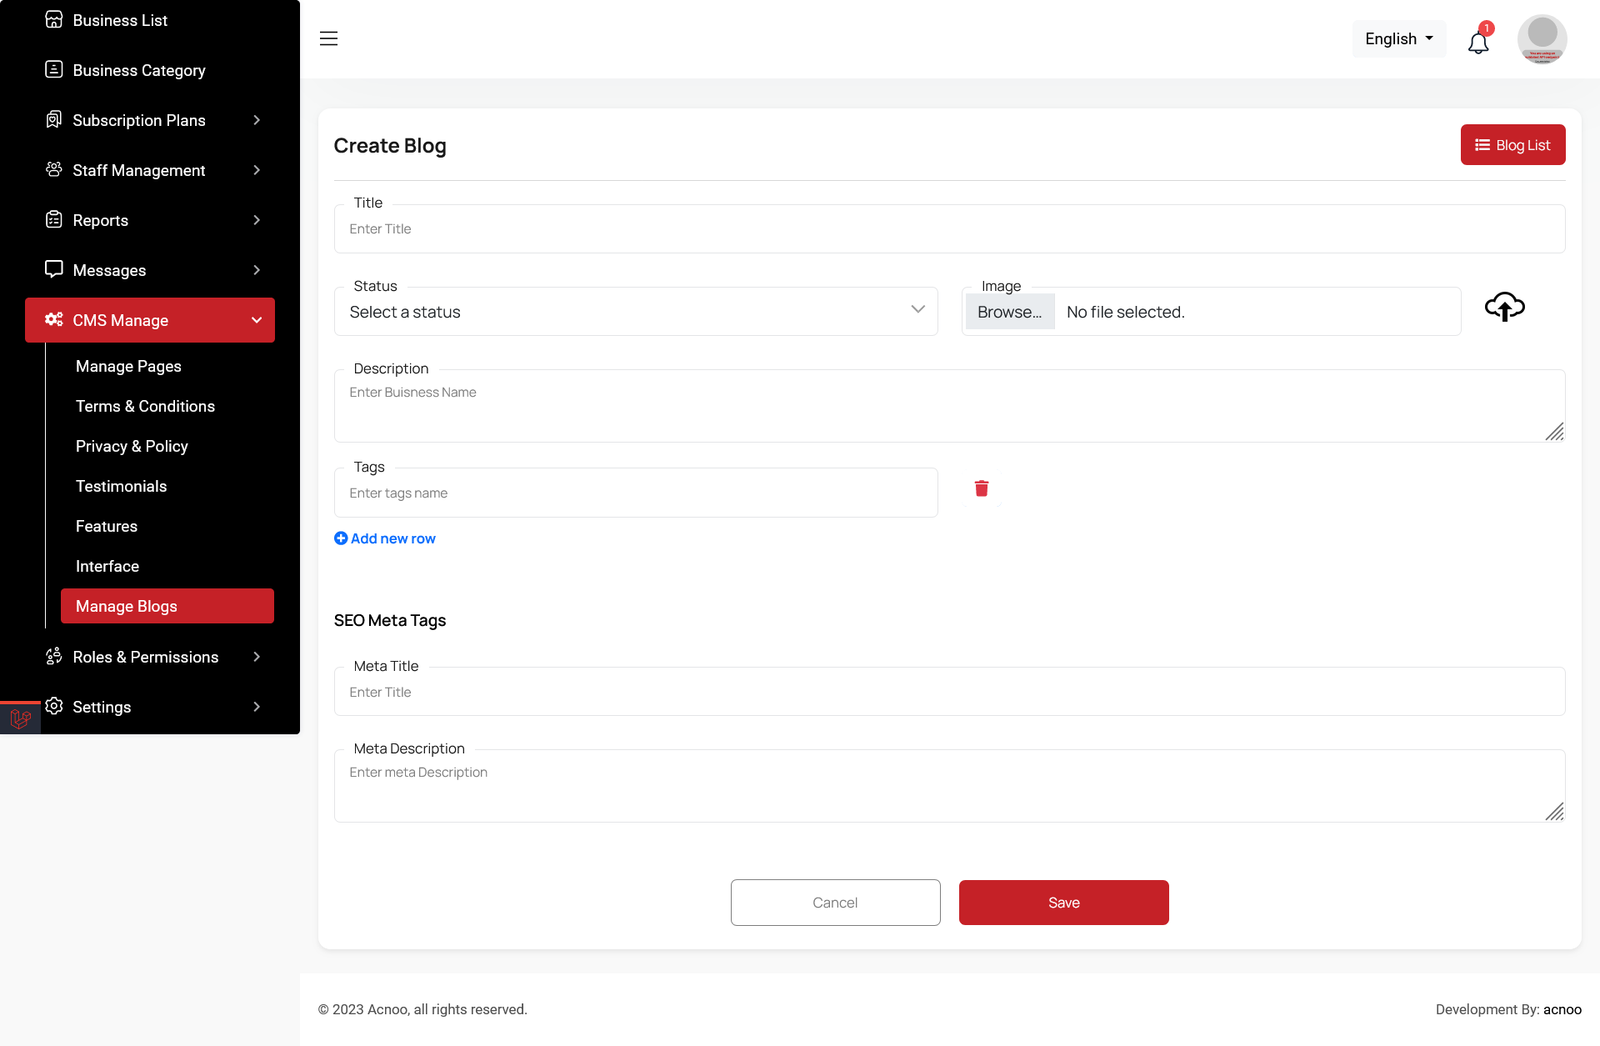
Create Blog
Feel free to utilize this platform to generate a blog post and complete the necessary fields. As you input your content, you'll notice the inclusion of multiple tags. Additionally, you can craft meta titles and meta descriptions for enhanced SEO purposes.
Roles & Permissions
In this section, you have the ability to define roles and allocate specific permissions to different users as needed.
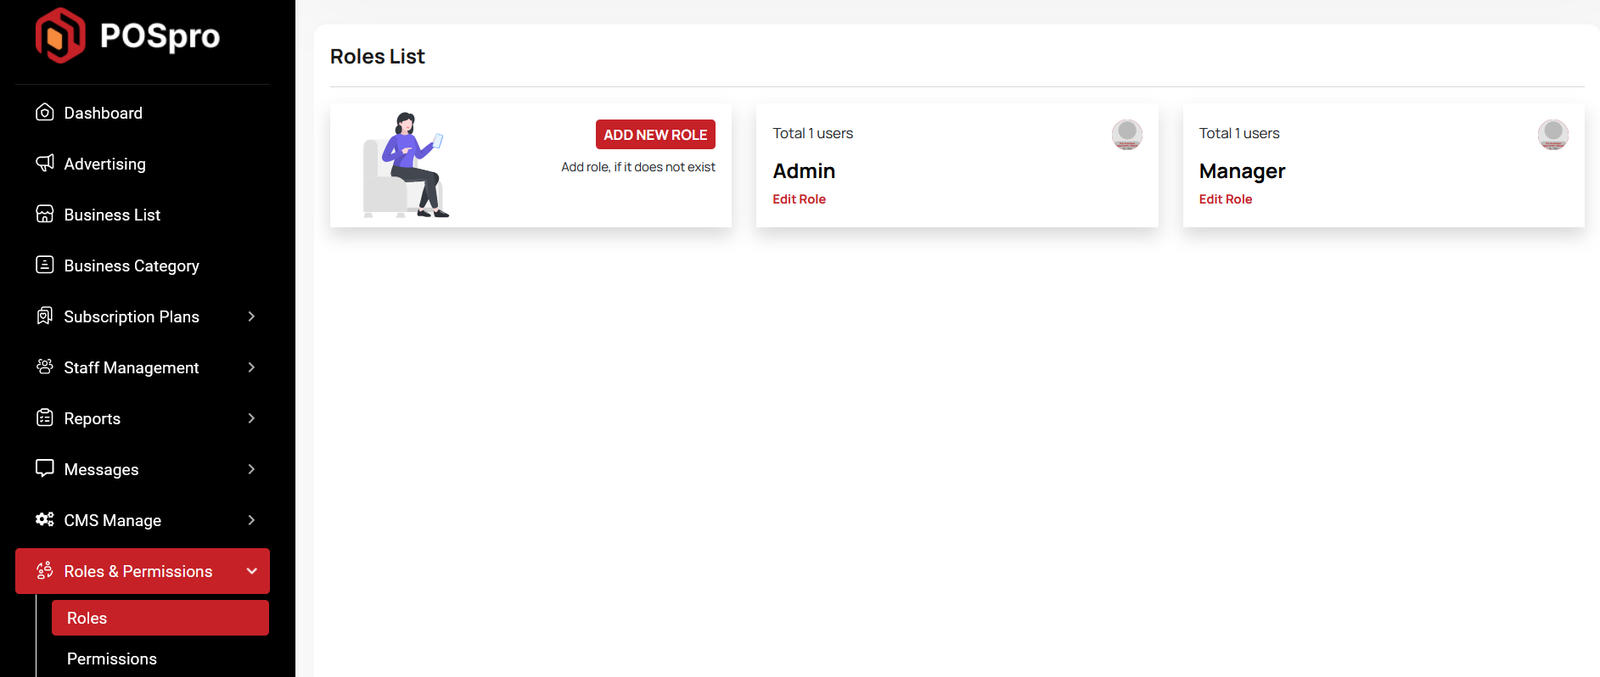
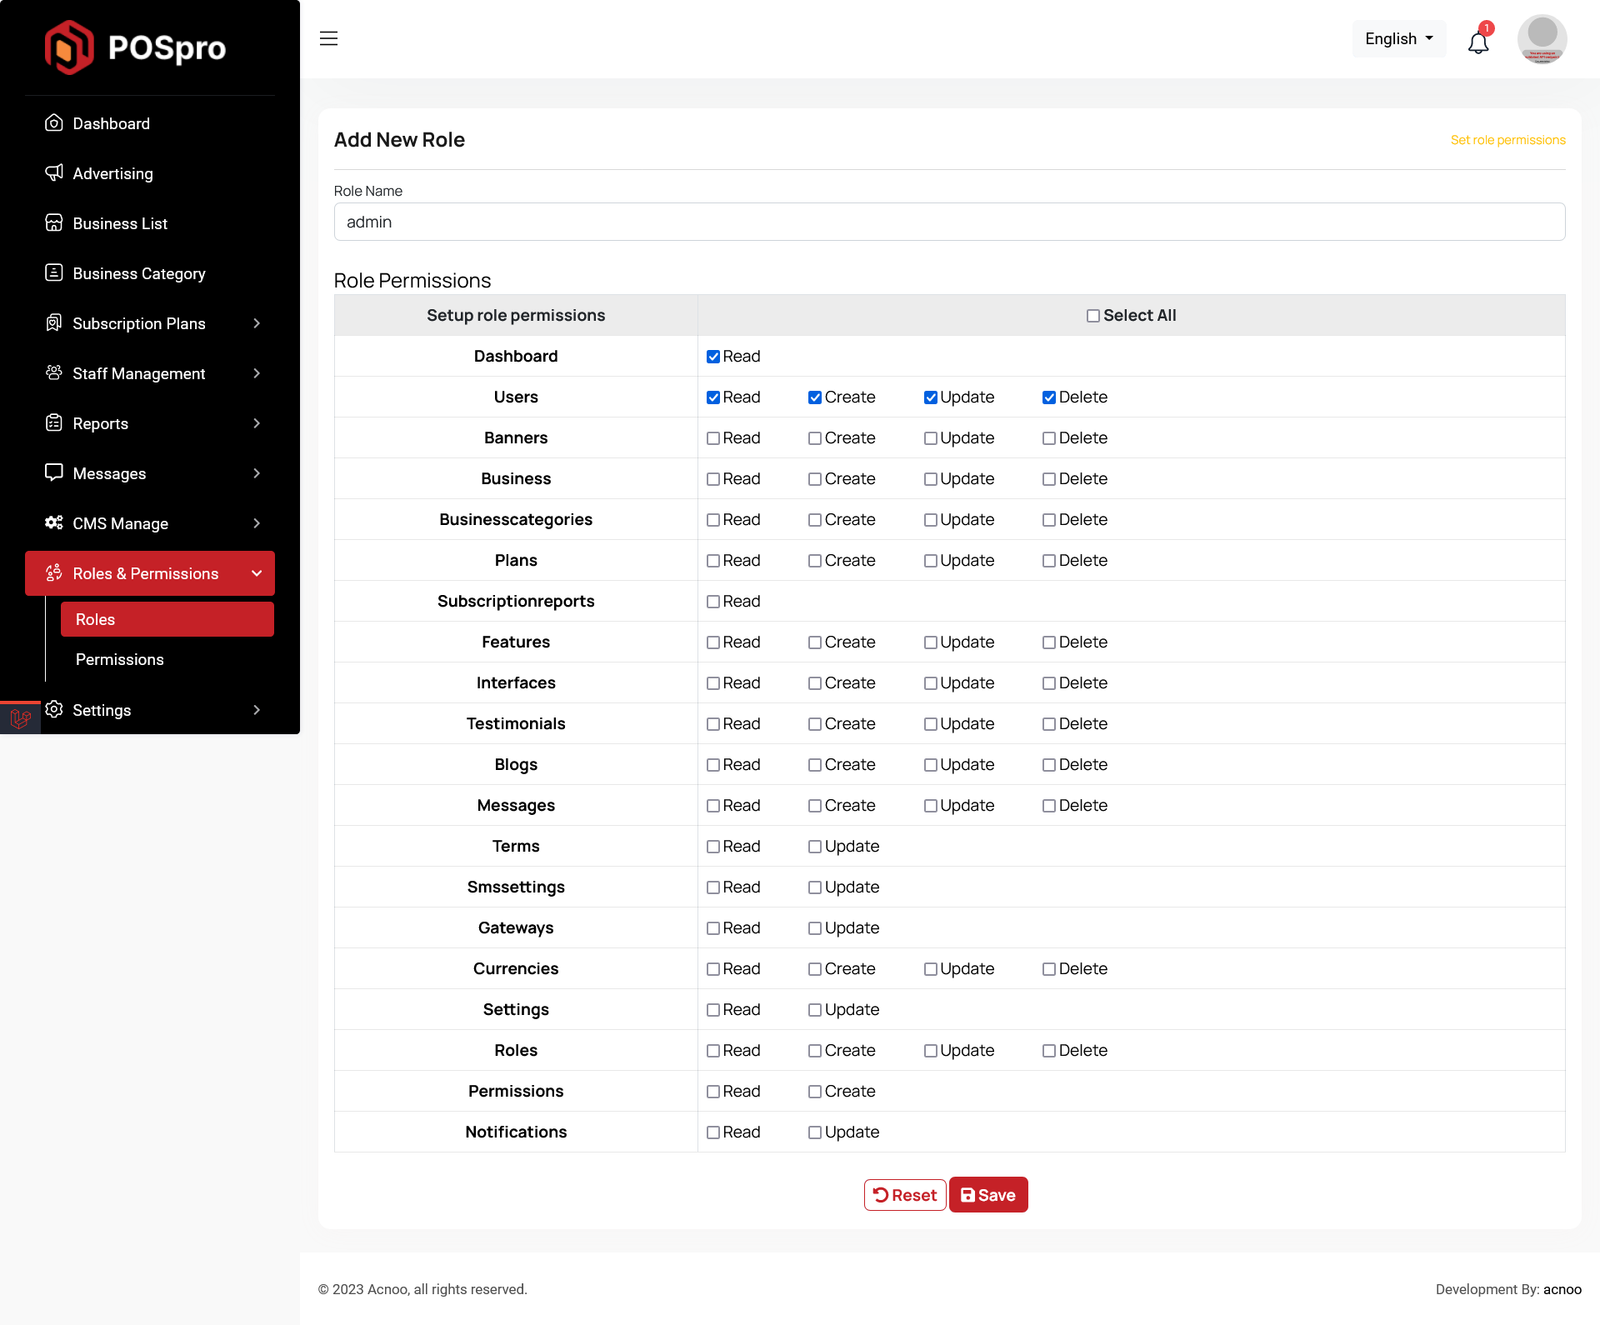
Roles
In this section, you have the capability to create new roles and update existing ones. When updating roles, you can configure their specific role permissions, granting or restricting access to various features and functionalities as required. This allows you to tailor user roles to your organizational needs and security requirements.
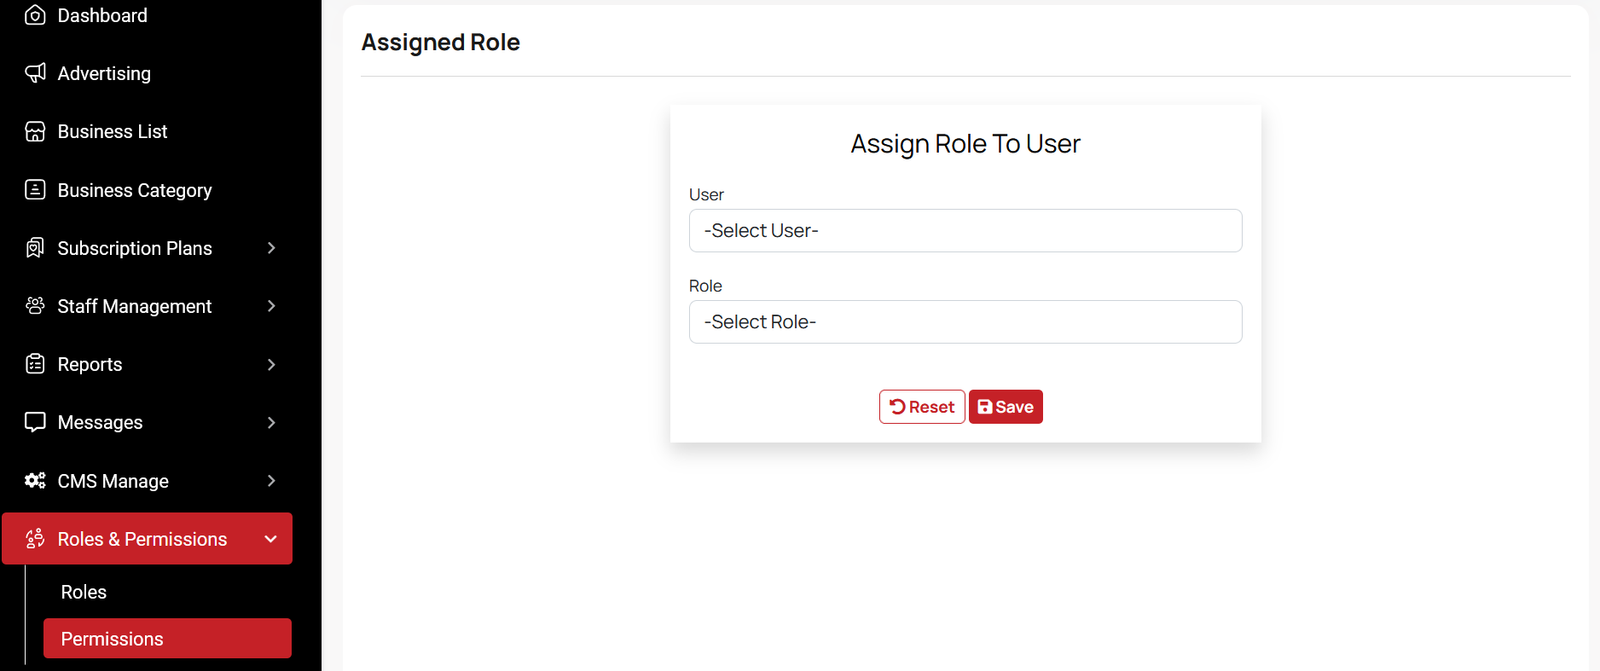
Permissions
In this section, you have the capability to set role-specific permissions, allowing you to fine-tune and control access rights for each role according to your organization's needs and security requirements.
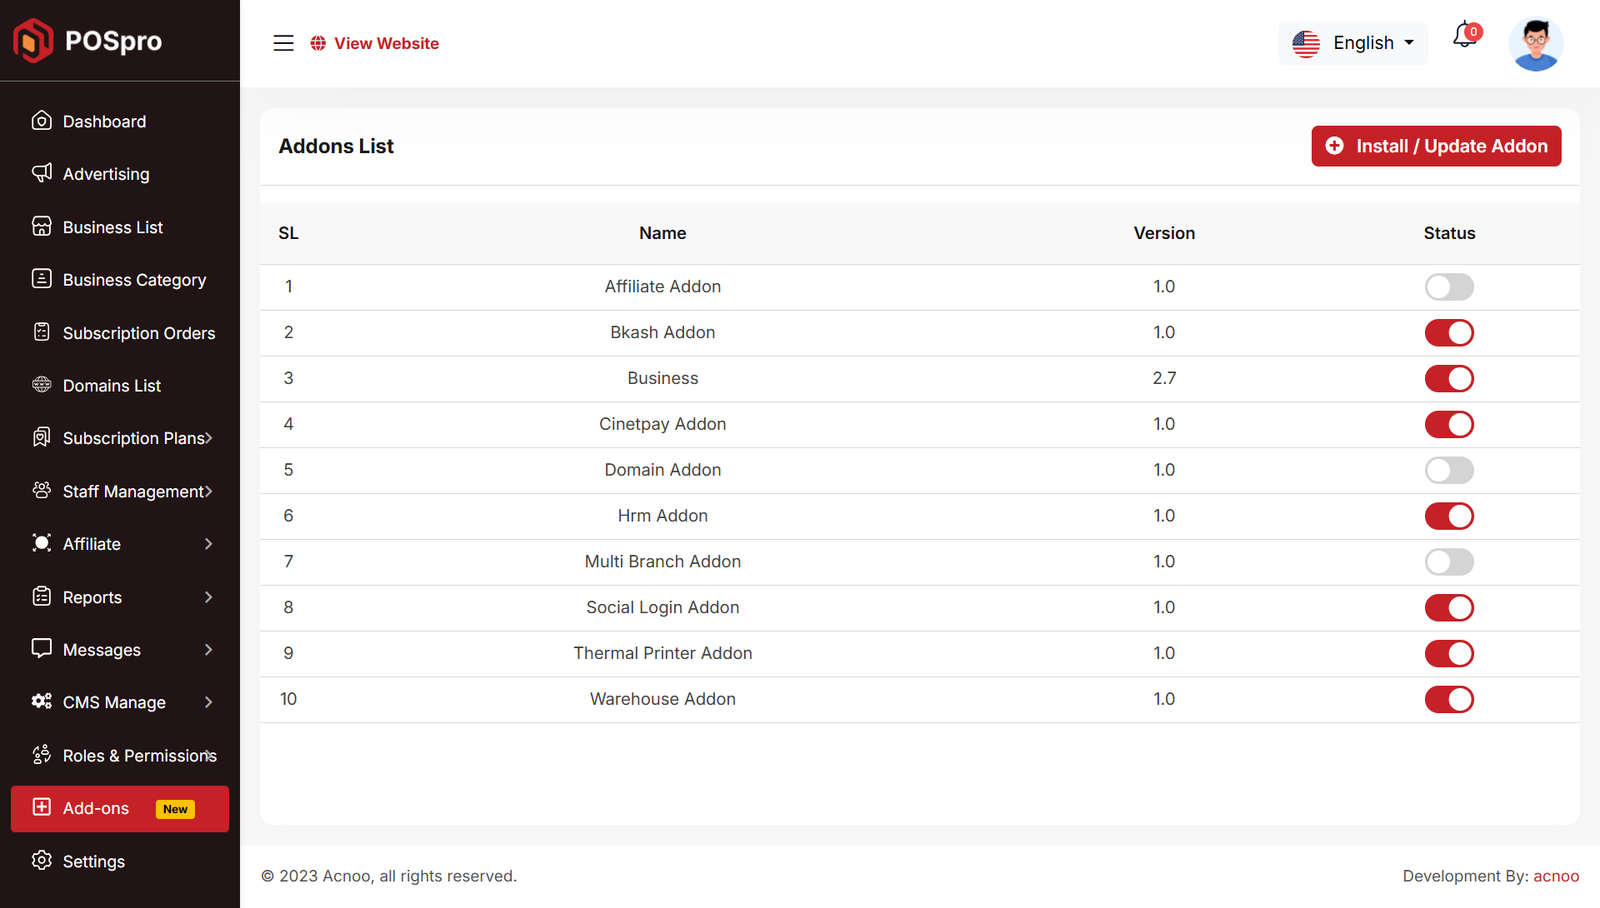
Add ons
In the Settings section, you can view the complete list of addons. You can also add a new addon by clicking the "Install/Update Addon" button. There is also a status toggle button where the user can activate or deactivate an addon.
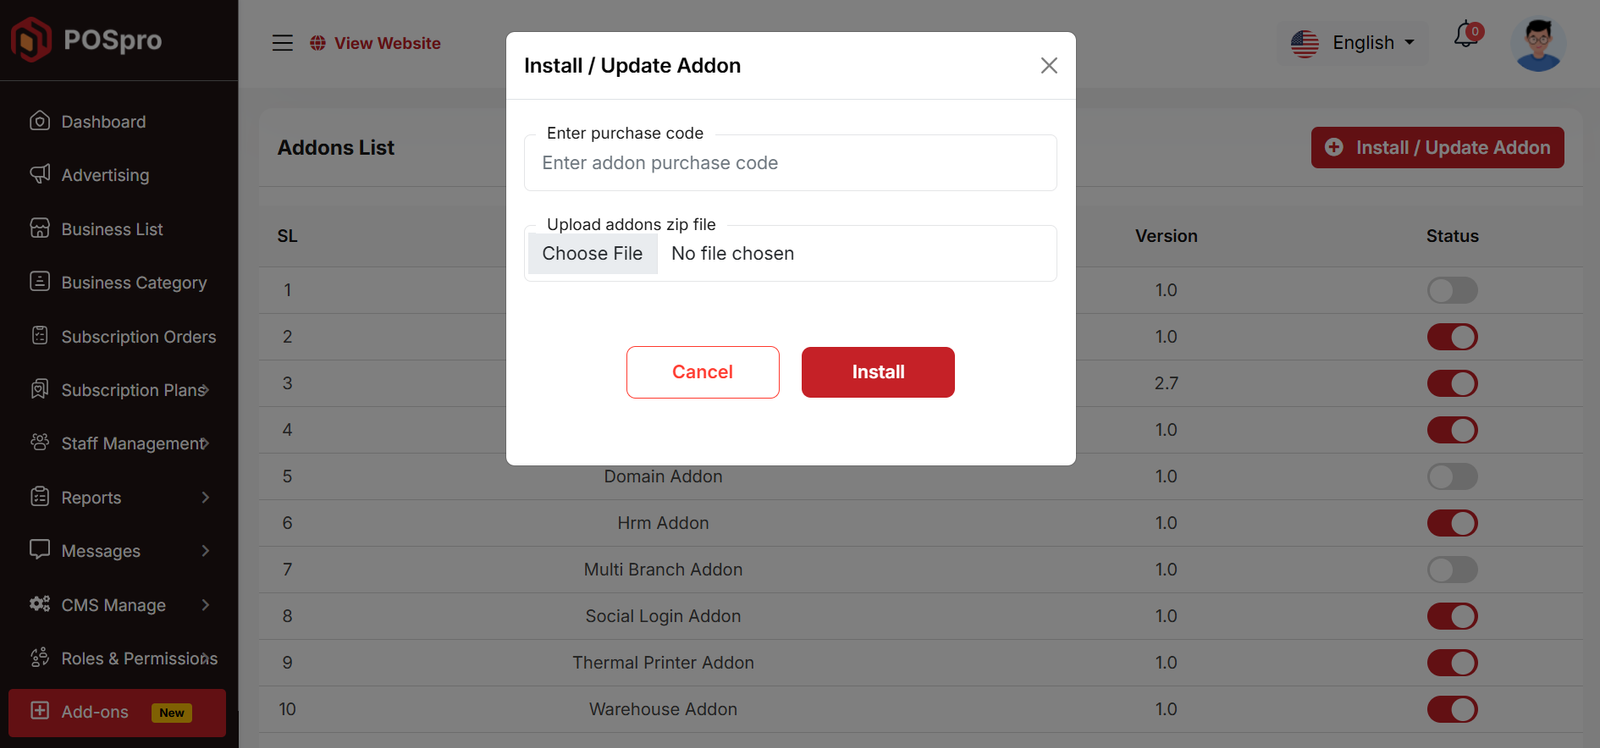
By clicking the "Install/Update Addon" button, a modal will open where you can create or purchase an addon. Below, I have added an image for clarification.
Setting
In the Setting section, you have the capability to configure the fundamental aspects or core elements of this project.
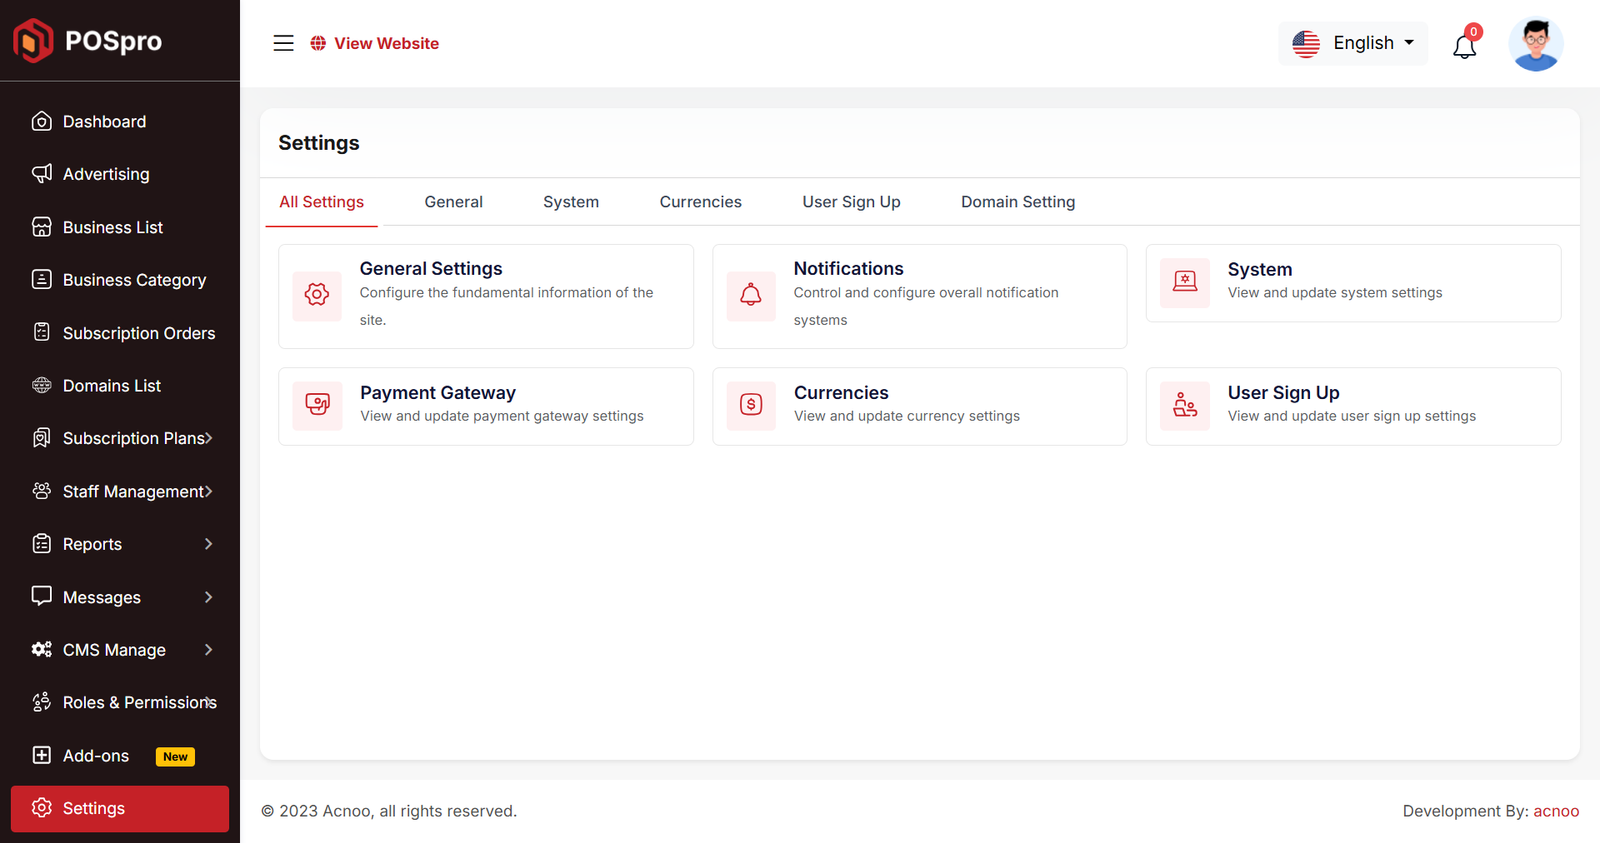
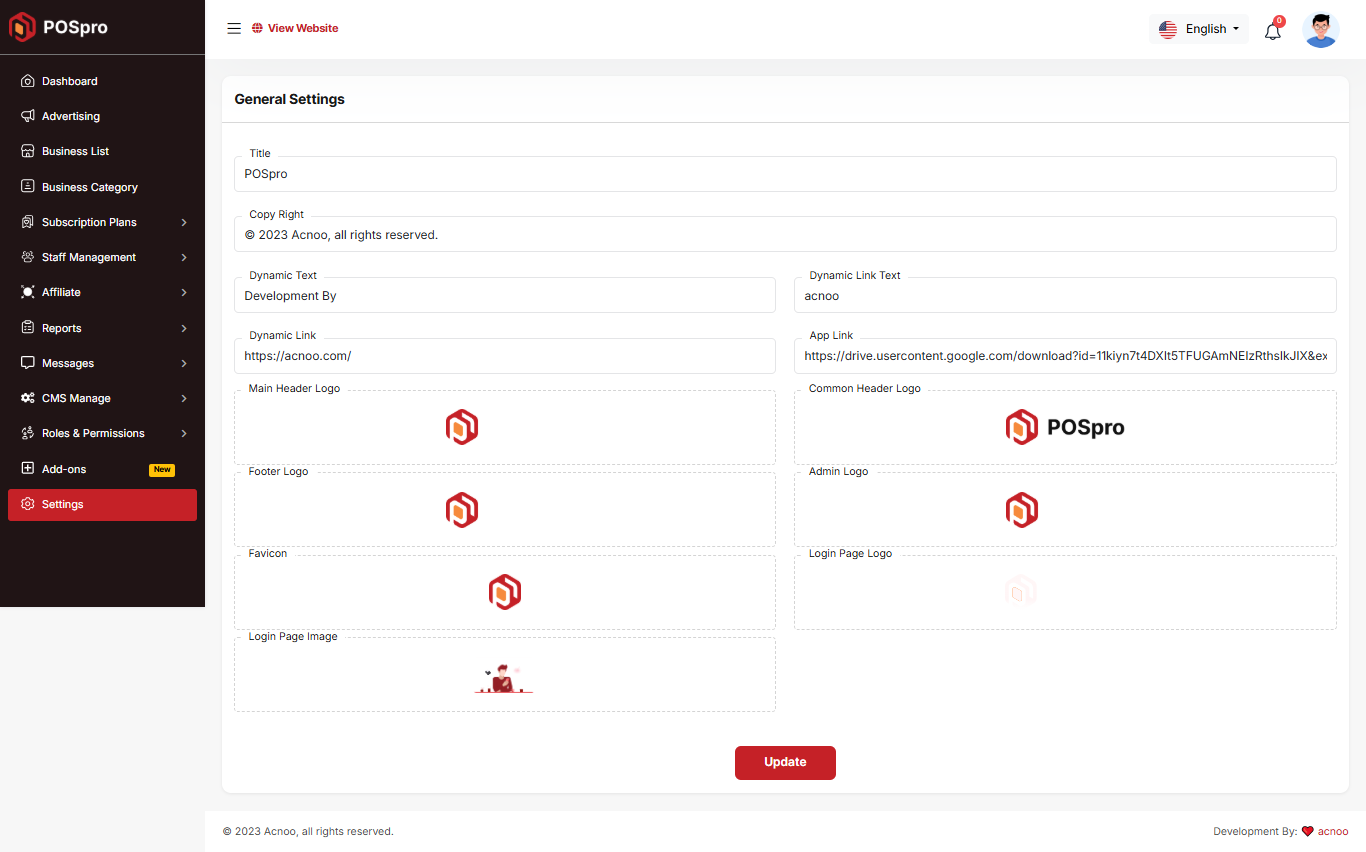
General Settings
You have the capability to modify the general project information.
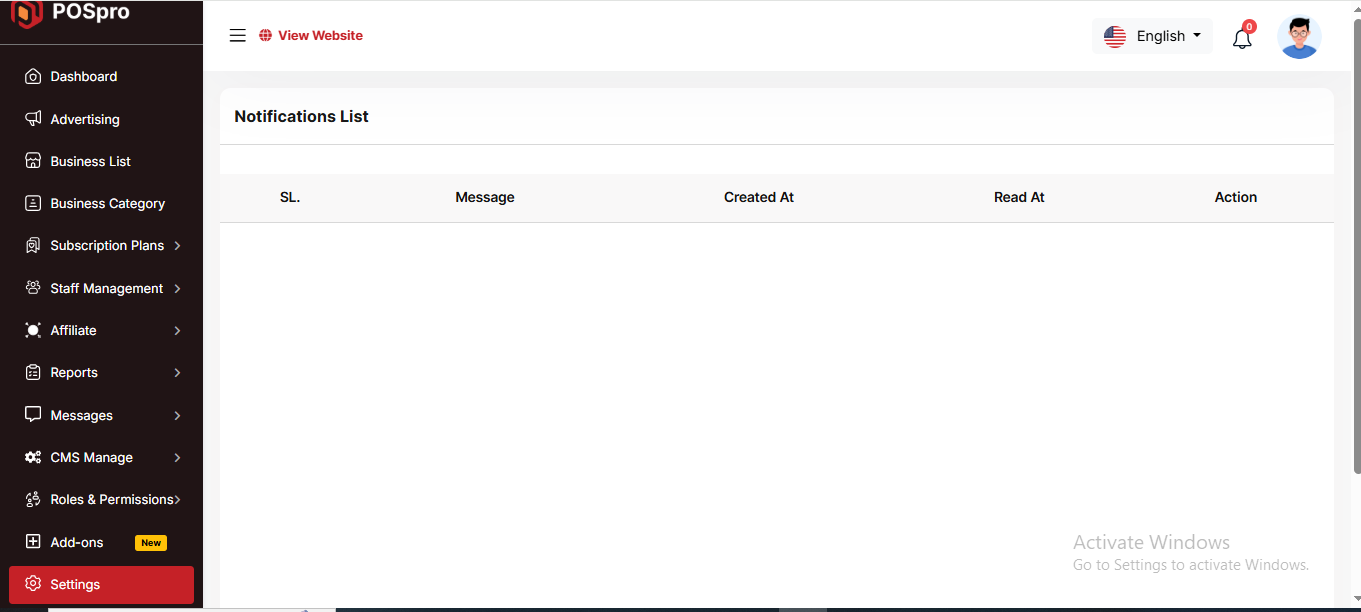
Notification
Here, you can view a list of various notifications. You also have the option to filter these notifications based on available criteria.In each list, clicking the "View" button allows you to see detailed information.
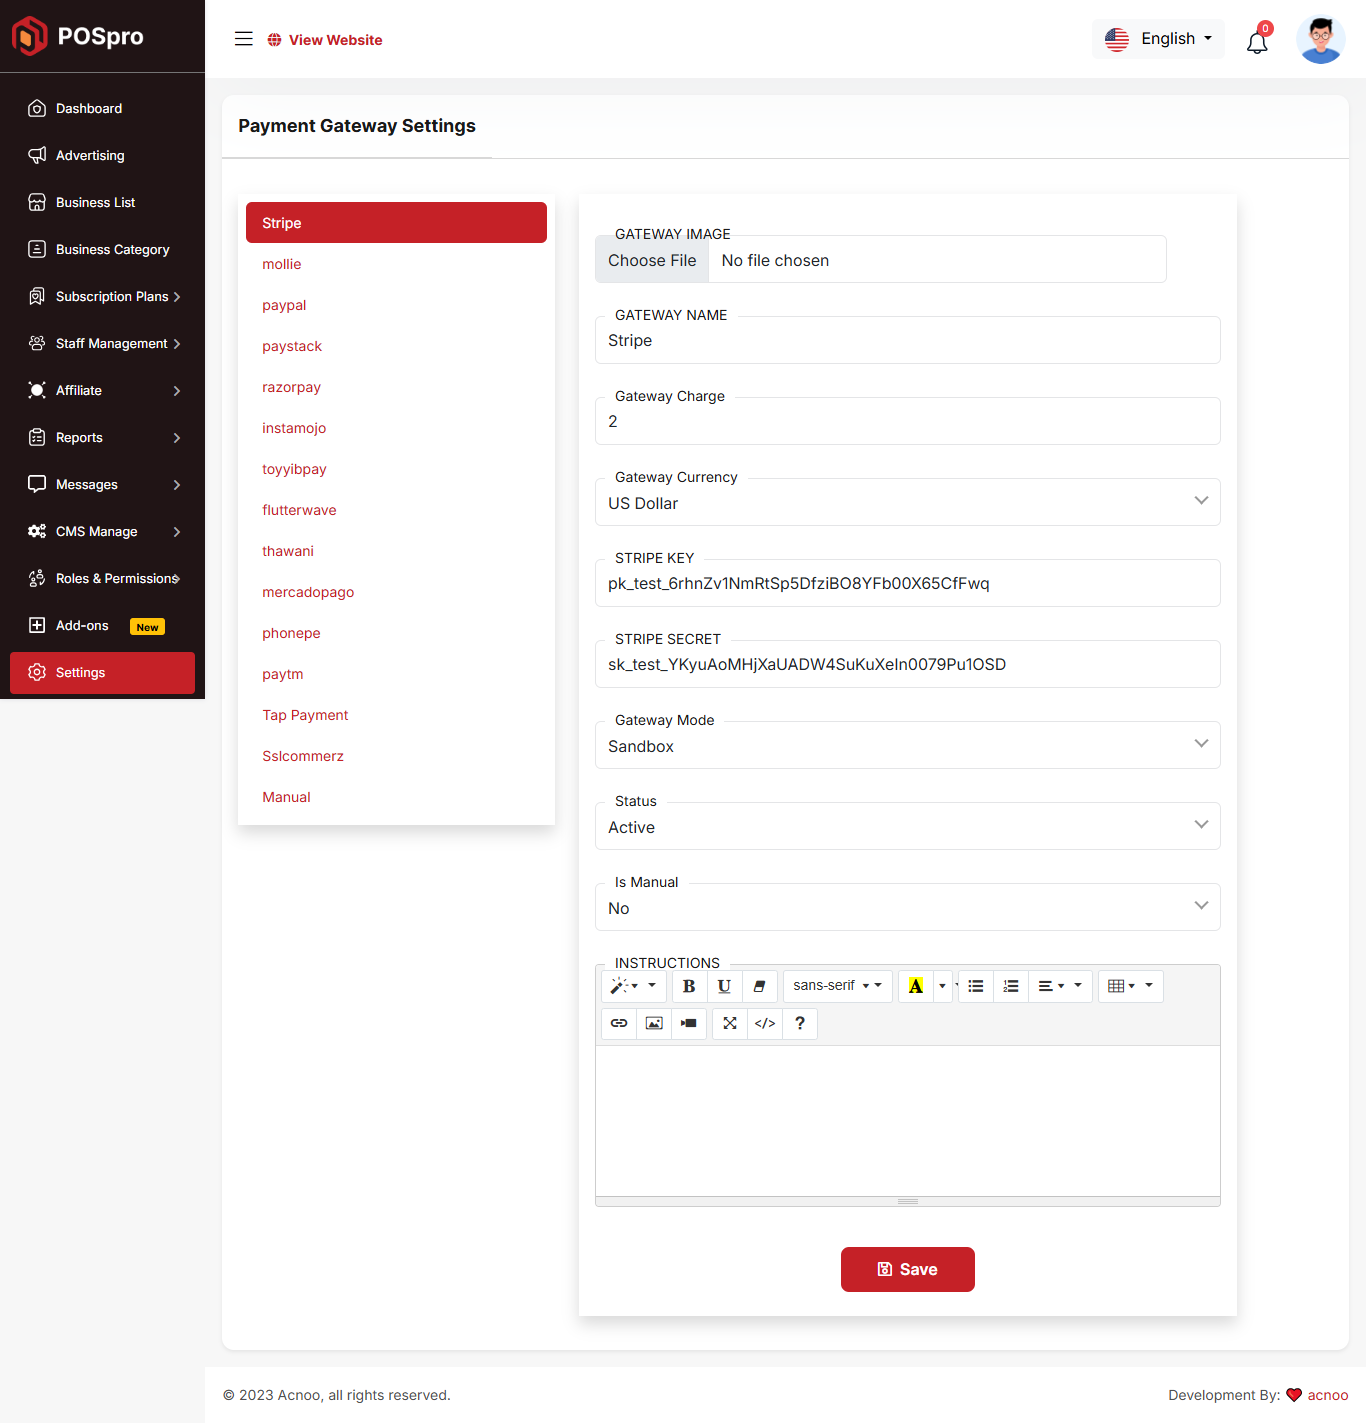
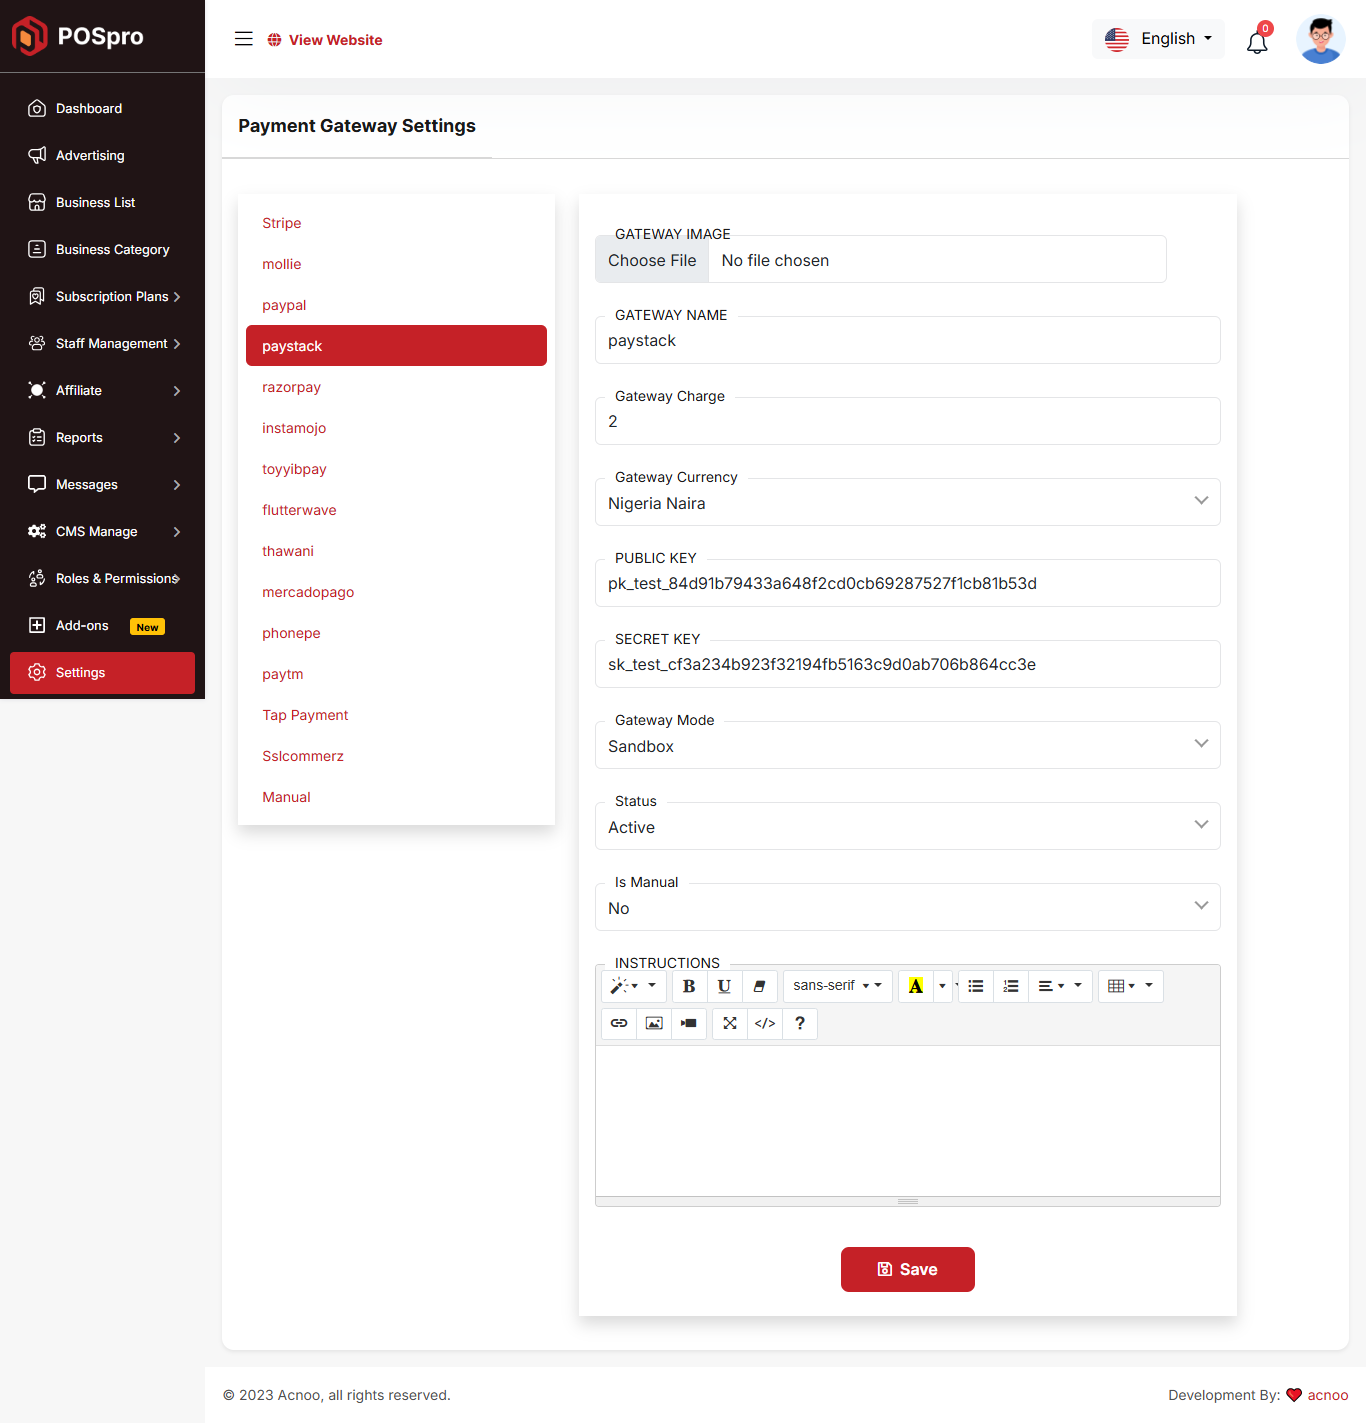
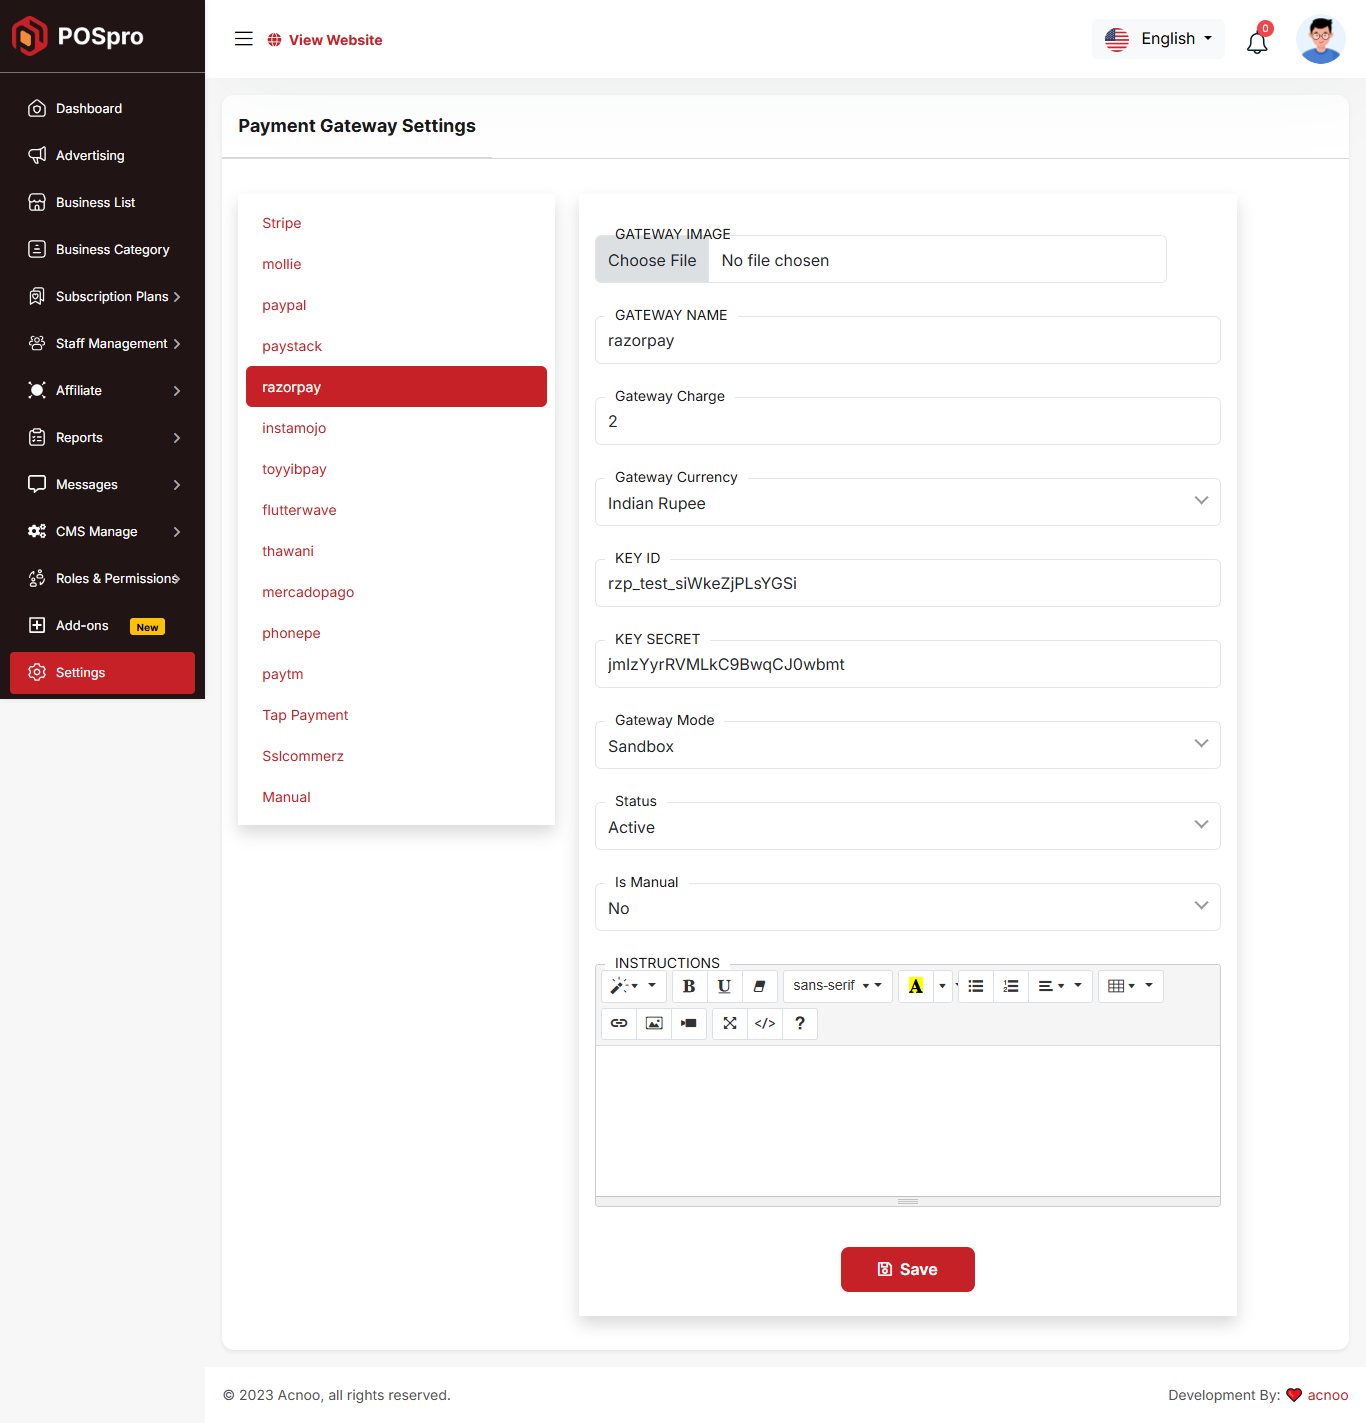
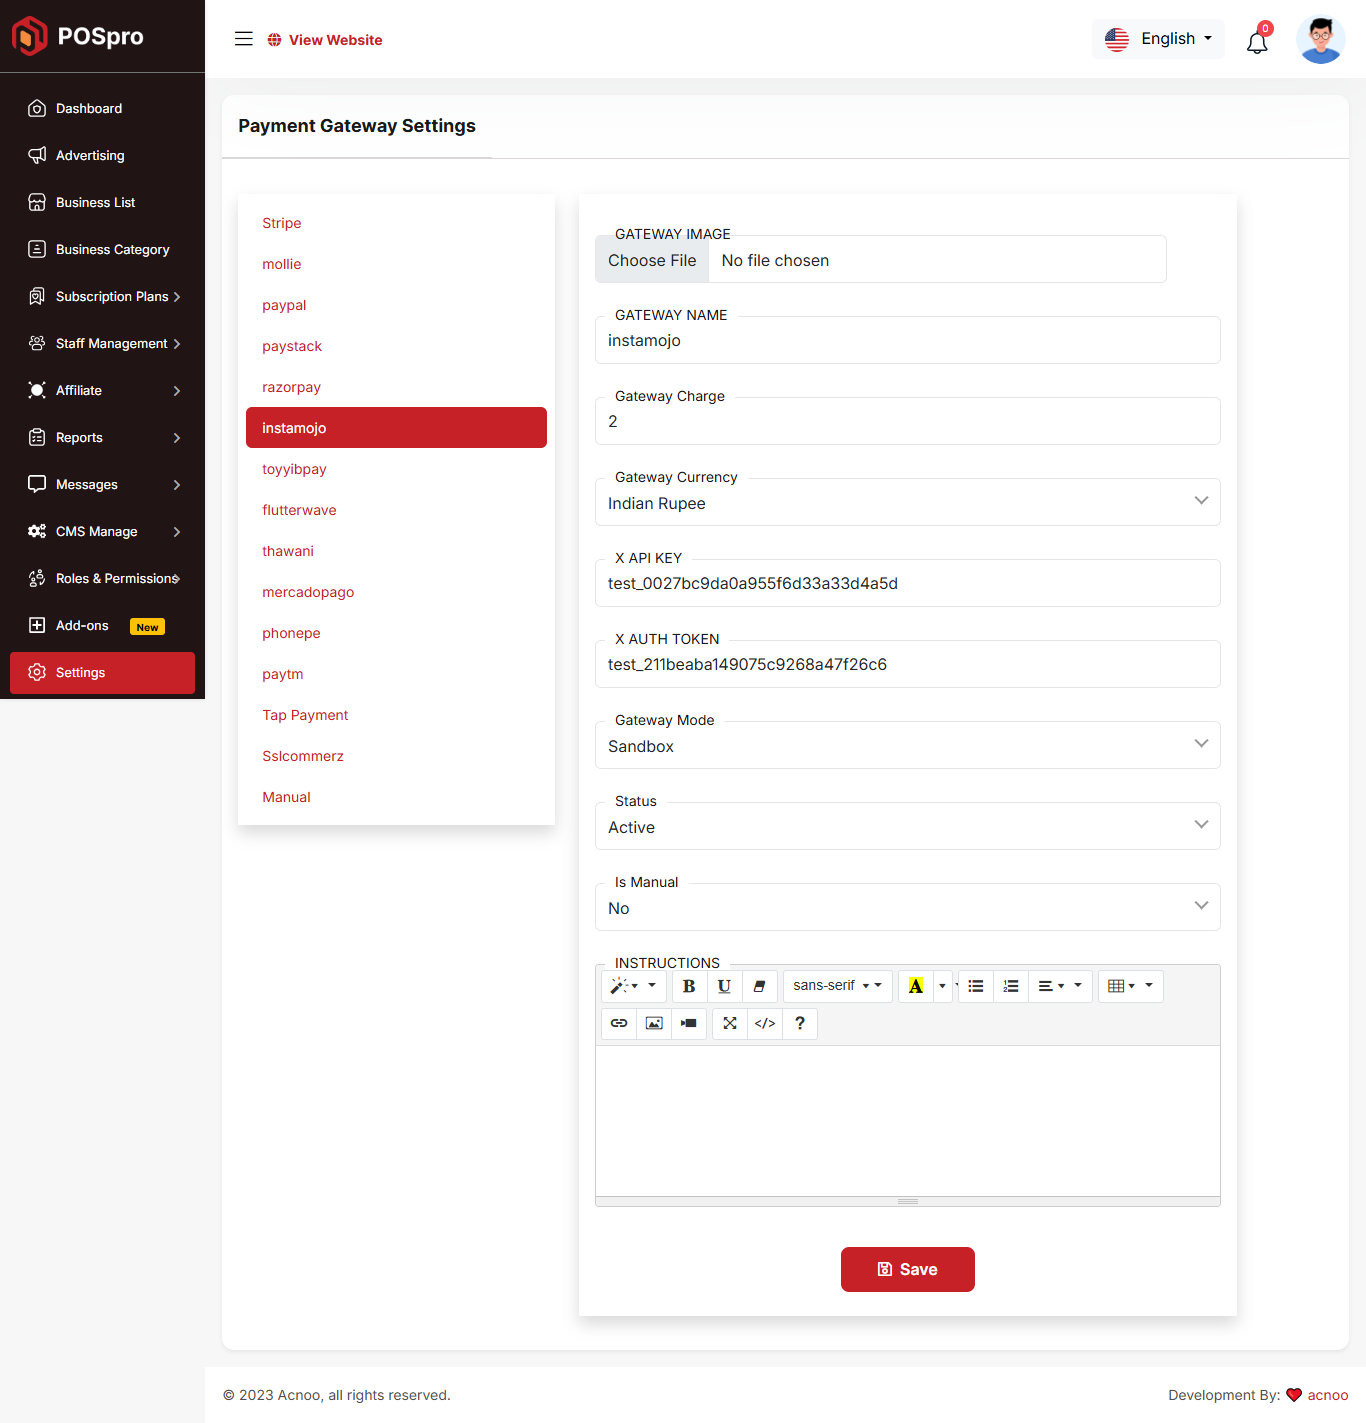
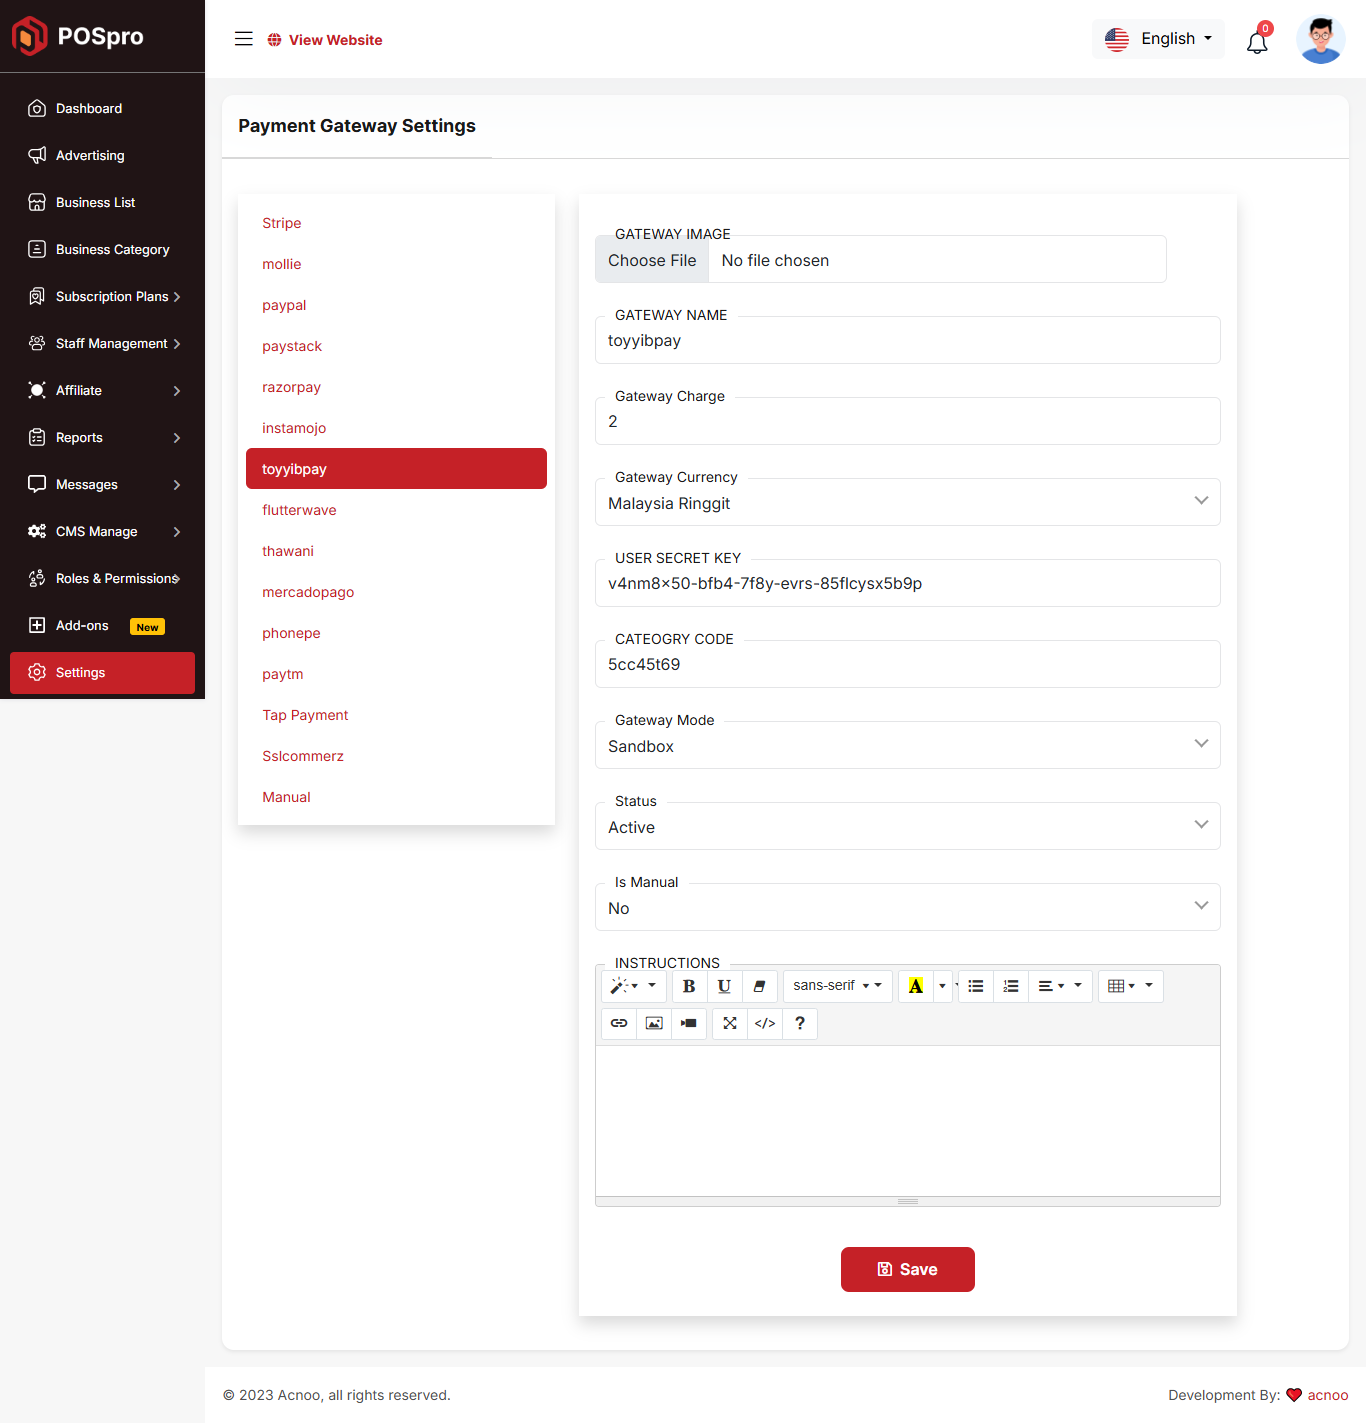
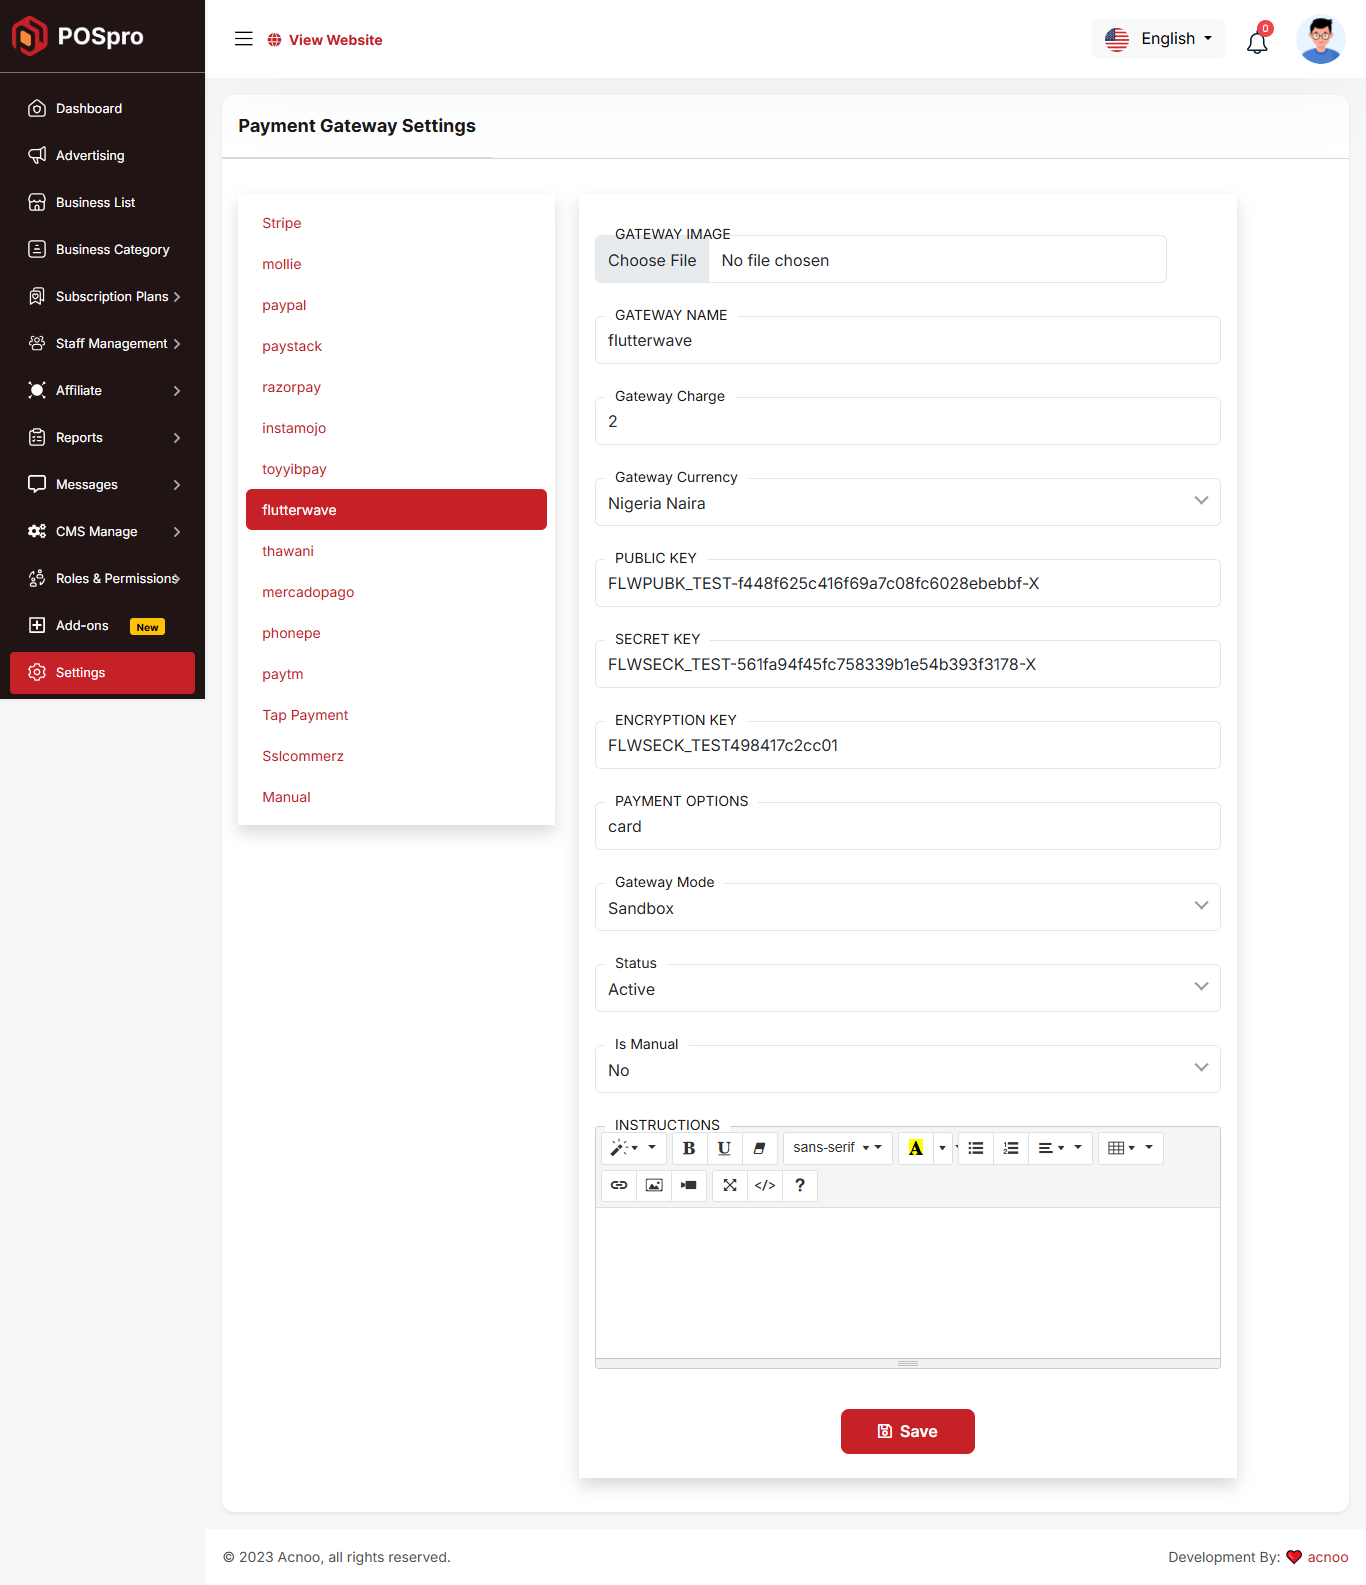
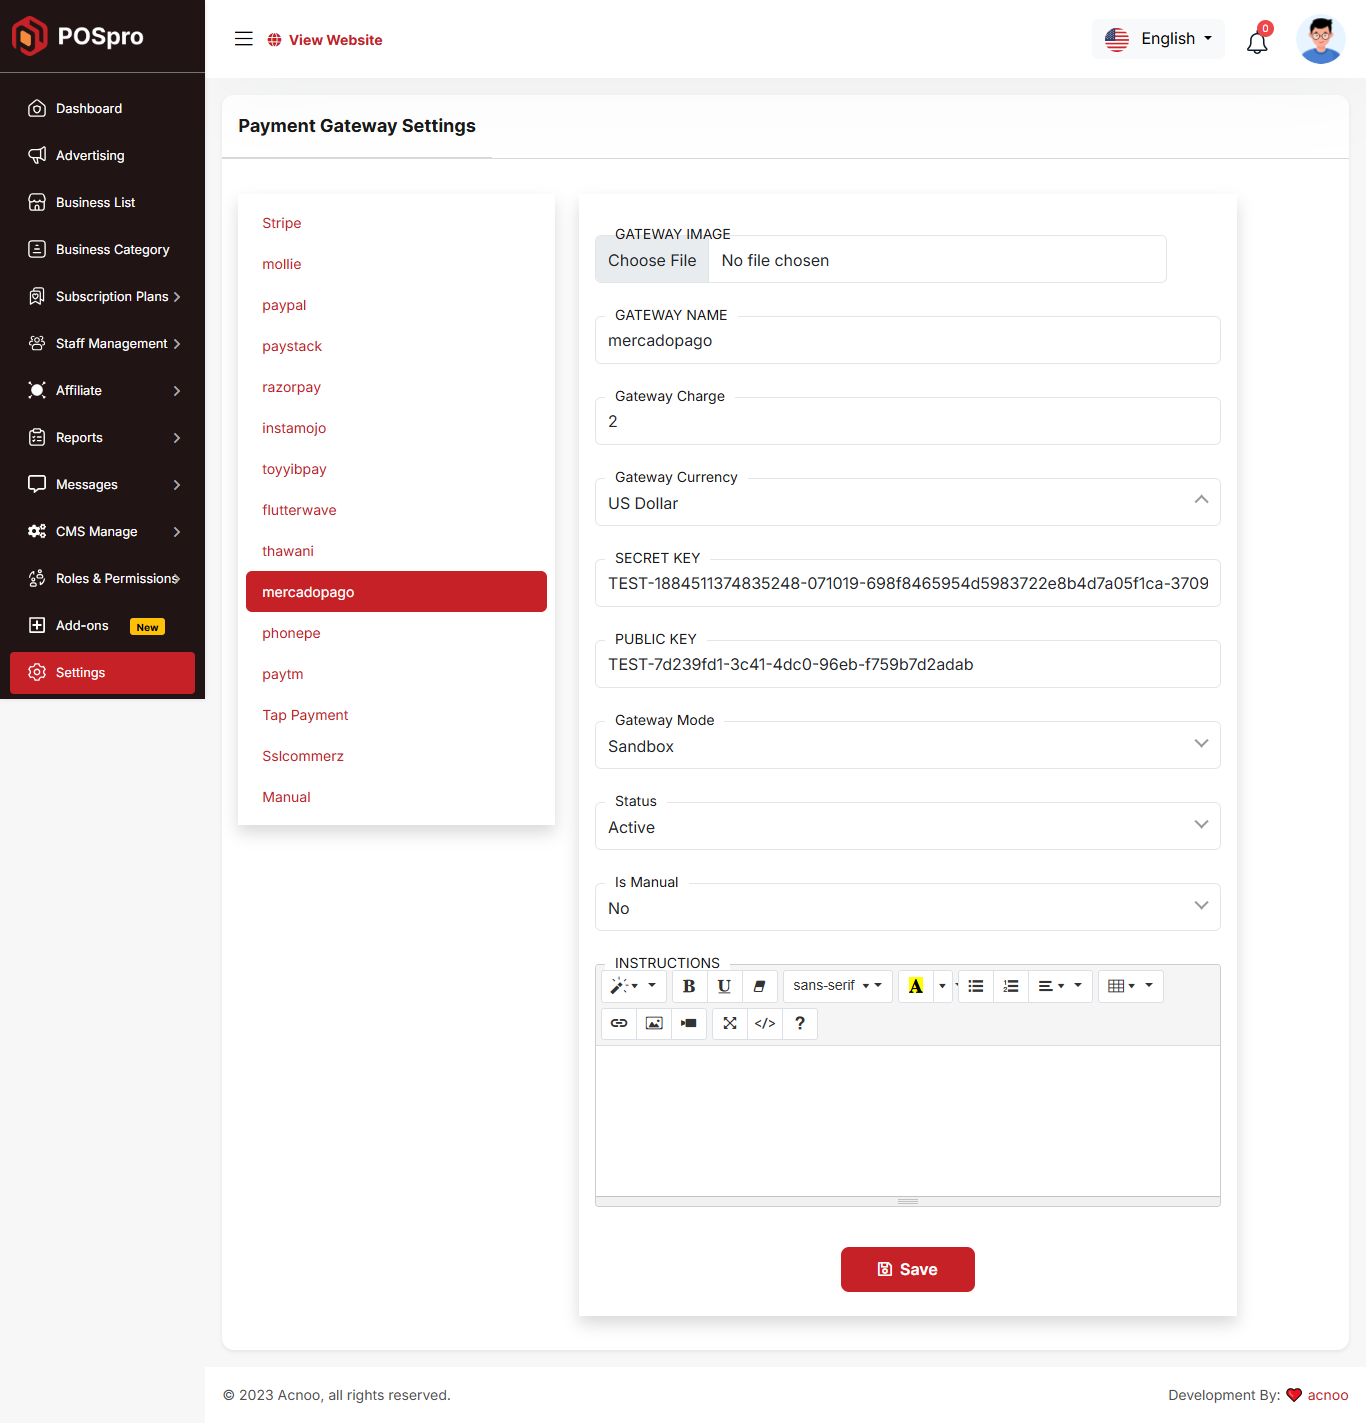
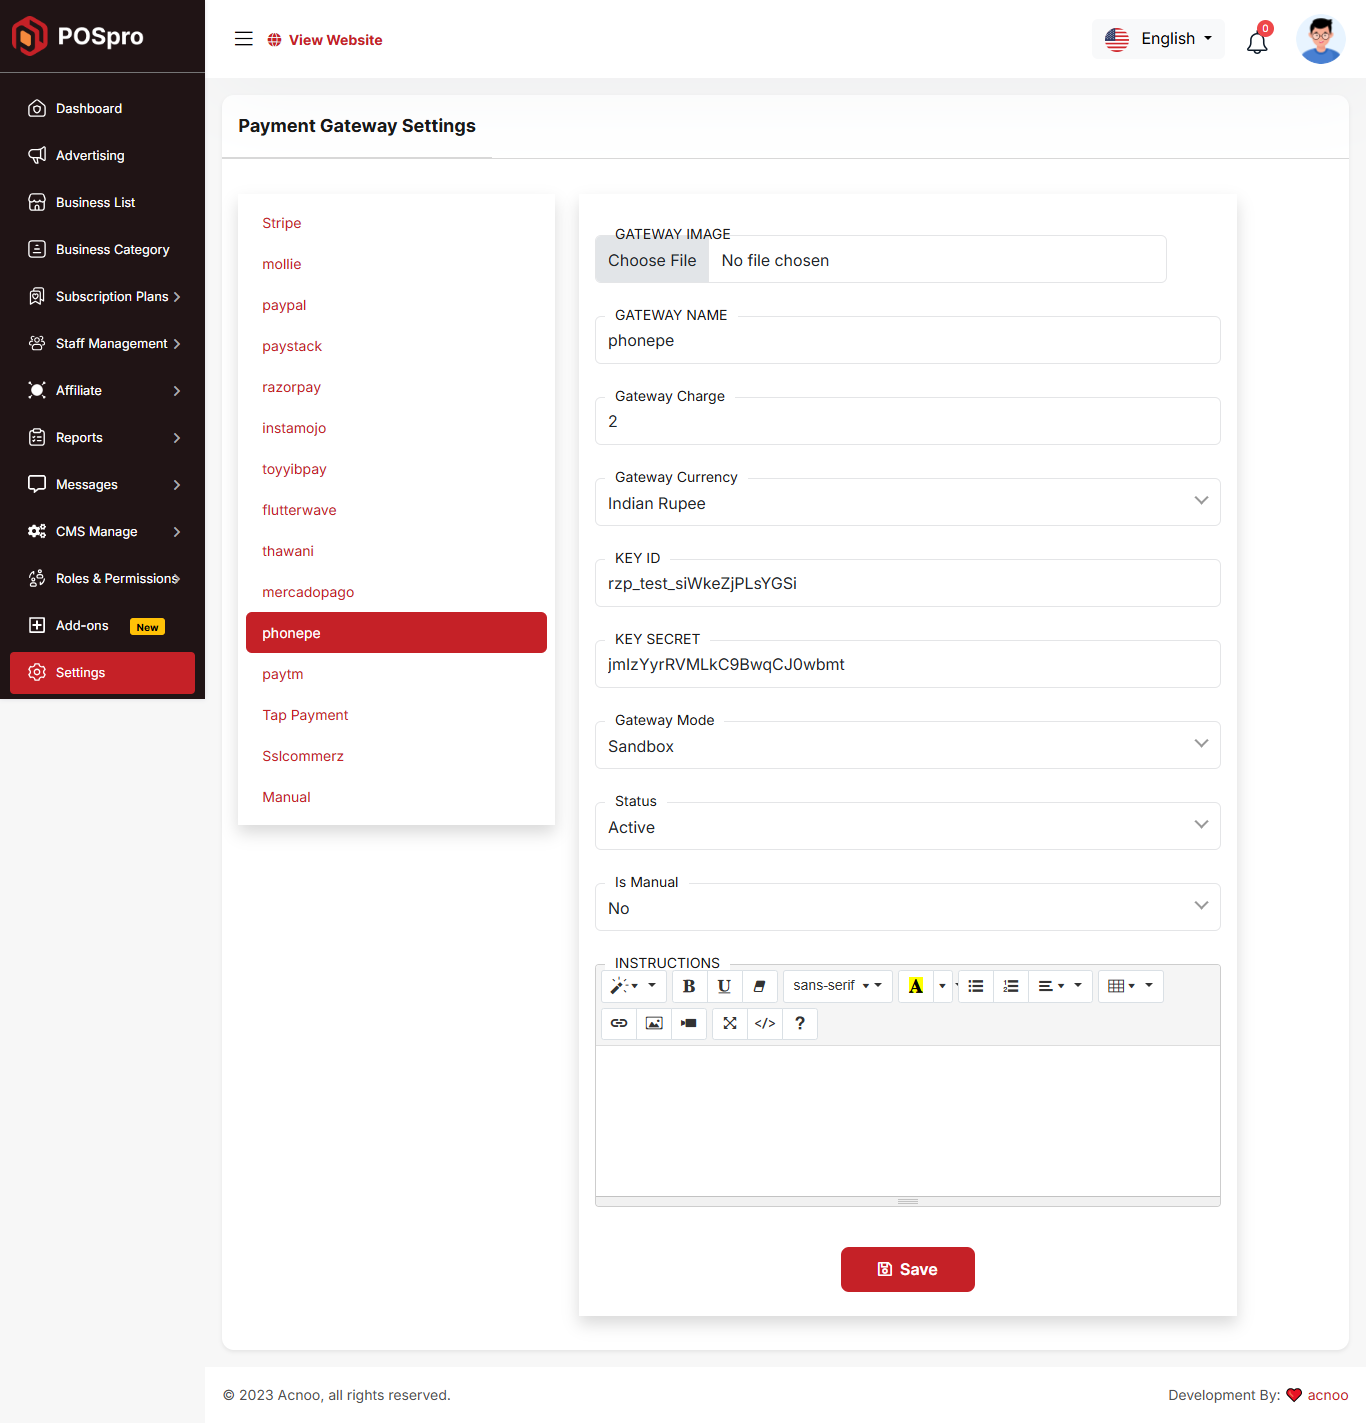
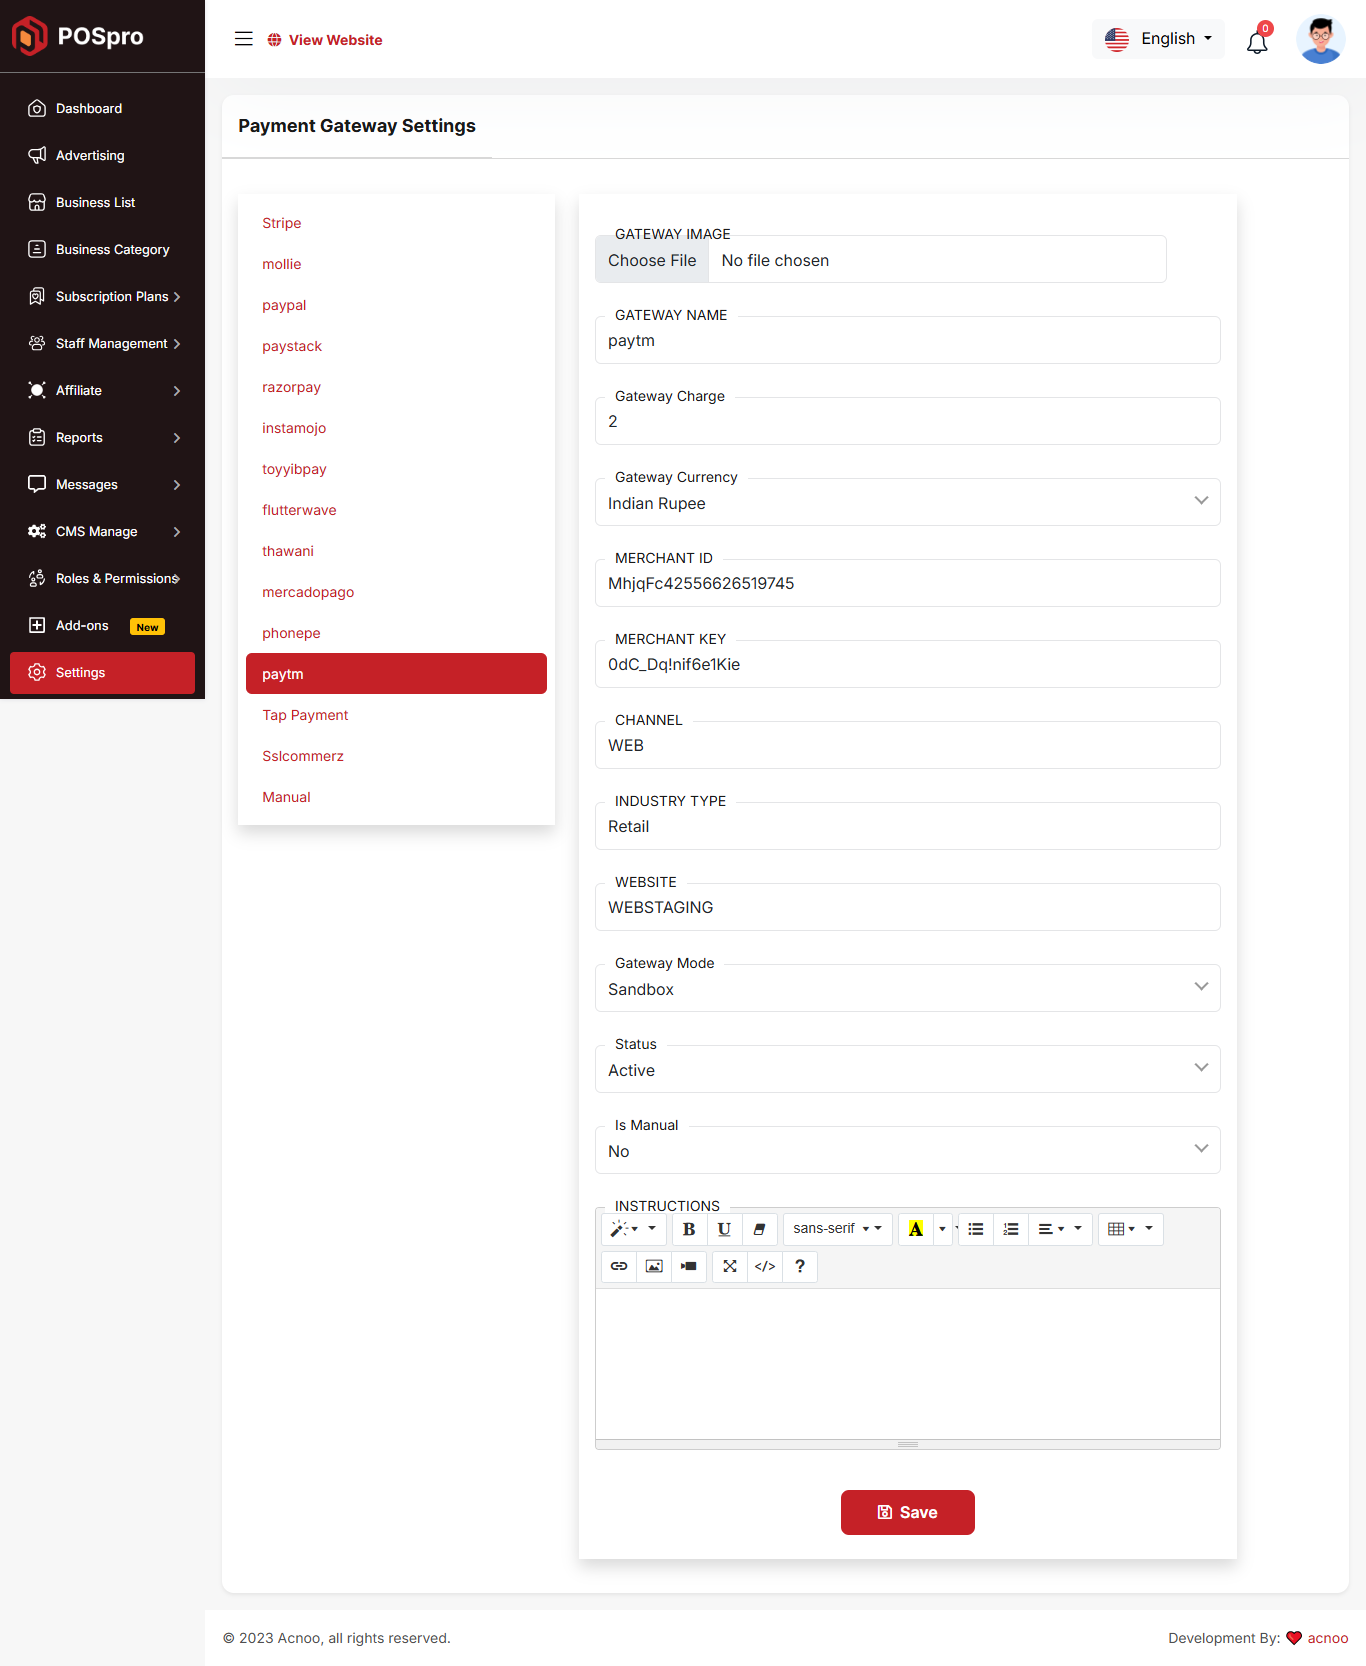
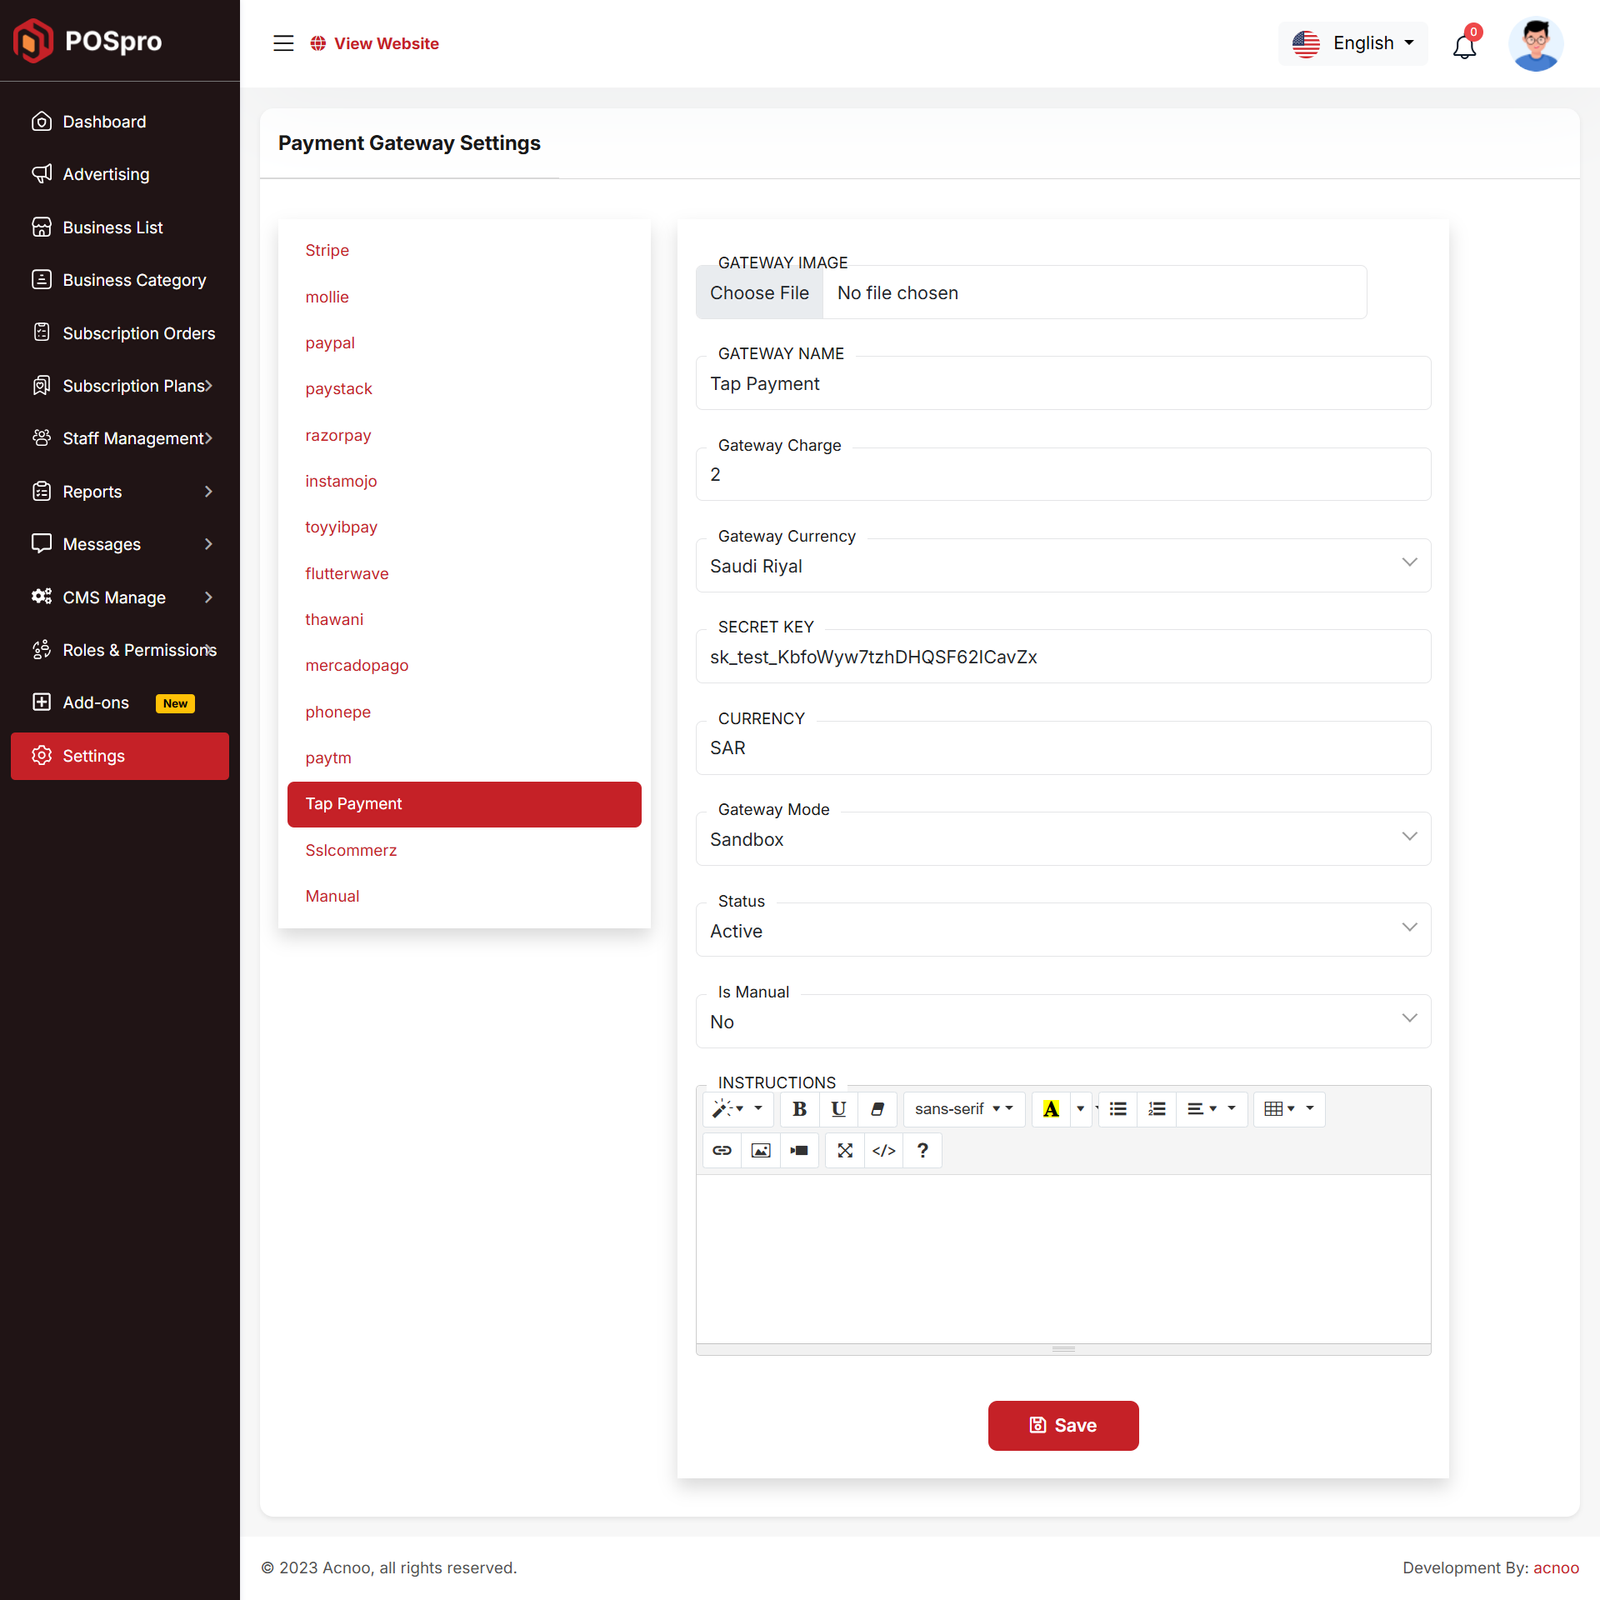
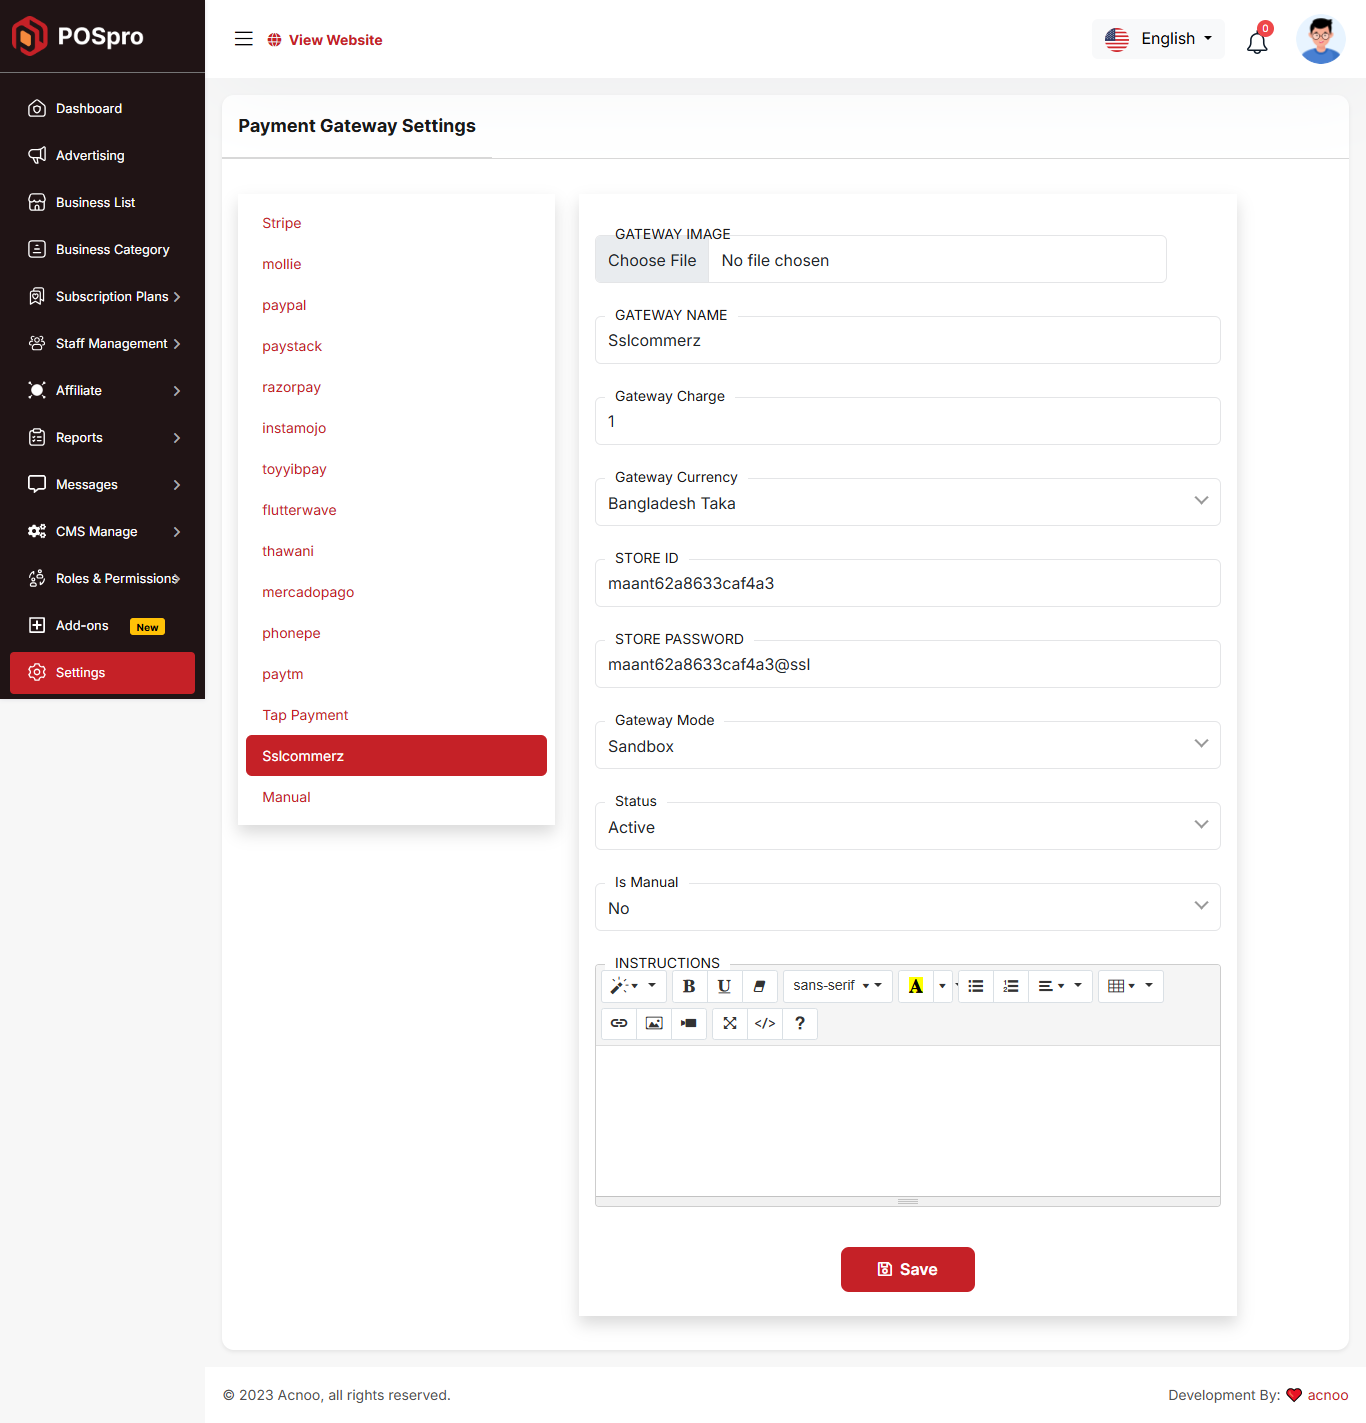
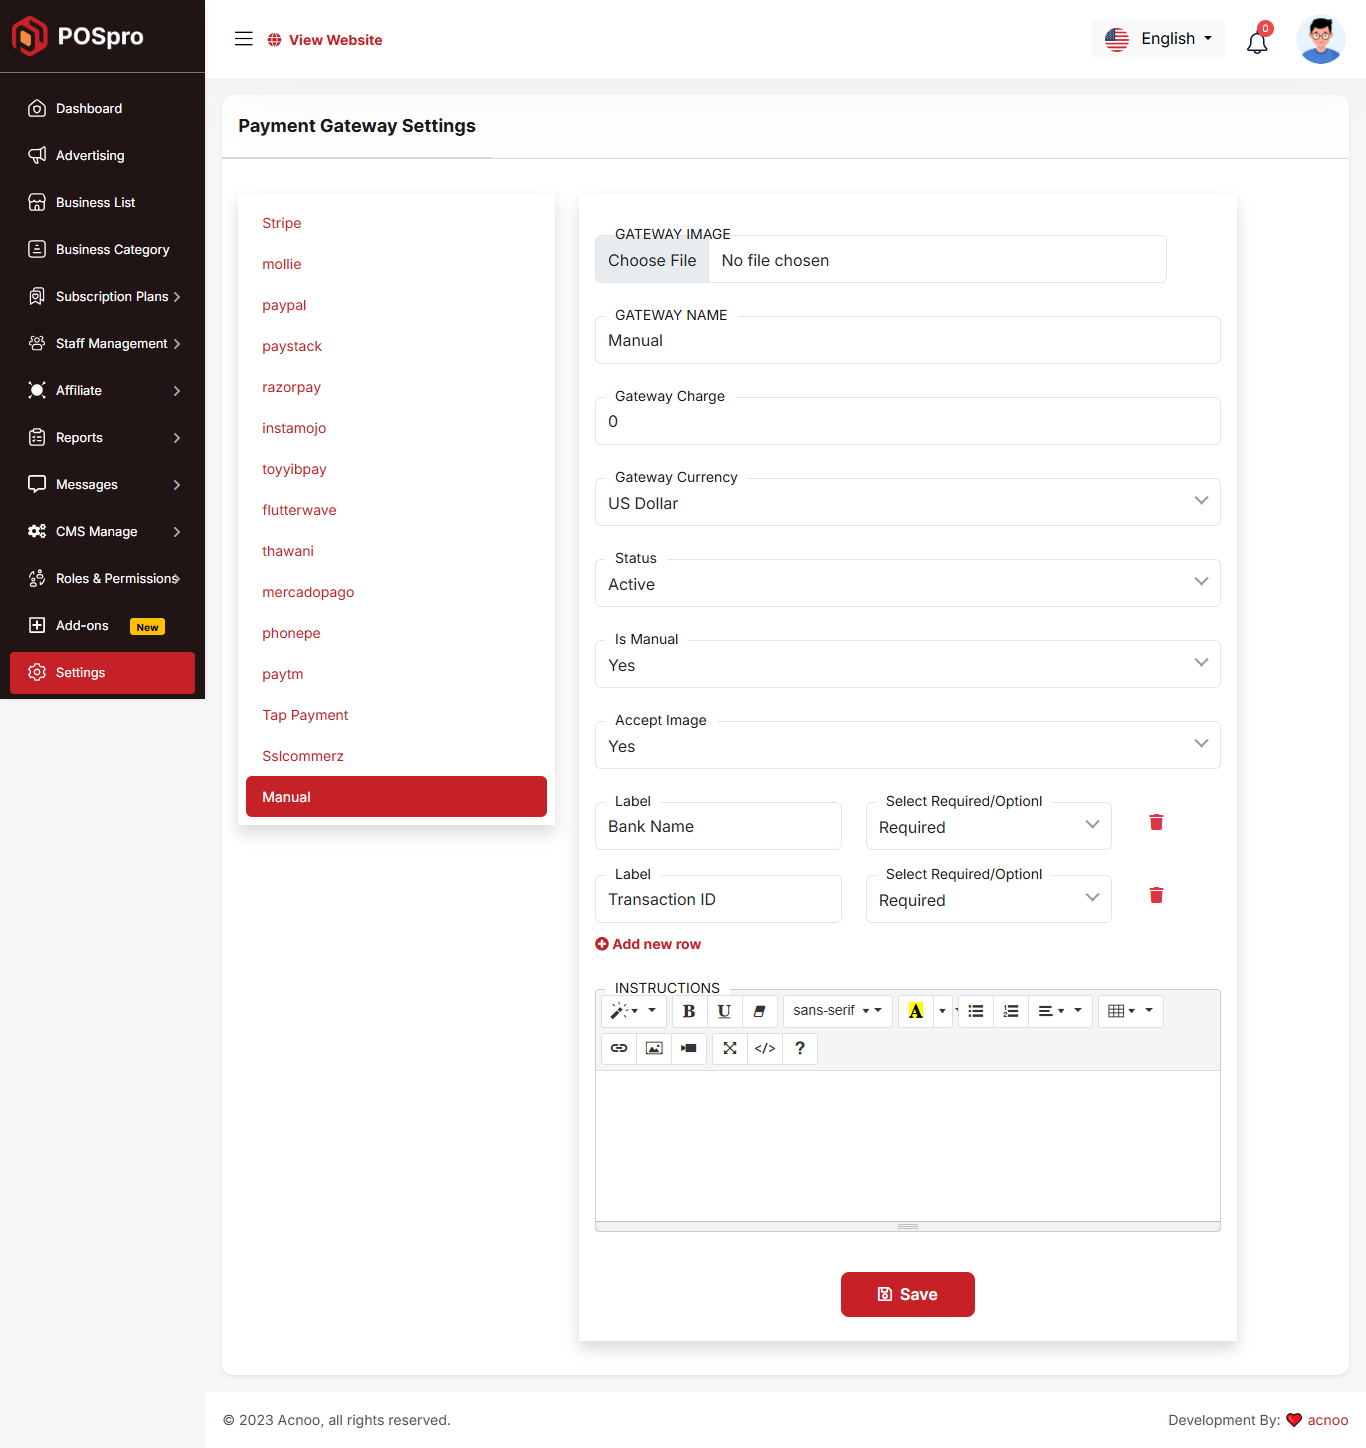
Payment Gateway Settings
Here, you can modify various payment gateways like Stripe, PayPal, SSLCommerz, manual and many others options.
Stripe
Mobile

Paypal

Paystack
Razorpay
Instamojo
Toyyibpay
Flutter Wave
Thawani

Mercadopago
Phonepe
Paytm
Tap Payment
Sslcommerz
Manual
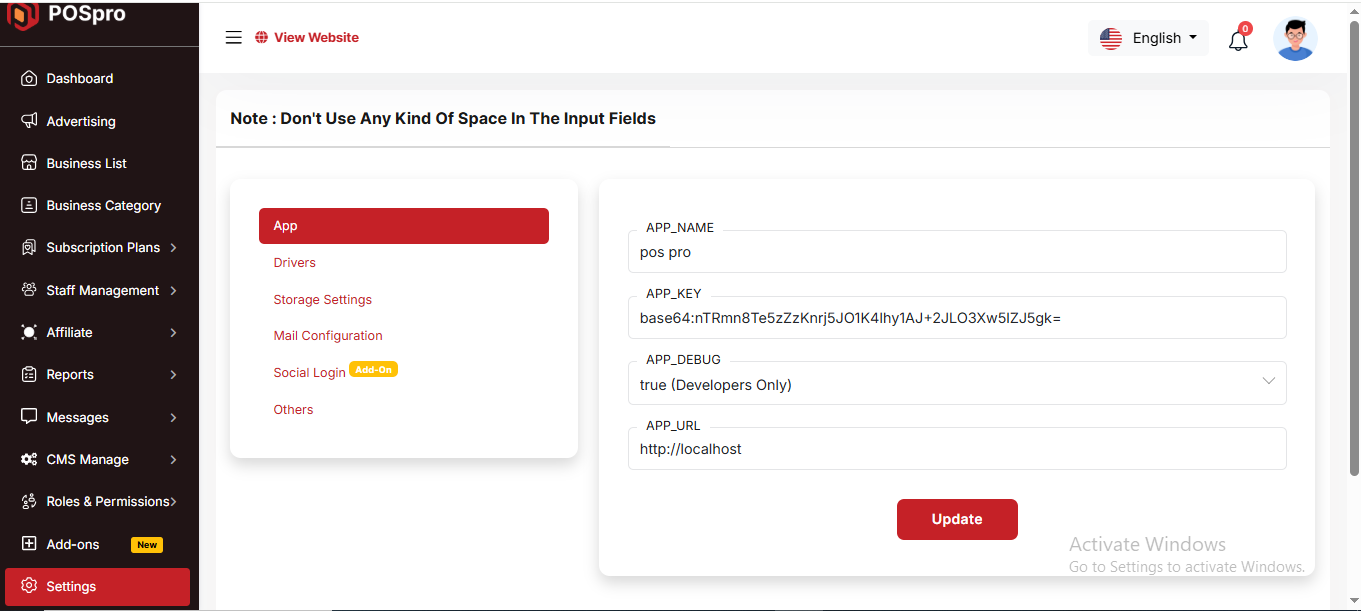
System Settings
In this section, you can configure various backend settings for the project, including application setup, driver configurations, mail settings, storage configurations, and other essential components. It's crucial to handle these configurations with care as they impact the functionality and security of the system.
App
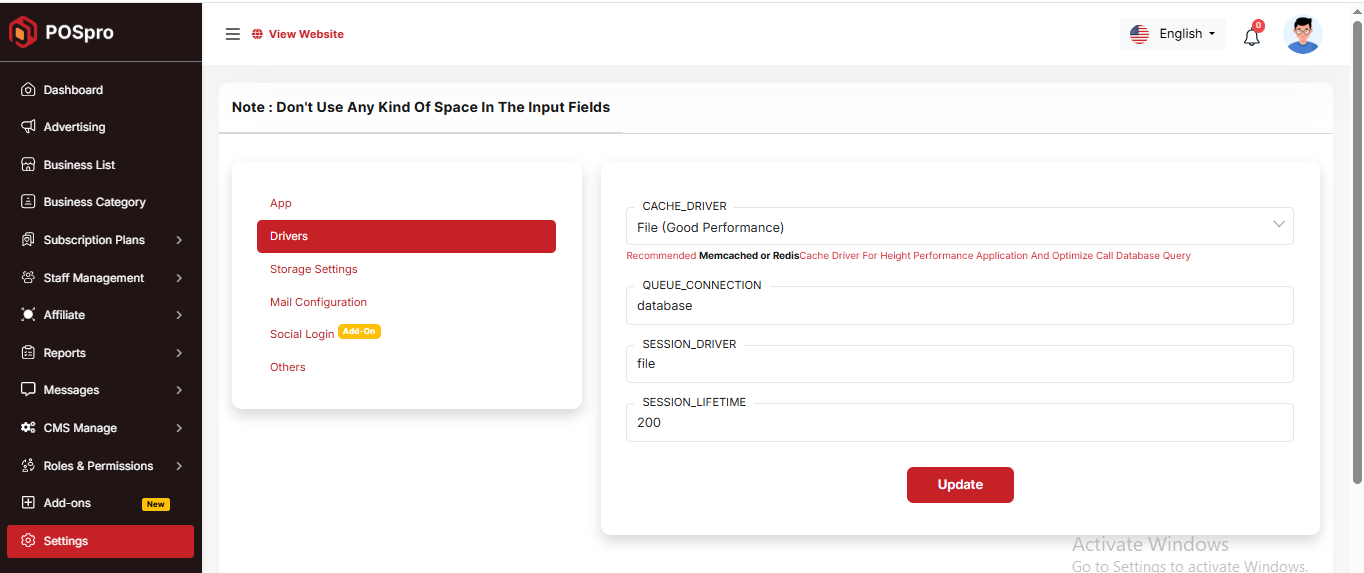
Drivers
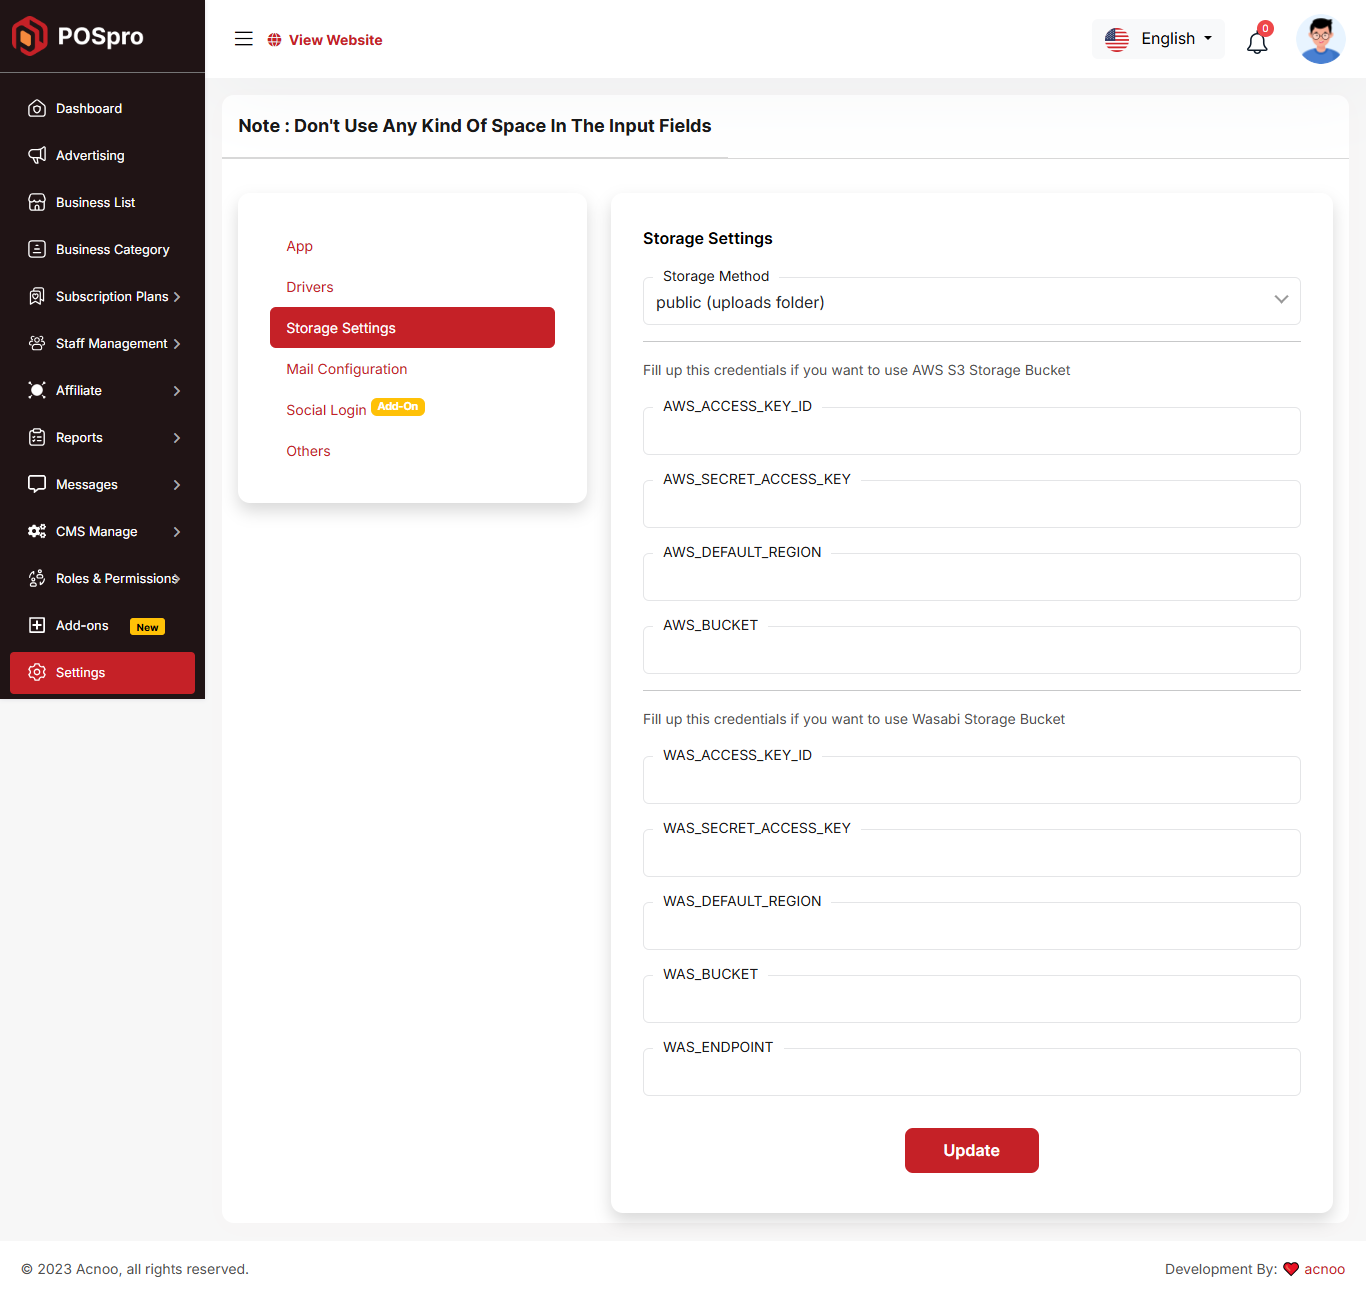
Storage Settings
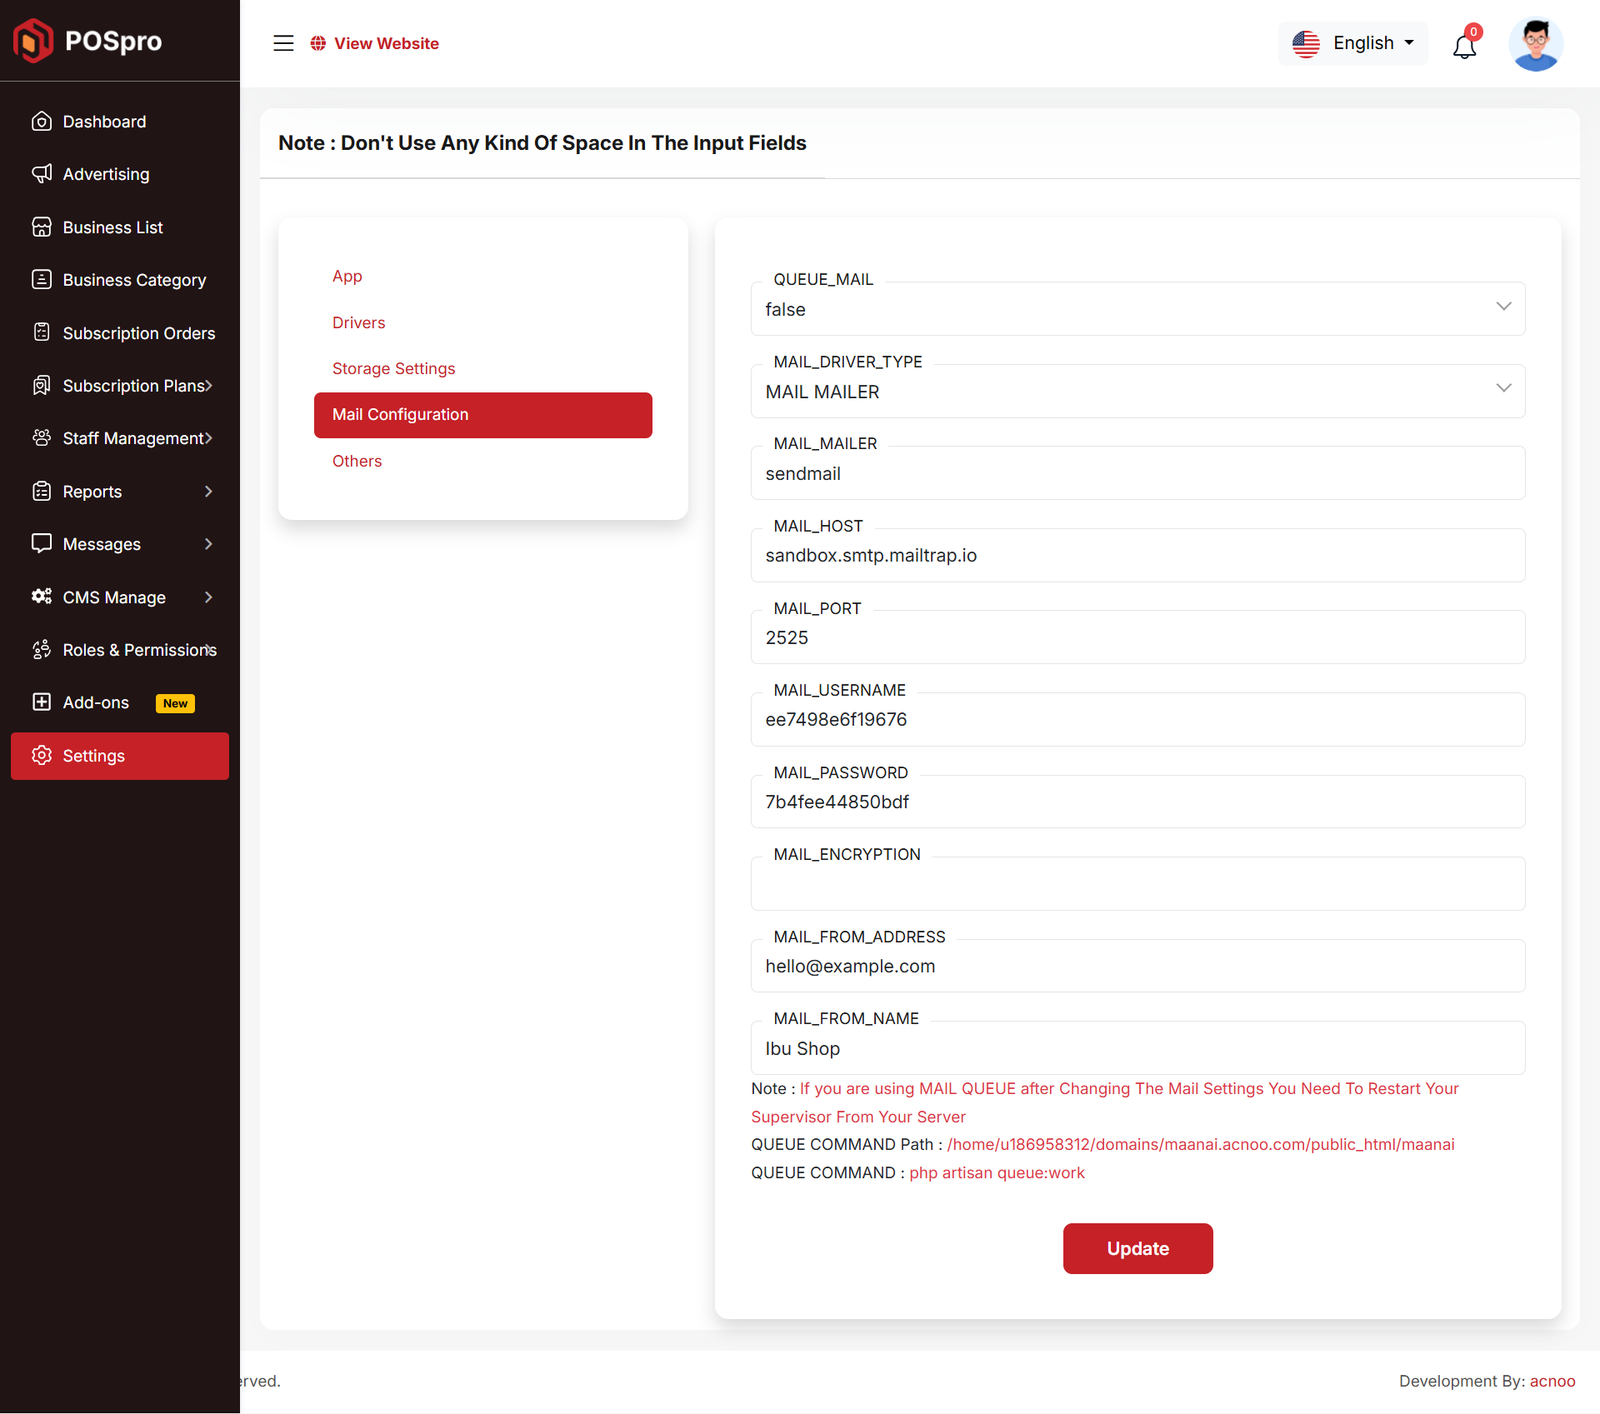
Mail Configuration
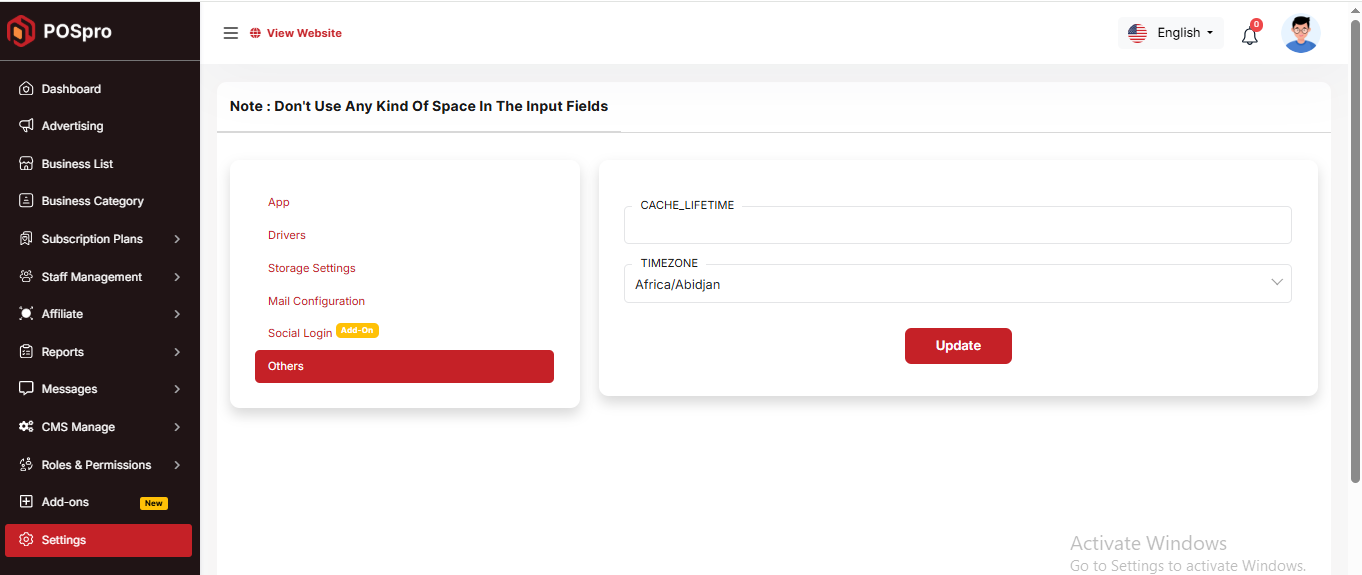
Others
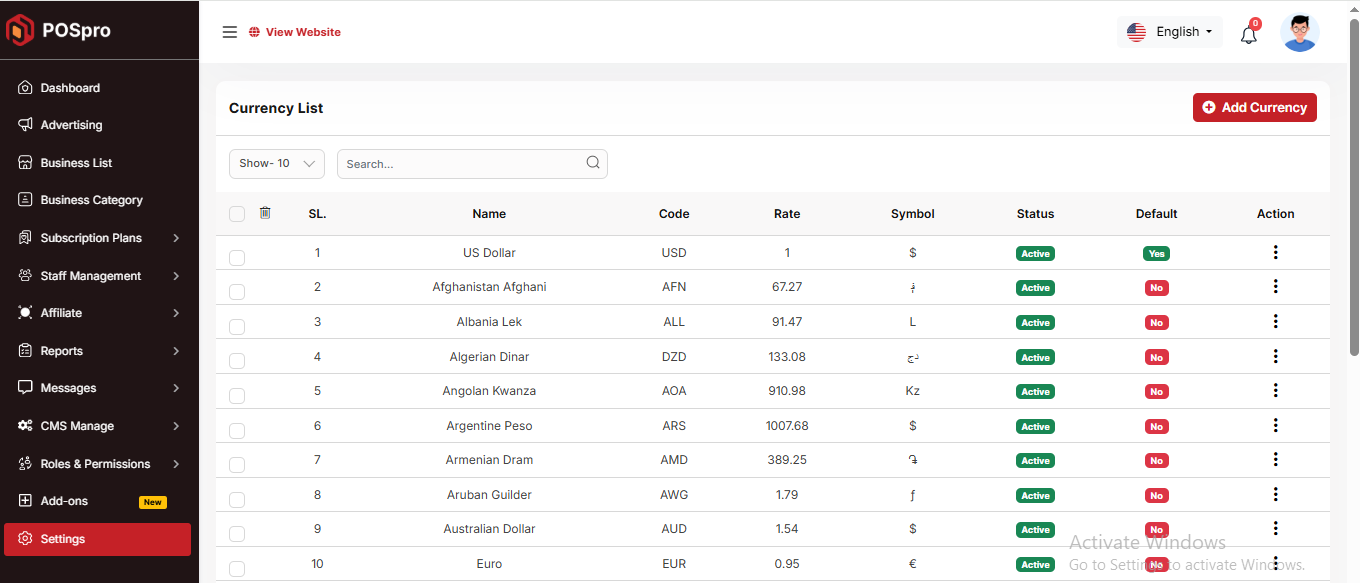
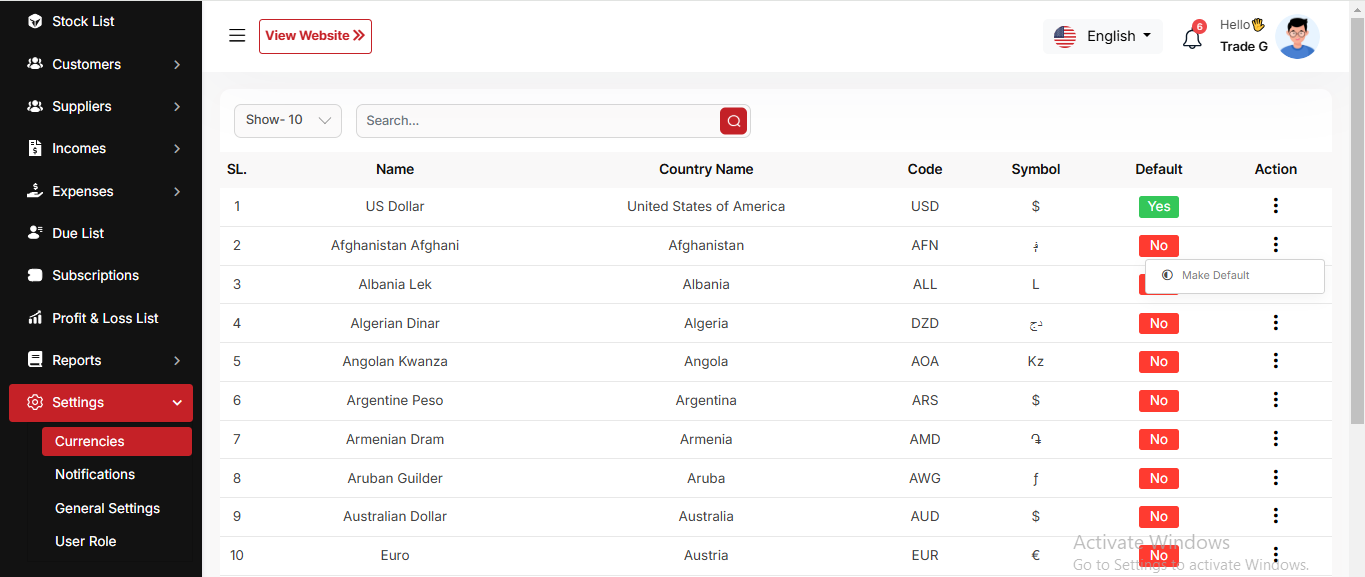
Currency list
Here, you can view a list of currencies with filtering options. Additionally, there is an option to edit currencies, and you can also set a default currency.
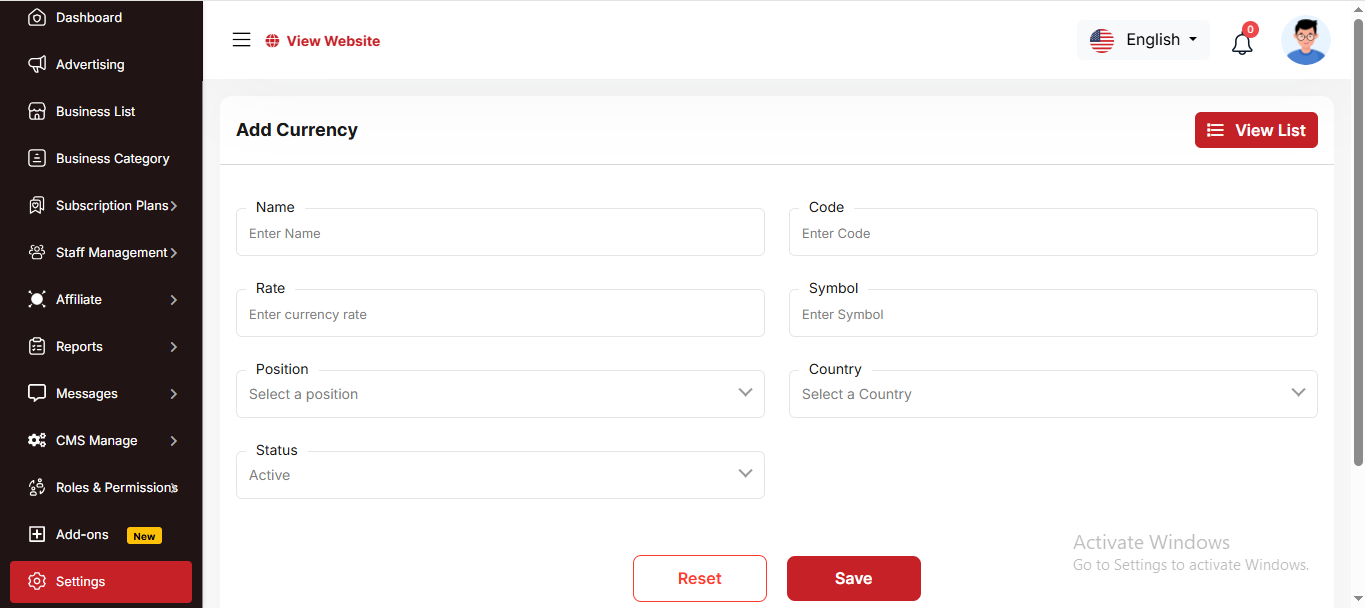
Create Currency
You have the option to include currency from this location.
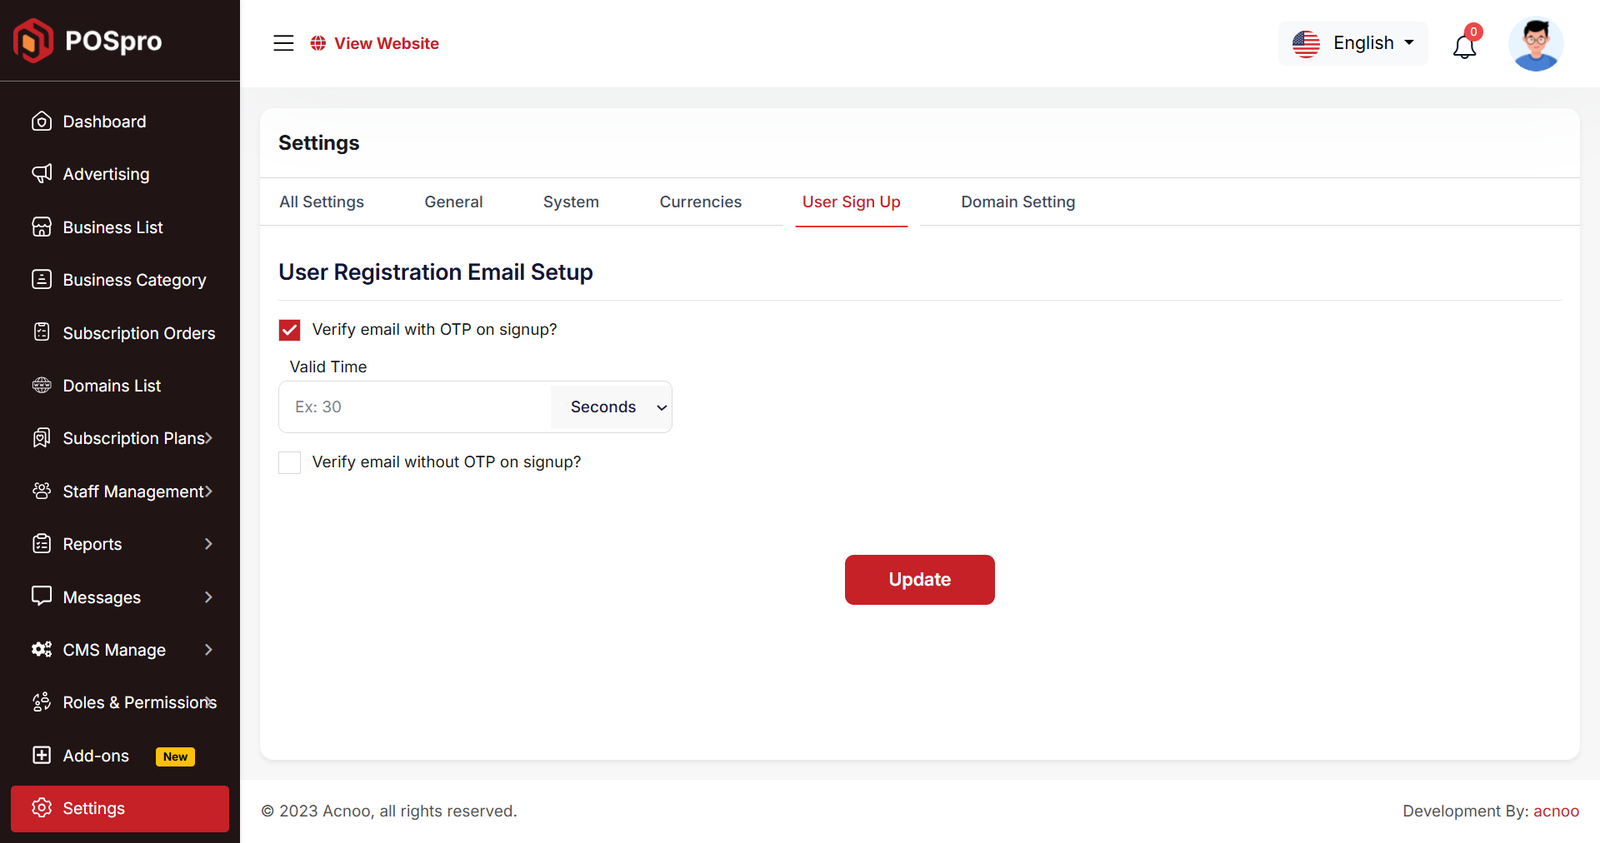
User Sign Up
During signup, you can choose whether the user must verify their email with an OTP or sign up without it. If you check "Verify email with OTP on signup," you will see options to set the OTP validity time, which can be configured in minutes or seconds. By default, users can sign up without OTP verification.

Mail Configuration / SMTP Setup
Cpanel
To create and configure an SMTP email account using cPanel, follow below steps:
Step 1: Log in to cPanel
Step 2: Create an Email Account
1. In cPanel, go to "Email Accounts".
2. Click “Create”.
3. Fill in:
a. Username: e.g., info, test, or hr
b. Domain: Select the correct domain (if multiple are available)
c. Password: Set a strong password or use the generator
4. Click Create.
📌 This creates an email like test@yourdomain.com
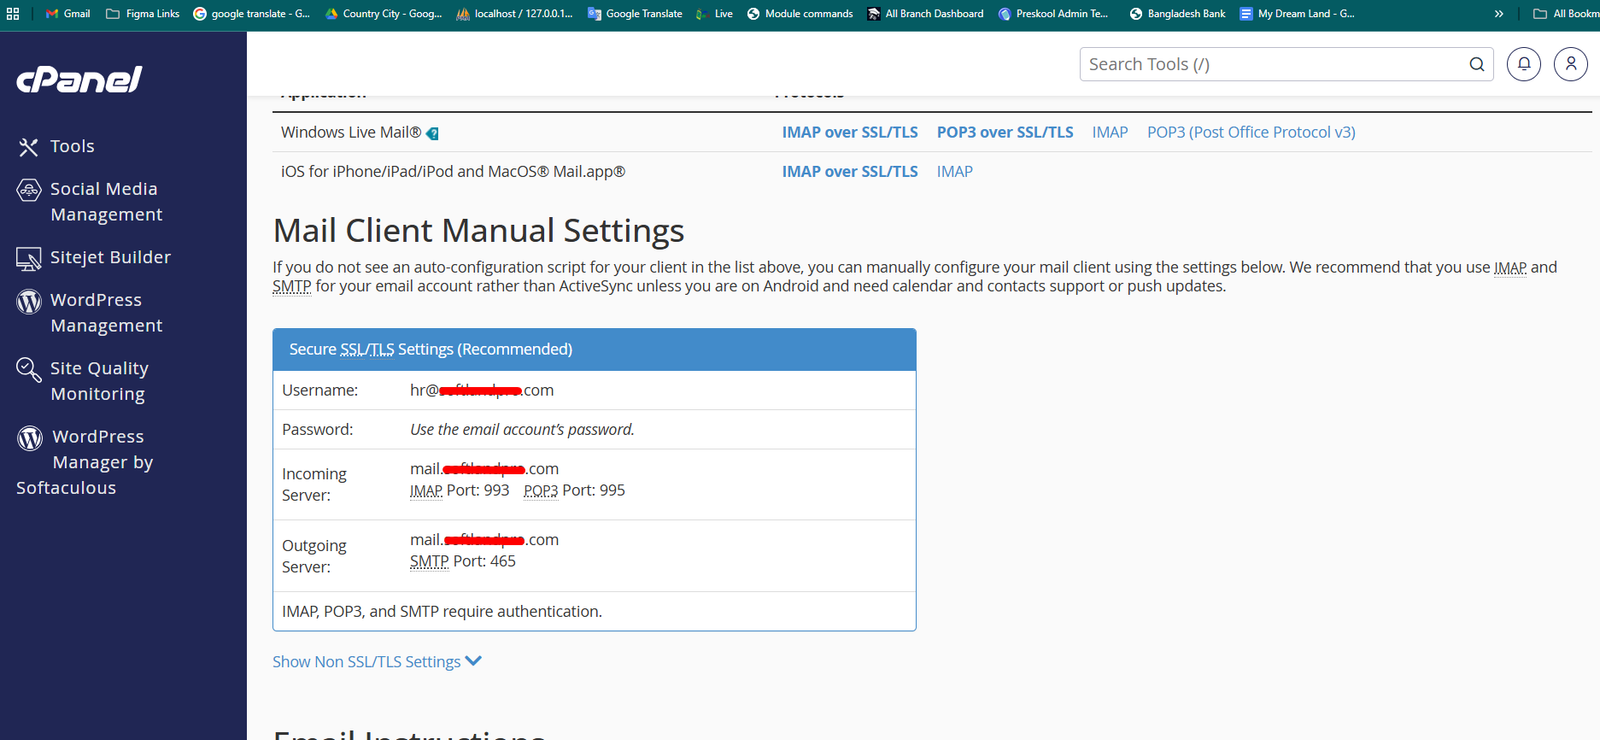
Step 3: Get SMTP Settings
Once the email is created:
1. Go to "Email Accounts" again.
2. Find your new email and click “Connect Devices”.
3. You’ll see the SMTP settings under the Mail Client Manual Settings section like below image:
Example:
| Input | Value |
|---|---|
| QUEUE_MAIL | Select true / false, (If you select true, you need to run the following command: php artisan queue:work on server) |
| MAIL_DRIVER_TYPE | Select MAIL MAILER / MAIL DRIVER |
| MAIL_DRIVER |
Use sendmail if your server has a local mail server installed (like Postfix
or Exim).
Use smtp when sending emails through an external mail service (like Gmail, Mailgun, or your hosting provider's SMTP server). |
| MAIL_HOST | mail.yourdomain.com |
| MAIL_PORT | 587 |
| MAIL_USERNAME | test@yourdomain.com |
| MAIL_PASSWORD | The one you set |
| MAIL_ENCRYPTION | tls |
| MAIL_FROM_ADDRESS | yourmail@gmail.com |
| MAIL_FROM_NAME | Your project/app name |
Set the values to System Settings → Mail Configuration

If you want to know more details please follow their, Official documentation. Here is also a youtube video link for reference.
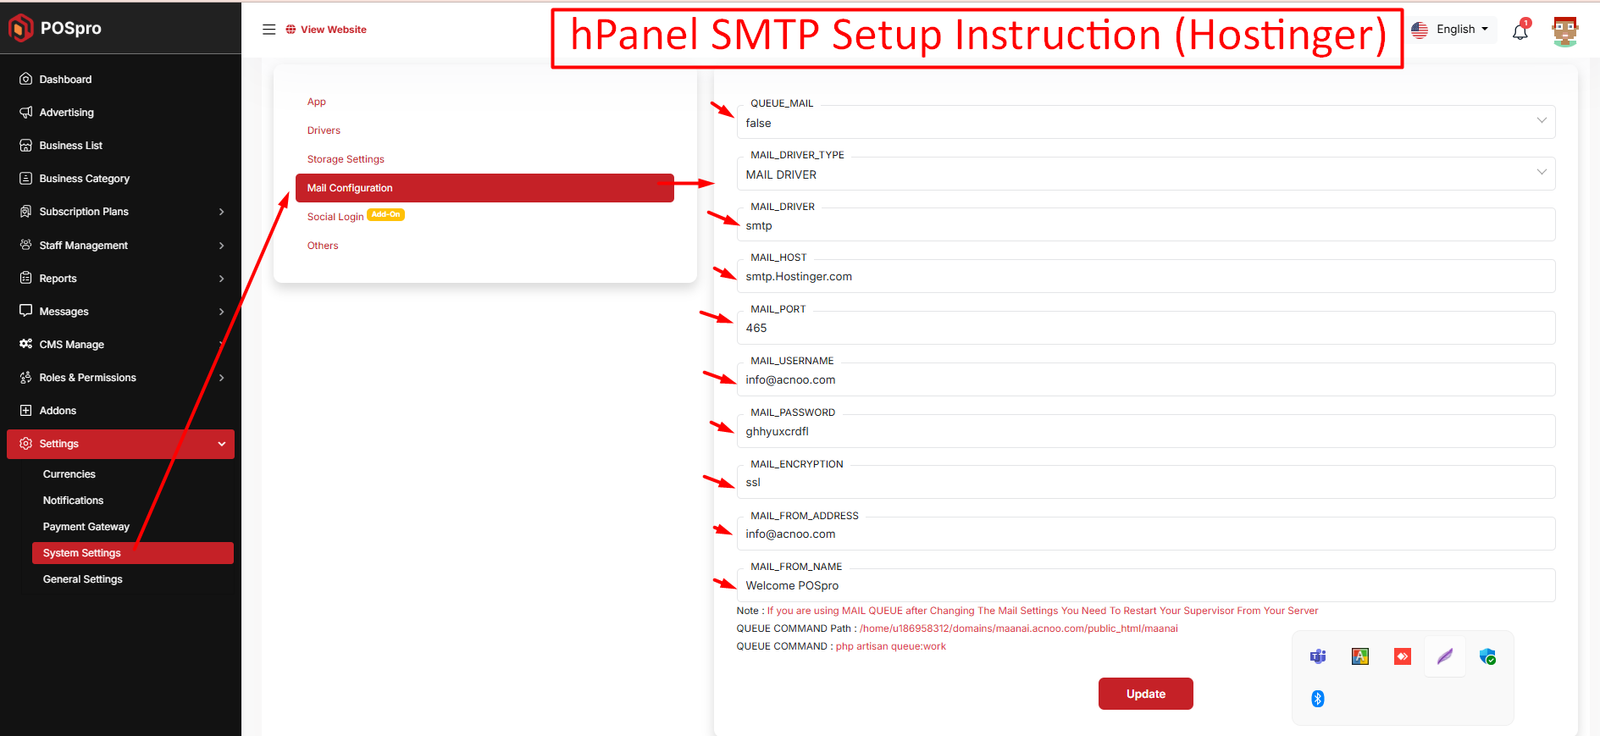
Hostinger Panel
To create and configure an SMTP email account using hostinger, follow below steps:
Step 1: Log In to Hostinger hPanel https://hpanel.hostinger.com
Step 2: Create an Email Account
1. Go to Emails from the top menu.
2. Select your domain name.
3. Click "Create New Email Account".
4. Fill in:
a. Email address (e.g., info, test, or hr)
b. Password
5. Click "Create".
📌 This creates an email like test@yourdomain.com
Step 3: Get SMTP Settings
1. After creating the email, go back to the Email Accounts section.
2. Find your email and click “Connect App & Devices” or “Set Up Devices”.
3. Look for the Manual Configuration or SMTP Settings.
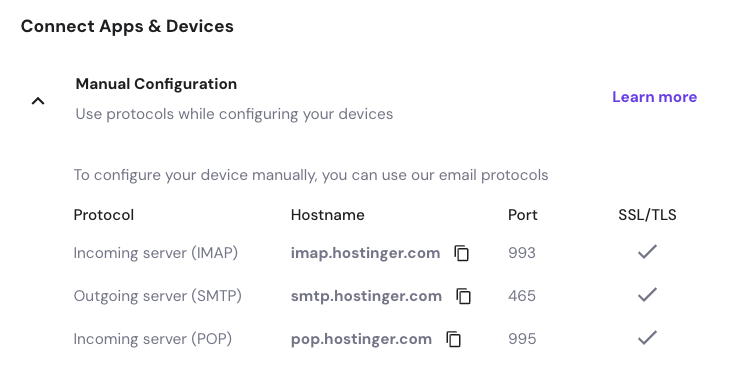
Example:
| Input | Value |
|---|---|
| QUEUE_MAIL | Select true / false, (If you select true, you need to run the following command: php artisan queue:work on server) |
| MAIL_DRIVER_TYPE | Select MAIL MAILER / MAIL DRIVER |
| MAIL_DRIVER |
Use sendmail if your server has a local mail server installed (like Postfix
or Exim).
Use smtp when sending emails through an external mail service (like Gmail, Mailgun, or your hosting provider's SMTP server). |
| MAIL_HOST | mail.yourdomain.com |
| MAIL_PORT | 465 |
| MAIL_USERNAME | test@yourdomain.com |
| MAIL_PASSWORD | The one you set |
| MAIL_ENCRYPTION | ssl |
| MAIL_FROM_ADDRESS | yourmail@gmail.com |
| MAIL_FROM_NAME | Your project/app name |
Set the values to System Settings → Mail Configuration
If you want to know more details please follow their, Official documentation. Here is also a youtube video link for reference.
Note: Please note that if you change QUEUE_MAIL from false to true,
you need to run the following command: php artisan queue:work.
Remember: The command path should be:
/home/u186958312/domains/yourdomain.com/public_html. Make sure you're in the
correct path.
Note: If you're not familiar with running the command, there's
another option. Simply visit yourdomain.com/queue-work and it will be executed
automatically.
Note: If you select QUEUE_MAIL as true but do not run the command or visit the URL, email functionality will not work properly.
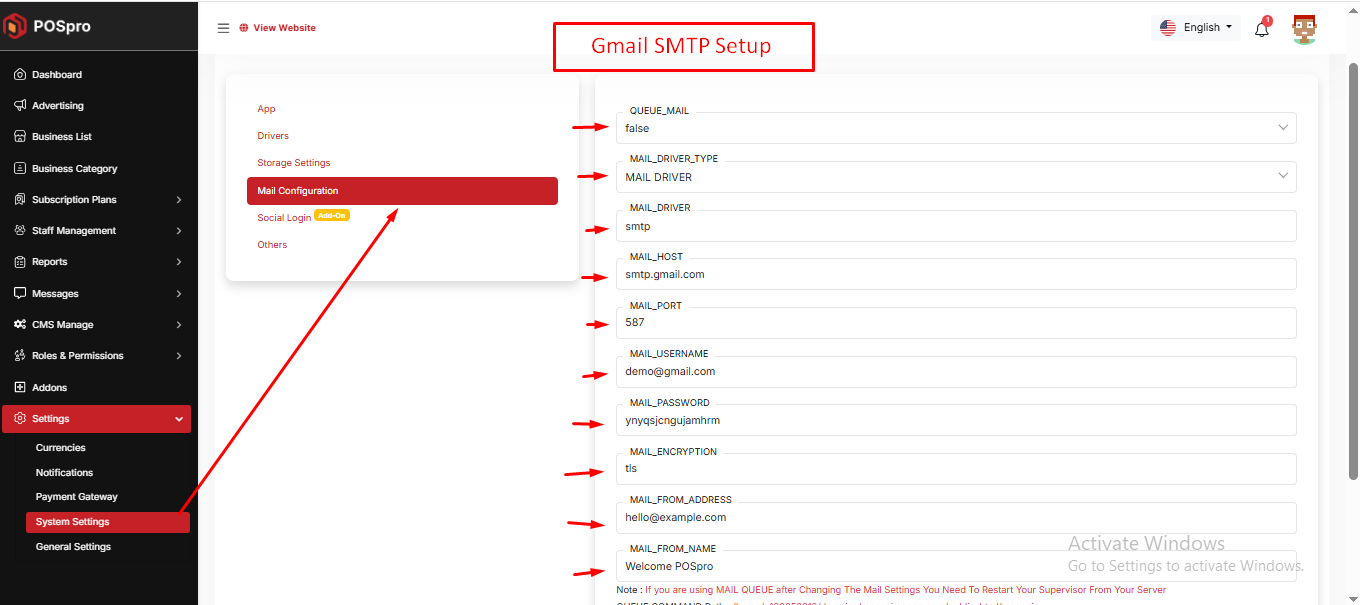
Gmail
To create and configure an SMTP email account using Gmail, follow below steps:
Step 1: Enable 2-Step Verification on Google Account
1. Go to https://myaccount.google.com
2. Click "Security" from the left menu.
3. Under "Signing in to Google", enable 2-Step Verification.

4. Complete the setup with your phone or other options.
Step 2: Create an App Password
After enabling 2-Step Verification:
1. Visit: https://myaccount.google.com/apppasswords
2. Sign in if asked.
3. Under "Select the app", choose Other (Custom name).
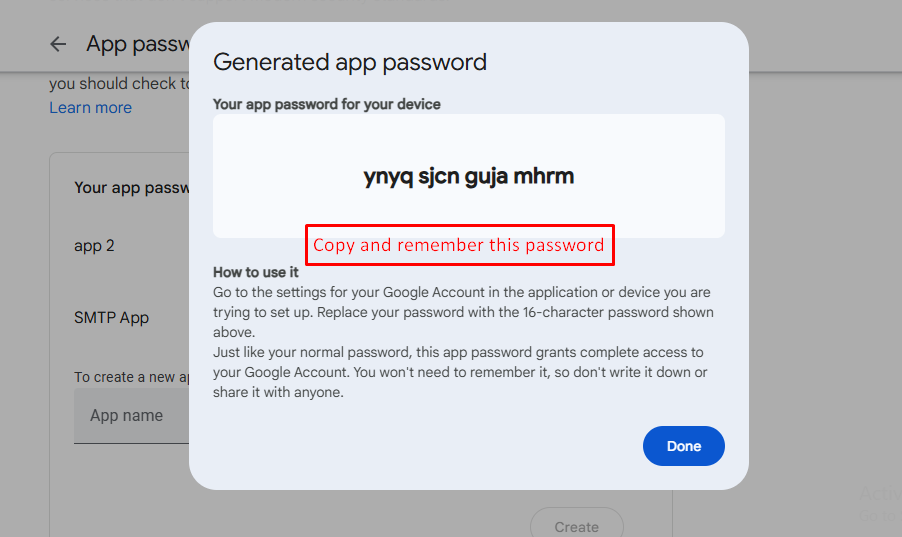
4. Give it a name like "SMTP App" and click Generate.
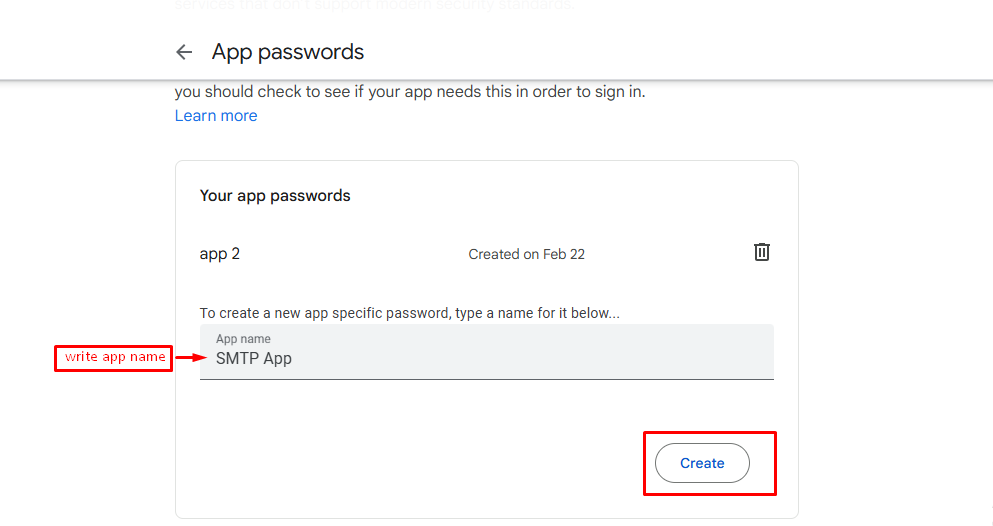
5. Google will show you a 16-character password — copy it. You’ll use this as your SMTP password
Example:
| Input | Value |
|---|---|
| QUEUE_MAIL | Select true / false, (If you select true, you need to run the following command: php artisan queue:work on server) |
| MAIL_DRIVER_TYPE | Select MAIL MAILER / MAIL DRIVER |
| MAIL_DRIVER | smtp |
| MAIL_HOST | smtp.gmail.com |
| MAIL_PORT | 587 |
| MAIL_USERNAME | your_email@gmail.com |
| MAIL_PASSWORD | your_app_password |
| MAIL_ENCRYPTION | tls |
| MAIL_FROM_ADDRESS | your_email@gmail.com |
| MAIL_FROM_NAME | Your project/app name |
Set the values to System Settings → Mail Configuration
If you want to know more details please follow their, Official documentation. Here is also a youtube video link for reference.
Others
Admin Change Logs & Update Guide
Note: Before updating to the new version, please ensure you have a database and full project backup, and that your project is already updated to the latest version. This is extremely important!
Version: 5.6.2 ( 09 October 2025 )
- Minor changes and improvements.
- Fixed sidebar issue.
- App Multibranch Create edit update added.
Note: Please replace the following folders:
✔ app
✔ public → assets
( No need to replace the entire public folder; just update assets folder inside it )
✔ resources
✔ routes
After replacing them, visit yourdomain.com/update to install the new version and
please don't forget to reload hard your browser. Without visiting the URL and reloading
hard, your project will not function correctly, so ensure you complete this step.
Note: If you face any issues with the update, please contact us.
Version: 5.6.1 ( 24 September 2025 )
- Plan Edit page updated with option for existing subscribers.
- Existing subscribers can now access new features.
Note: Please replace the following folders:
✔ app
✔ resources
✔ routes
After replacing them, visit yourdomain.com/update to install the new version and
please don't forget to reload hard your browser. Without visiting the URL and reloading
hard, your project will not function correctly, so ensure you complete this step.
Note: If you face any issues with the update, please contact us.
Version: 5.6 ( 20 September 2025 )
- Installer updated
- Domain instruction added
- Domain setting updated
- Version shows in sidebar
- Sidebar updated
- Language translation for Multi-Branch Add-on, Warehouse Add-on, Custom Domain Add-on
Note: Please replace the following folders:
✔ app
✔ lang
✔ public → assets
( No need to replace the entire public folder; just update assets folder inside it )
✔ resources
✔ routes
✔ updates
After replacing them, visit yourdomain.com/update to install the new version and
please don't forget to reload hard your browser. Without visiting the URL and reloading
hard, your project will not function correctly, so ensure you complete this step.
Note: If you face any issues with the update, please contact us.
Version: 5.5 ( 15 September 2025 )
- Added Multibranch Add-on, Warehouse Add-on, and Custom Domain Add-on
- Updated plan subscription with Multibranch option
- Added Subscription Orders section
- Updated documentation
- Updated business List
- Fixed social login issue
- Updated design
Note: Please replace the following folders:
✔ app
✔ config
✔ database
✔ public → assets
✔ resources
✔ routes
✔ updates
After replacing them, visit yourdomain.com/update to install the new version and
please don't forget to reload hard your browser. Without visiting the URL and reloading
hard, your project will not function correctly, so ensure you complete this step.
Note: If you face any issues with the update, please contact us.
Version: 5.4 ( 14 August 2025 )
- Changed Setting Structure.
- Business sign-up settings added.
- OTP expiration time is now dynamic, and an option to enable or disable email verification has been added.
- Fixed minor design issues.
- PhonePe payment gateway issues have been fixed.
- Invoice issue fixed for thermal printer.
Note: Please replace the following folders:
✔ app
✔ public → assets
✔ resources
✔ routes
After replacing them, visit yourdomain.com/update to install the new version and
please don't forget to reload hard your browser. Without visiting the URL and reloading
hard, your project will not function correctly, so ensure you complete this step.
Note: If you face any issues with the update, please contact us.
Version: 5.3 ( 09 August 2025 )
- Fixed data type issues in dashboard.
- Resolved type casting issues.
Note: Please replace the following folders:
✔ app
✔ public → assets
After replacing them, visit yourdomain.com/update to install the new version and
please don't forget to reload hard your browser. Without visiting the URL and reloading
hard, your project will not function correctly, so ensure you complete this step.
Note: If you face any issues with the update, please contact us.
Version: 5.2.0 ( 05 August 2025 )
- Added Batch-wise Stock Management.
- Added 80mm Thermal Invoice Printing Support (Add-On).
- Product Label Printing Functionality Updated.
- Added Bulk Purchase Feature.
- Added Filter Option on Income & Expense Reports.
- Product Settings added for products input options.
- Updated Sales Module to Support Batch-wise Sales.
- Improved Purchase Module UI and Logic.
- Enhanced Product List & Product Details View.
- Updated Stock List, Expiry List, and Loss/Profit Calculation.
- Product Model Added.
- Sidebar position fixed after reloading the page.
Note: Please replace the following folders: app, database, public/assets, resources, routes and vendor. After replacing them, visit yourdomain.com/update to install the new version and please don't forget to reload hard your browser. Without visiting the URL and reloading hard, your project will not function correctly, so ensure you complete this step.
Note: If you face any issues with the update, please contact us.
Version: 5.1.4 ( 03 August 2025 )
- Fixed subscription cache issue.
- PayPal issue fixed.
- Improved UI design.
- Fixed responsive layout issues.
Note: Please replace the following folder: app,database,public/assets,resources and routes. After replacing them, visit yourdomain.com/update to install the new version and please don't forget to reload hard your browser. Without visiting the URL and reloading hard, your project will not function correctly, so ensure you complete this step.
Note: If you face any issues with the update, please contact us.
Version: 5.1.3 ( 26 May 2025 )
- Profile setup issue fixed.
- Minor issues fixed.
Note: Please replace the following folder: app. After replacing them, visit yourdomain.com/update to install the new version and please don't forget to reload hard your browser. Without visiting the URL and reloading hard, your project will not function correctly, so ensure you complete this step.
Note: If you face any issues with the update, please contact us.
Version: 5.1.2 ( 25 May 2025 )
- Subscribers list issue fixed.
- Sign-up system updated.
- Minor issues fixed.
Note: Please replace the following folder: app,resources,routes, config & public/assets. After replacing them, visit yourdomain.com/update to install the new version and please don't forget to reload hard your browser. Without visiting the URL and reloading hard, your project will not function correctly, so ensure you complete this step.
Note: If you face any issues with the update, please contact us.
Version: 5.1.1 ( 18 May 2025 )
- Fixed data type issues.
- Fixed 5.0 update issues.
- Optimized some codes.
Note: Please replace the following folder: app. After replacing them, visit yourdomain.com/update to install the new version and please don't forget to reload hard your browser. Without visiting the URL and reloading hard, your project will not function correctly, so ensure you complete this step.
Note: If you face any issues with the update, please contact us.
Version: 5.1 ( 17 May 2025 )
- Type casting issues fixed.
- Fixed some known issues.
Note: Please replace the following folder: app. After replacing them, visit yourdomain.com/update to install the new version and please don't forget to reload hard your browser. Without visiting the URL and reloading hard, your project will not function correctly, so ensure you complete this step.
Note: If you face any issues with the update, please contact us.
Version: 5.0 ( 15 May 2025 )
- Database updated for invertory sales.
- Fixed otp email resend issues.
- Timezone issues fixed.
- Business update issue fixed.
- Payment gateways issues fixed.
- Payment Gateway design updated.
- Plan purchase and payment option has been added to the signup process.
- Add-On installation system updated for new Add-On.
Note: Please replace the following folders & files: app, database, public/assets, resources, routes, vendor, composer.json. After replacing them, visit yourdomain.com/update to install the new version and please don't forget to reload hard your browser. Without visiting the URL and reloading hard, your project will not function correctly, so ensure you complete this step.
Note: If you face any issues with the update, please contact us.
Version: 4.9 ( 17 April 2025 )
- Password change API implemented.
- Fixed issue with invoice amount in words.
- Improved invoice design.
Note: Please replace the following folders: app, public/assets and routes.
Note: If you face any issues with the update, please contact us.
Version: 4.8 ( 16 April 2025 )
- Added "change amount" column in sales and purchases table.
- Update Sales and Purchases api and their model.
Note: Please replace the following folders: app, database. After replacing them, visit yourdomain.com/update to install the new version and please don't forget to reload hard your browser. Without visiting the URL and reloading hard, your project will not function correctly, so ensure you complete this step.
Note: If you face any issues with the update, please contact us.
Version: 4.7 ( 24 March 2025 )
- Invoice update api added.
- Some codes and query optimized.
- Invoices updated.
Note: Please replace the following folders: app, resources. After replacing them, visit yourdomain.com/update to install the new version and please don't forget to reload hard your browser. Without visiting the URL and reloading hard, your project will not function correctly, so ensure you complete this step.
Note: If you face any issues with the update, please contact us.
Version: 4.6 ( 17 March 2025 )
- Customer phone unique validation removed in api.
- Customer database updated.
- Optimized some codes.
- Party phone validation api updated in Sales, Purchase, Supplier & Customer.
Note: Please replace the following folders: app and database. After replacing them, visit yourdomain.com/update to install the new version and please don't forget to reload hard your browser. Without visiting the URL and reloading hard, your project will not function correctly, so ensure you complete this step.
Note: If you face any issues with the update, please contact us.
Version: 4.5 ( 13 March 2025 )
- Change some design and fixed some design issues.
- Payment type api added.
- Number format updated.
- Optimized codes and improved.
- Fixed minor bugs
Note: Please replace the following folders: app, public/assets, database and routes. After replacing them, visit yourdomain.com/update to install the new version and please don't forget to reload hard your browser. Without visiting the URL and reloading hard, your project will not function correctly, so ensure you complete this step.
Note: If you face any issues with the update, please contact us.
Version: 4.4 ( 27 February 2025 )
- Add confirm password field in Business create & update secion.
- Fixed sales issues if the payment type is unpaid/paid.
- Customized error pages added.
Note: Please replace the following folders: app, public/assets, resources. You don't need to do anything after replacing them.
Note: If you face any issues with the update, please contact us.
Version: 4.3 ( 23 February 2025 )
- Alert qty, expire date added in products table
- Purchase price split into Exclusive & Inclusive.
- Subscription payment issues fixed.
- Dashboard api issue fixed.
- Request limit updated for single user.
- Manual payment status issue fixed.
- Attachment added with sale.
- Some design issues updated.
- Text editor added for payment gateways.
- Profile update issue fixed.
Note: Please replace the following folders: app, database, public/assets, resources and routes. After replacing them, visit yourdomain.com/update to install the new version and please don't forget to reload hard your browser. Without visiting the URL and reloading hard, your project will not function correctly, so ensure you complete this step.
Note: If you face any issues with the update, please contact us.
Version: 4.2 ( 04 February 2025 )
- Barcode issues fixed.
- Fixed system settings issues.
- Barcode print page design issues fixed.
- Summernote added for payment gateways instructions.
- Dashboard API issue fixed.
- Vat name and Vat number added on business setup.
- Subscription logic updated.
Note: Please replace the following folders: app, config, database, public/assets, resources and routes. After replacing them, visit yourdomain.com/update to install the new version. Without visiting the URL, your project will not function correctly, so ensure you complete this step.
Note: If you face any issues with the update, please contact us.
Version: 4.1.1 ( 30 January 2025 )
- Fixed 4.1 update issue.
Note: Please follow the 4.1 update guide, in this version we've just fixed version 4.1 update issue, so you don't need to update anything for this version.
Note: If you face any issues with the update, please contact us.
Version: 4.1 ( 29 January 2025 )
- Update some design for landing page.
- Buy Now button added into pricing plan.
- Fixed stock api issue.
- Vat and vat group added for app.
- Dynamically vat option added into products, sales and purchase.
- Fixed some js issues.
- Rate option added into currency module.
- Login page background image dynamically added.
- Installer updated.
Note: Please replace the following folders: app, database, public/assets, resources, routes and vendor. After replacing them, visit yourdomain.com/update to install the new version. Without visiting the URL, your project will not function correctly, so ensure you complete this step.
Note: If you face any issues with the update, please contact us.
Version: 4.0.1 ( 11 January 2025 )
- Documentation updated.
Note: In this version, you don’t need to do anything. We’ve only updated the documentation.
Note: If you face any issues with the update, please contact us.
Version: 4.0 ( 09 January 2025 )
- Payment gateways issues fixed.
- Plan edit issue fixed.
- Removed and update some optimized codes.
Note: Please replace the following folders & files: app, config, resources, routes and vendor and composer.json(file). After replacing them, visit yourdomain.com/update to install the new version. Without visiting the URL, your project will not function correctly, so ensure you complete this step.
Note: If you face any issues with the update, please contact us.
Version: 3.9 ( 07 January 2025 )
- Fixed manual payment issues.
- Subscription report and invoice added.
- Gateways status issue fixed.
- Fixed subscription plan edit issue.
Note: Please replace the following folders: app, public/assets/css and public/assets/plugins, resources and routes. You don't need to do anything after replacing them.
Note: If you face any issues with the update, please contact us.
Version: 3.8 ( 04 January 2025 )
- Fixed advertisement api issue.
- Add and removed some new codes.
Note: Please replace the following folders: app and resources. You don't need to do anything after replacing them.
Note: If you face any issues with the update, please contact us.
Version: 3.7 ( 02 January 2025 )
- Fixed sign out issues for multiple devices for the app.
- Sidebar responsive issue fixed.
- Logo issue fixed for login page.
- Timezone issue fixed.
- Free plan issue fixed.
Note: Please replace the following folders: app, public/assets/css and resources. You don't need to do anything after replacing them.
Note: If you face any issues with the update, please contact us.
Version: 3.6
- Fixed payment gateways issues for different currencies.
- Increase the pagination data limit from 10 to 20.
- Invoice logo dynamically added.
- Language issue fixed.
- Purchase return issue fixed.
Note: Please replace the following folders: app, database and routes. After replacing them, visit yourdomain.com/update to install the new version. Without visiting the URL, your project will not function correctly, so ensure you complete this step.
Note: If you face any issues with the update, please contact us.
Version: 3.5
- Update Flutter app.
- Code optimized.
Note: You don’t need to update anything for the admin panel. This update is specifically for the app.
Version: 3.4
- New packages added for web addon.
- Addon installation system added.
- Fixed some responsive issues and update design.
- 100+ Languages Added.
- Currency bug fixed.
- Update Documentation.
Note: Please replace the following folders and files: app, database, lang, public/assets, resources, routes, vendor and modules_statuses.json (Please upload this file if you don’t already have it.). After replacing them, visit yourdomain.com/update to install the new version. Without visiting the URL, your project will not function correctly, so ensure you complete this step.
Note: If you face any issues with the update, please contact us.
Version: 3.1
- Fixed sales return loss profit calculation issues.
- Documentation updated.
Note: Please update app folder only.
Version: 3.0
- Sales return added.
- Purchase return added.
- Sale List api updated.
- Purchase List api updated.
- Remove some extra codes.
- Optimized some codes.
Note: Please update app databases and routes folders and visit yourdomain.com/migrate
Version: 2.5 ( 15/10/2024 )
- Admin panel Installation issues fixed.
Note: You don't need to update anything this is for new users.
Version: 2.4 ( 01/10/2024 )
- Fixed product codes issue.
- Add income module.
- Fixed some minor issues.
Note: Please update app, lang, public/assets, resources and routes folders and visit yourdomain.com/migrate
Version: 2.3 ( 12/09/2024 )
- Admin Panel SMTP settings issues fixed.
- Logout issues fixed.
- Password field added on users create or update.
Note: Replace app, resources and routes folders.
Version: 2.2 ( 02/09/2024 )
Note: This version is not for the admin panel.
Version: 2.1 ( 23/08/2024 )
Note: This version is not for the admin panel.
Version: 2.0
- Phone unique validation removed.
- Login Issue fixed.
- Fixed dashboard api issue.
- Fixed user role create api issue.
Note: Please update app and databases folders and visit yourdomain.com/migrate
Version: 1.2 ( 07/08/2024 )
- Dashboard api issues fixed.
Note: Please update app folder.
Version: 1.1 ( 06/08/2024 )
- Fixes queue and jobs issue.
Note: Please update app folder.
Version: 1.0.0 ( 6 August 2024 )
- Initial Release
POSpro Business Web Add-on: Setup and Installation
Note: This is a web add-on. You need to purchase this add-on and ensure that you’ve already purchased and installed the main POSpro system. If you haven’t, click here to purchase the POSpro system. Here you will get Business.zip file.
Addon List
In the Admin Panel, you will see the Addon list. You can activate or deactivate an addon by changing its status.
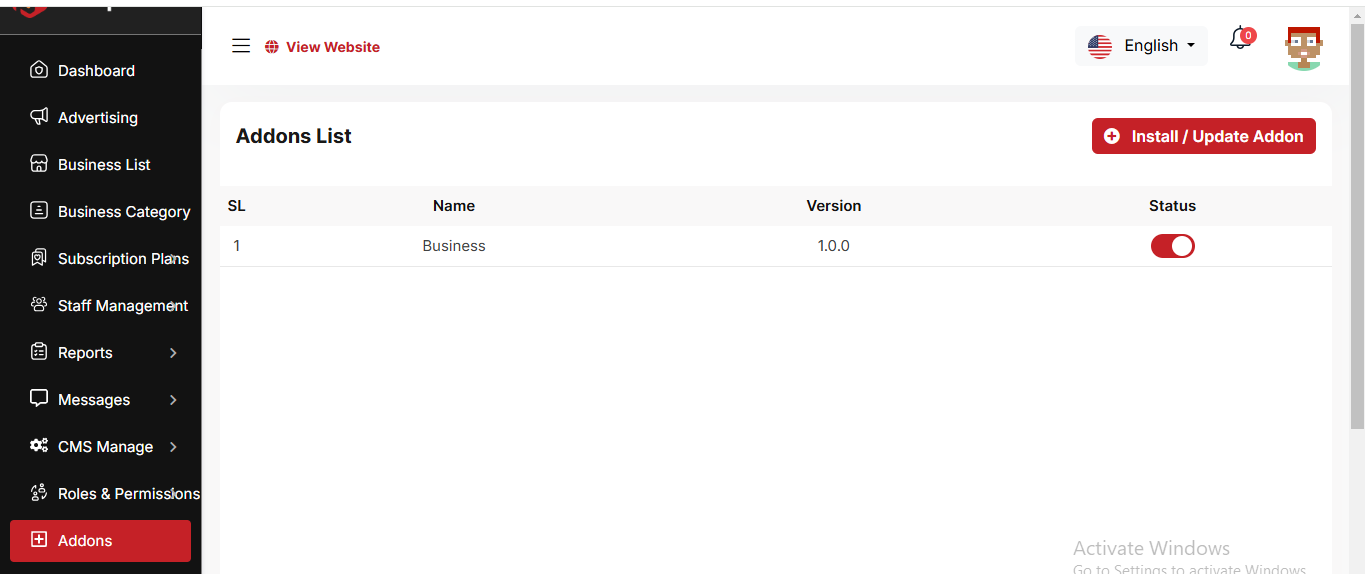
Install / Update Addon
To enter the purchase code and upload a file, you can install/update the Addon.

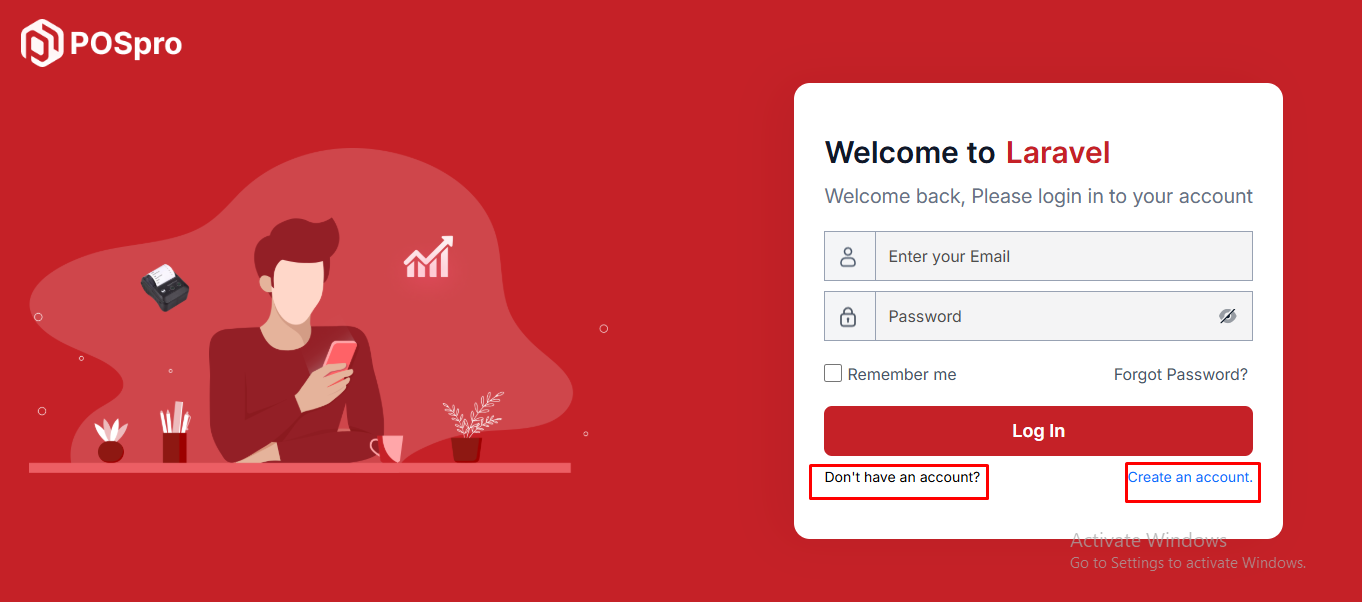
Sign Up
By clicking "Create an account", you will be redirected to the landing page
plan section, where you can choose a subscription plan.
If the admin allows login without email verification, a pop-up modal will appear where you
need to enter your email and password. After that, another modal will appear to collect
additional information. Once submitted, you will be redirected to the payment gateway.
After completing the payment, you will be taken to your business panel.
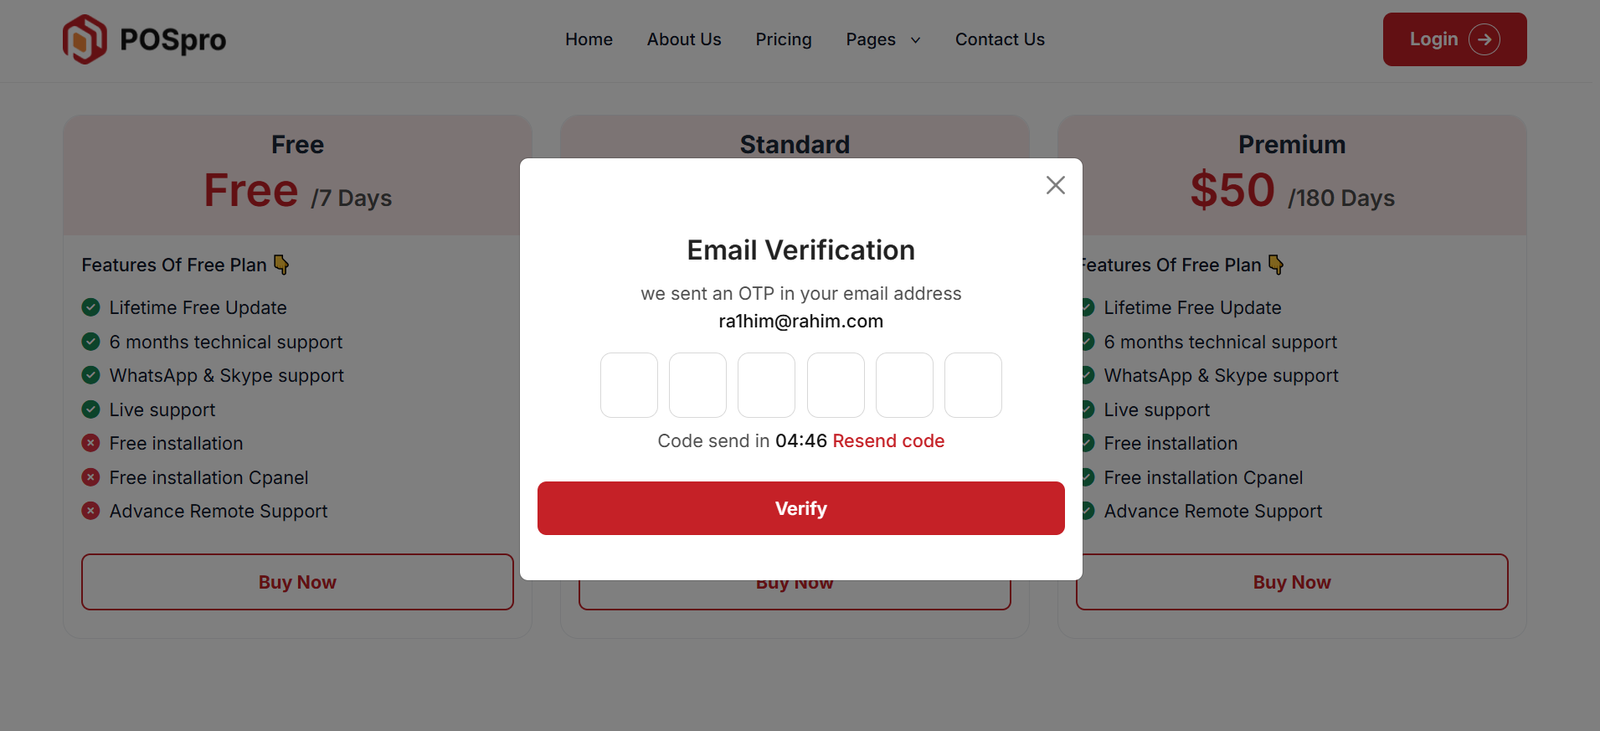
If the admin requires email verification, an extra step is needed. A verification modal will
appear where you must enter the code sent to your email. After verification, you will fill
out the form, proceed to the payment gateway, and finally be redirected to your panel.
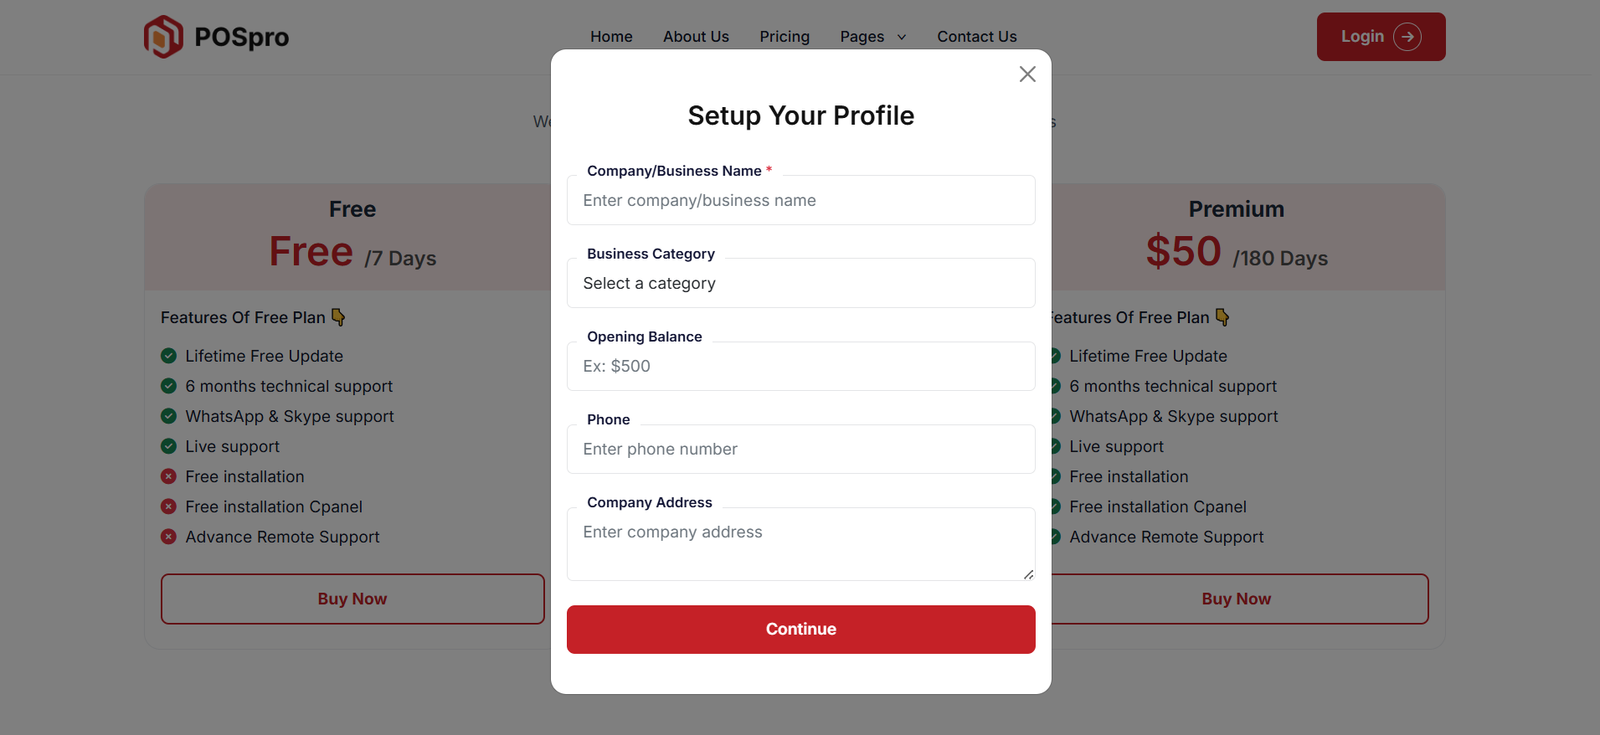
Create Account without email verification
You can create an account by entering your email and password, then clicking the Sign Up button. After that, a new modal will open where you need to fill in details such as business name, business category, phone number, and company address.


Create Account with email verification
You can create an account by entering your email and password, then clicking the Sign Up button. After that, a verification pop-up will appear, and a verification code will be sent to your email. Enter the code to verify your account. Once verified, a new modal will open where you need to provide details such as business name, business category, phone number, and company address.
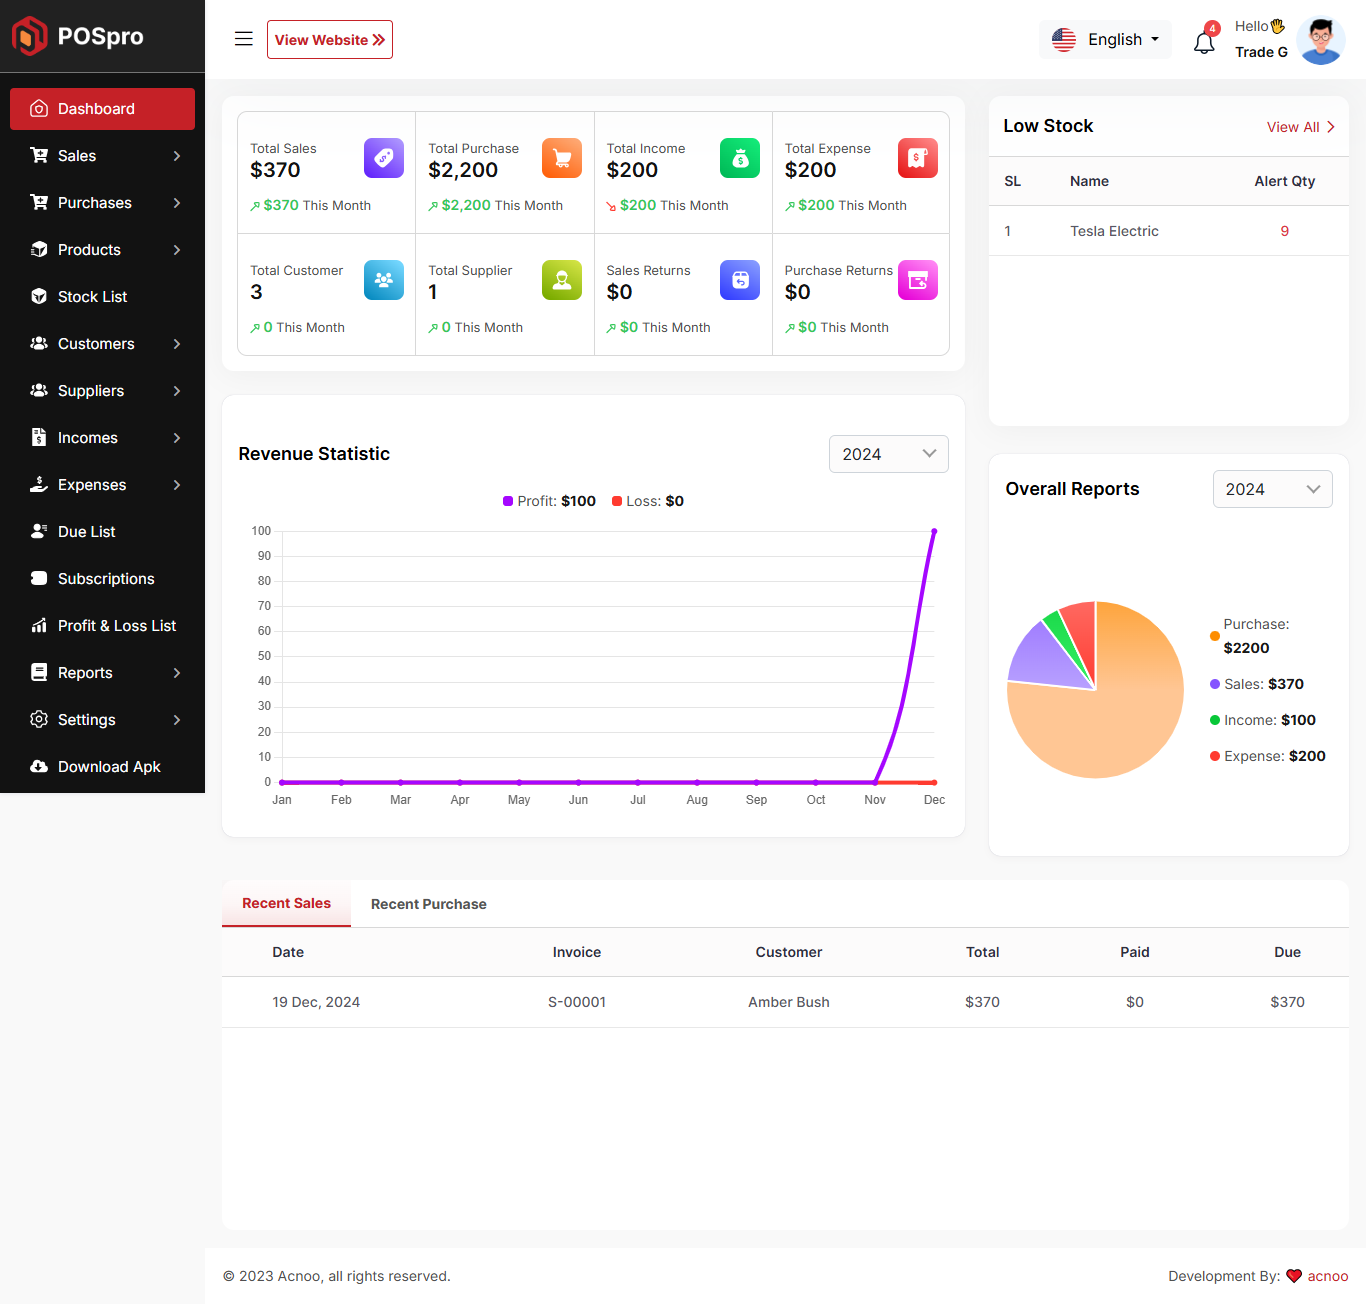
Dashboard
This is the Addon dashboard page, where key project information is presented.
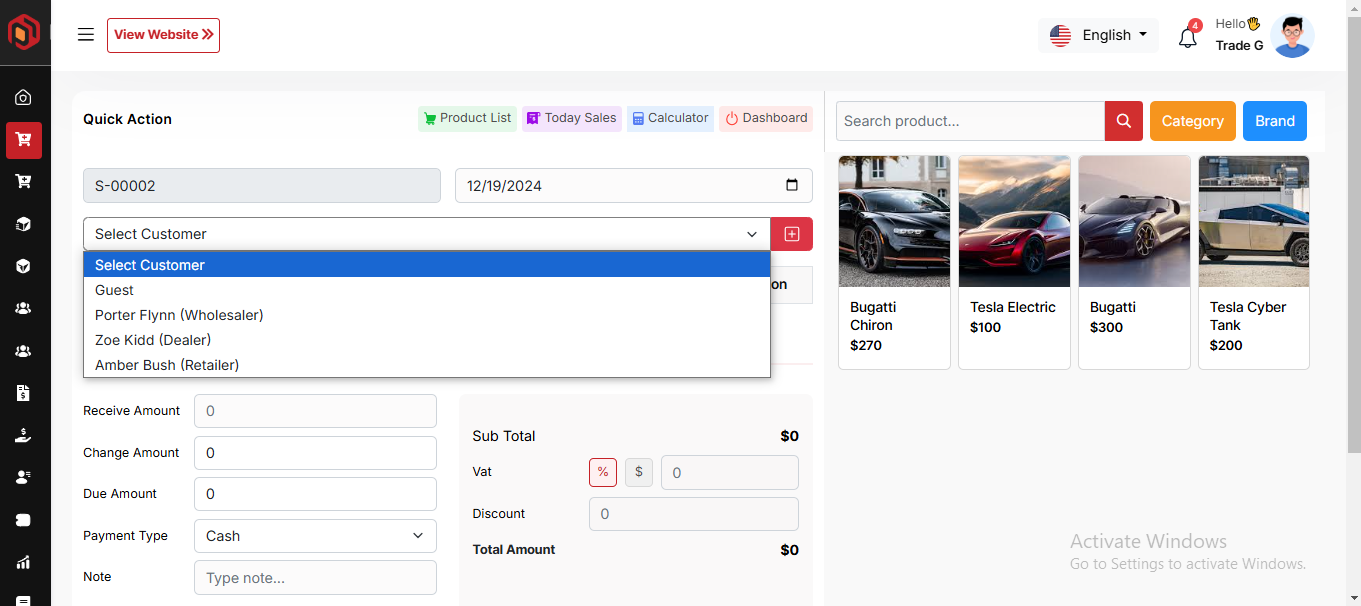
Create Sale
By clicking on "Sale New," you can create a new sale. First, select a customer. If you choose "Guest," an optional field is available to provide a phone number. By selecting register customer the product prices displayed on the right will automatically update based on the selected customer's type (Retailer, Wholesaler, or Dealer).
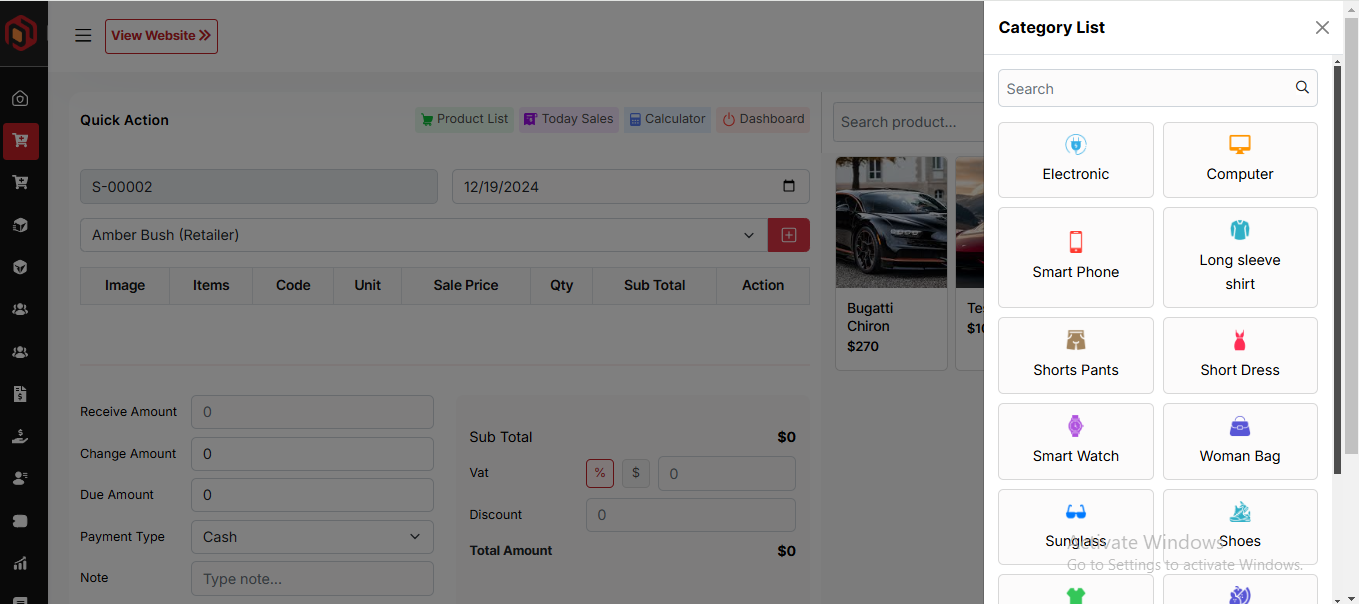
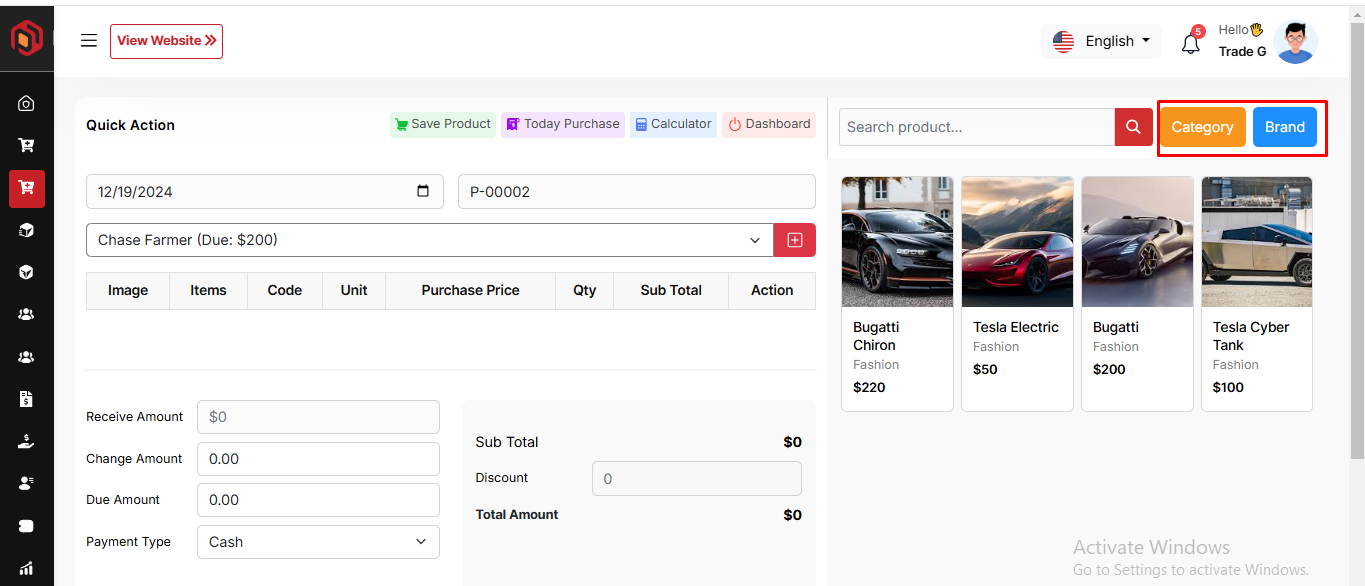
Select Product
Next, you need to select a product for the sale. You have the option to search by product name or code. Additionally, you can filter products by Category or Brand. For example, if you click on the category, you will see a list of categories. From there, you can select a category, and the products will be filtered accordingly. A screenshot is provided for the Category Filter. The same process applies for filtering by Brand.
Add to Cart & store product
When you click on a product, it will be automatically added to the cart if this product available in stock. You can adjust the quantity by using the plus or minus buttons, or directly update the quantity by entering a value. To remove a product from the cart, simply click the red cross button.
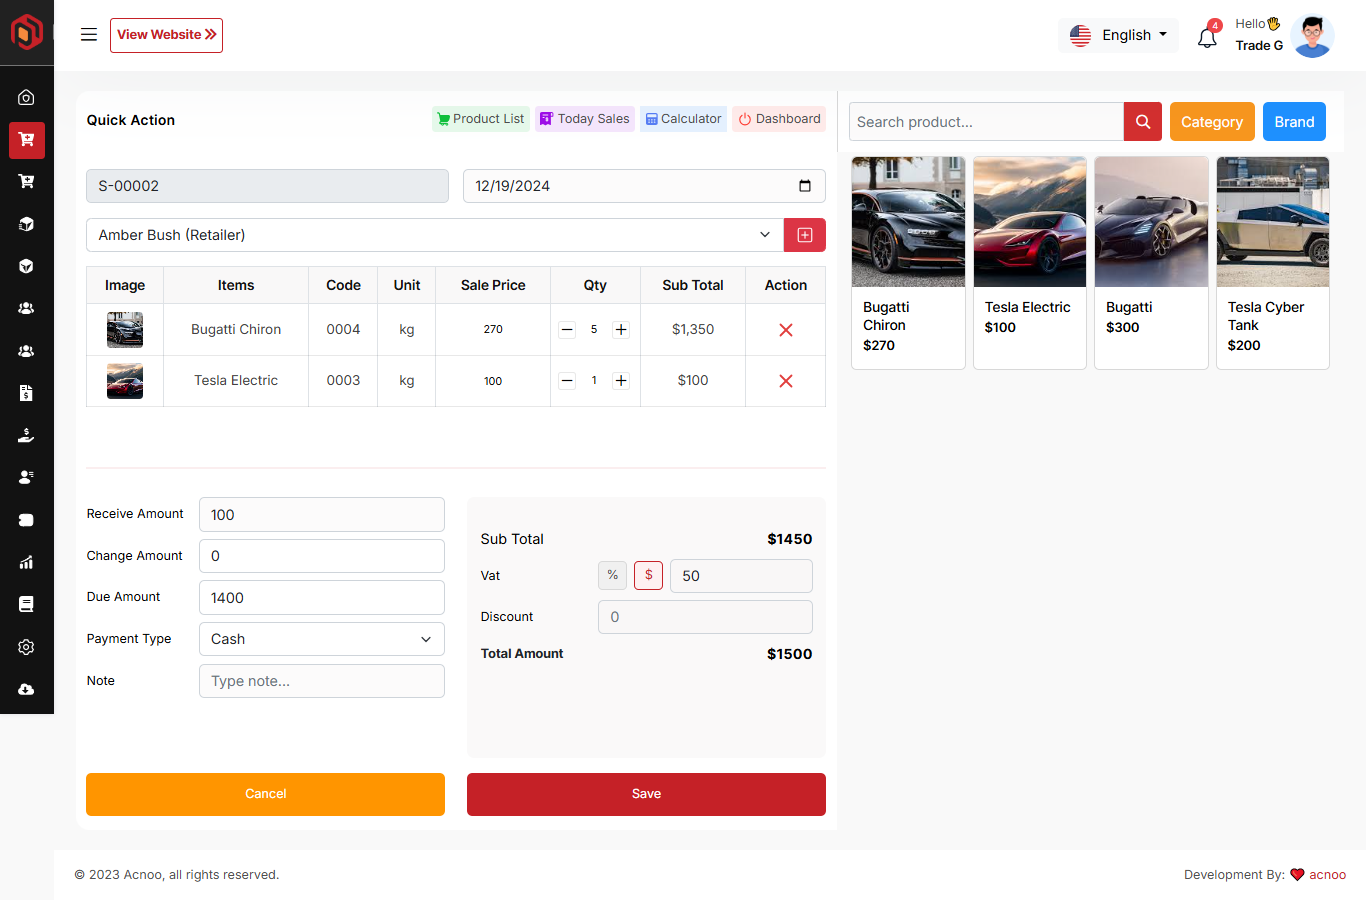
Below, you will see the subtotal of all products. You can also add VAT or a discount to the subtotal. After the calculations, the total amount will be displayed. Next, you can enter the received amount. If the received amount is greater than the total amount, the remaining balance will be shown in the "Change Amount" field. If the received amount is less, the "Due Amount" field will display the difference. If you want to remove all products from the list, click the cancel button. Once everything is correct, click the save button to complete the sale.
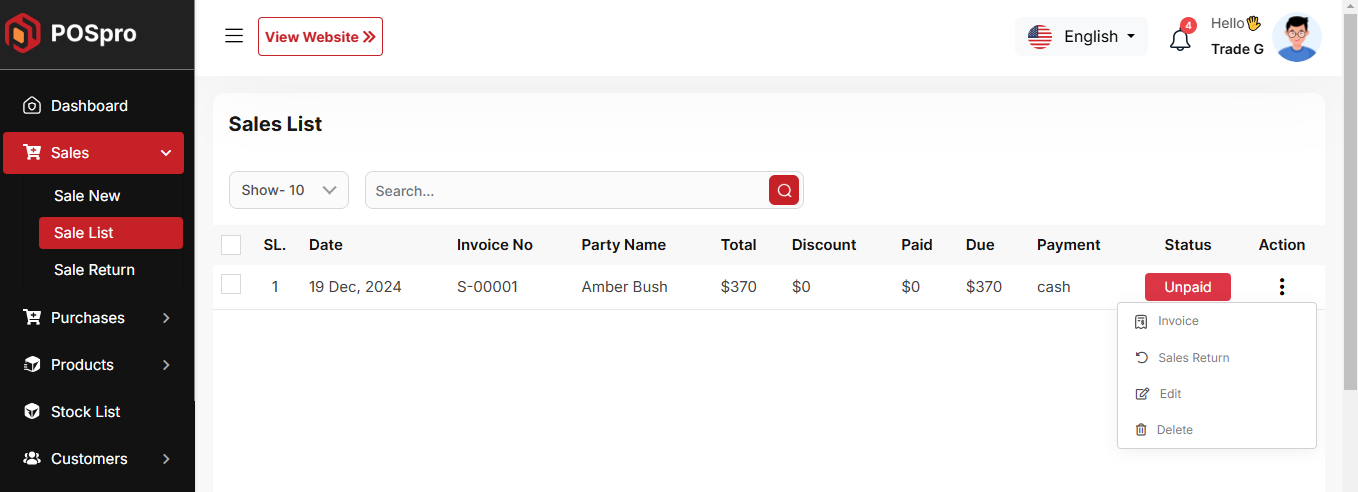
Sale List
This appears to be a screenshot of the Sale list page, where you can filter data using the search function. Additionally, you can view invoices, as well as edit, delete, or use the multi-delete option. Furthermore, you will have the option to initiate a Sale Return from this list. Please note, once a sale return is processed, you will no longer be able to update or delete the sale.
Create Sale Return
From the Sale list, when you click on Sales Return, this page will appear. By adjusting the quantity, you can return the desired amount. However, you cannot return more than the quantity sold.

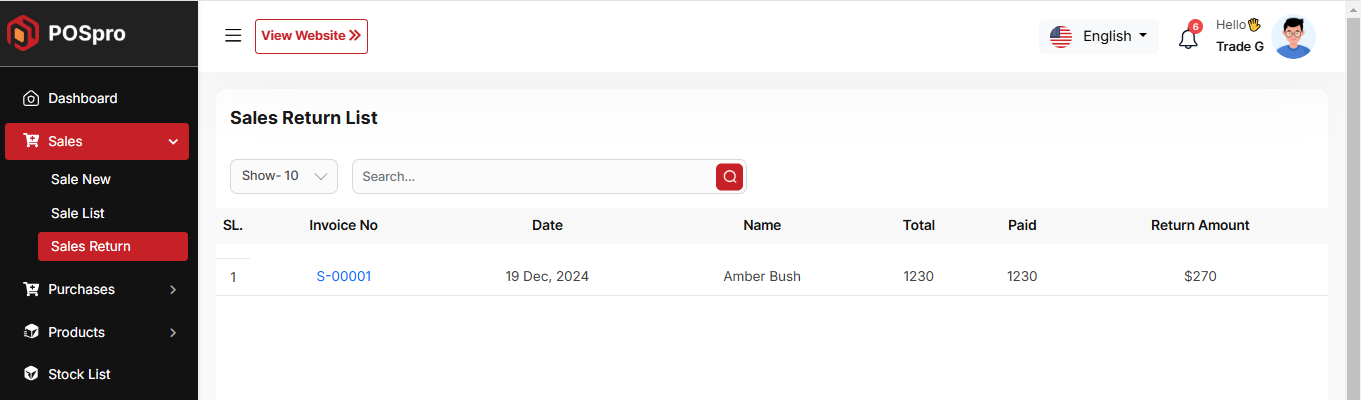
Sale Return List
Here, you can view the complete list of sale returns with a filtering option. To view an invoice, simply click on the invoice No.
Create Purchase
By clicking on "Purchase New," you can create a new purchase. First, select a supplier. Next, choose a product for the purchase. Additionally, you can filter products by Category or Brand, using the same filters as in the Sale process.
Select Product
Next, select a product for the purchase. When you choose a product, a pop-up will appear. Enter the quantity you wish to purchase and update the prices as needed. Once done, click save.
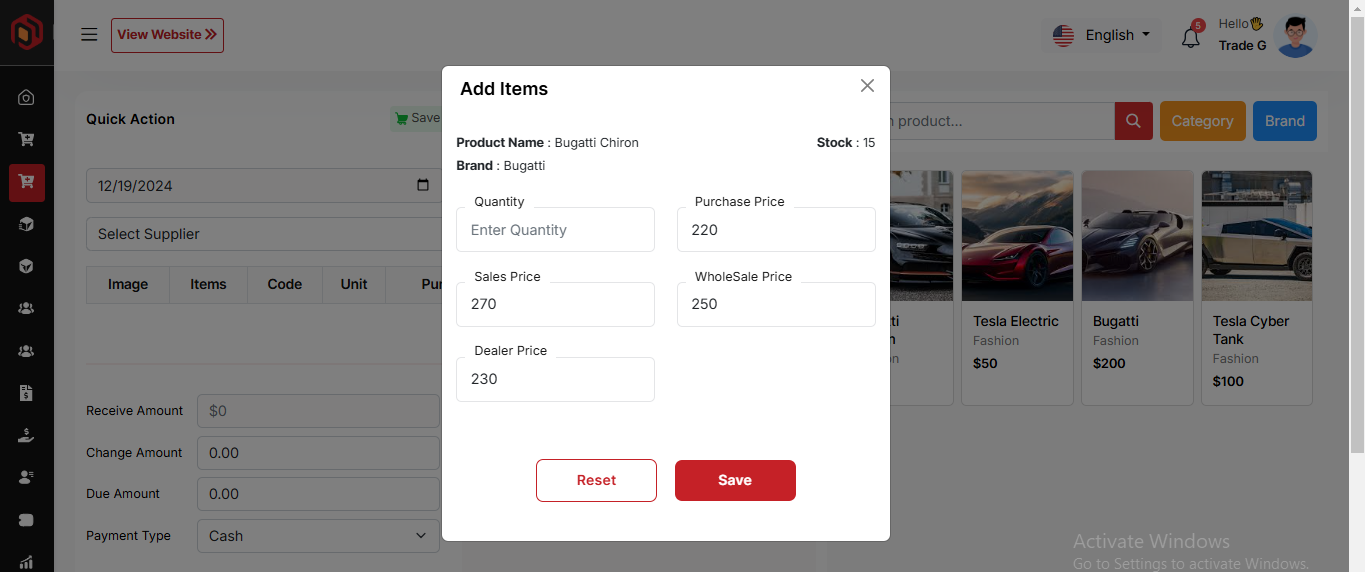
Add to Cart & store product
After clicking the save button in the pop-up window, the product will automatically appear in the cart list. You can adjust the quantity using the plus or minus buttons or update it directly by entering a value. To remove a product from the cart, click the red cross button.
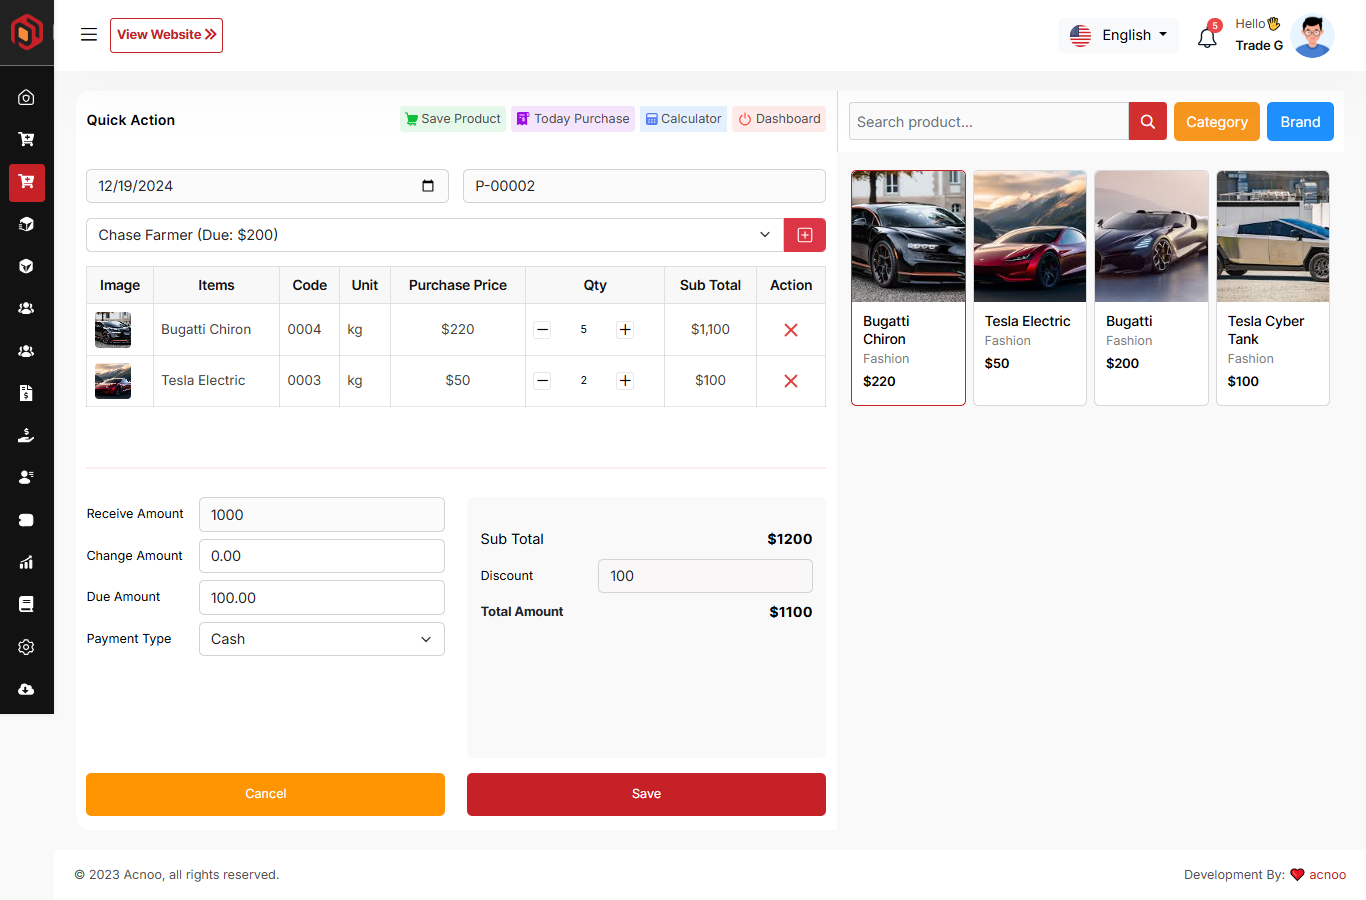
Below, you will see the subtotal of all products. You can also add discount to the subtotal. After the calculations, the total amount will be displayed. Next, you can enter the received amount. If the received amount is greater than the total amount, the remaining balance will be shown in the "Change Amount" field. If the received amount is less, the "Due Amount" field will display the difference. If you want to remove all products from the list, click the cancel button. Once everything is correct, click the save button to complete the purchase.
Purchase List
This appears to be a screenshot of the Purchase list page, where you can filter data using the search function. Additionally, you can view invoices, as well as edit, delete, or use the multi-delete option. Furthermore, you will have the option to initiate a Purchase Return from this list. Please note, once a Purchase return is processed, you will no longer be able to update or delete the Purchase.
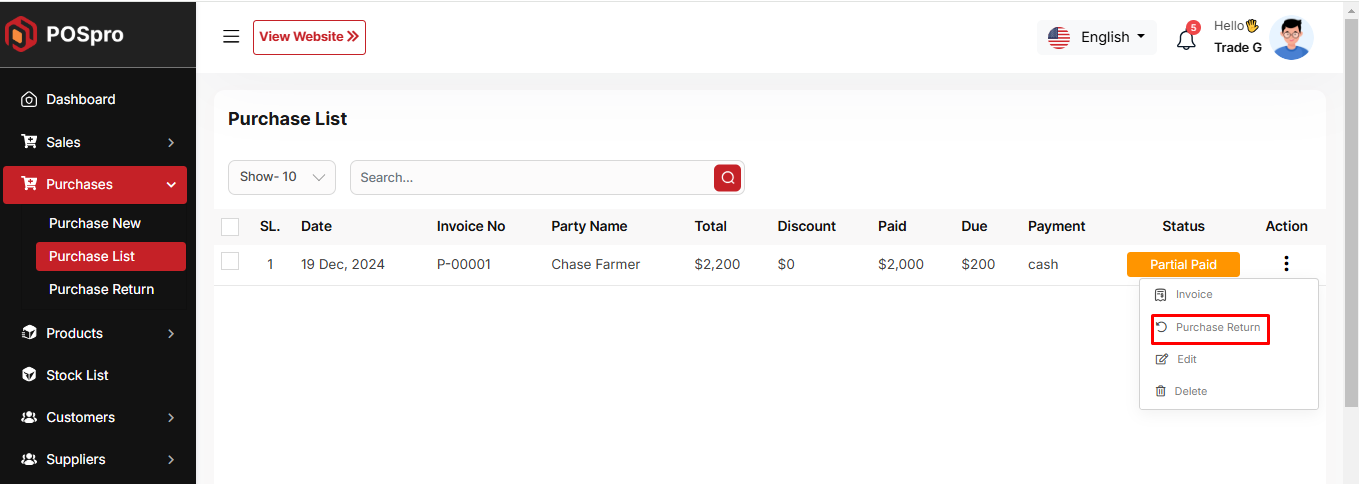
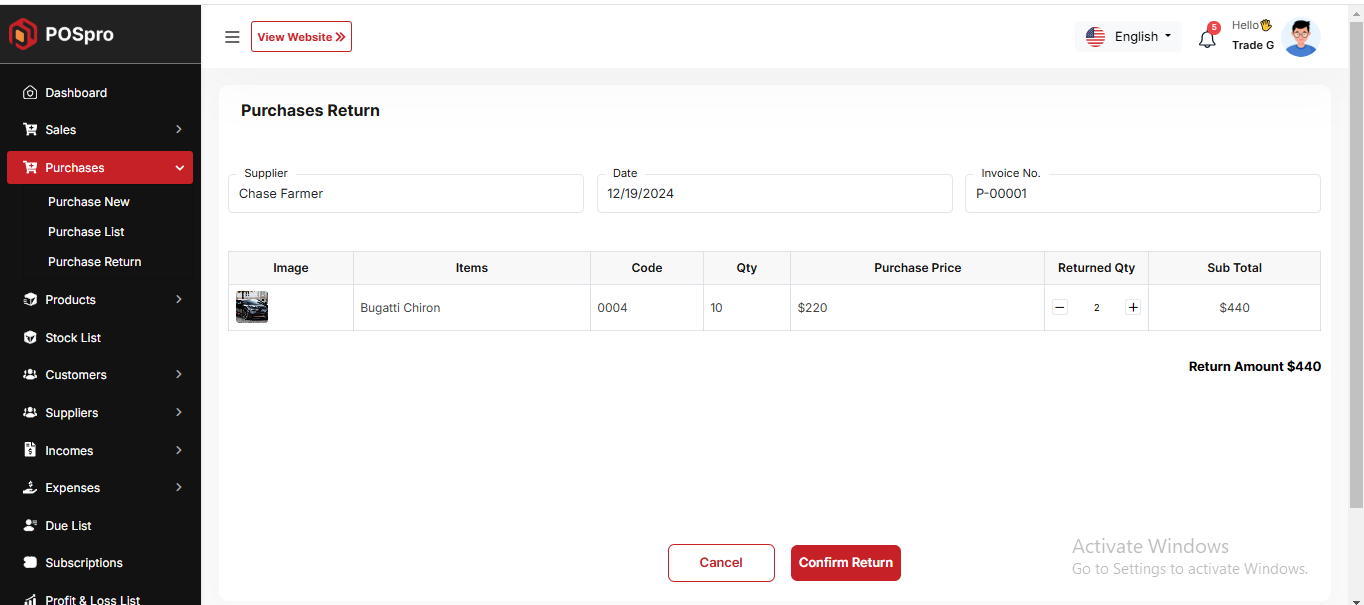
Create Purchase Return
From the Purchase list, clicking on Purchases Return will open this page. You can adjust the quantity to return the desired amount, but you cannot return more than the purchased quantity.
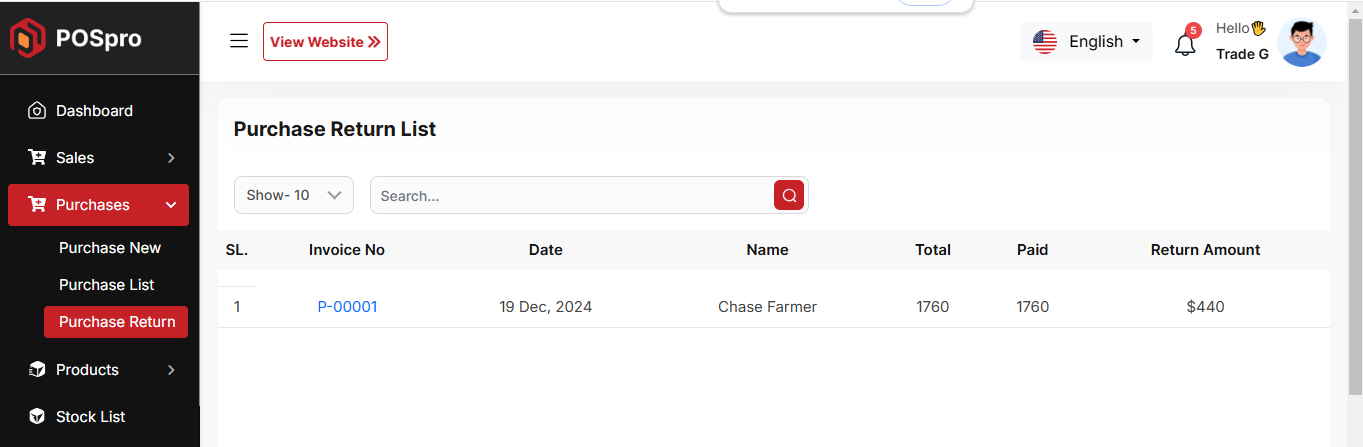
Return List
Here, you can view the complete list of Purchase returns with a filtering option. To view an invoice, simply click on the invoice No.
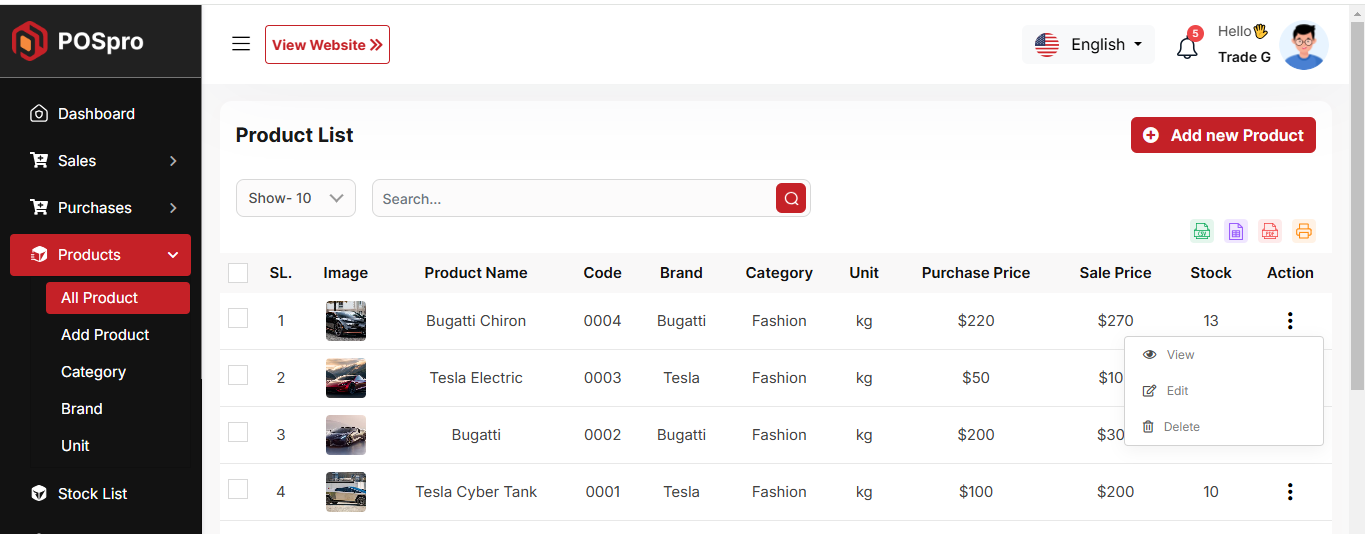
Product List
Here, you can view the Product list with filtering options available. The list can be exported as Excel, CSV, and there is also a print option. By clicking the "View" button, you can see details in a pop-up window. Additionally, you can edit, delete, or perform multi-delete actions.
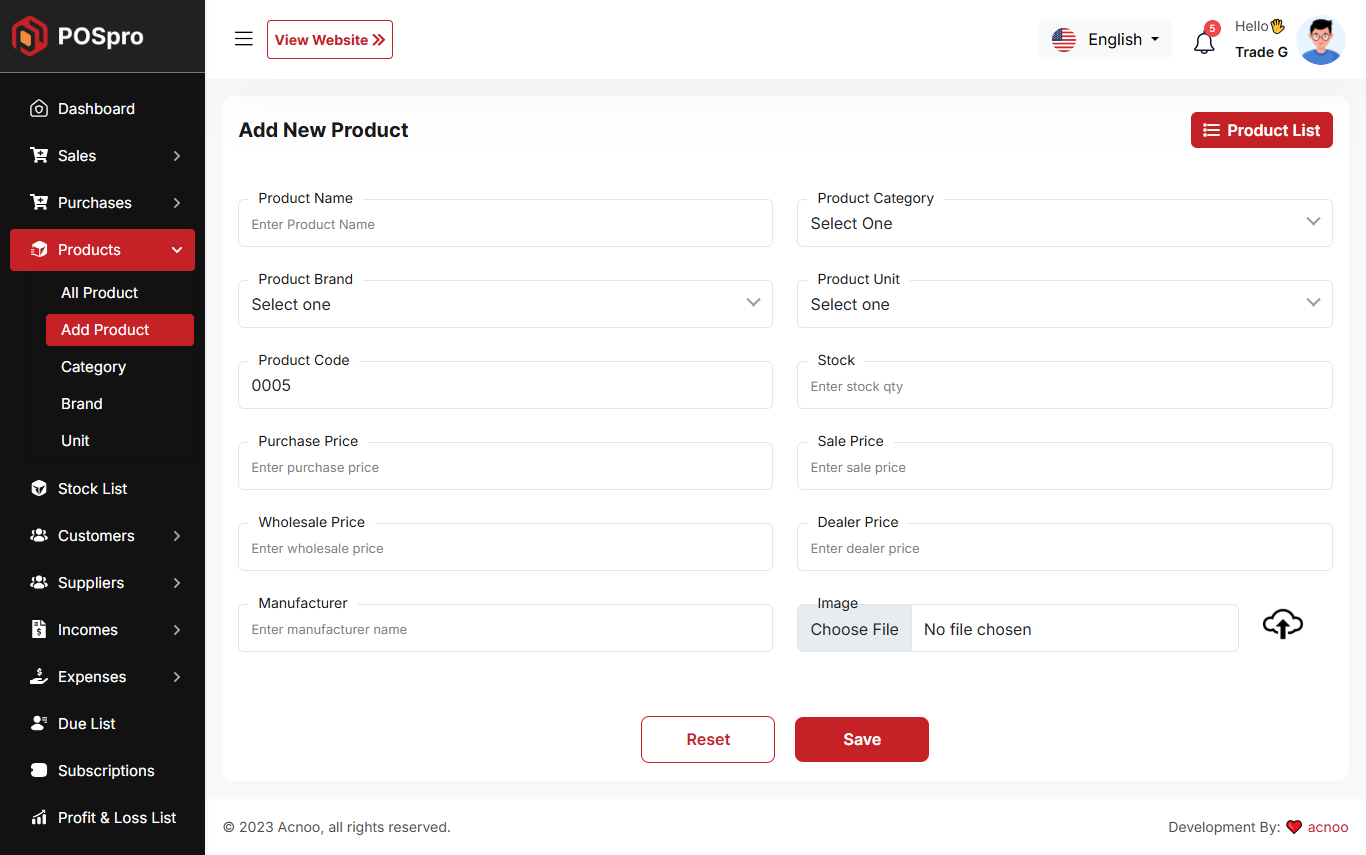
Create Product
You can create a product by filling in the required fields. When you select a Product Category, the associated variation fields (such as capacity, color, size, type, or weight) linked to that category will appear. You can then provide the necessary variations. The Product Code field will suggest a code by default, but you can update it if needed. Ensure you carefully input the product price. If everything is correct, click the save button to store the product.
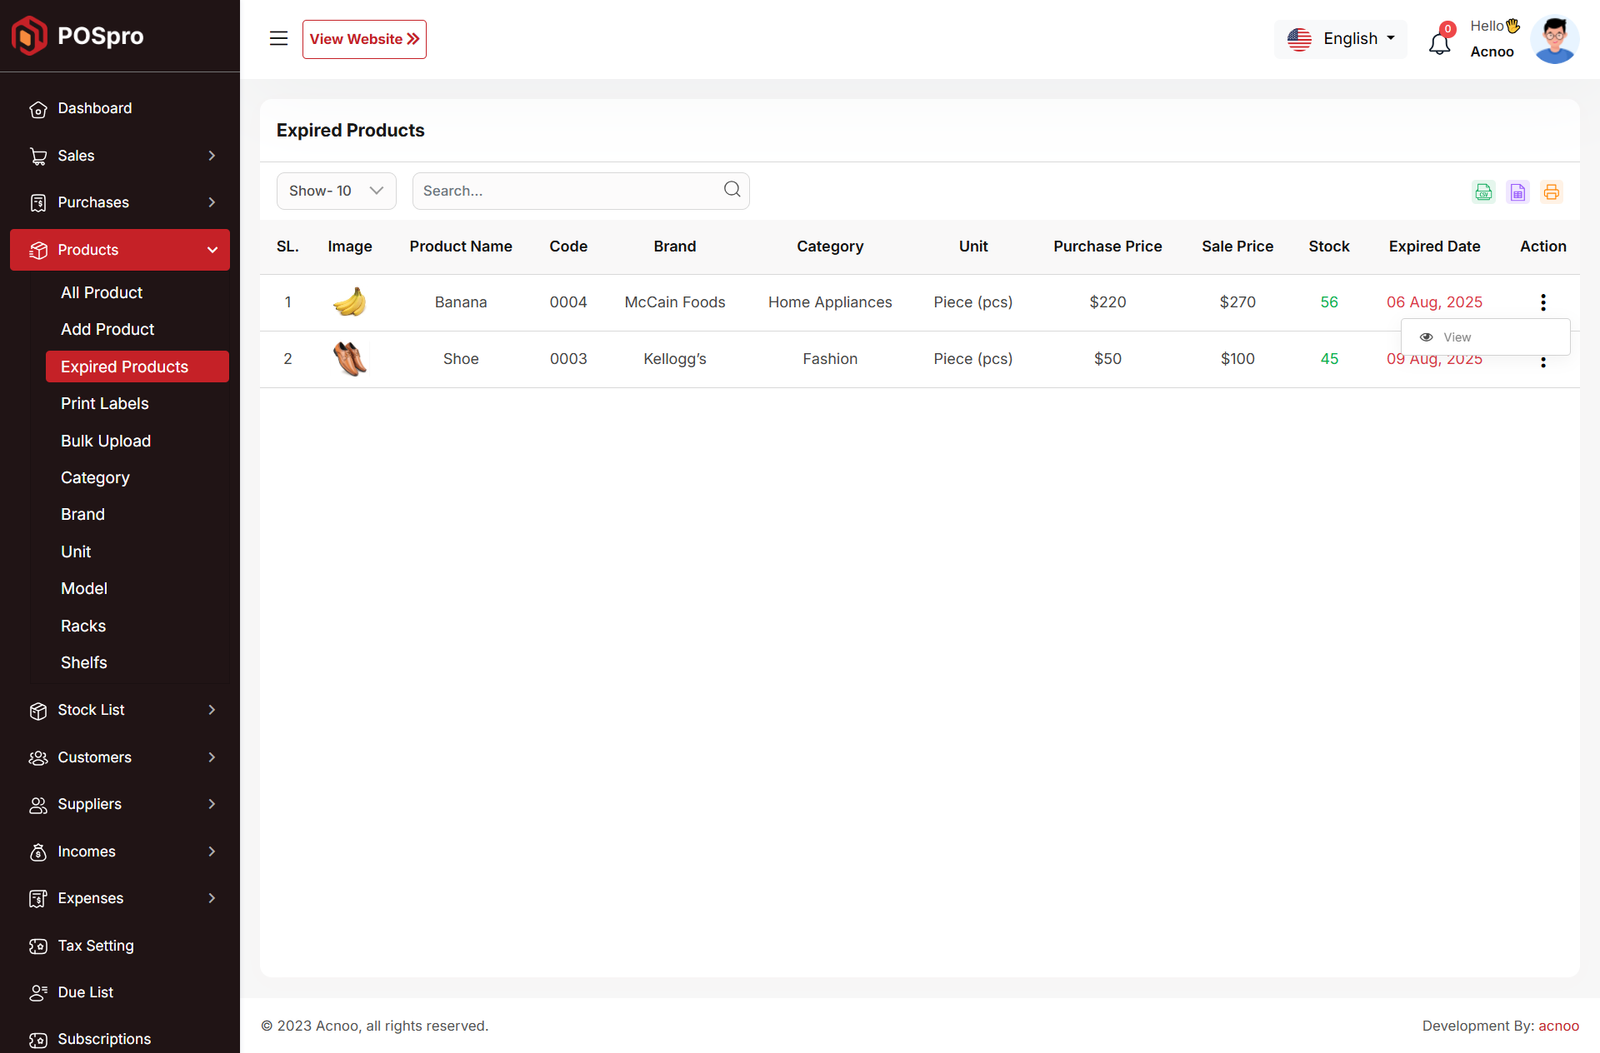
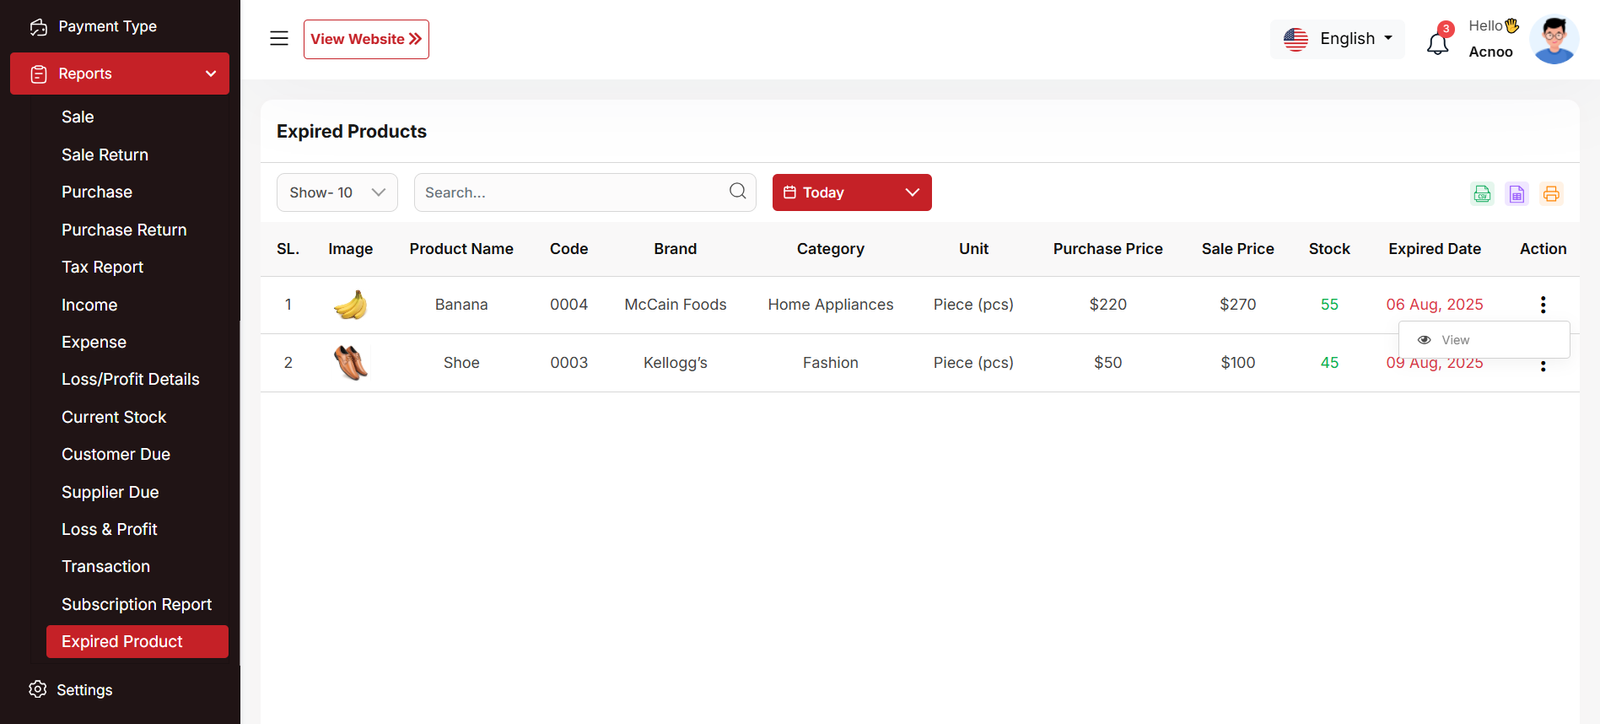
Expired Product List
Here, you can view the expire Product list with filtering options available. The list can be exported as Excel, CSV, and there is also a print option. By clicking the "View" button, you can see details in a pop-up window.
Print Labels
The Barcode Label Module in POS Pro allows users to generate and print barcode labels for selected products. Users can choose which information appears on the labels, including business name, product name, price, product code, packing date, and barcode. Each label uses the size defined for the product, and paper settings can be adjusted to ensure proper printing. Users can preview labels before printing to verify layout and content.

Bulk Uploads
From the **Bulk Upload** module, users can upload a list of products in bulk. You can download a demo Excel file by clicking the download file button. This file contains all the columns that need to be filled, and columns marked with an asterisk (*) indicate mandatory fields. After completing the file, use the **Choose File** option to select your edited file for bulk upload, then click the **Submit** button. All roles, conditions, and instructions are illustrated in the image below for better understanding.

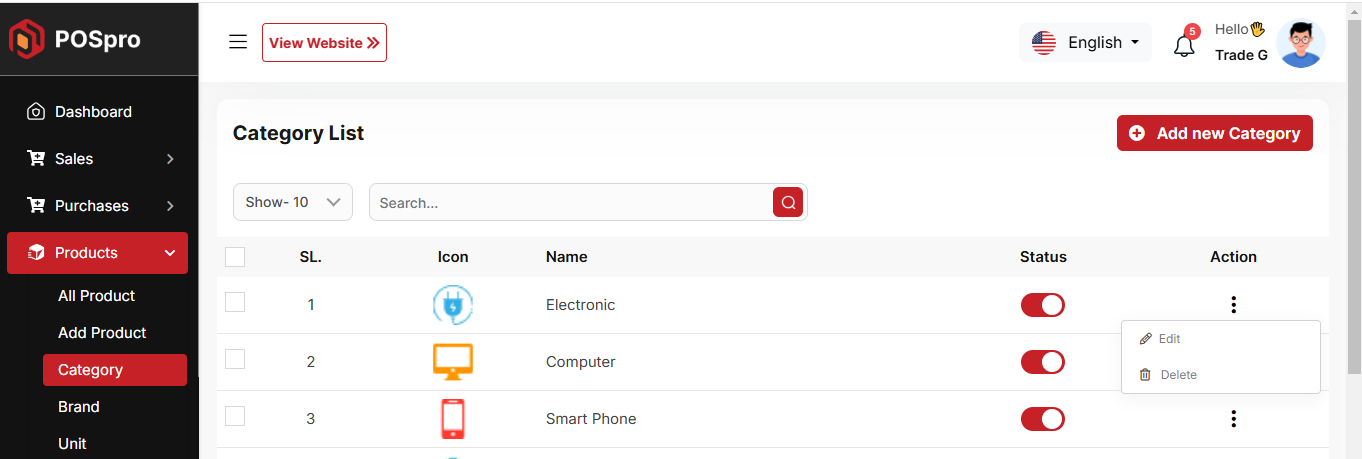
Category List
You can view the Category list with available filtering options. Furthermore, you have the ability to edit, delete, or use the multi-delete function.
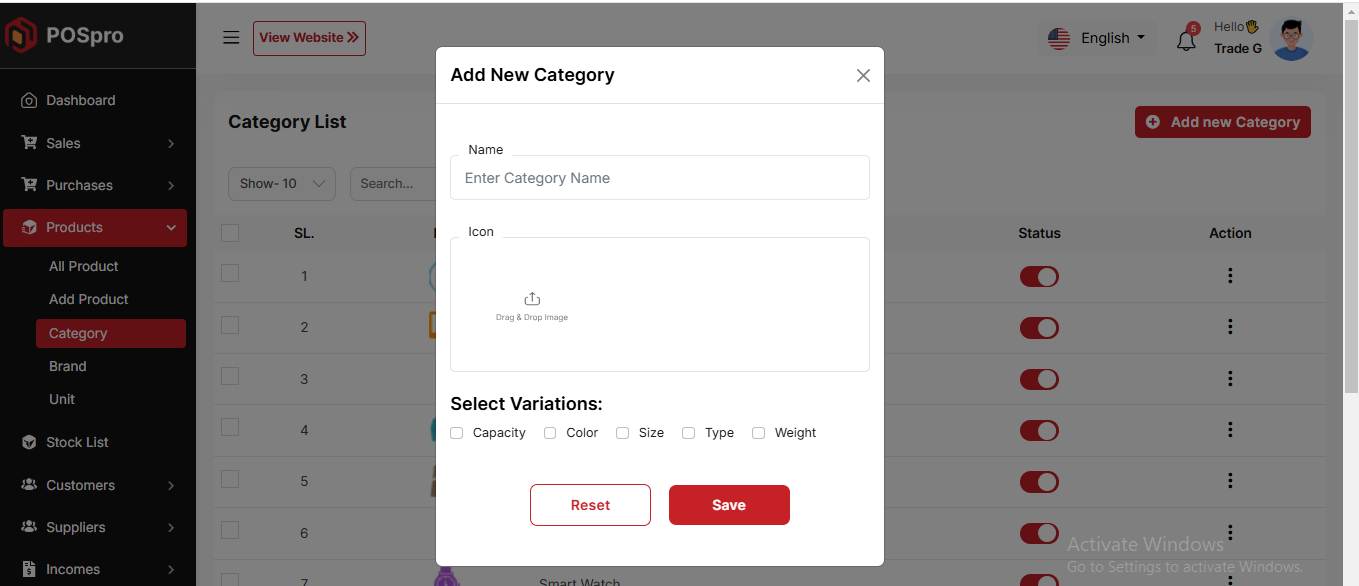
Create Category
You can create a Category by filling in the required fields and selecting the desired variation.
Brand List
You can view the Brand list with available filtering options. Furthermore, you have the ability to edit, delete, or use the multi-delete function.

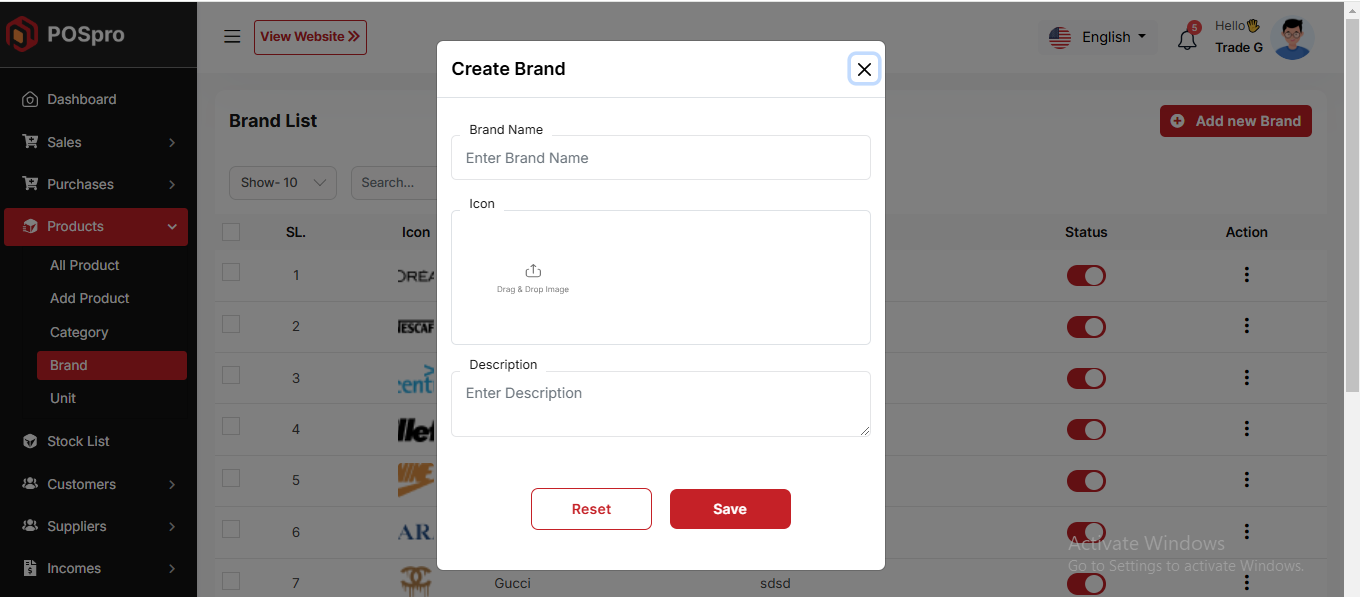
Create Brand
You can create a Brand by filling in the required fields.
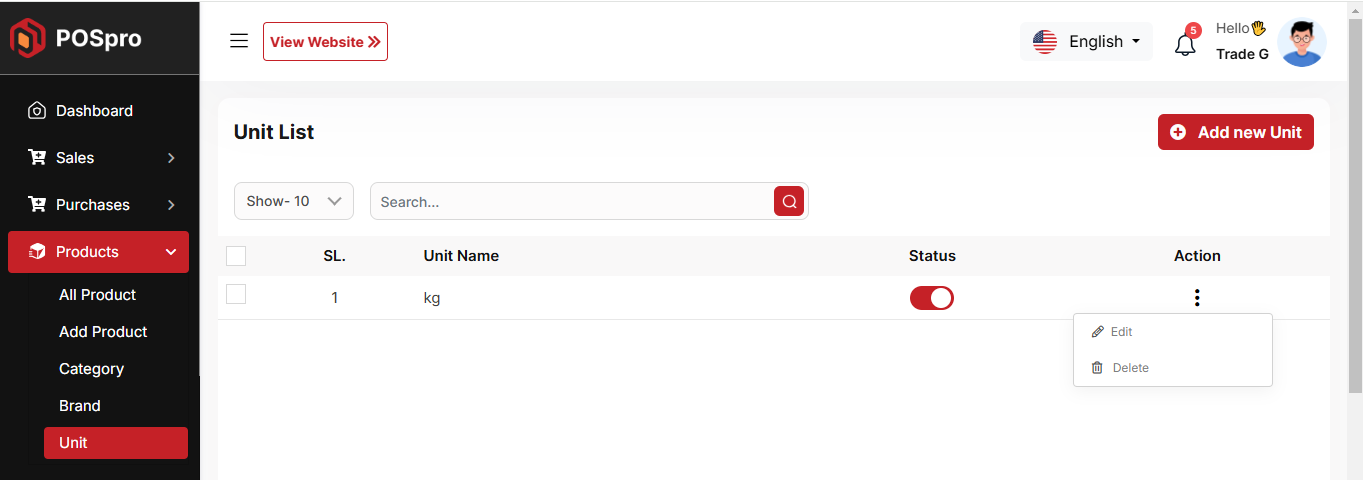
Unit List
You can view the Unit list with available filtering options. Furthermore, you have the ability to edit, delete, or use the multi-delete function.
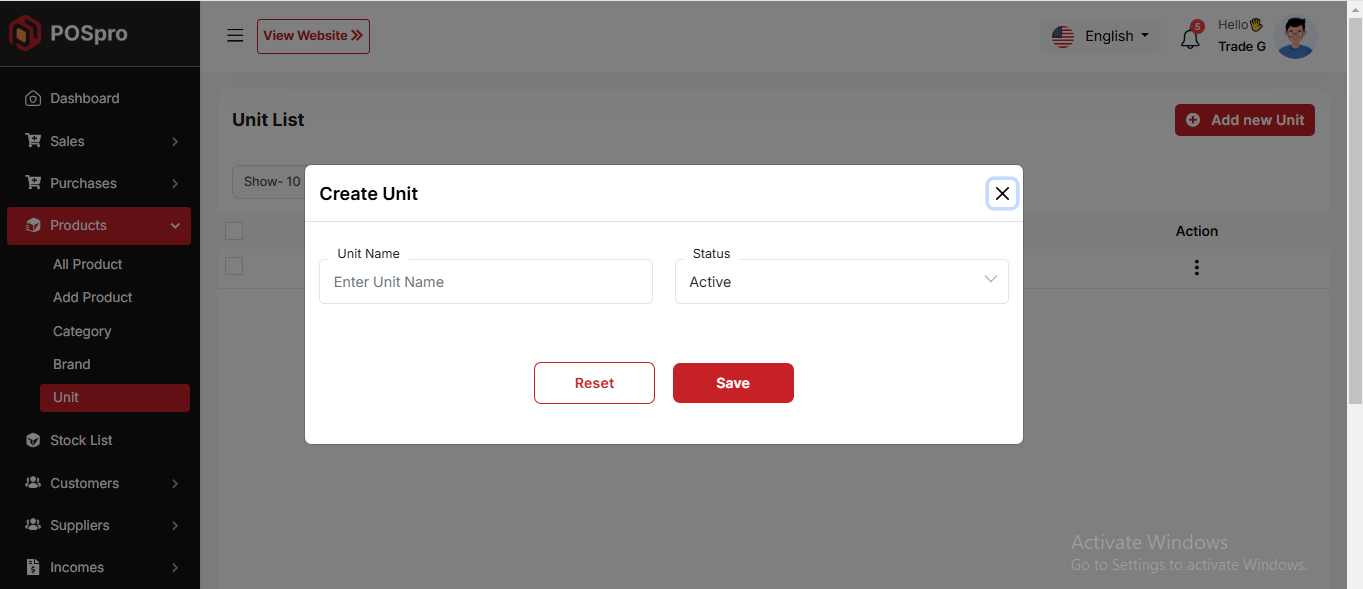
Create Unit
You can create a Category by filling in the required fields.
Model List
You can view the model list with available filtering options. Furthermore, you have the ability to edit, delete, or use the multi-delete function.
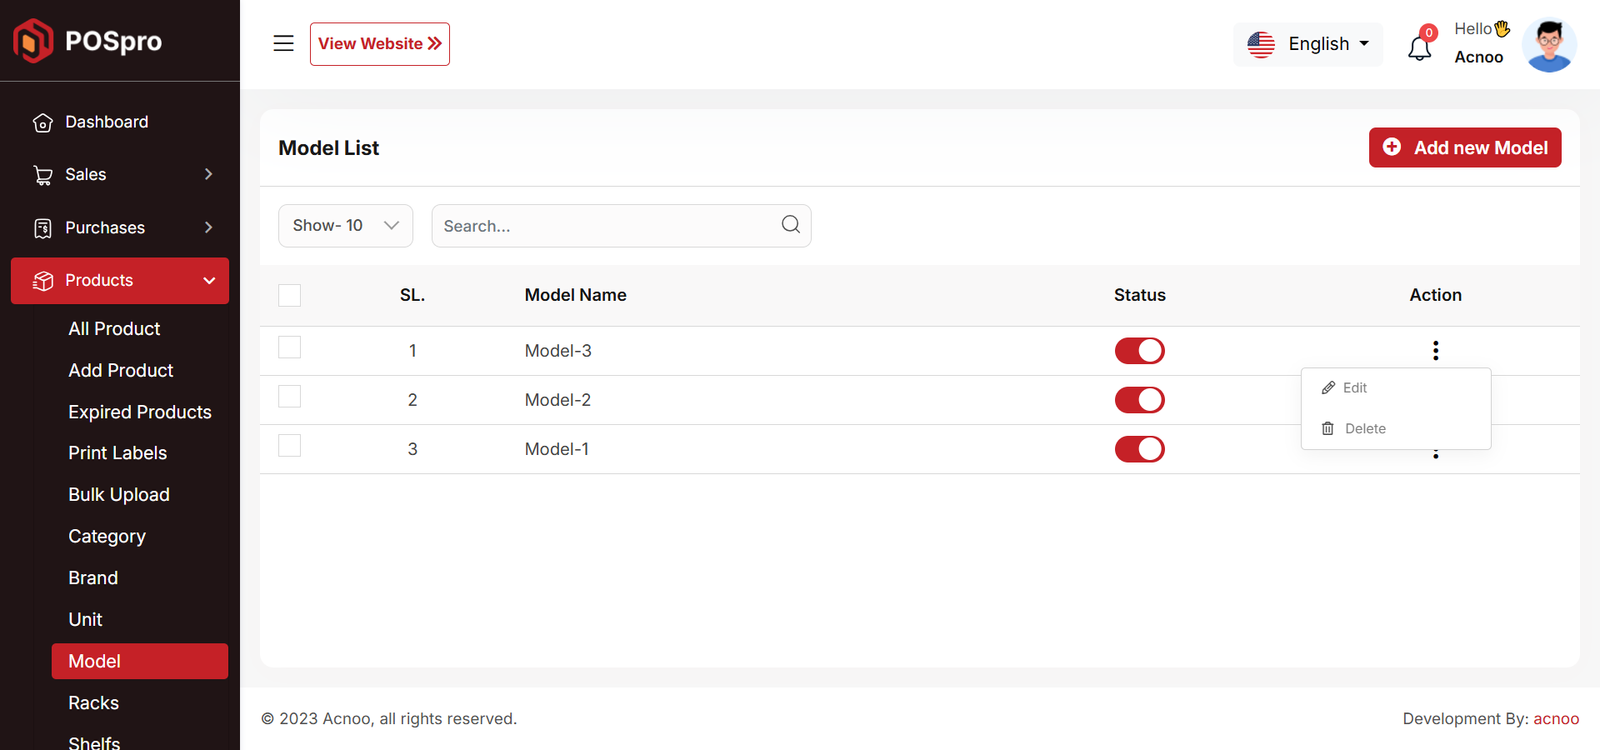
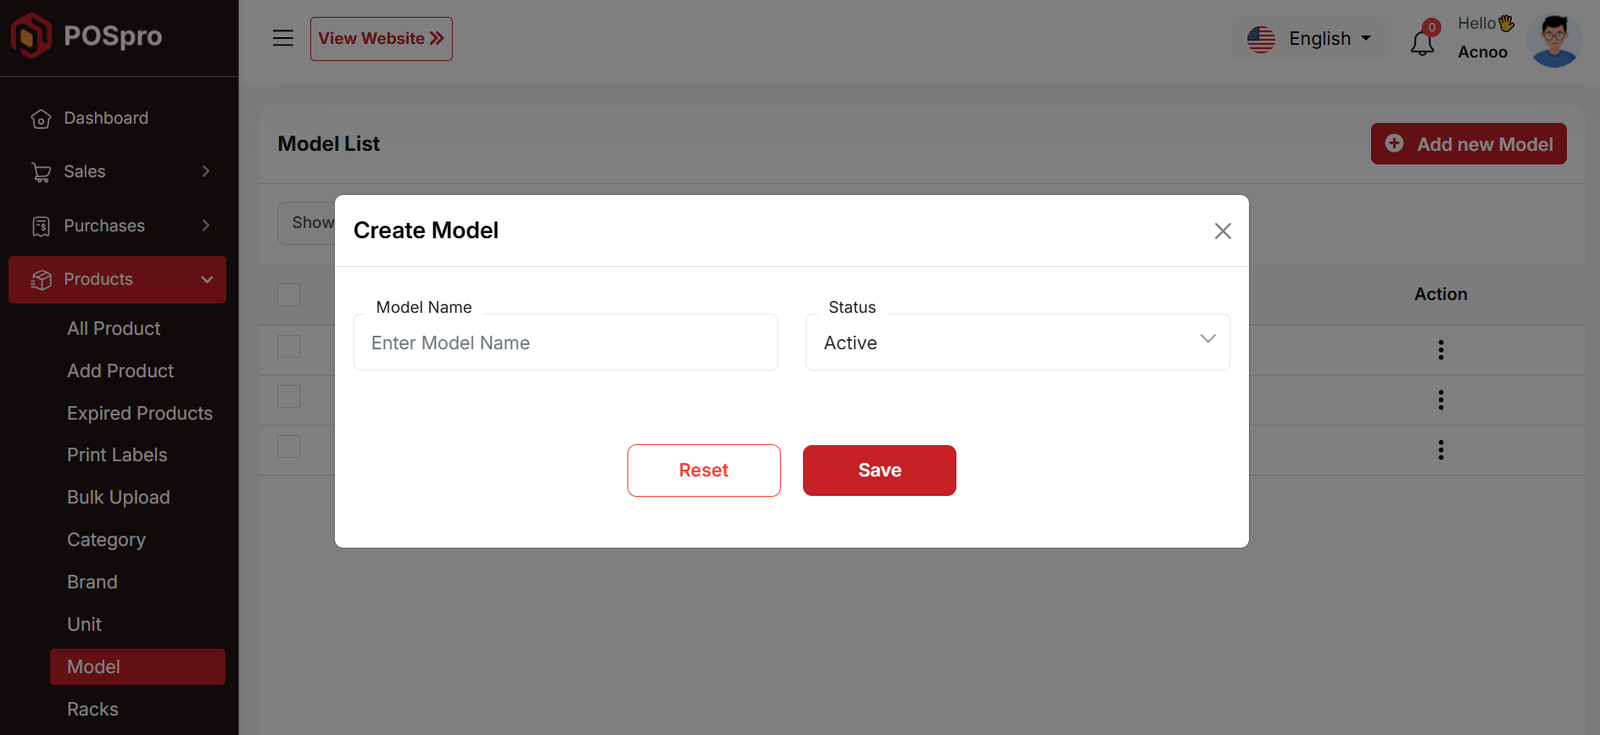
Create Model
You can create a model by filling in the required fields.
Rack List
You can view the rack list with available filtering options. Furthermore, you have the ability to edit, delete, or use the multi-delete function.
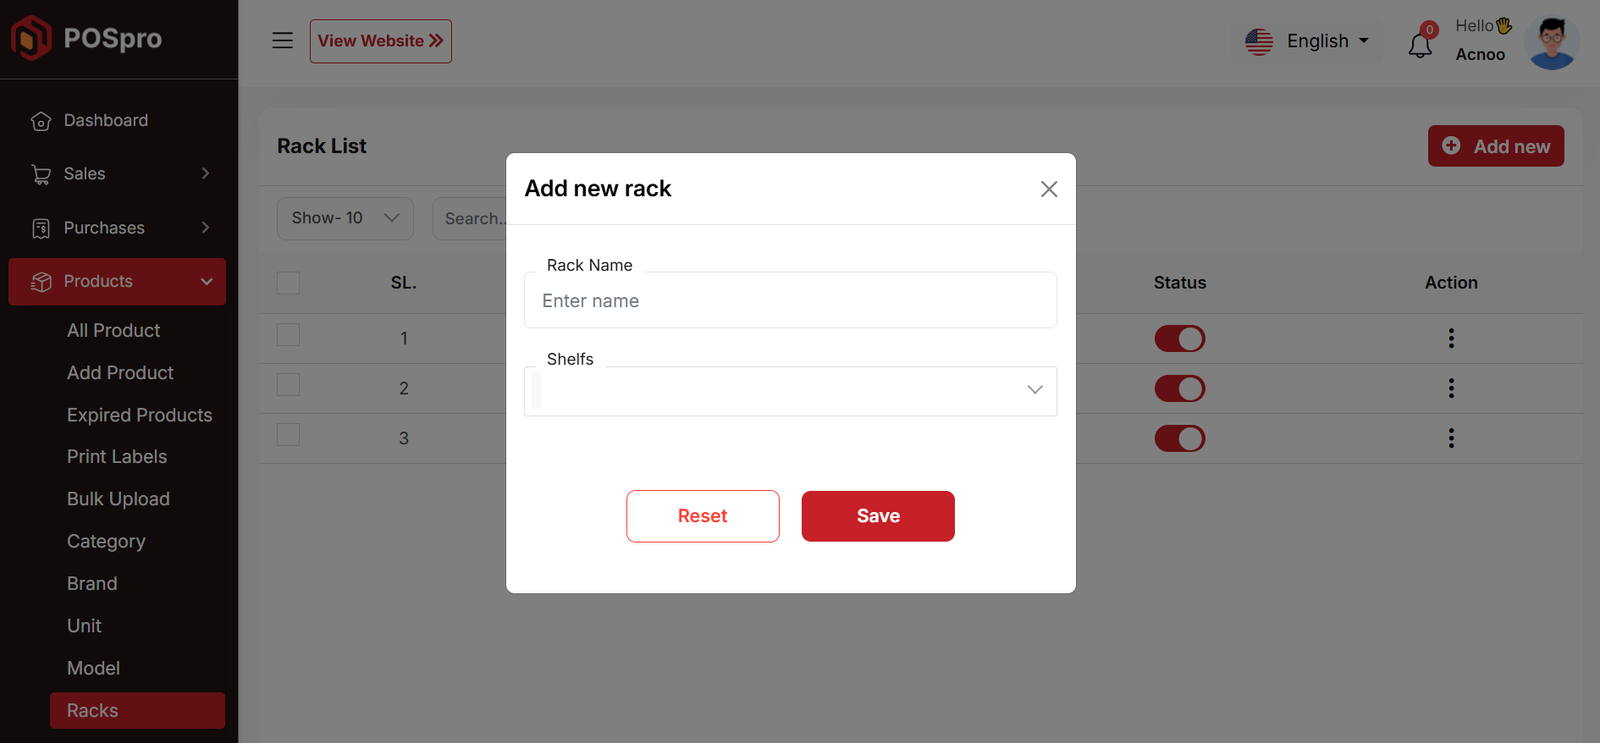
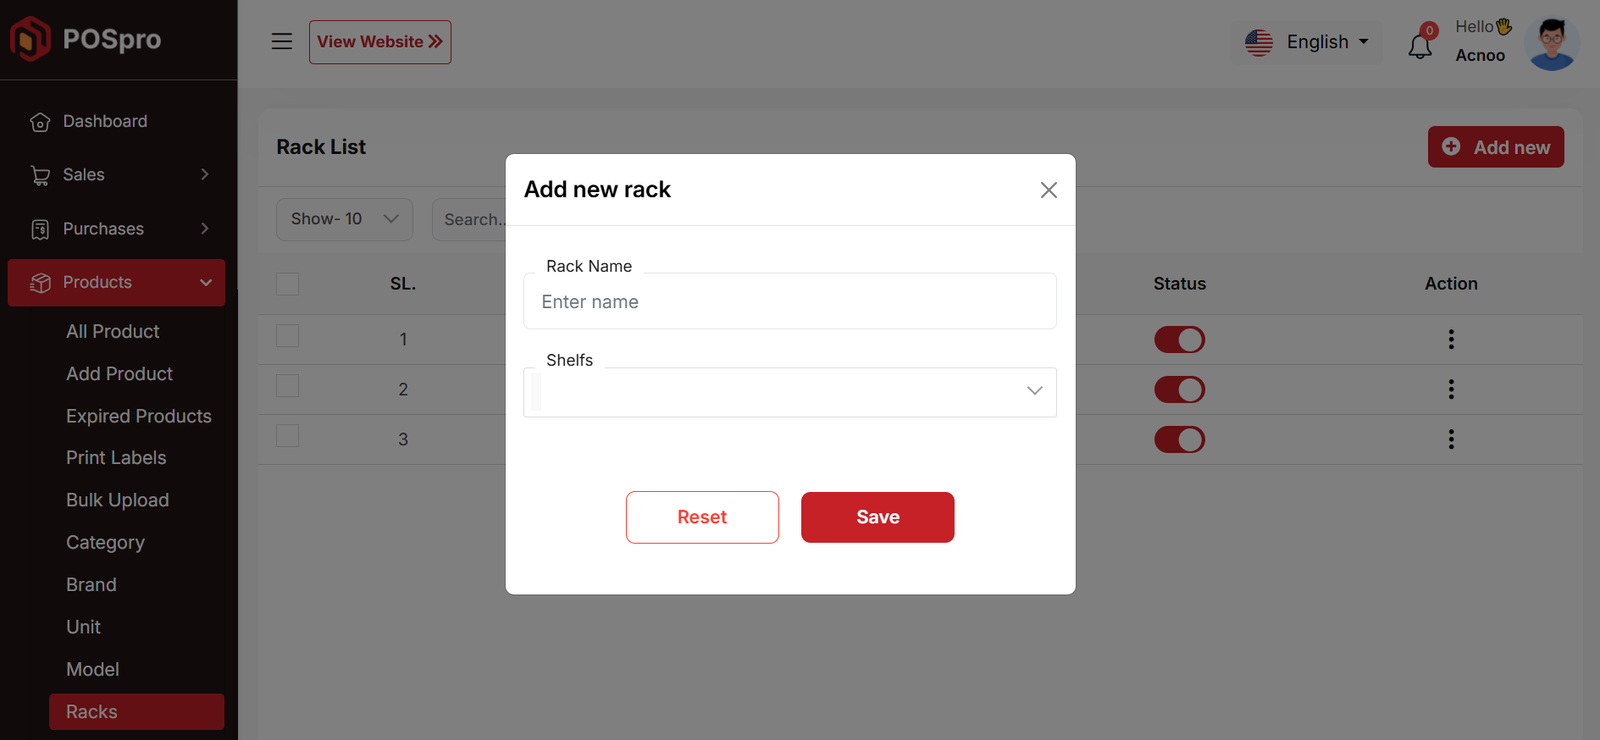
Create Rack
You can create a rack by filling in the required fields.
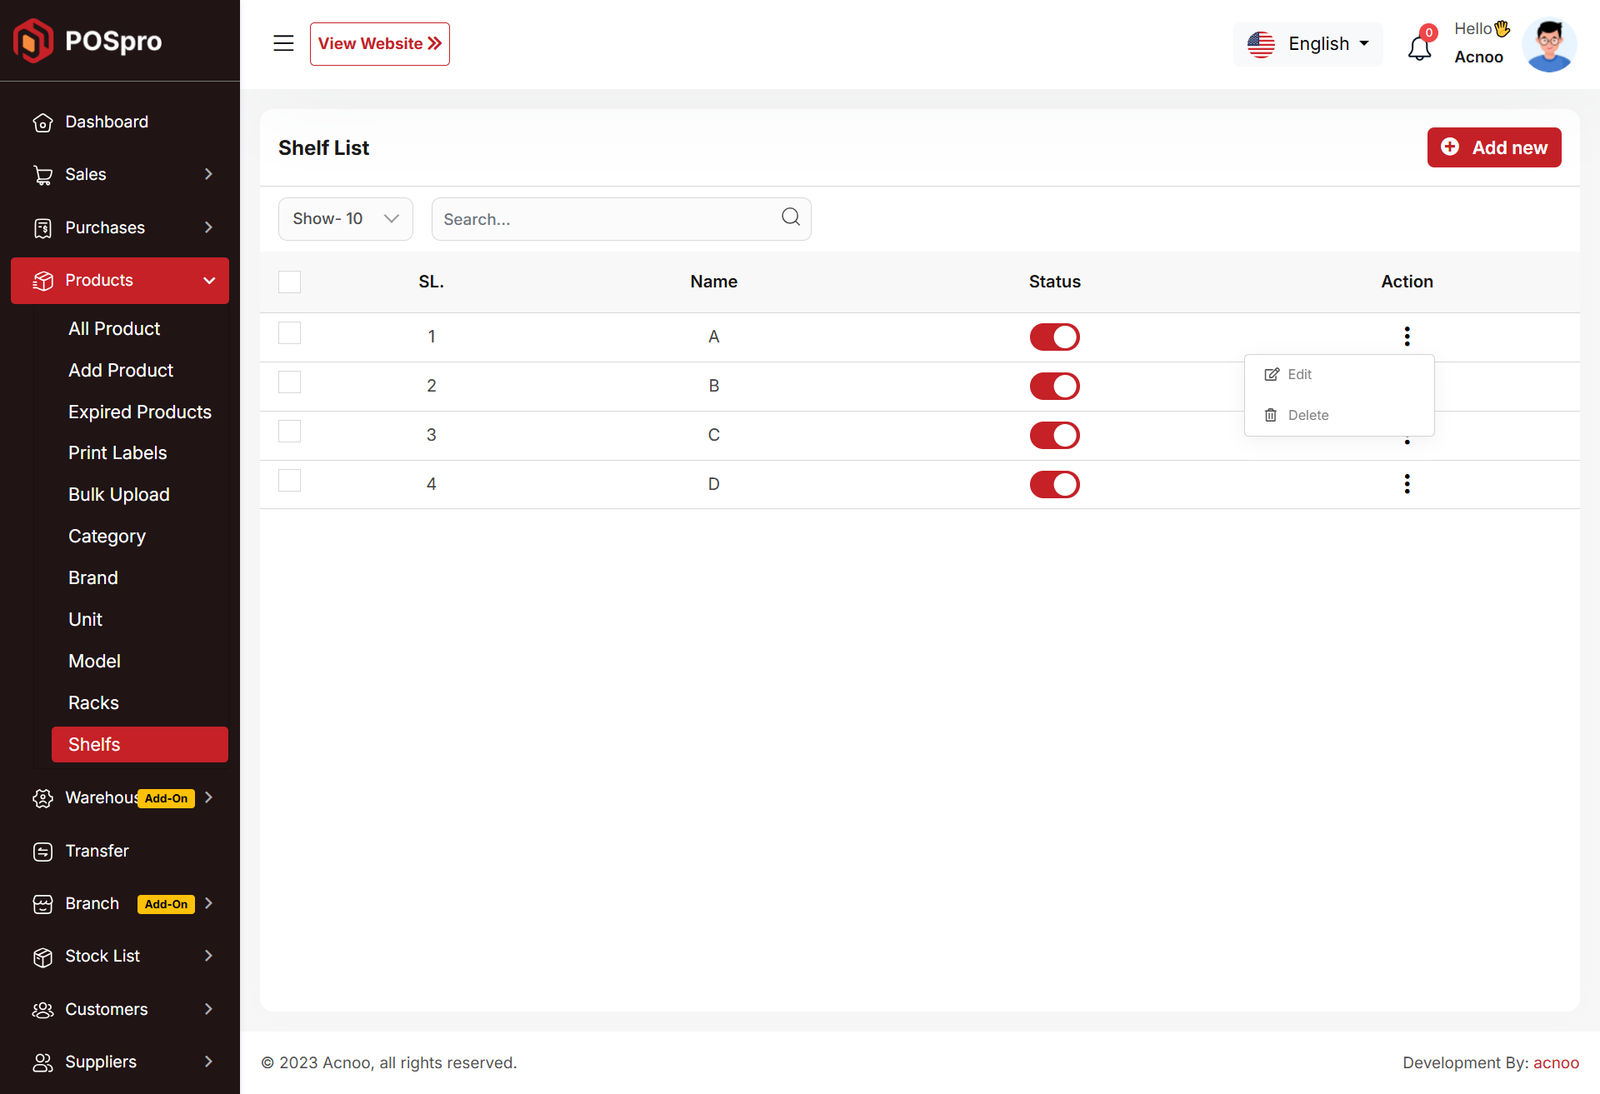
Shelf List
You can view the shelf list with available filtering options. Furthermore, you have the ability to edit, delete, or use the multi-delete function.
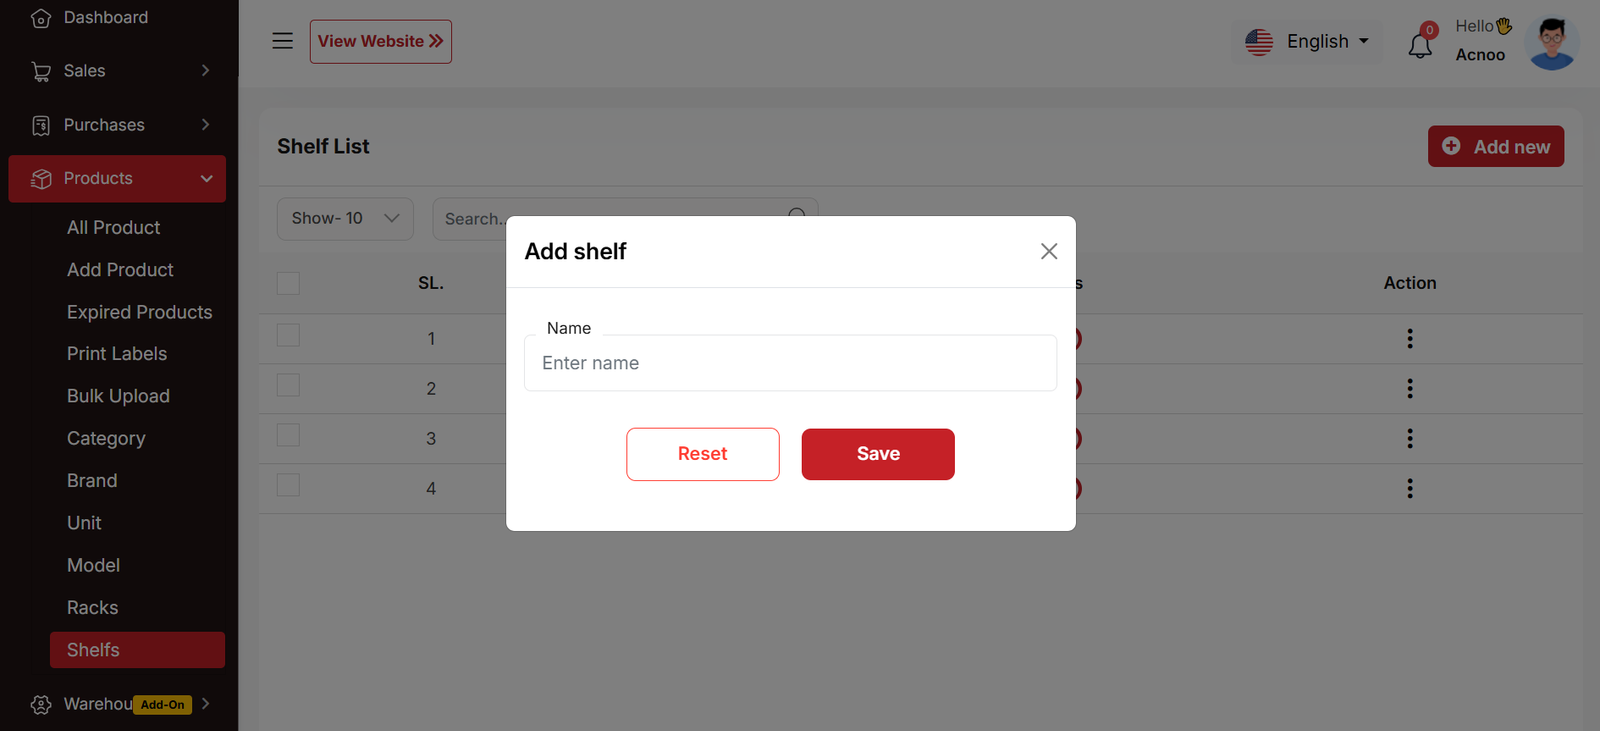
Create Shelf
You can create a shelf by filling in the required fields.
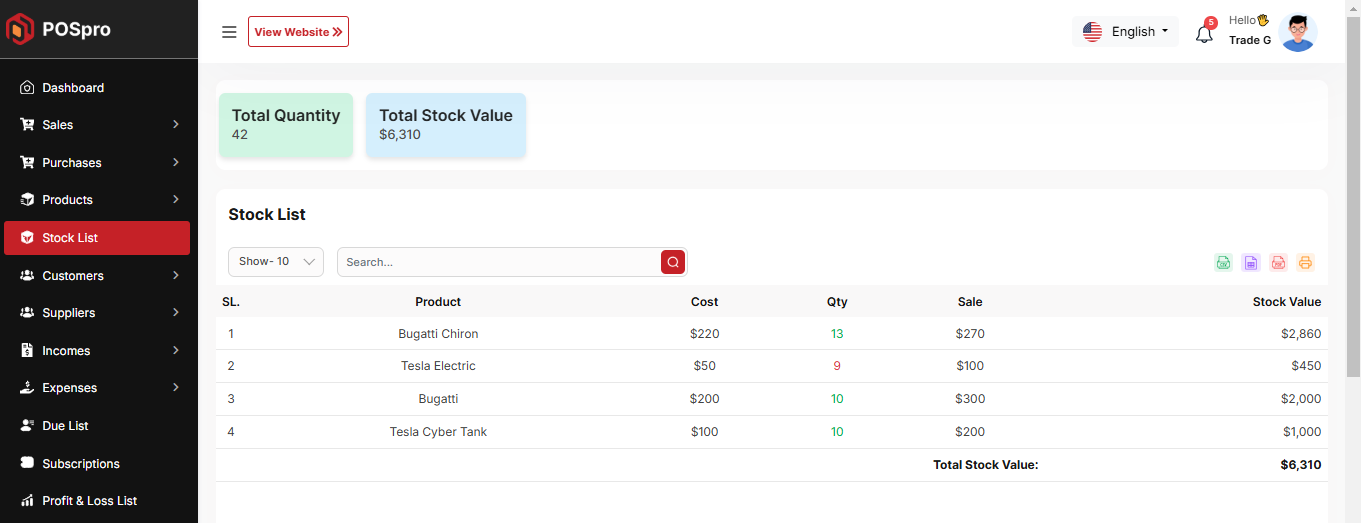
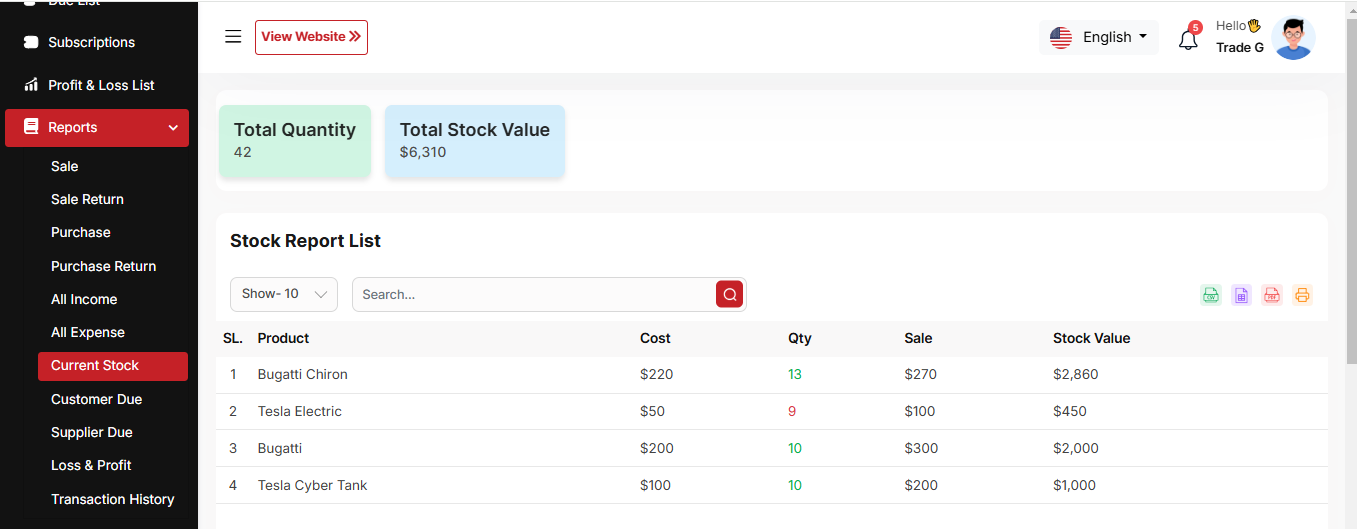
Stock List
In this section, you can view the product list with available filtering options. The list can be exported as Excel or CSV, and there is also a print option. At the top, you can see the total quantity and stock value. You can also view low stock and expired products from the same dropdown, and their respective lists will be displayed.
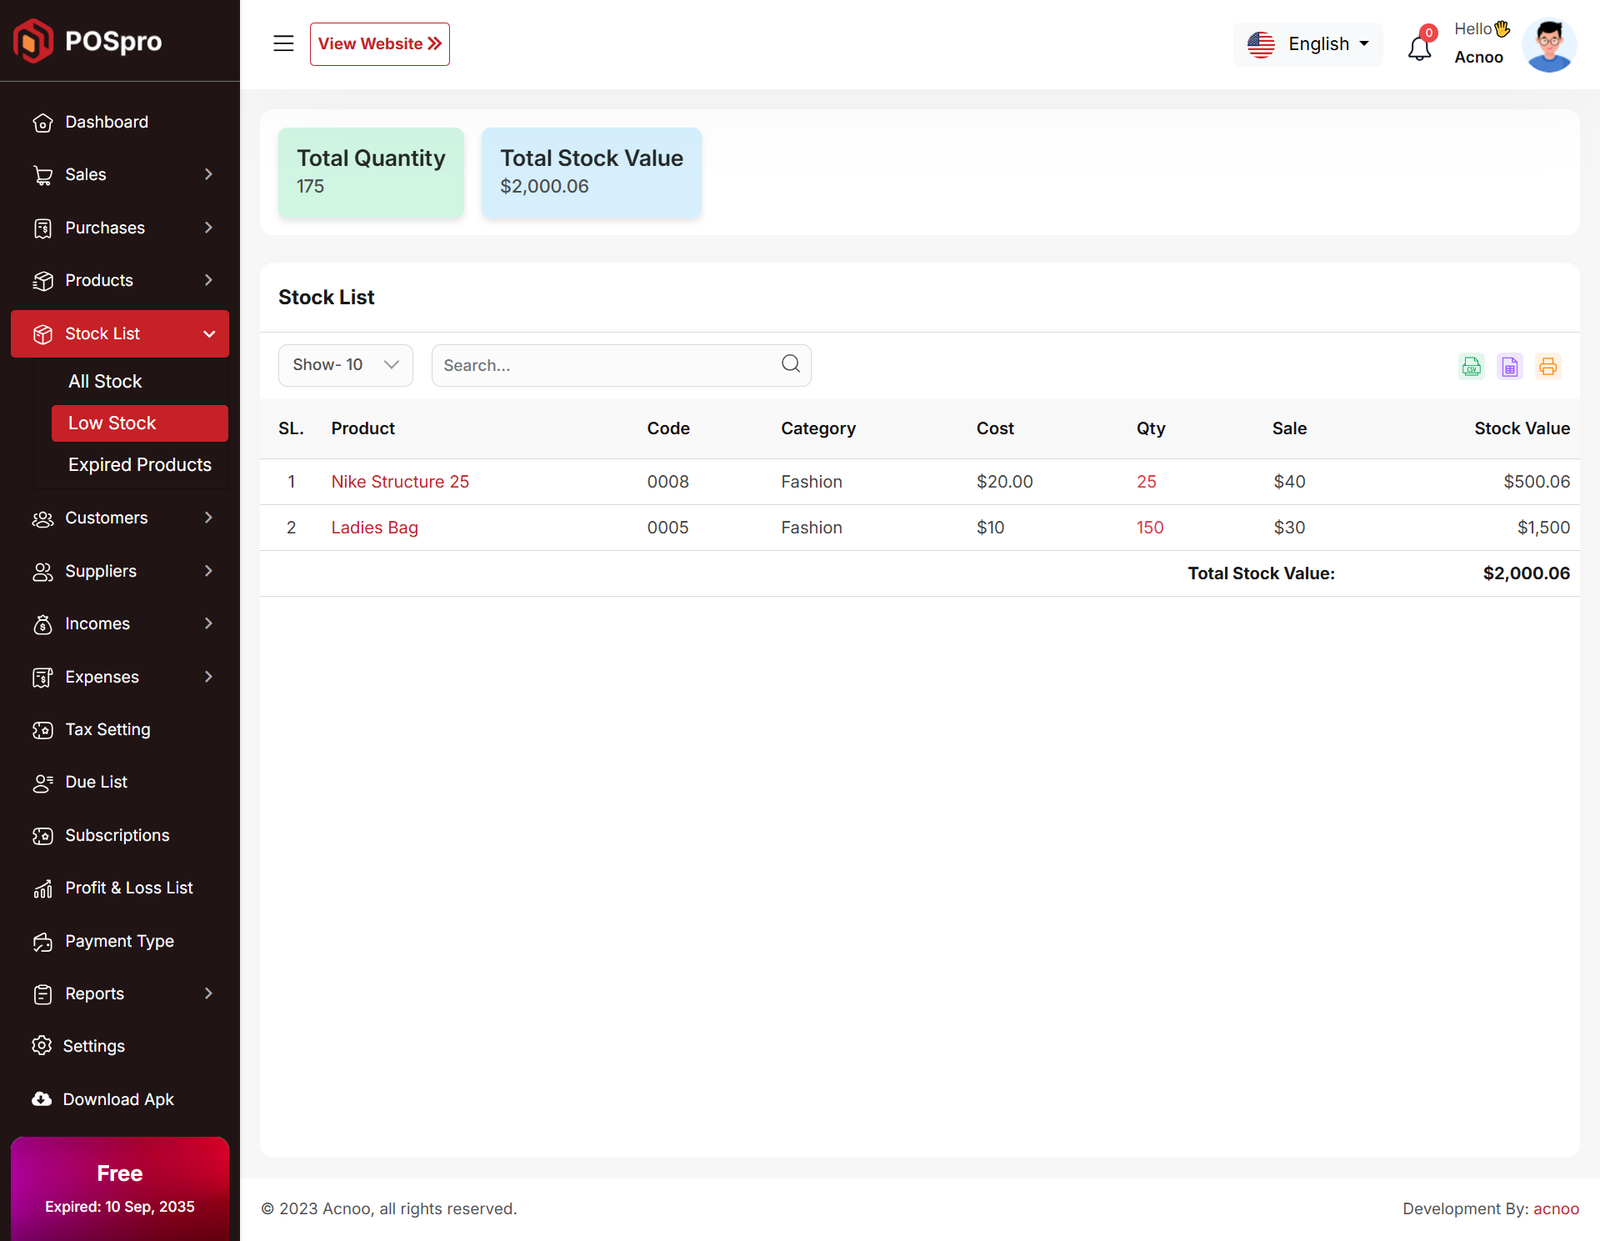
Low Stock List
This section displays a list of products that are low in stock. You can use the available filtering options to refine the list. The data can be exported as Excel or CSV, and a print option is also available. At the top, the total quantity and stock value are displayed for quick reference.
Expired Product List
This section displays a list of expired products. You can use the available filtering options to refine the list. The data can be exported as Excel or CSV, and a print option is also available for convenience.

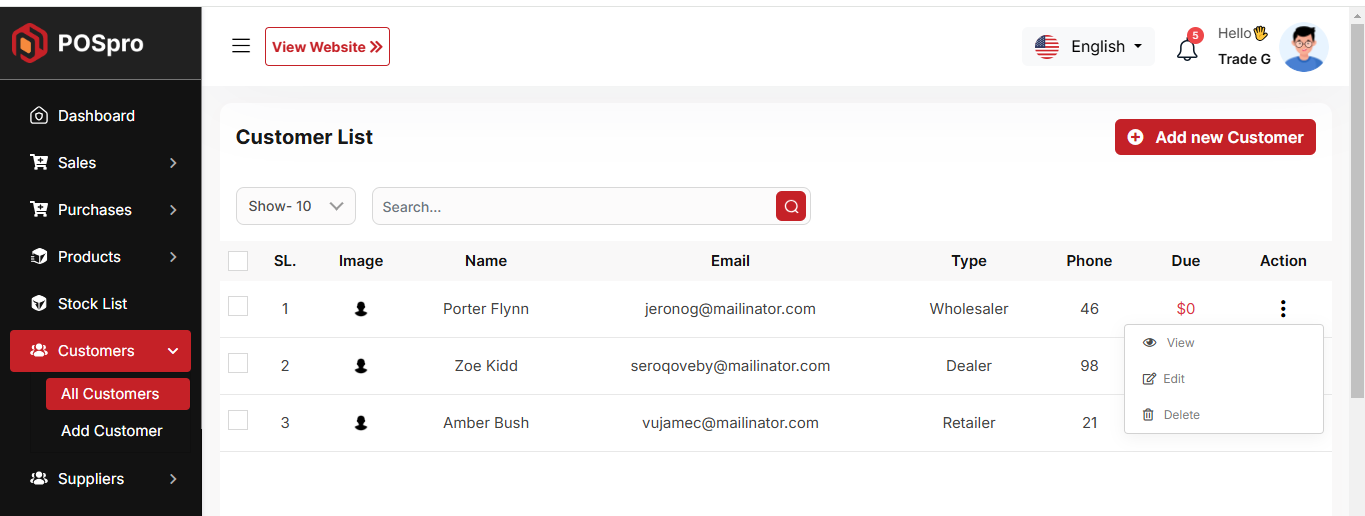
Customer List
Here, you can view the customer list with a search filter. Additionally, you have the option to view, edit, delete, or use the multi-delete function.
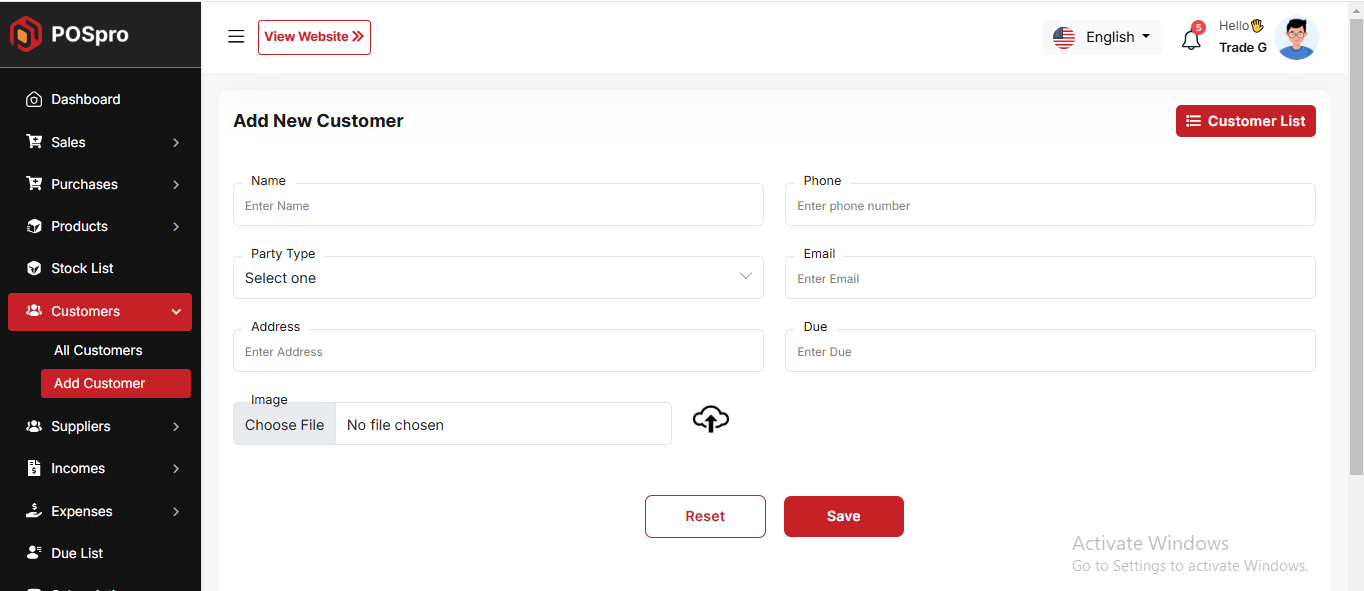
Create Customer
You can create a customer by filling out the required fields. Additionally, you can add an initial due amount to be stored.
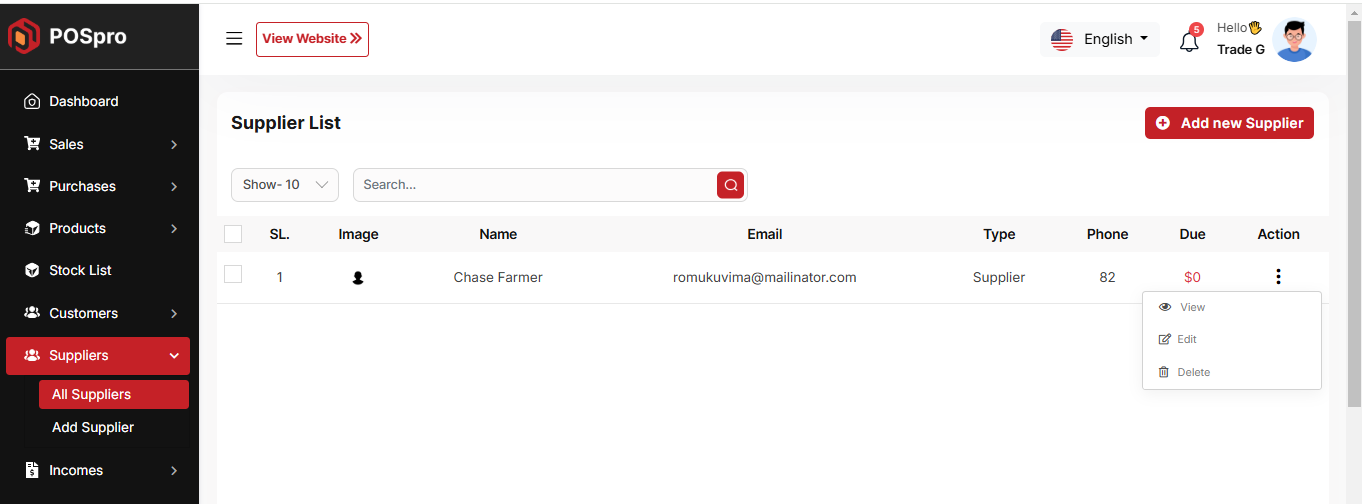
Supplier List
Here, you can view the Supplier list with a search filter. Additionally, you have the option to view, edit, delete, or use the multi-delete function.
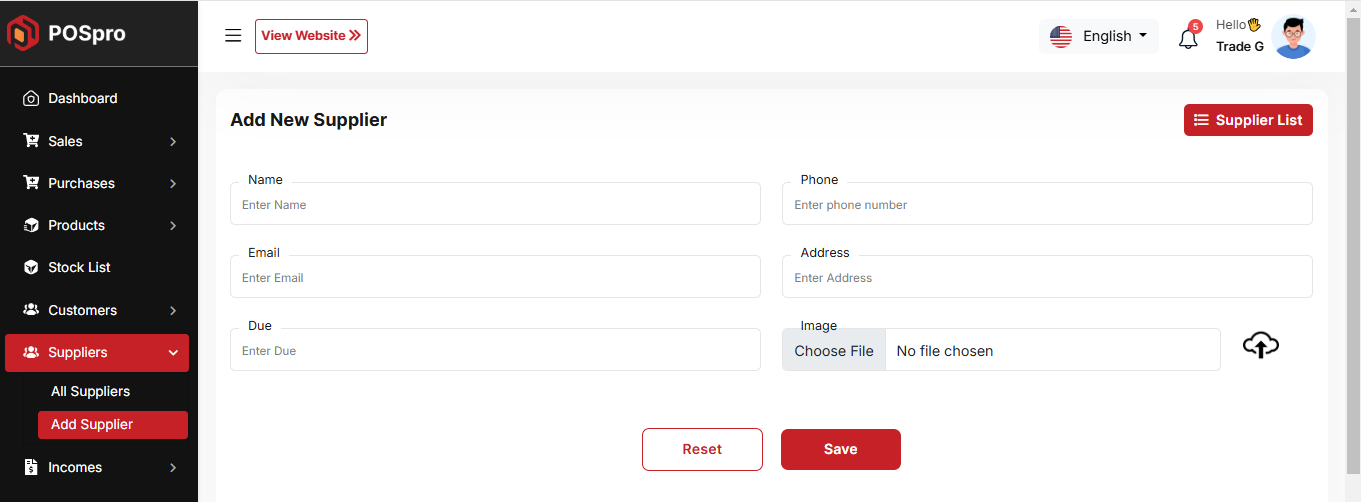
Create Supplier
You can create a Supplier by filling out the required fields. Additionally, you can add an initial due amount to be stored.
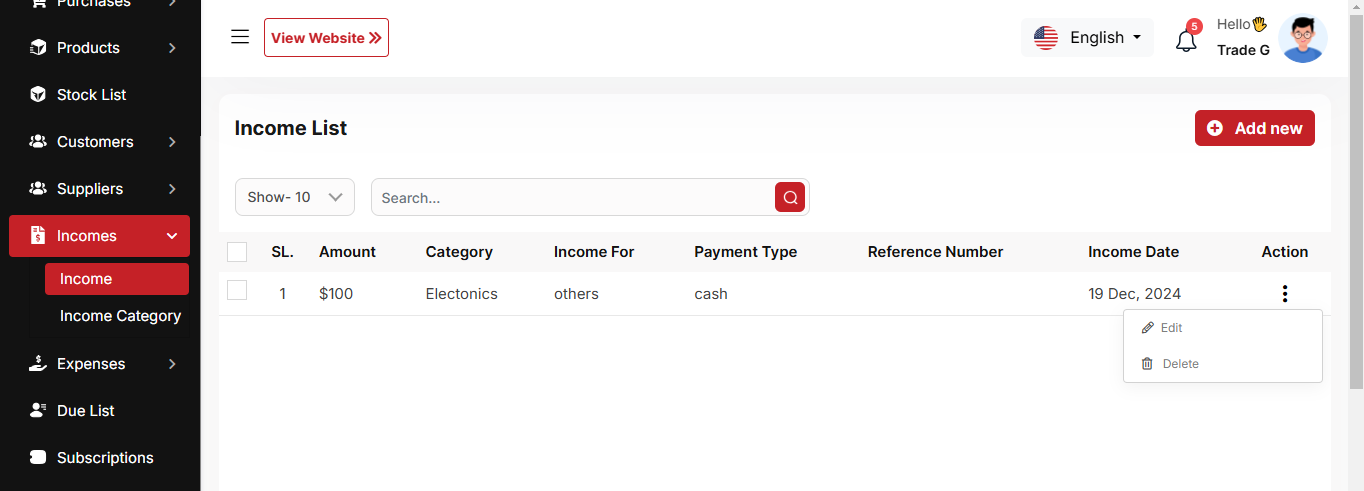
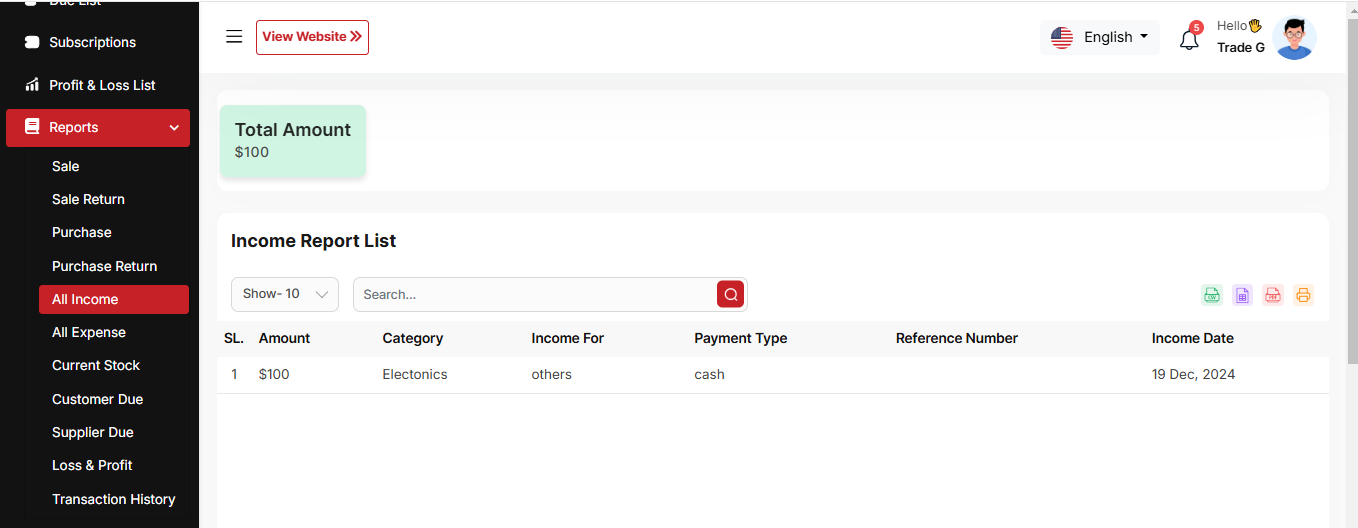
Income List
Here, you can view the Income list with a search filter. Additionally, you have the option to edit, delete, or use the multi-delete function.
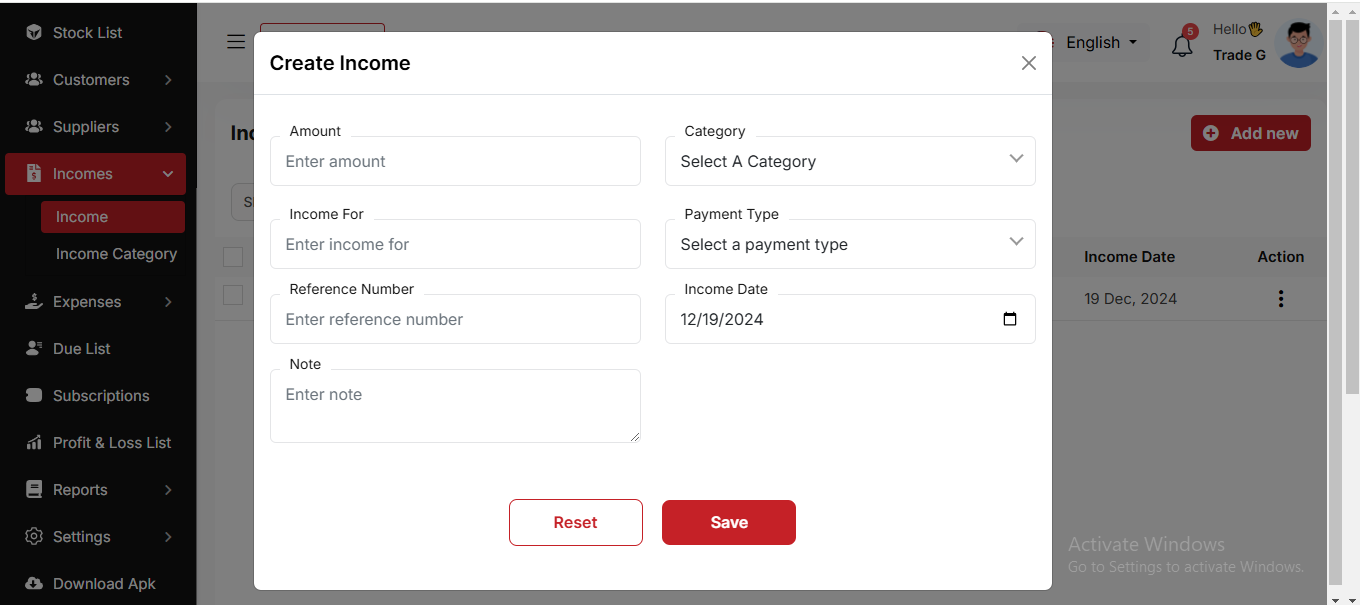
Create Income
You can create an income by filling out the required fields.Here You can also select category and payment type.
Income Category
Here, you can view the Income Category with a search filter. Additionally, you have the option to edit, delete, or use the multi-delete function. Just put category name and description for create Income Category

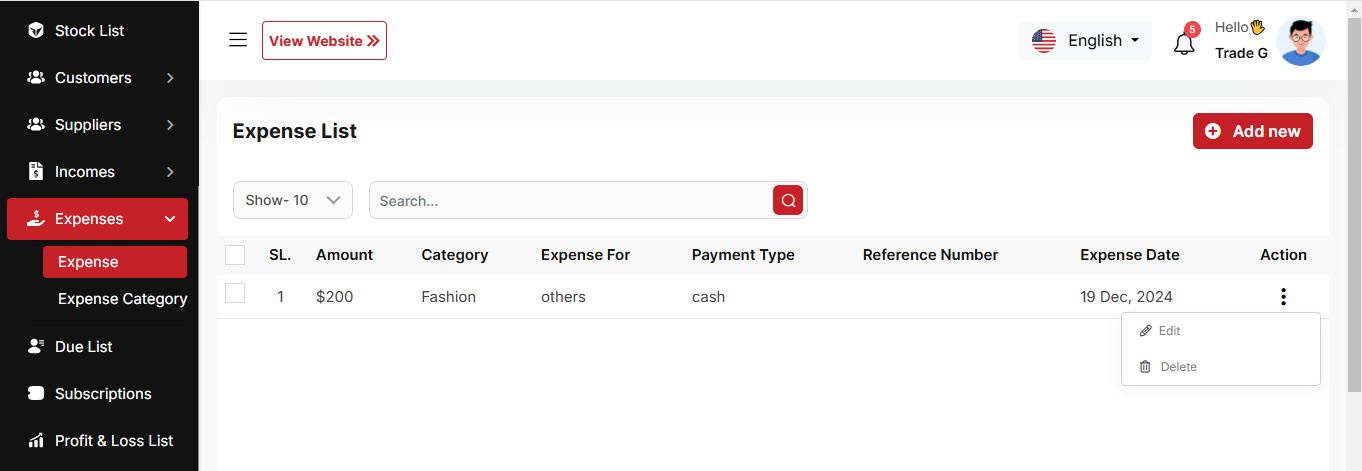
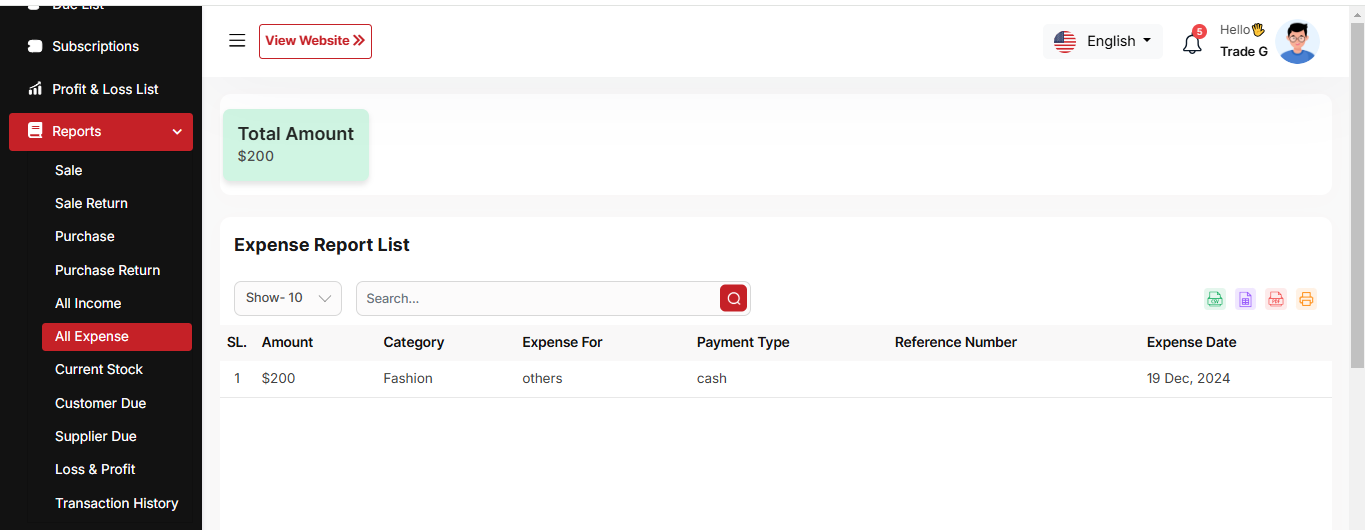
Expense List
Here, you can view the Expense list with a search filter. Additionally, you have the option to edit, delete, or use the multi-delete function.
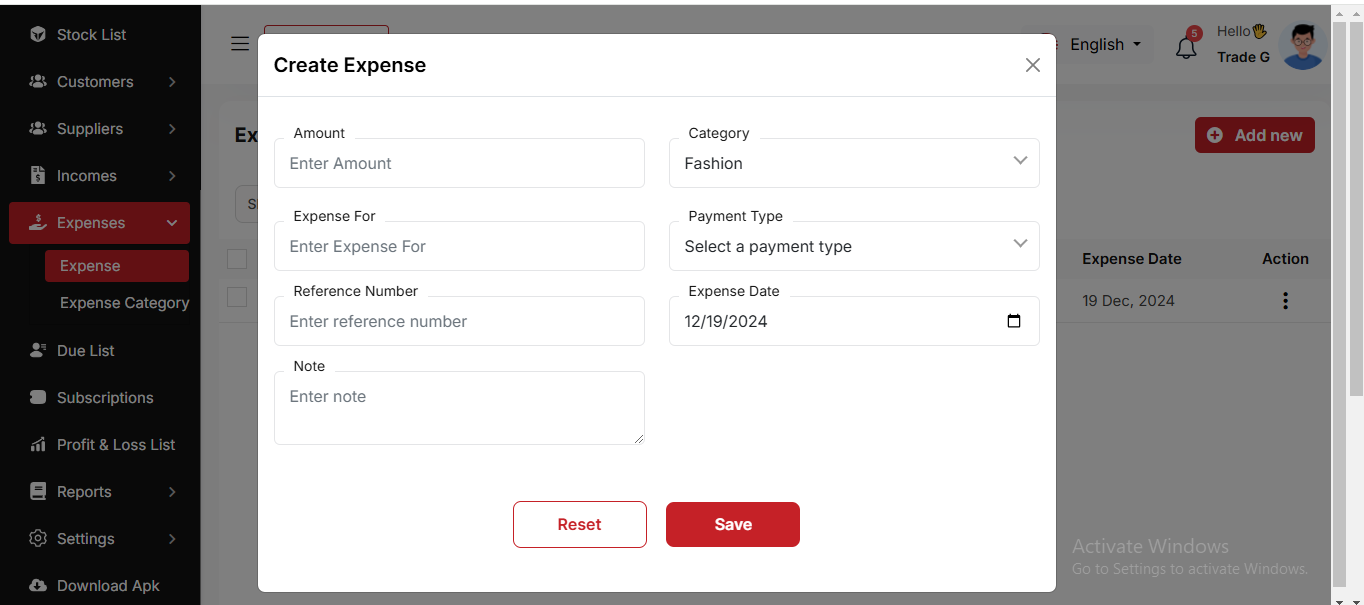
Create Expense
You can create an expense by filling out the required fields.Here You can also select category and payment type.
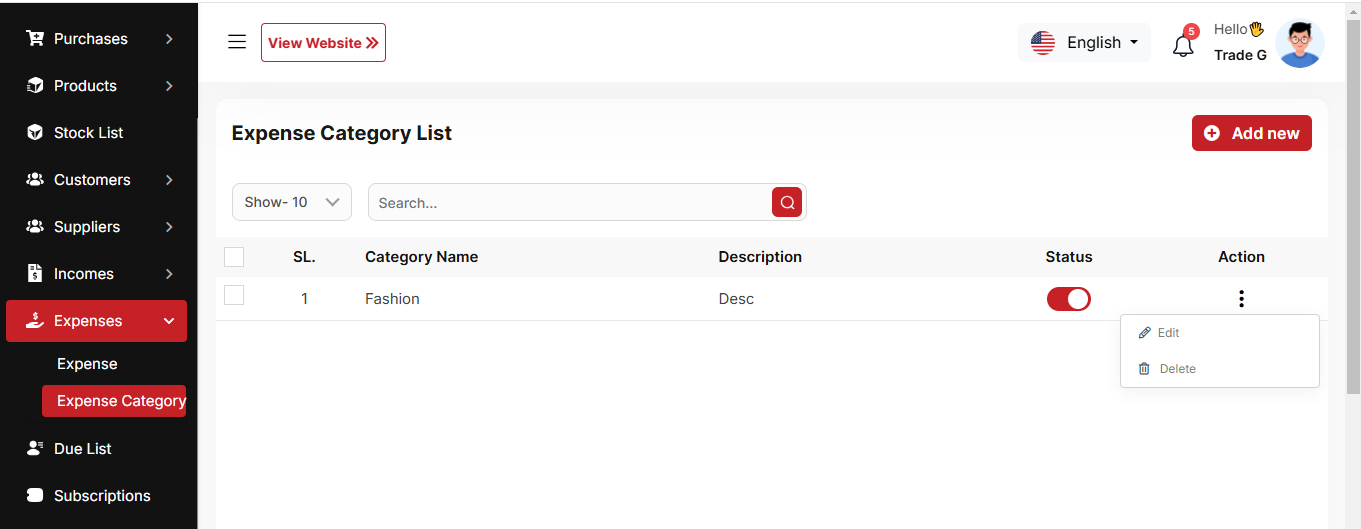
Expense Category
Here, you can view the Expense Category with a search filter. Additionally, you have the option to edit, delete, or use the multi-delete function. Just put category name and description for create Expense Category
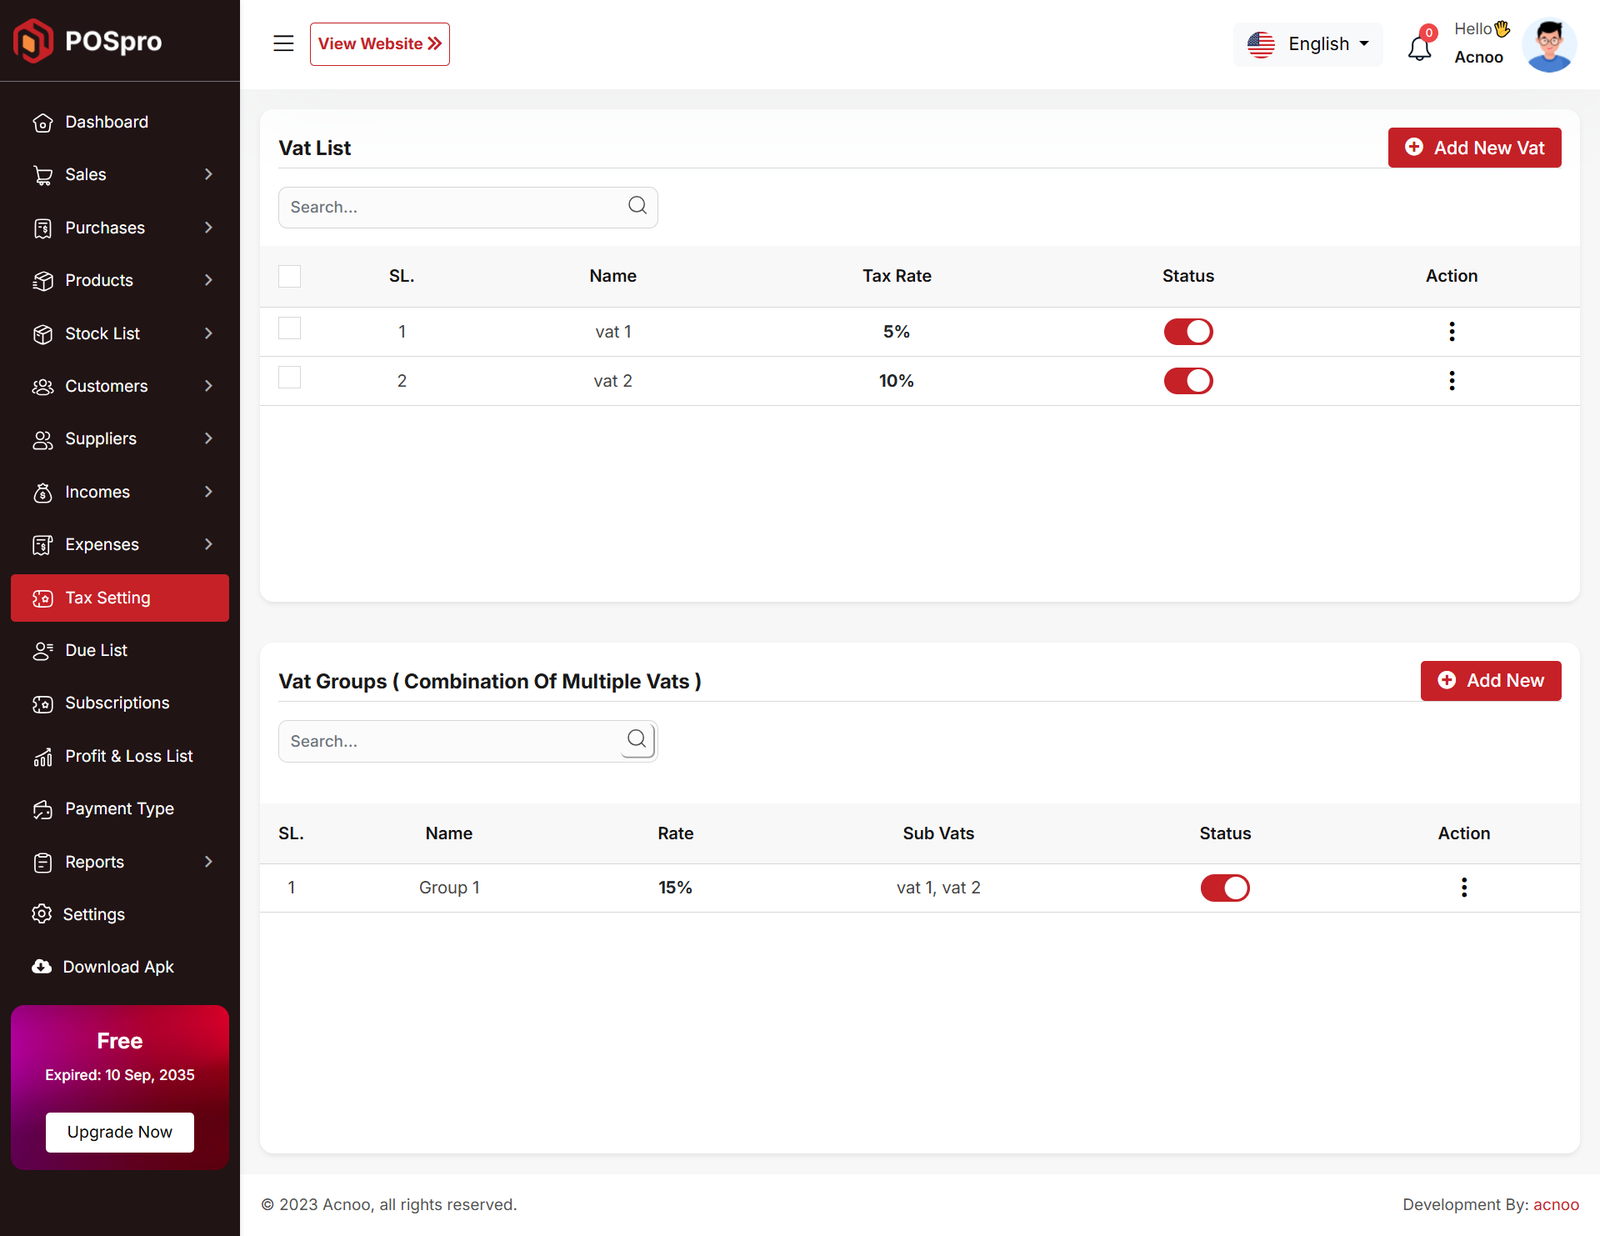
Tax Setting
Here, you can view VAT settings and VAT groups. Two tables are available: one for the list of VAT rates and another for the list of VAT groups. You can apply filtering separately in both tables.
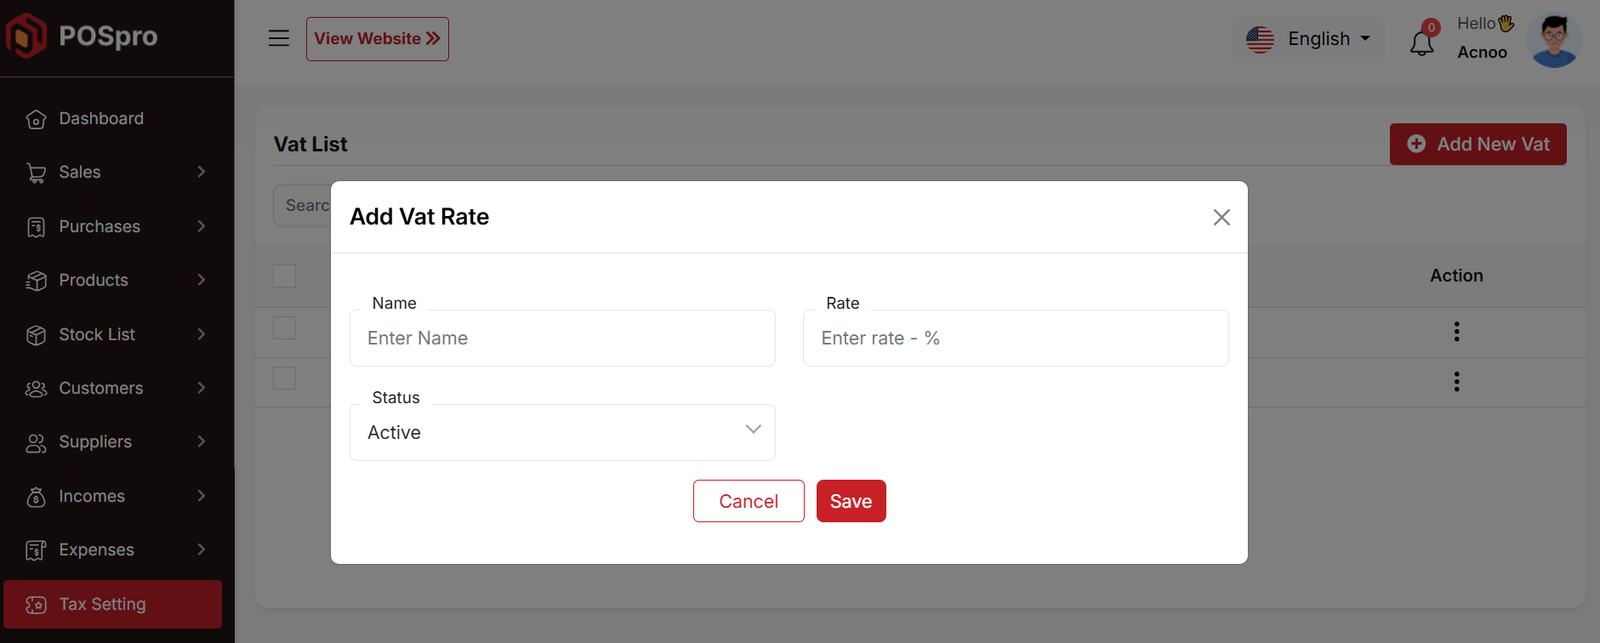
Create Vat
By clicking the Add New VAT button, a modal will appear. Fill in the required input fields and then click the Save button to add a new VAT entry.
Create Vat Group
By clicking the Add New button, you will be redirected to the VAT Group creation page. Fill in the required input fields and then click the Save button to add a new VAT group.

Due List
Here, you can view the Due list with a search filter. Additionally, you can view invoices and collect the due amounts from this page.
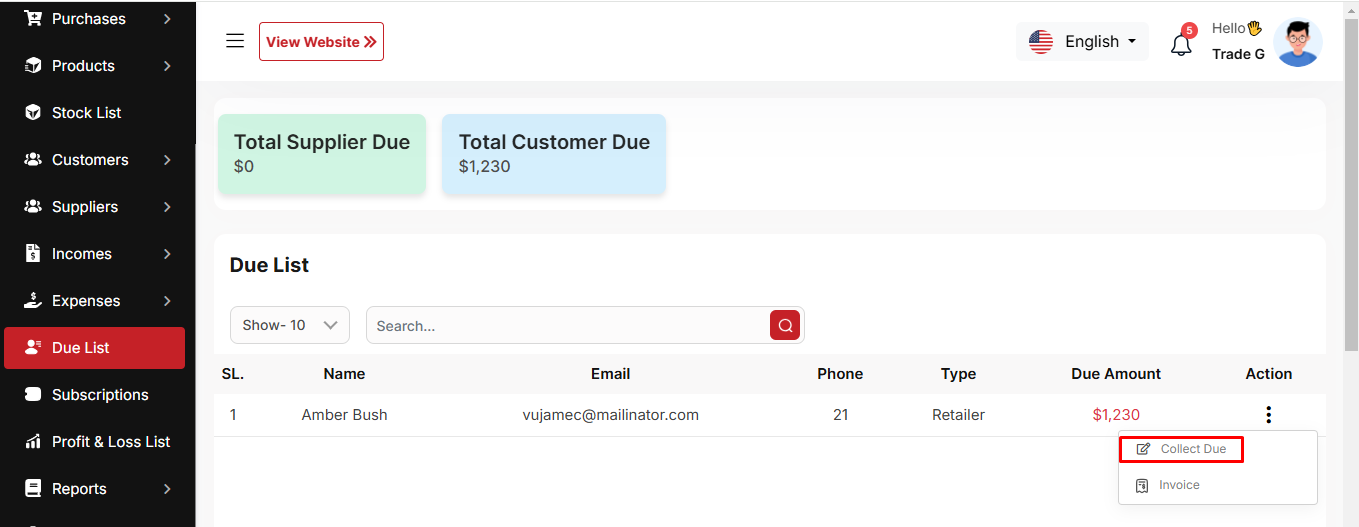
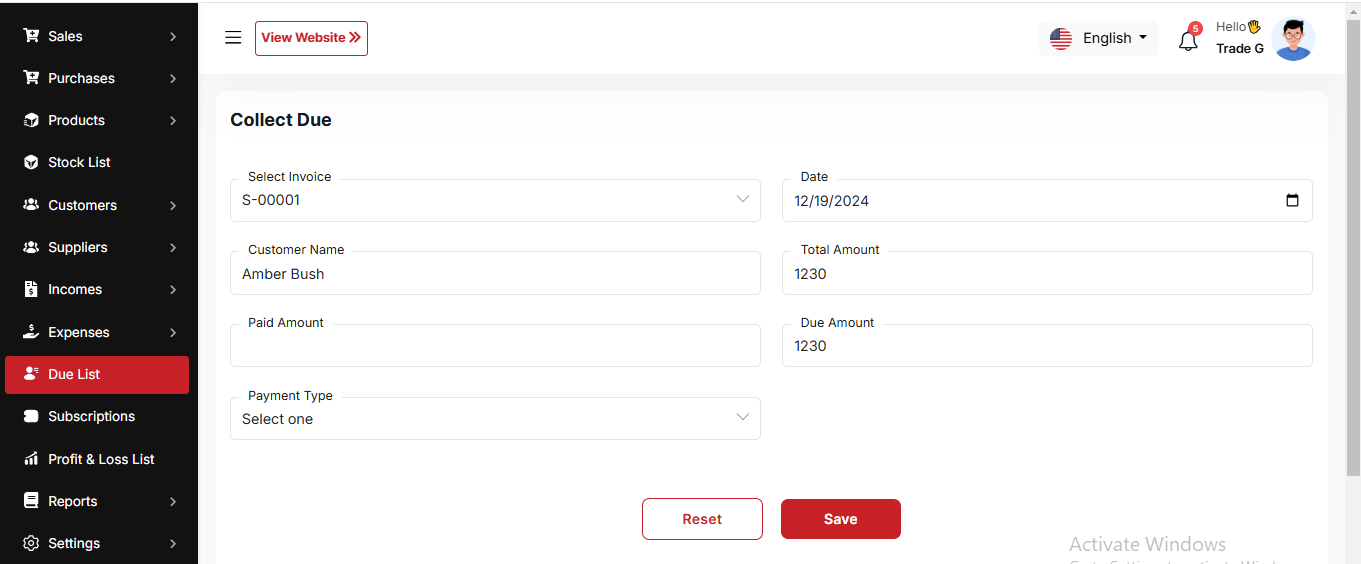
Collect Due
When you click "Collect Invoice," this page will appear. Here, you can collect the due amount either by invoice or without an invoice if there is any initial due.
Subscriptions
Here, you can view your current plan status along with all other available plans. You can also upgrade your plan from this page.

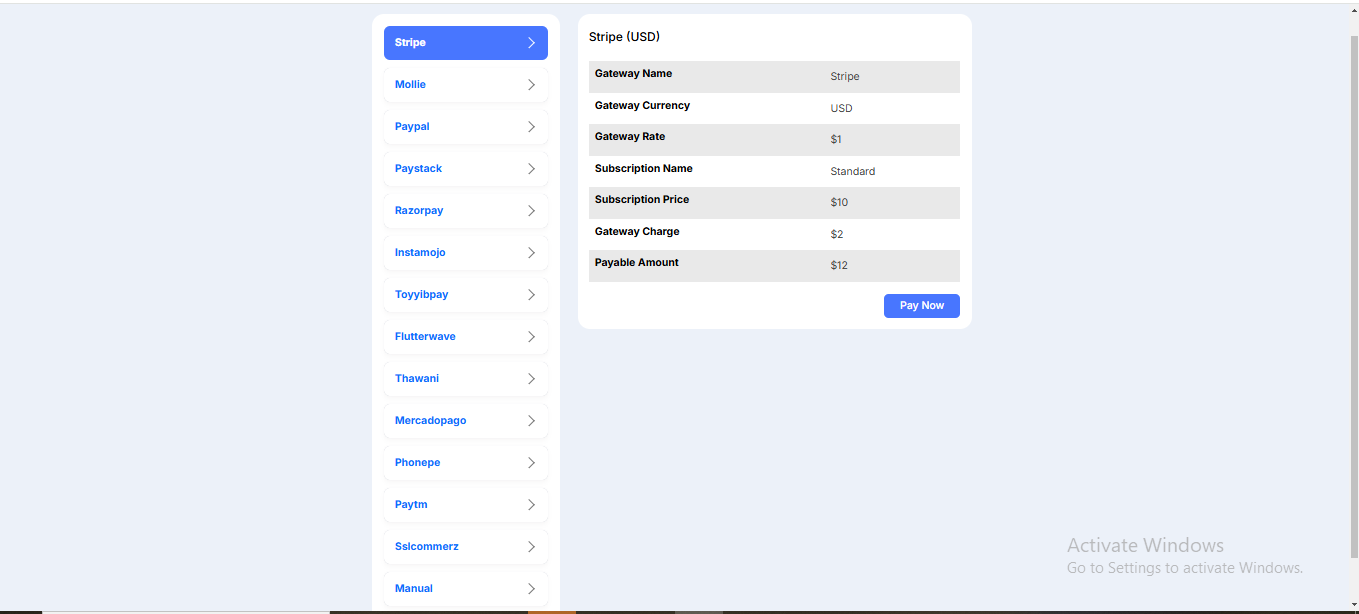
Payment
After choosing your desired plan, just click to view the available payment options. Once you complete your payment, you can upgrade your plan.
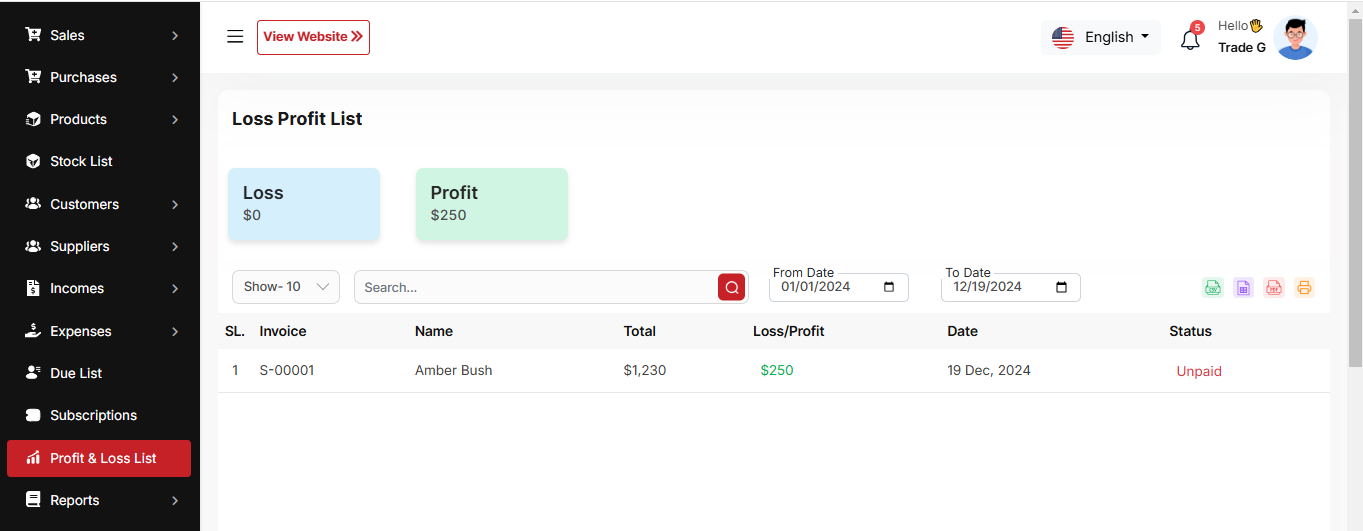
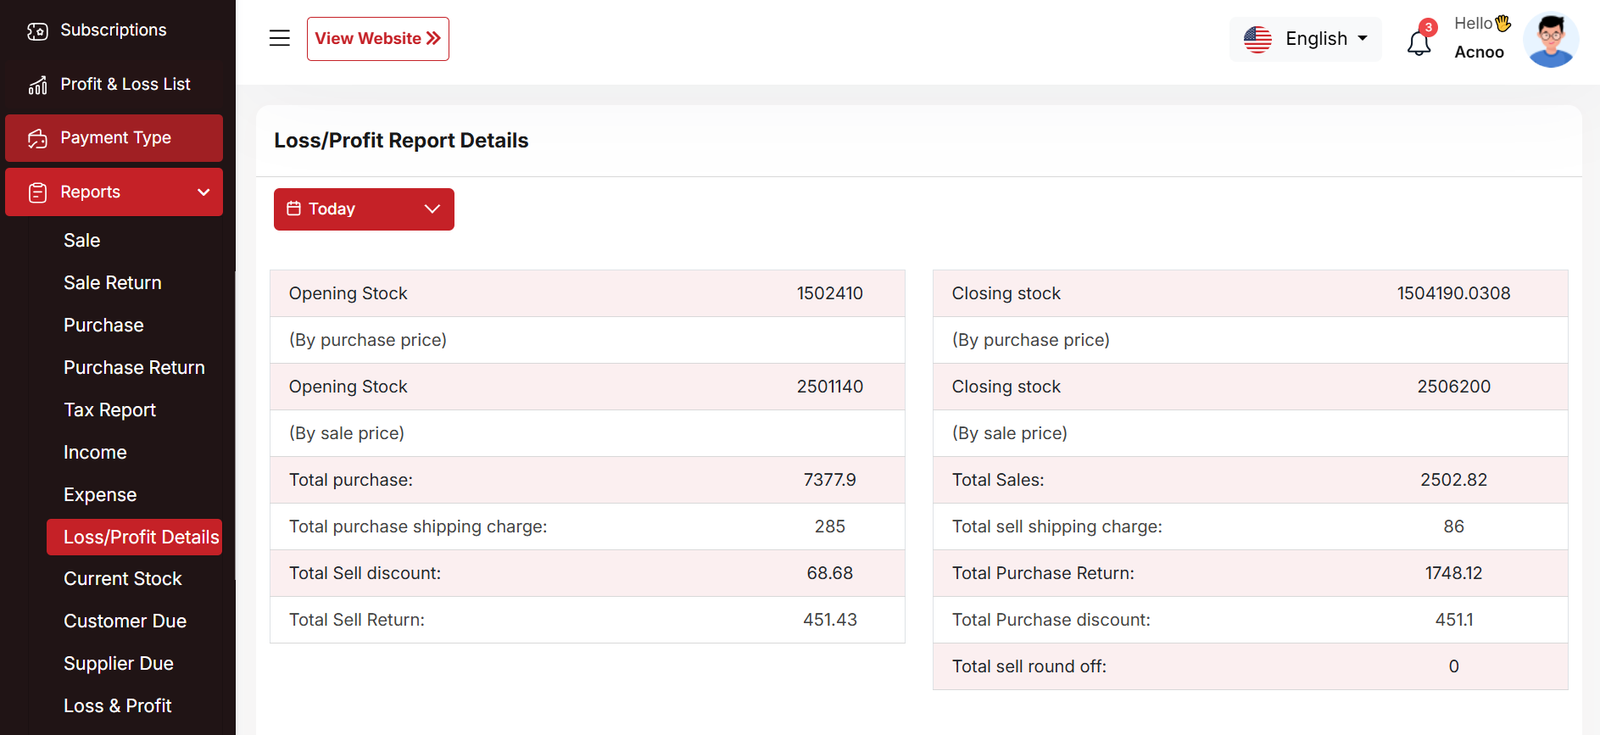
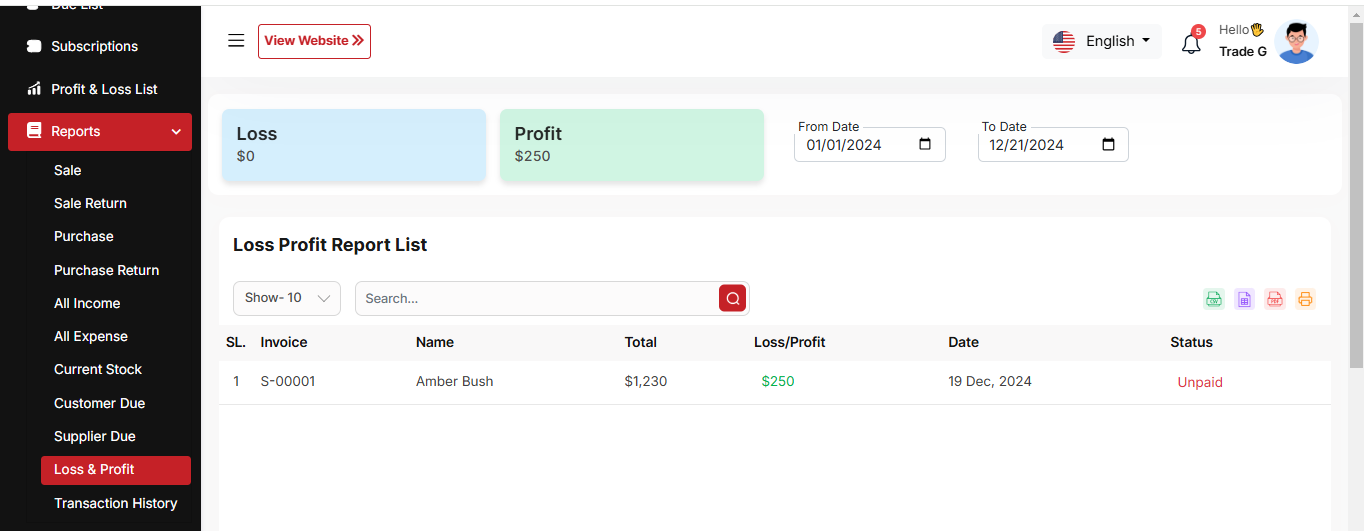
Loss Profit List
Here, you can view the profit and loss data from sales with search and date filters. You can also export the list as CSV, Excel, and print it. Additionally, the total loss and profit are displayed in the top cart.
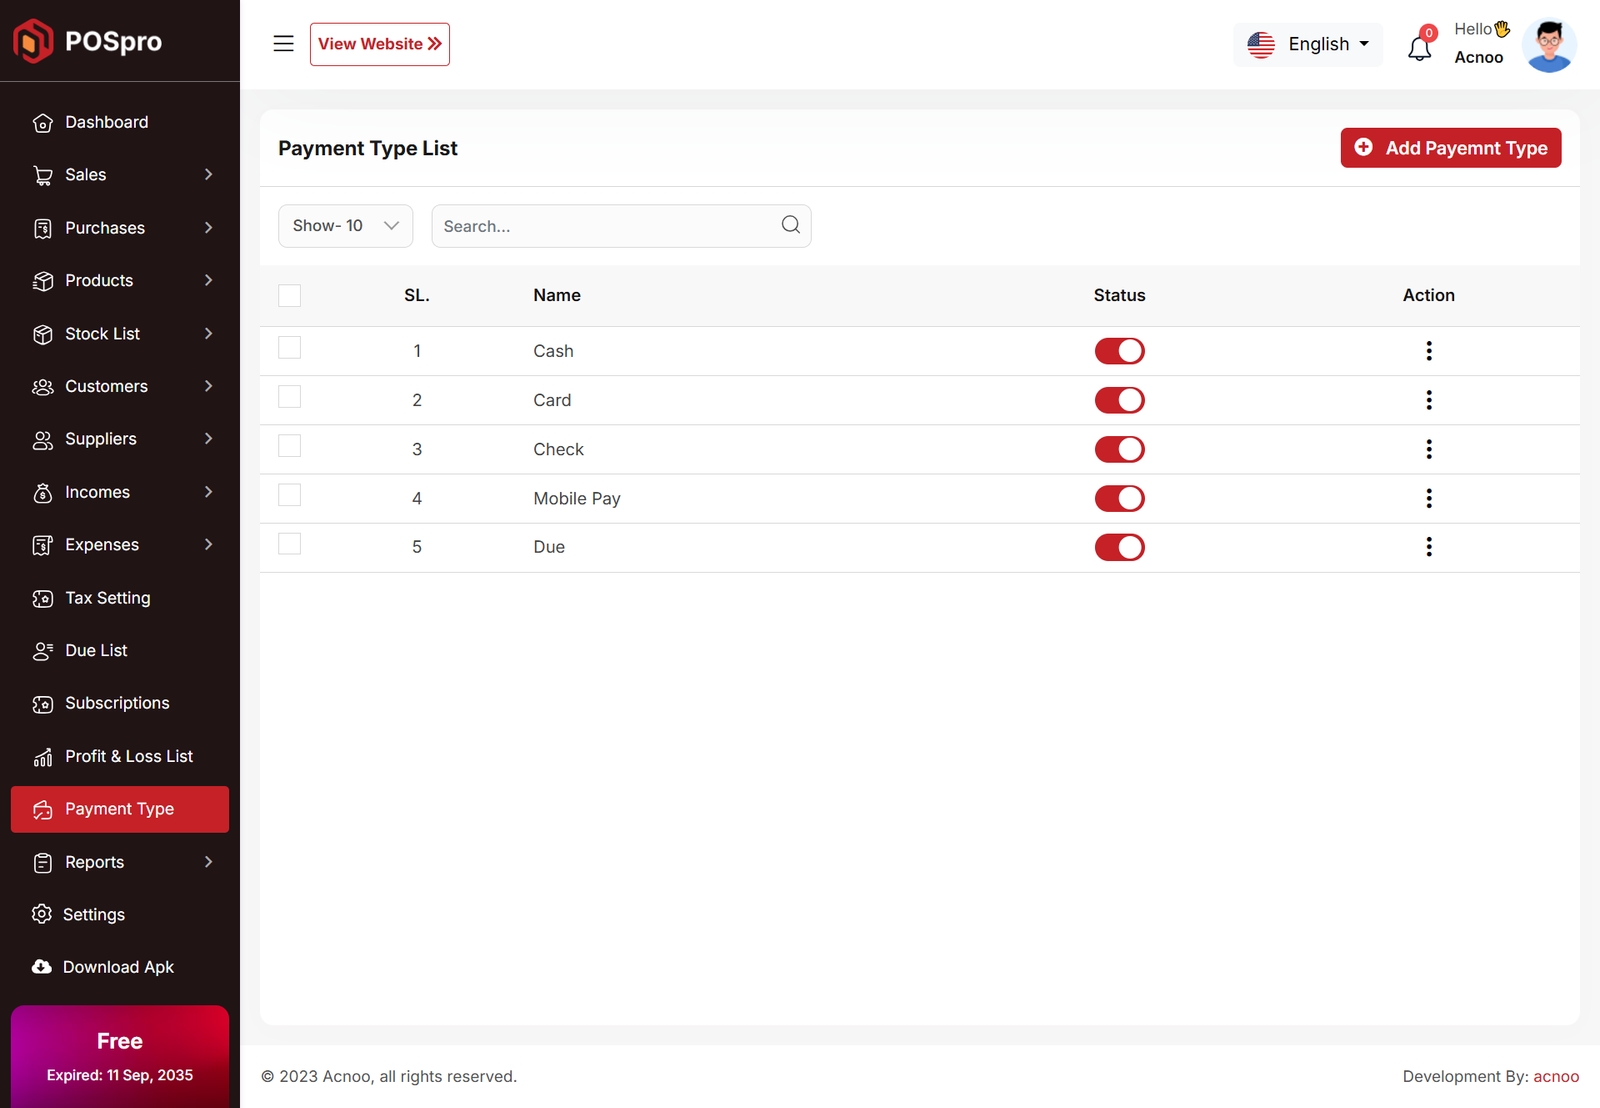
Payment type List
Here, you can view the list of payment types. The list can be filtered using the search input or the per-page filter. You can also update the status (active or inactive) by toggling the switch. Additionally, edit, delete, and multi-delete options are available.
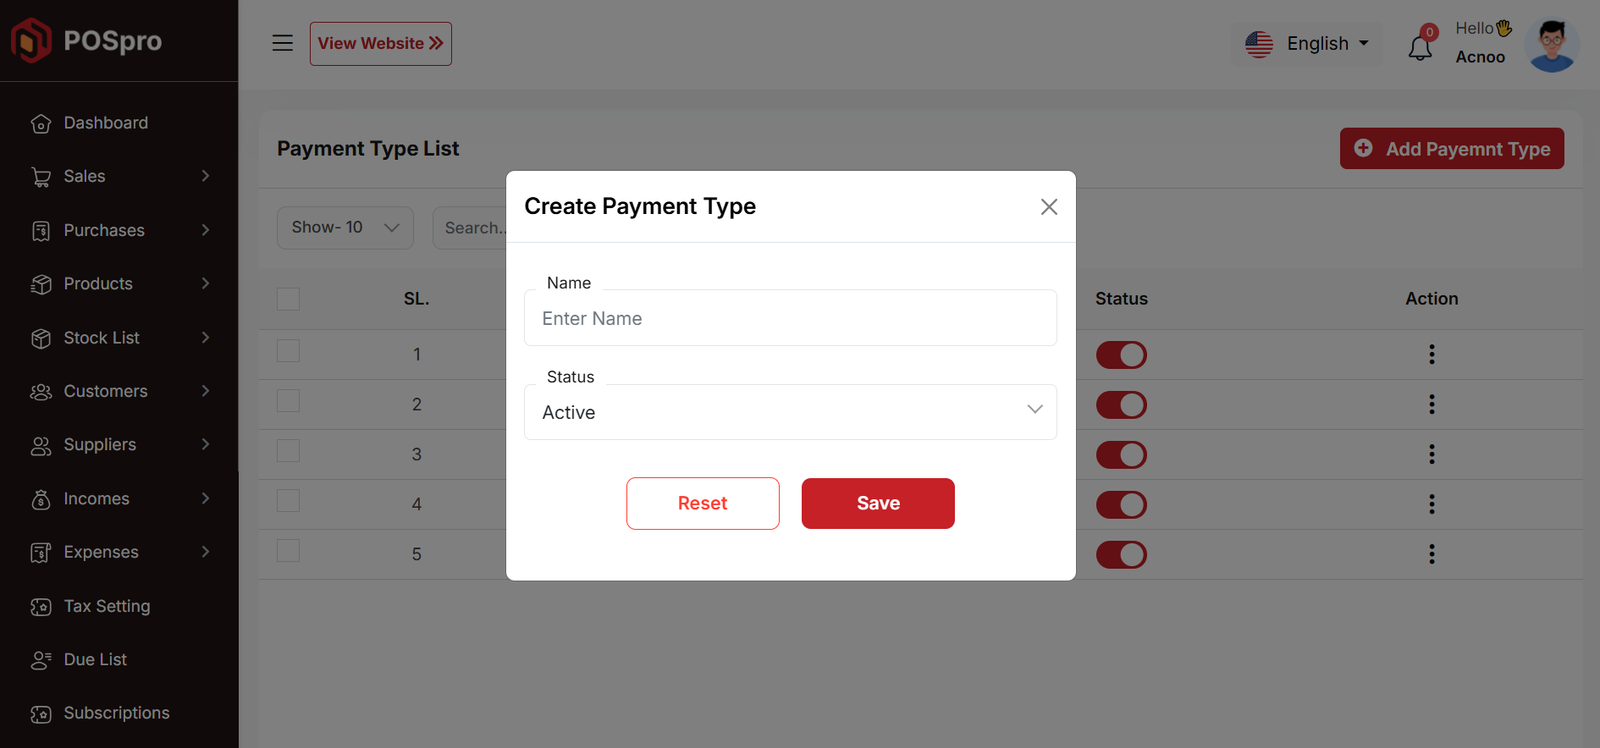
Create Payment type
You can create an payment type by filling out the required fields.
Reports
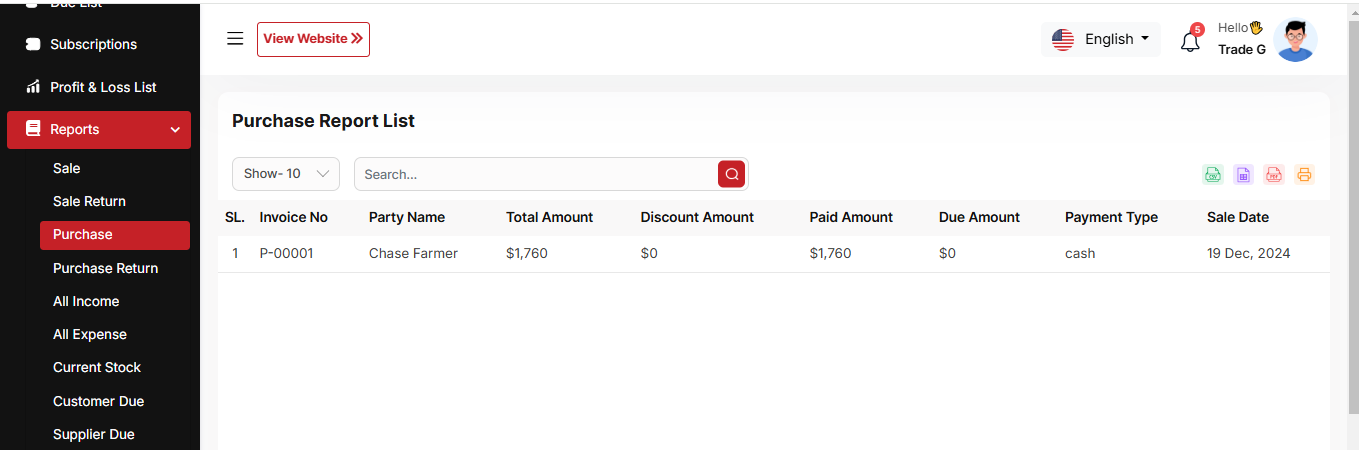
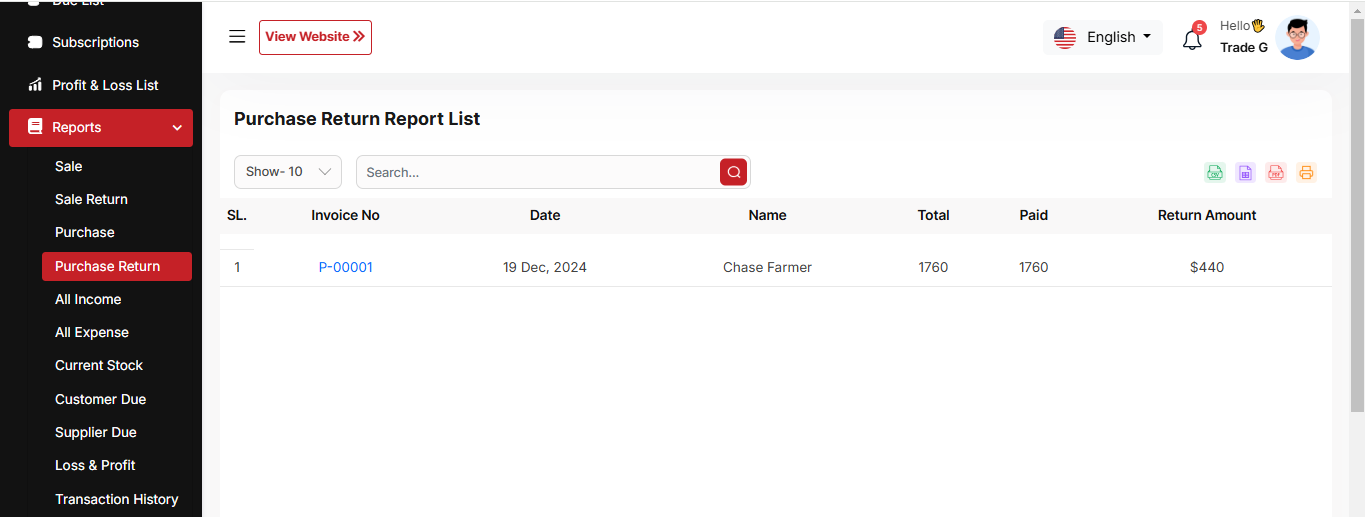
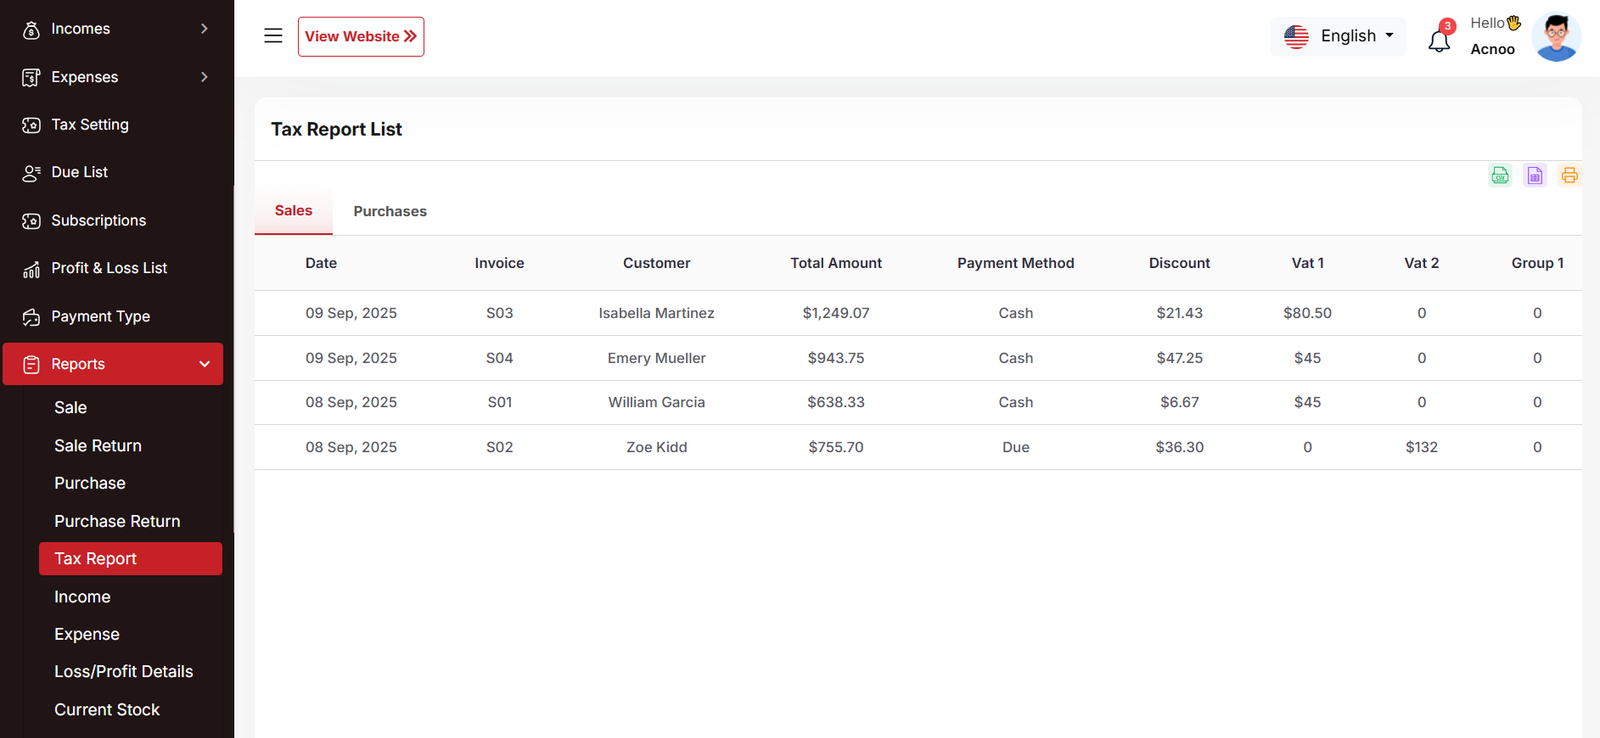
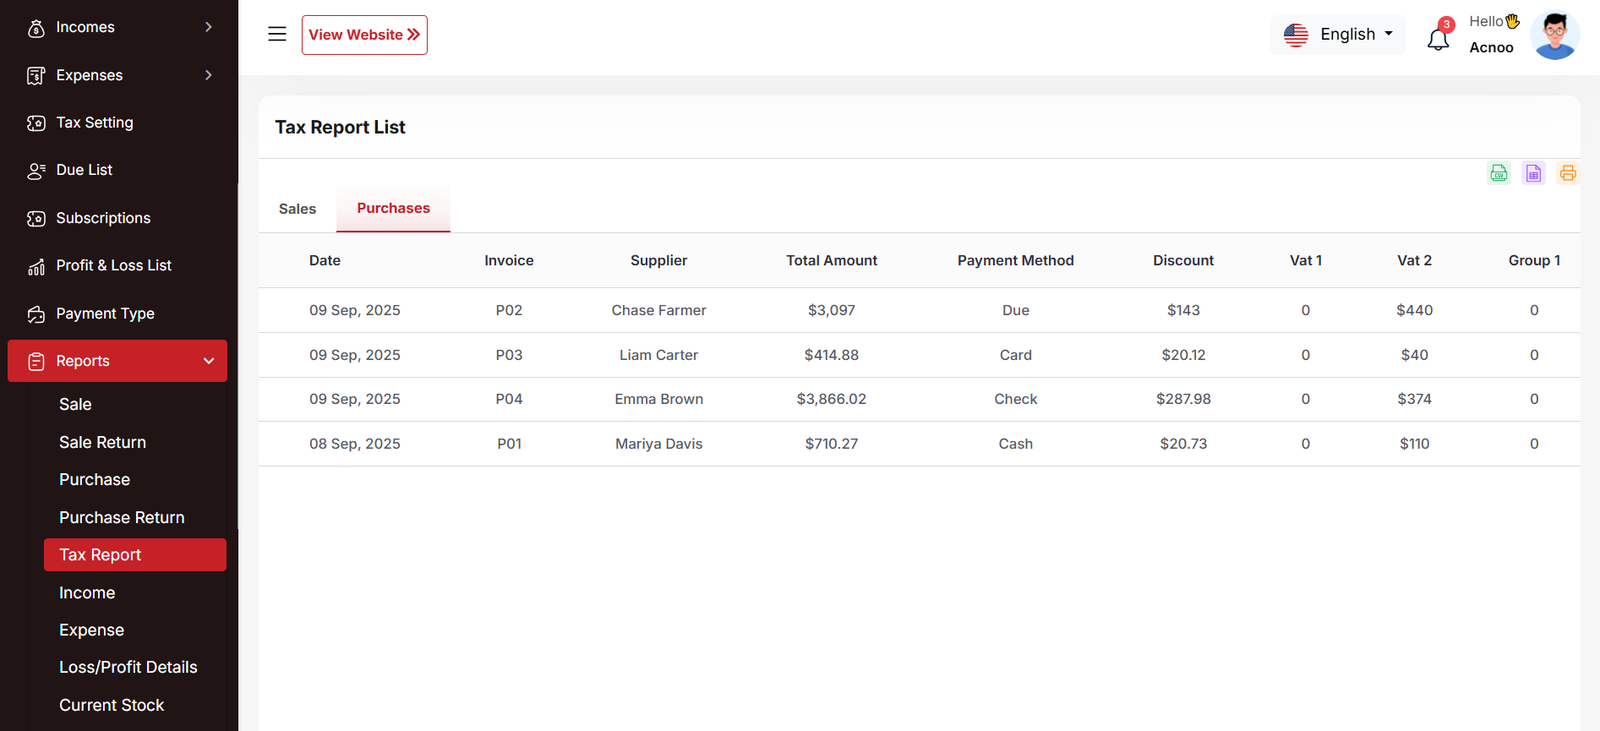
Here, various reports are available, including Sale, Sale Return, Purchase, Purchase Return, Income, Expense, Current Stock, Customer Due, Supplier Due, Profit and Loss, and Due collection Transaction. Each report includes filtering options for data. Additionally, you can export data as CSV, Excel, and a Print option is also provided.
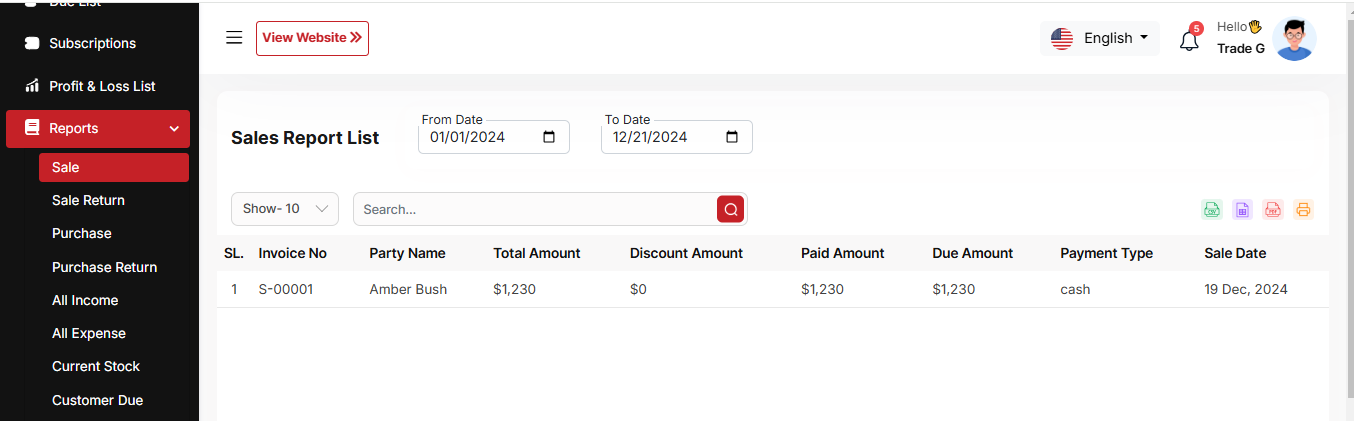
Sale Report
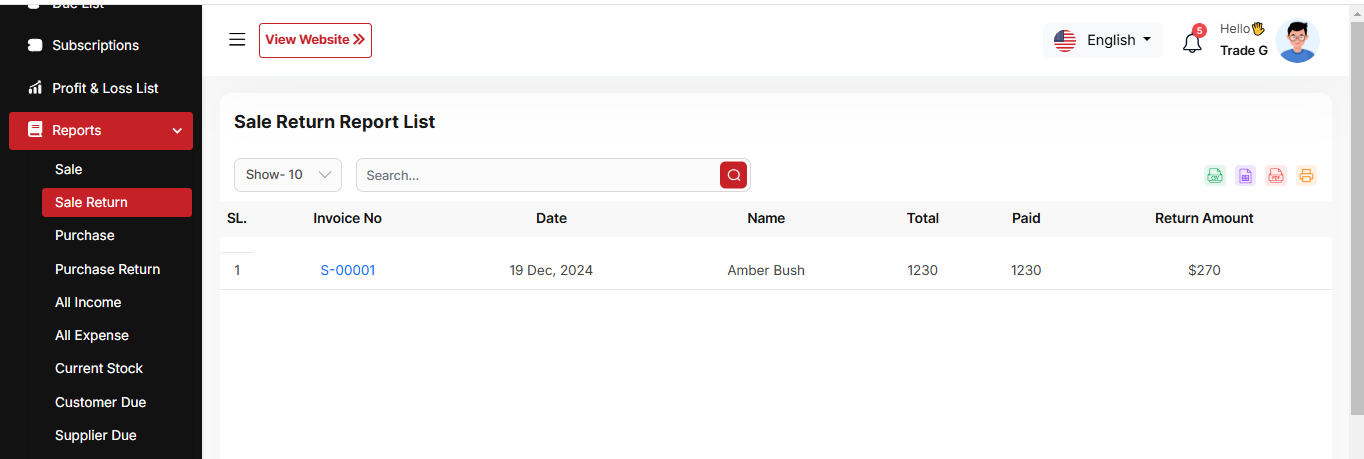
Sale Return Report
Purchase Report
Purchase Return Report
Tax Report (Sales)
Tax Report (Purchases)
Income Report
Expense Report
Loss Profit Details Report
Stock Report
Customer Due Report

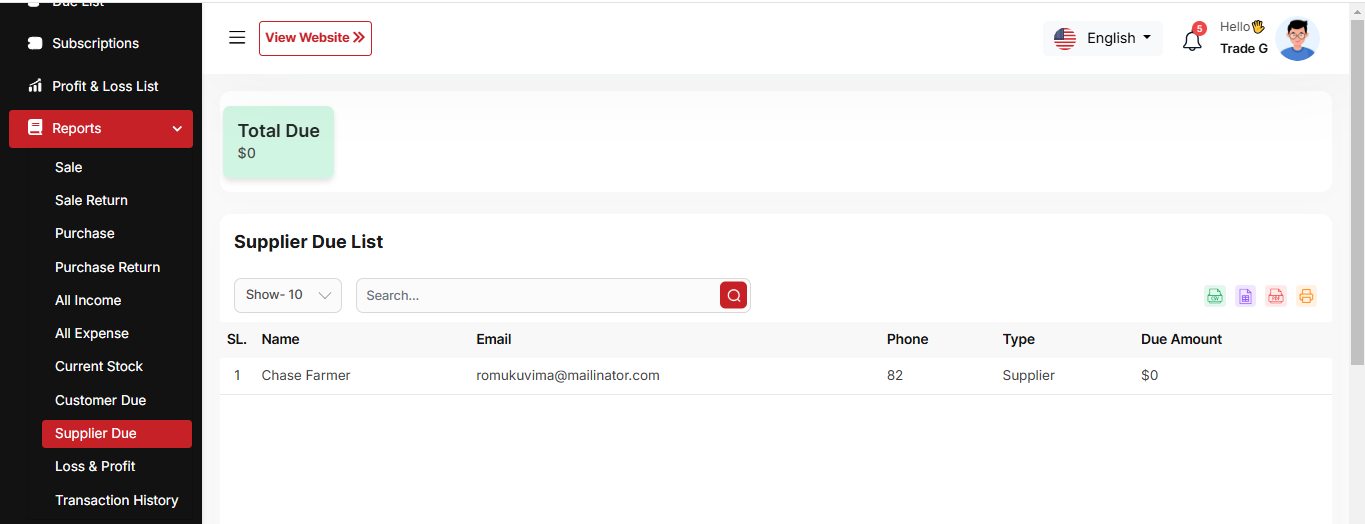
Supplier Due Report
Loss & Profit Report
Due Collection Transactions
Subscription Report
Expired Product Report
Settings
In the Setting section, you have the capability to configure the fundamental aspects or core elements of this project.
Currencies
Here, you can view a list of currencies added through the Admin Panel. You can select your preferred default currency, but by default, the system uses the currency set in the Admin Panel.
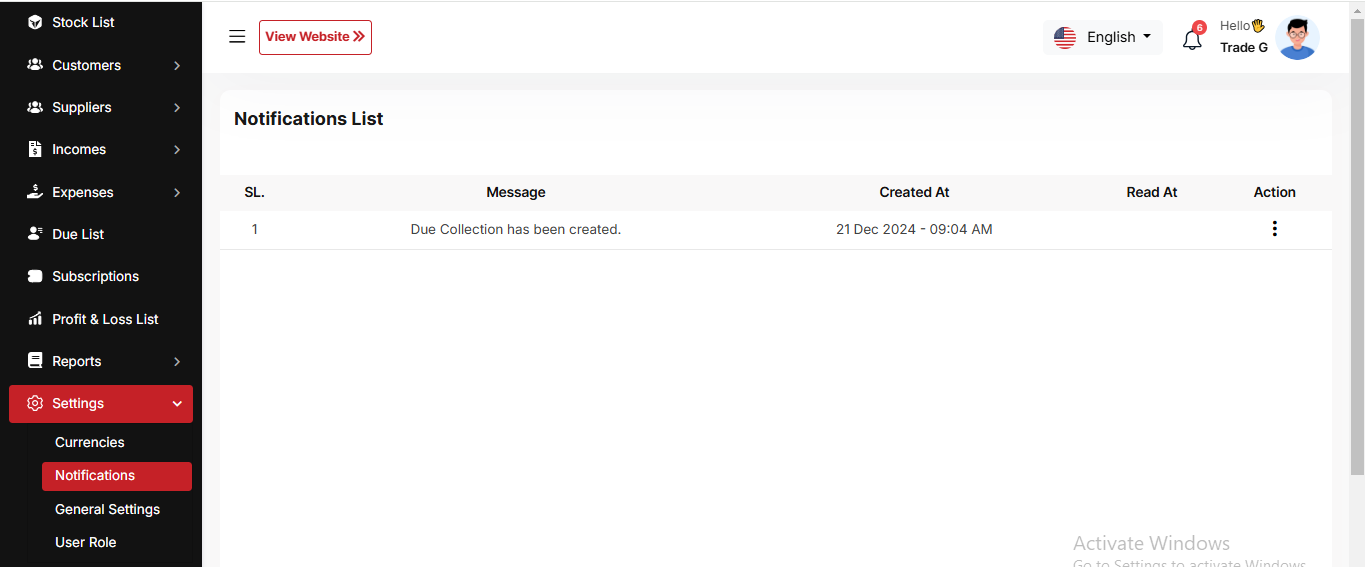
Notification
Here, you can view a list of notifications for Sales, Purchases, Income, Expenses, and Due Collections. You can also filter these notifications using the available criteria. For each notification, clicking the "View" button will display detailed information.
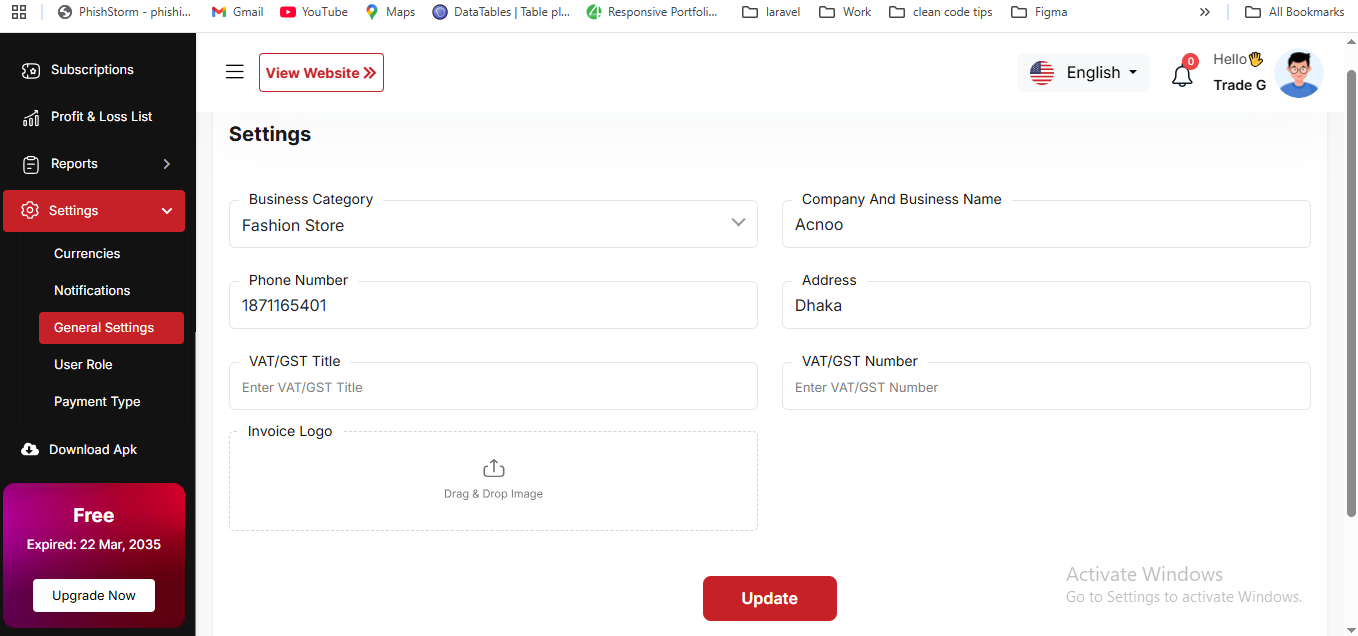
Generale Settings
You can modify the general project information, which will also reflect in all your project invoices. For example, if you update the invoice logo here, it will be displayed on all invoices, including Sales, Purchases, and Due Invoices.
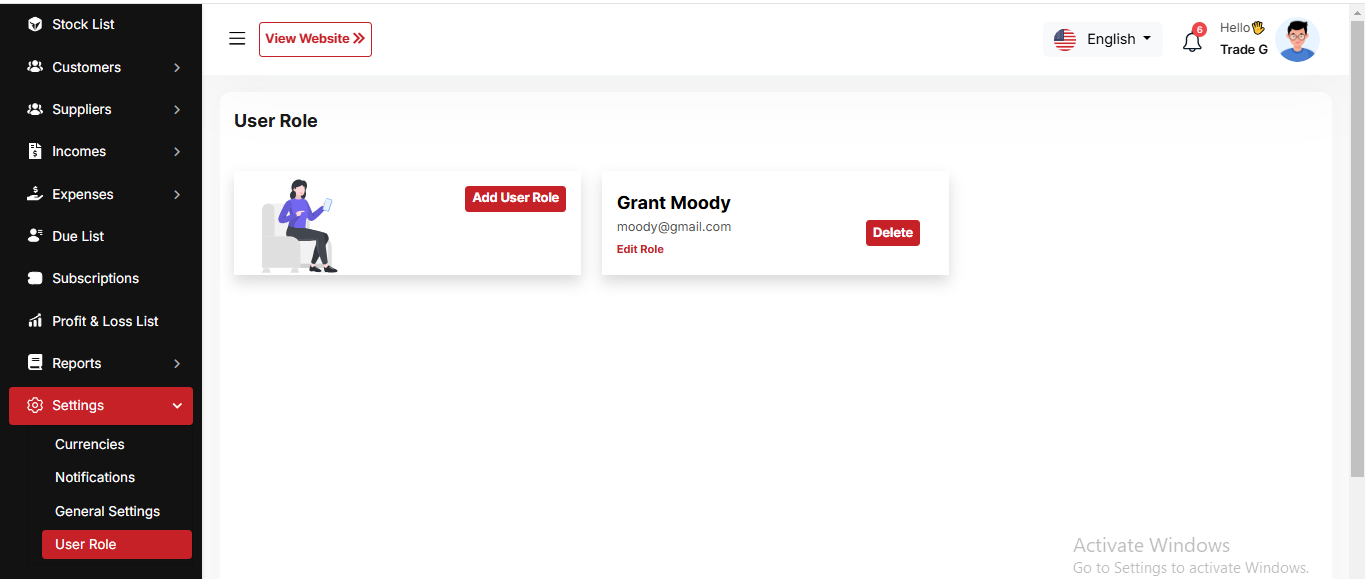
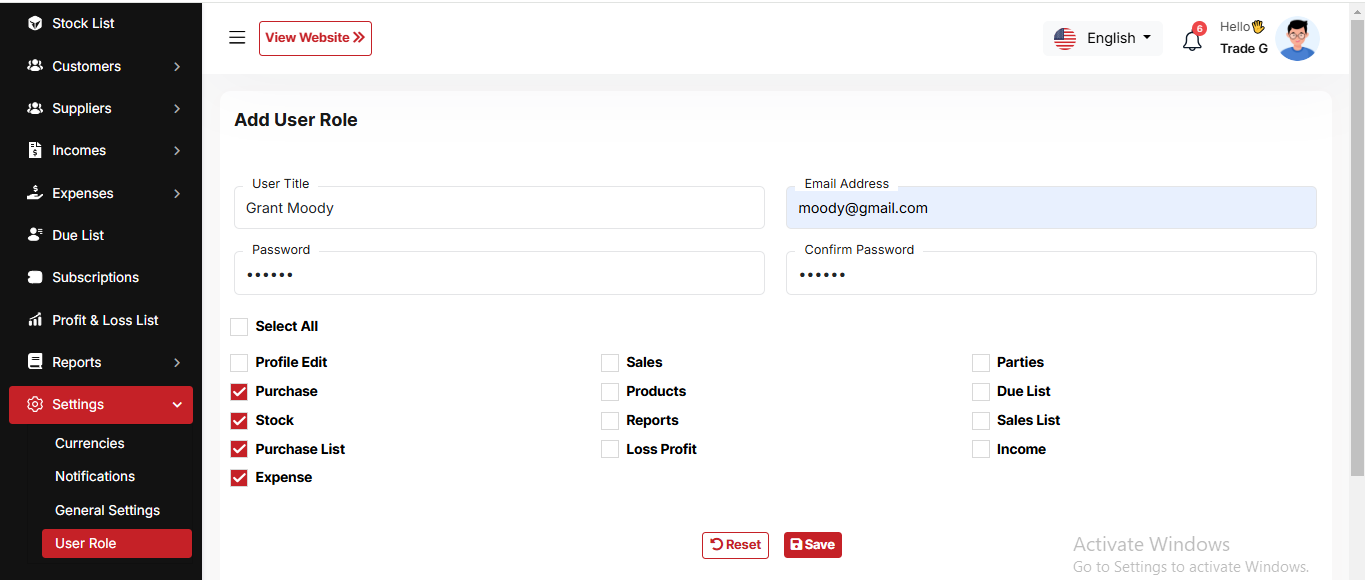
User Role
In this section, you can create new roles, update existing ones, and delete them. While updating roles, you can configure specific permissions to grant or restrict access to various features and functionalities. This enables you to customize user roles according to your organizational needs and security requirements.
Download Apk
After this, you will be redirected to a URL where you can download the APK file
Business Add-on Change Logs
Note: Before updating to the new version, please ensure you have a database and full project backup, and that your project is already updated to the latest version. This is extremely important!
Version: 2.9 ( 09 October 2025 )
- Fixed product edit issue for warehouse and exclusive pricing.
- Fixed purchase store issue for parties.
- Fixed product import issue for profit percent rounding.
- Updated filters across different project sections.
- Resolved minor issues
- Edit product issue Fixed
- System Architecture updated
Note: Please click here to update your addon.
Note: If you face any issues with the update, please contact us.
Version: 2.8 ( 20 September 2025 )
- Dashboard issue fixed
- Roles and permissions updated
- Minor issue fixed
- Layouts changed
- System Architecture updated
Note: Please click here to update your addon.
Note: If you face any issues with the update, please contact us.
Version: 2.7 ( 15 September 2025 )
- Applied branch logic in Severel sections. Like products, sales, purchases, stocks, and due collection, employe(HRMAddon),
- Transfer added (show if Multibranch Add-on or Warehouse Add-on exists)
- Updated filters in different sections
- Updated product settings
- Fixed a few minor issues
- Fixed invoice issue
Note: Please click here to update your addon. Before updating this addon, you must first update Super-Admin.zip to version 5.5 .
Note: If you face any issues with the update, please contact us.
Version: 2.6 ( 17 August 2025 )
- Fixed expired product pricing issue.
- Enhanced several validations.
- Improved multiple design elements.
- Resolved product list pricing issue in purchases.
- Fixed some fields to remain checked by default on the Product Settings page.
- Fixed a few minor issues.
Note: Please click here to update your addon.
Note: If you face any issues with the update, please contact us.
Version: 2.5 ( 09 August 2025 )
- Resolved PDF issue.
- Fixed product bulk upload issue.
- Fixed purchase page filter for 0-quantity products.
- Improved several design.
- Updated settings structure.
Note: Please click here to update your addon.
Note: If you face any issues with the update, please contact us.
Version: 2.4 ( 05 August 2025 )
- Batch-wise stock management added
- Bulk purchase import added
- Product bulk upload updated
- Business settings options updated
- Product Settings added for products input options
- Invoice settings added for default A4 size and 3 inch 80mm Thermal Printer Add-On
- Changed design for lots of modules
- Product Model Added
- Products structure & design changed
- System Ready for product variation
- System Ready for Thermal Printer
- Paypal payment gateway issue fixed
- Inventory sales structure update
- Batch wise sales added
- Batch wise purchase added
- Product purchase price update option added in purchase
- Product search option added on inventory sales
- Sidebar position fixed after reloading the page.
Note: Please click here to update your addon.
Note: If you face any issues with the update, please contact us.
Version: 2.3 ( 25 May 2025 )
- Fixed shipping charge issue in Sale.
- Resolved issues on Sale pages.
- Several minor issues have been addressed.
Note: Please click here to update your addon.
Note: If you face any issues with the update, please contact us.
Version: 2.2 ( 15 May 2025 )
- Expired Products list has been added.
- Expire Date field added in Purchase when adding products.
- Inventory Sale added.
- Loss/Profit details report added.
- Tax Report added.
- Product Profit option in Settings → General Settings.
- Sidebar design updated and fixed issues.
- Products Bulk Upload feature has been added.
- Optimized some codes and fixed some design issues.
Note: Please click here to update your addon.
Note: If you face any issues with the update, please contact us.
Version: 2.1 ( 17 April 2025 )
- Added a dynamic sale rounding option and applied it to Sales, Sales Returns, and their invoices.
- Enabled fractional quantity support across Sales, Sales Returns, Purchases, Purchase Returns, and all related invoices.
- Integrated the CinetPay payment gateway.
- Upgraded invoice design and fixed some minor issues.
- Fixed logo display issue in sales PDF.
Note: Please click here to update your addon.
Note: If you face any issues with the update, please contact us.
Version: 2.0 ( 16 April 2025 )
- Applied "change amount" logic in Sales, Purchases and their invoices
- Fixed some minor issues.
Note: Please click here to update your addon.
Note: If you face any issues with the update, please contact us.
Version: 1.9 ( 24 March 2025 )
- Updated Sales and Purchase invoices.
- Fixed some minor issues.
- User profile updated.
- Optimized some codes.
Note: Please click here to update your addon.
Note: If you face any issues with the update, please contact us.
Version: 1.8 ( 17 March 2025 )
- Customer phone unique removed.
- Optimized some codes.
- Fixed sales invoices
- Party phone validation updated in Sales, Purchase, Supplier & Customer.
Note: Please click here to update your addon.
Note: If you face any issues with the update, please contact us.
Version: 1.7 ( 03 March 2025 )
- Added Payment Type Module.
- Integrated dynamic Payment Type in Sales, Purchases, Incomes, Expenses & Due Collections
- Updated Payment Type views in all Invoices & Reports
- Applied User Role Permission in Dashboard.
- Fixed Sales Return & Purchase Return Discount Issues and updated invoices
- Fixed minor bugs
Note: Please click here to update your addon.
Note: If you face any issues with the update, please contact us.
Version: 1.6 ( 27 February 2025 )
- New Vat & Tax Section Added
- Alert qty, expire date, VAT, VAT type, profit margin, added in products table.
- Also purchase price split into exclusive & Inclusive price
- Dynamic vat section & extra discount option added in sale and purchase.
- Shipping charge added in sale & purchase
- Product low stock list added.
- Expired products list added.
- Some of new filter added in reports.
- Improved & update some design.
- Sale status issue fixed.
Note: Please click here to update your addon.
Note: If you face any issues with the update, please contact us.
Version: 1.5 ( 04 February 2025 )
- Fixed barcode issue.
- Barcode print issues fixed.
- Invoices updated with vat name and vat number.
- Total sale and total purchase added in report pages.
Note: Please click here to update your addon.
Note: If you face any issues with the update, please contact us.
Version: 1.4 ( 29 January 2025 )
- Fixed brand creating issue.
- Barcode generate module added.
- Scanner added in sales and purchase.
- Item added to the cart automatically after search.
- Fixed some searching issues.
- Low stock page added.
- Pdf option added.
- Fixed some design issues.
Note: Please click here to update your addon.
Note: If you face any issues with the update, please contact us.
Version: 1.3 ( 07 January 2025 )
- Message showing issue fixed after payment.
- Attachment issue fixed for manual payment.
- Mobile menu logo issue fixed.
Note: Please click here to update your addon.
Note: If you face any issues with the update, please contact us.
Version: 1.2 ( 04 January 2025 )
- Removed the logo and favicon change option from the settings module.
- Updated some text in the purchase creation and editing process.
- Sidebar logo and favicon will now use the ones set by the admin.
Note: Please click here to update your addon.
Note: If you face any issues with the update, please contact us.
Version: 1.1 ( 29/12/2024 )
- Cart issue fixed.
- Currency bug fixed on stock list.
- Expire date added into profile page.
- Notification issue fixed for.
Note: Please click here to update your addon.
Note: If you face any issues with the update, please contact us.
Version: 1.0.0 ( 26 December 2024 )
- Initial Release
POSpro HRM Add-on: Setup and Installation
📘 Overview:
The HRM Add-on for POS Pro is a comprehensive extension designed to streamline human resource management in your organization. This add-on allows users to efficiently manage employees, departments, shifts, leaves, attendance, and payroll in one unified system. With real-time visibility, HR managers can quickly track employee status, monitor attendance, process payroll, and generate detailed reports on workforce activities.
🔑 Key Features
👥 Employee management with complete profiles and role assignments
🏢 Department and designation setup for structured organizational hierarchy
⏰ Shift management and attendance tracking for accurate working hours
📅 Leave and holiday management with approval workflows
💰 Payroll management including salaries, deductions, and bonuses
📊 Detailed reports for attendance, leave, payroll, and HR analytics
🔄 Seamless integration with POS Pro modules for smooth operations
🔒 Secure and reliable system, ensuring HR data integrity
⚡ User-friendly, lightweight, and compatible with future POS Pro updates
📦 Installation
The installation process for the HRM Add-on follows the same steps as outlined in the Business Add-on documentation.
👉 Please refer to the Business Add-on Installation Guide for detailed instructions.
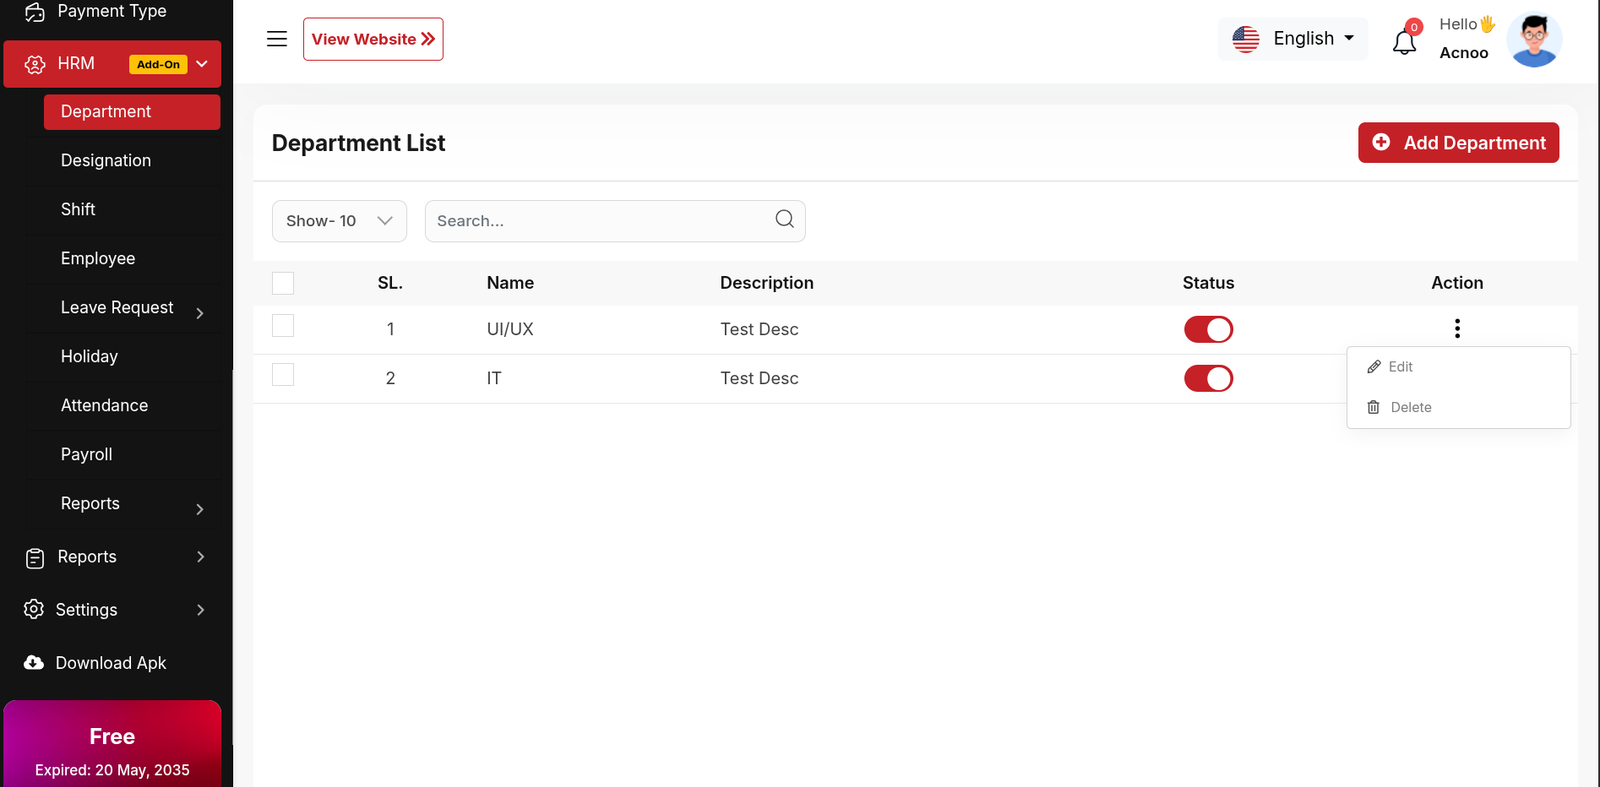
Department
The "Department List" page displays a list of all defined department,
including
their names, descriptions, and status. It provides options to manage these
department.
Use the search bar to find specific department by name or description.Click the "Add New
department" button to navigate to a page or modal where you can add a new
department.Clicking the three dots in the "Action" where you can edit,delete and view.
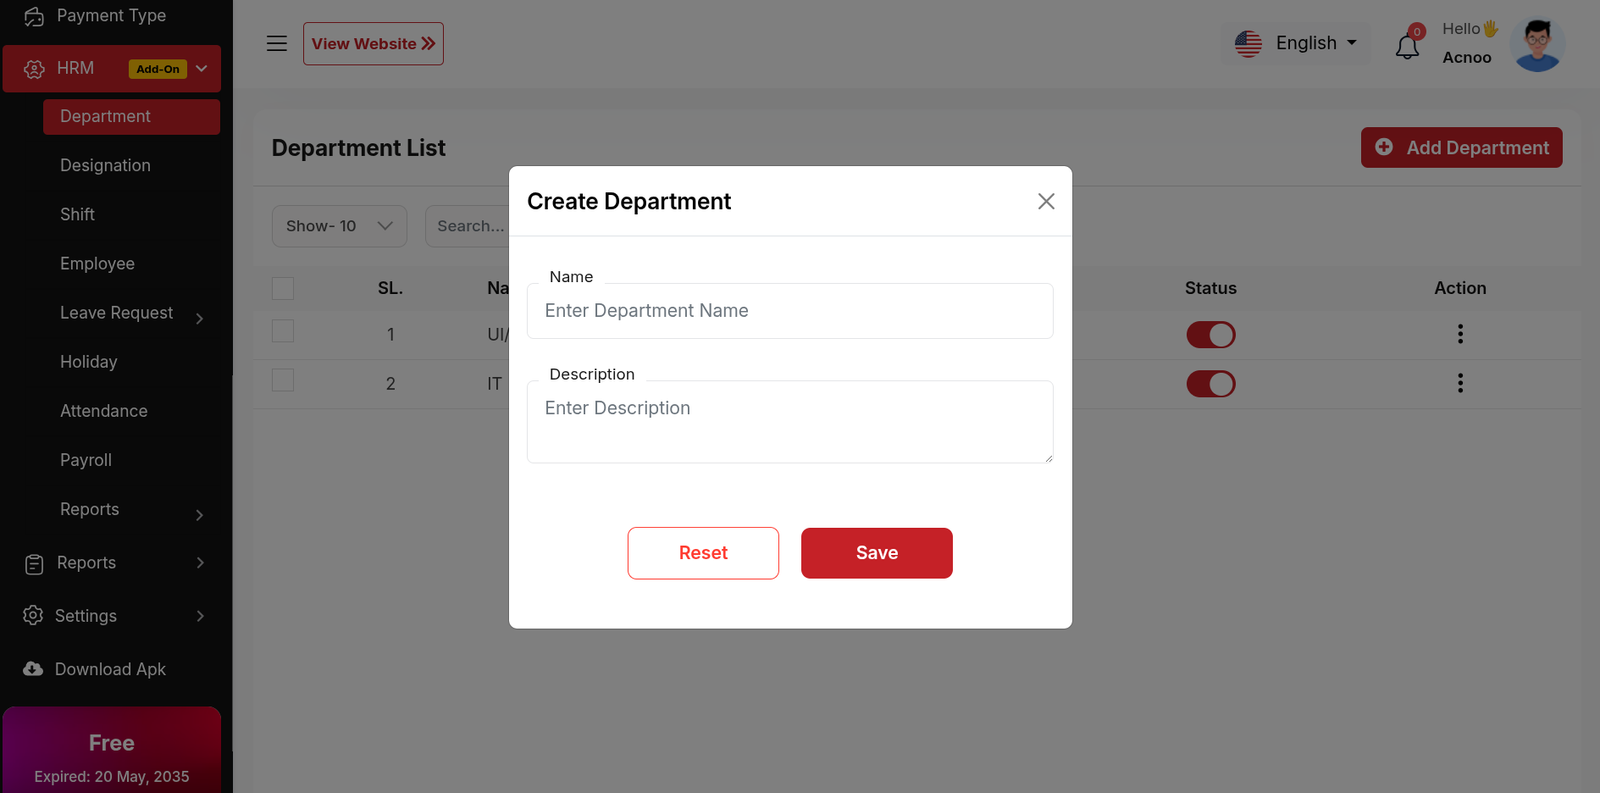
Add New Department
The "Department" form appears as a pop-up or overlay on the "Department List" page. It contains the following fields:
Designation
The "Designation List" page displays a list of all defined designations,
including their names, descriptions, and status. It provides options to manage these
designations.
Use the search bar to find specific designations by name or description.Click the "Add New
designation" button to navigate to a page or modal where you can add a new
designation.Clicking the three dots in the "Action" where you can edit,delete and view.

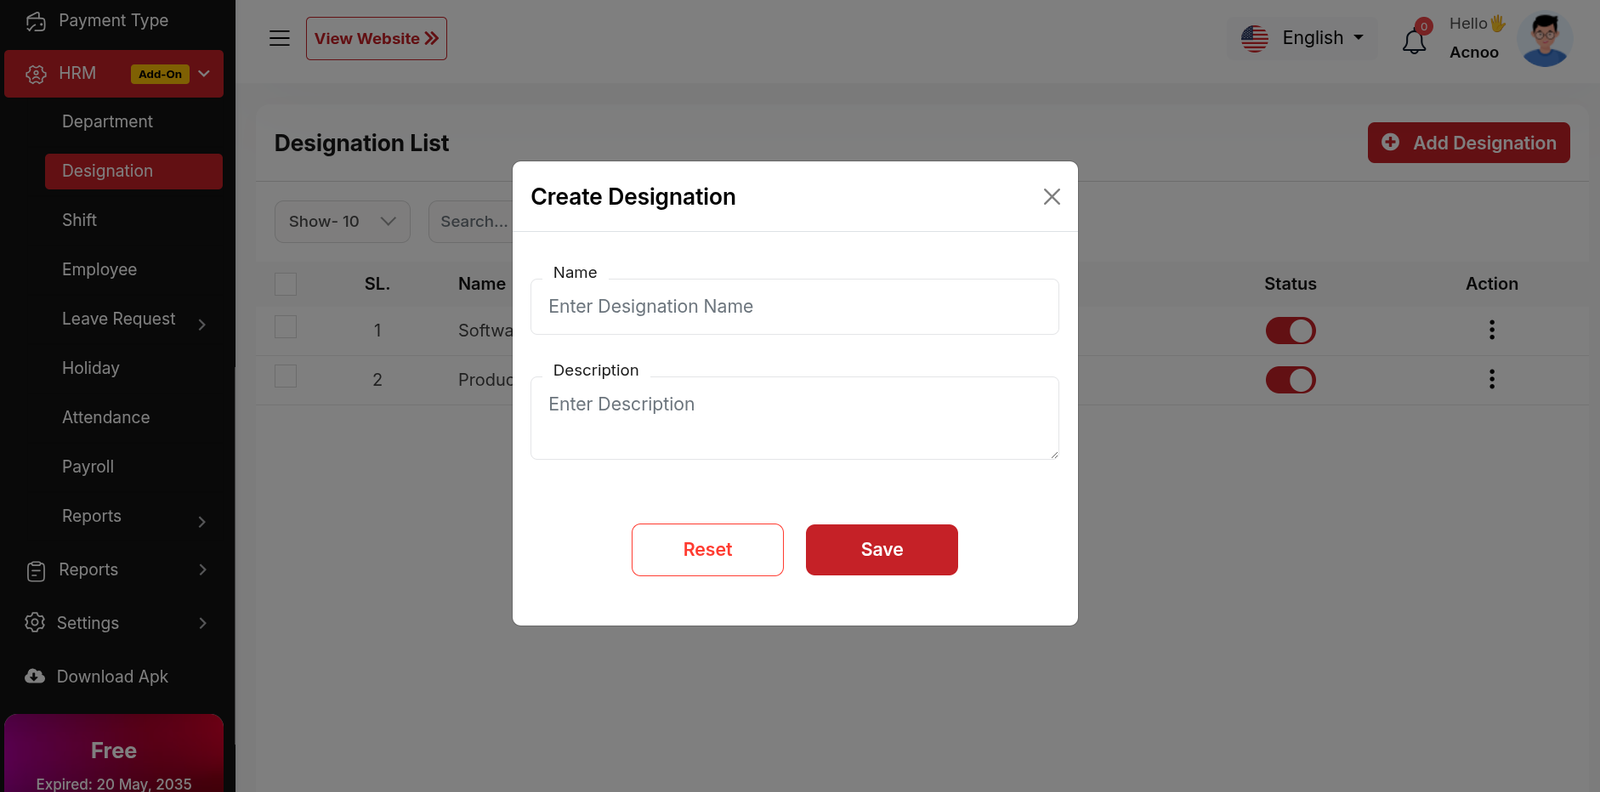
Add New Designation
The "Designation" form appears as a pop-up or overlay on the "Designation List" page. It contains the following fields:
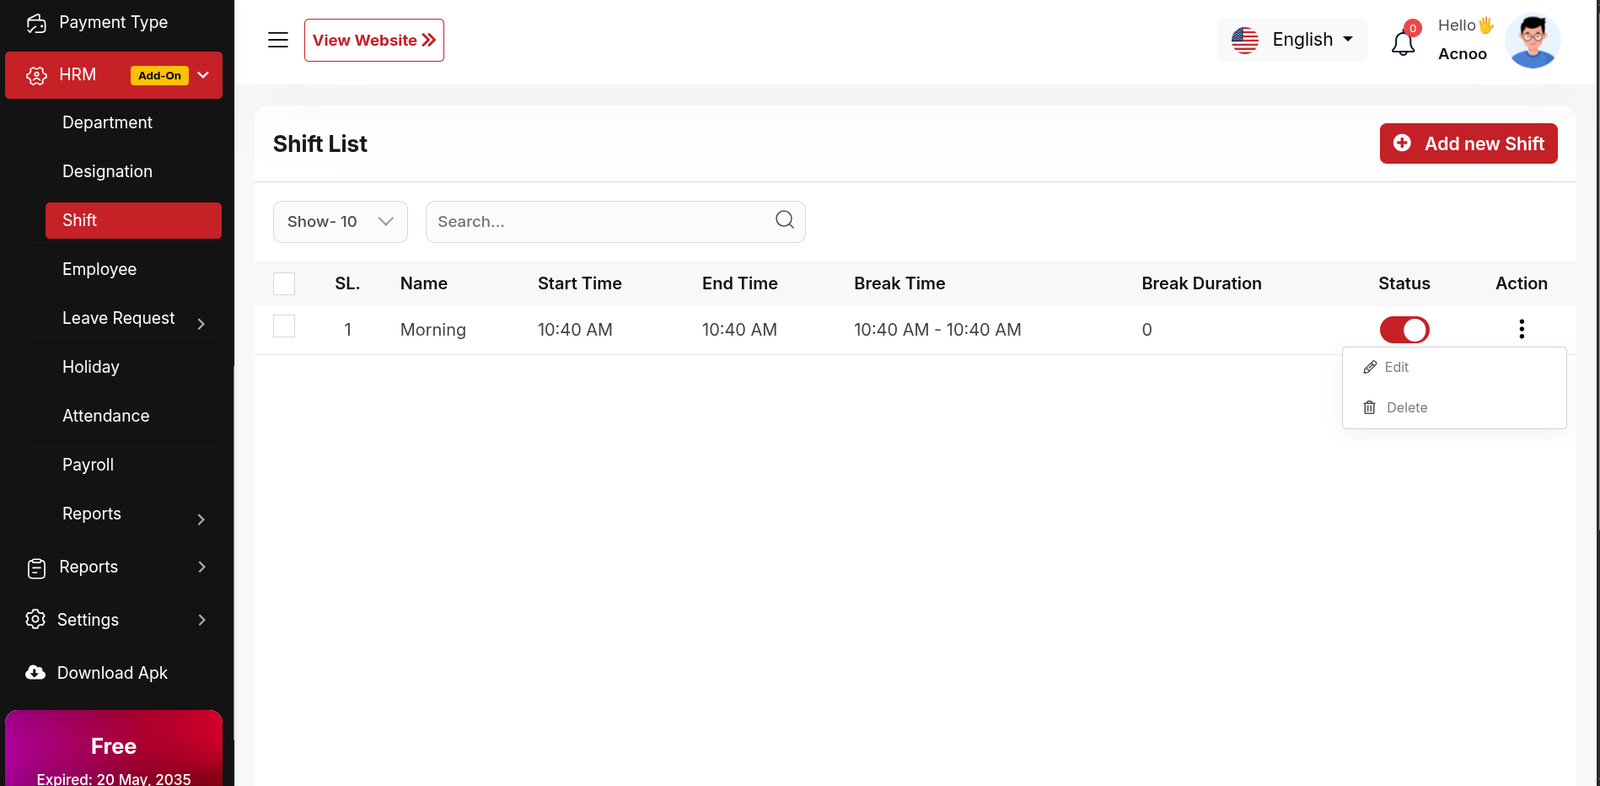
Shift List
The "Shift List" page displays a list of all defined work shifts, including their
names, start and end times, break times, and status. It provides options to manage these
shifts.
Use the search bar to find specific shifts by name.Click the "Add New Shift" button to
navigate to a page or modal where you can add a new work shift to the system.Clicking the
three dots where you can edit,delete and view for shift.
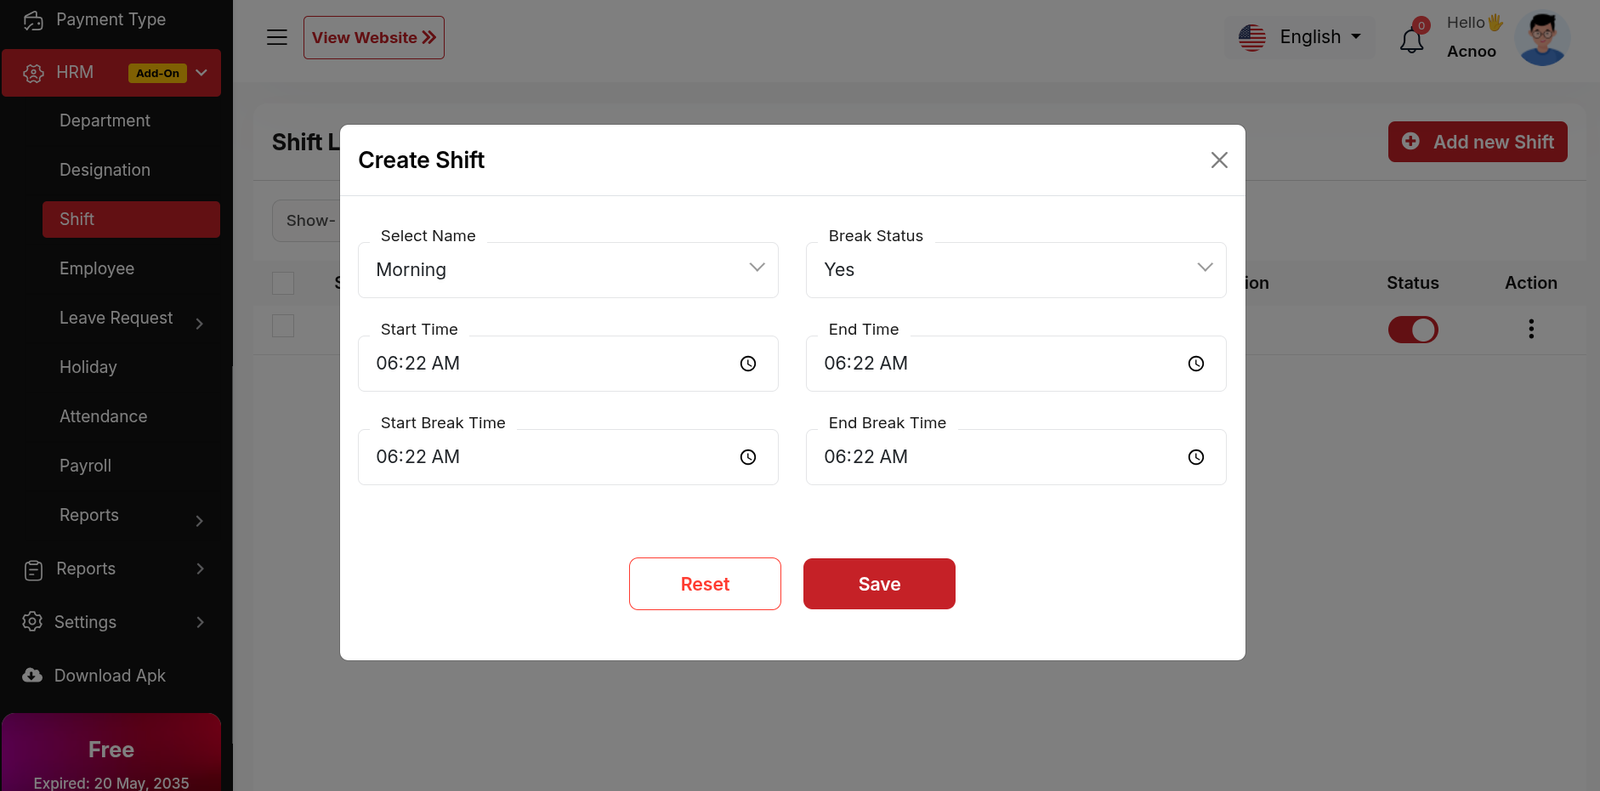
Create New Shift
The "Add New Shift" form appears as a pop-up or overlay on the "Shift List" page. It contains filled the following input fields.
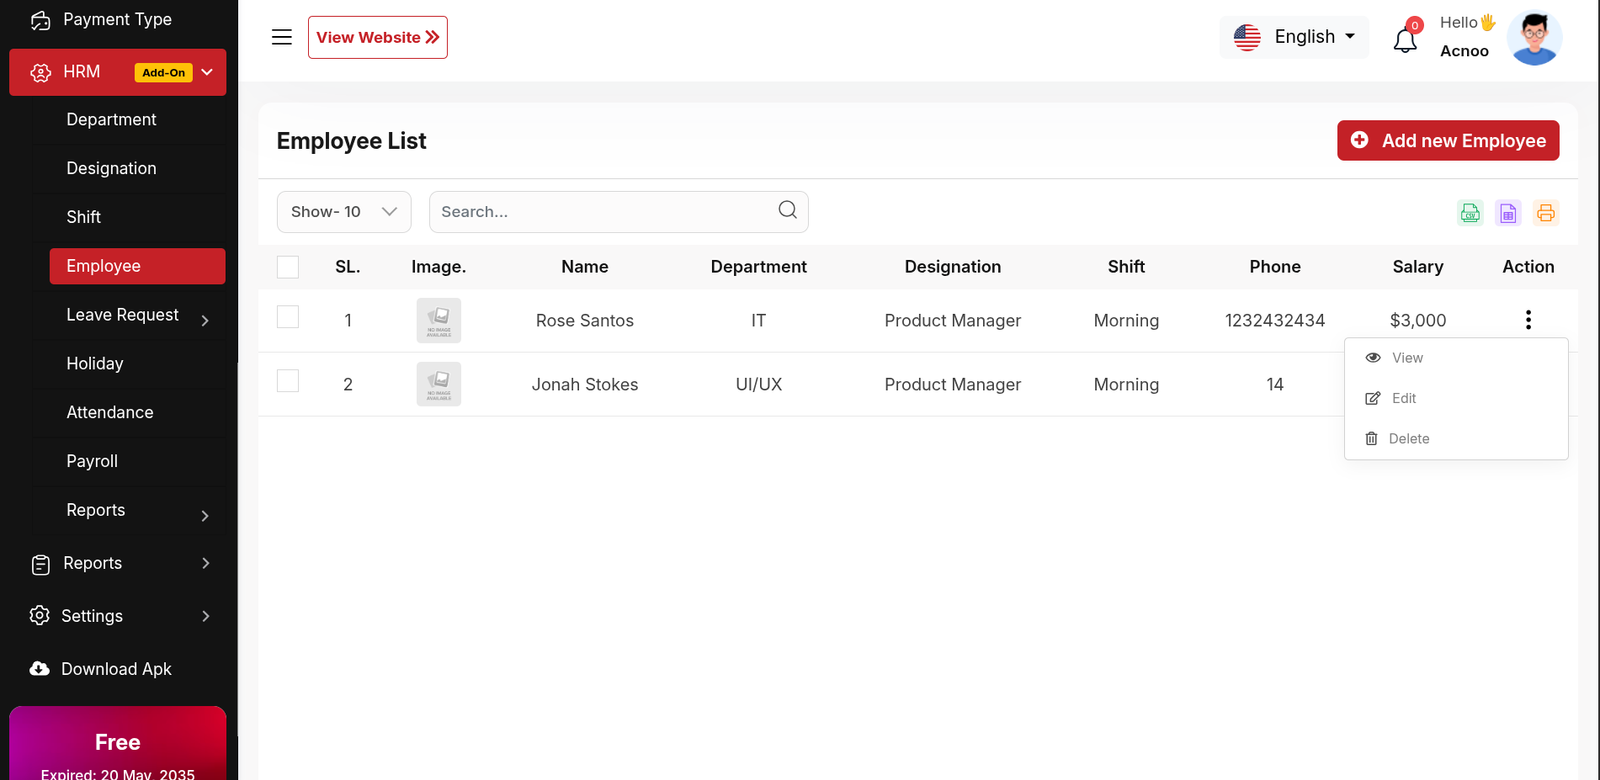
Employee
The "Employee List" page displays a list of all employees, including relevant
details such as their employee ID, name, designation, department, join date, employment
status, shift, and salary. It provides options to manage these employee records.
Use the search bar to find specific employees by name, employee ID, designation, or other
relevant criteria.Click the "Add New Employee" button to navigate to a page or modal where
you can add a new employee record.Clicking the three dots in the "Action" where you can
perform edit,delete and view.
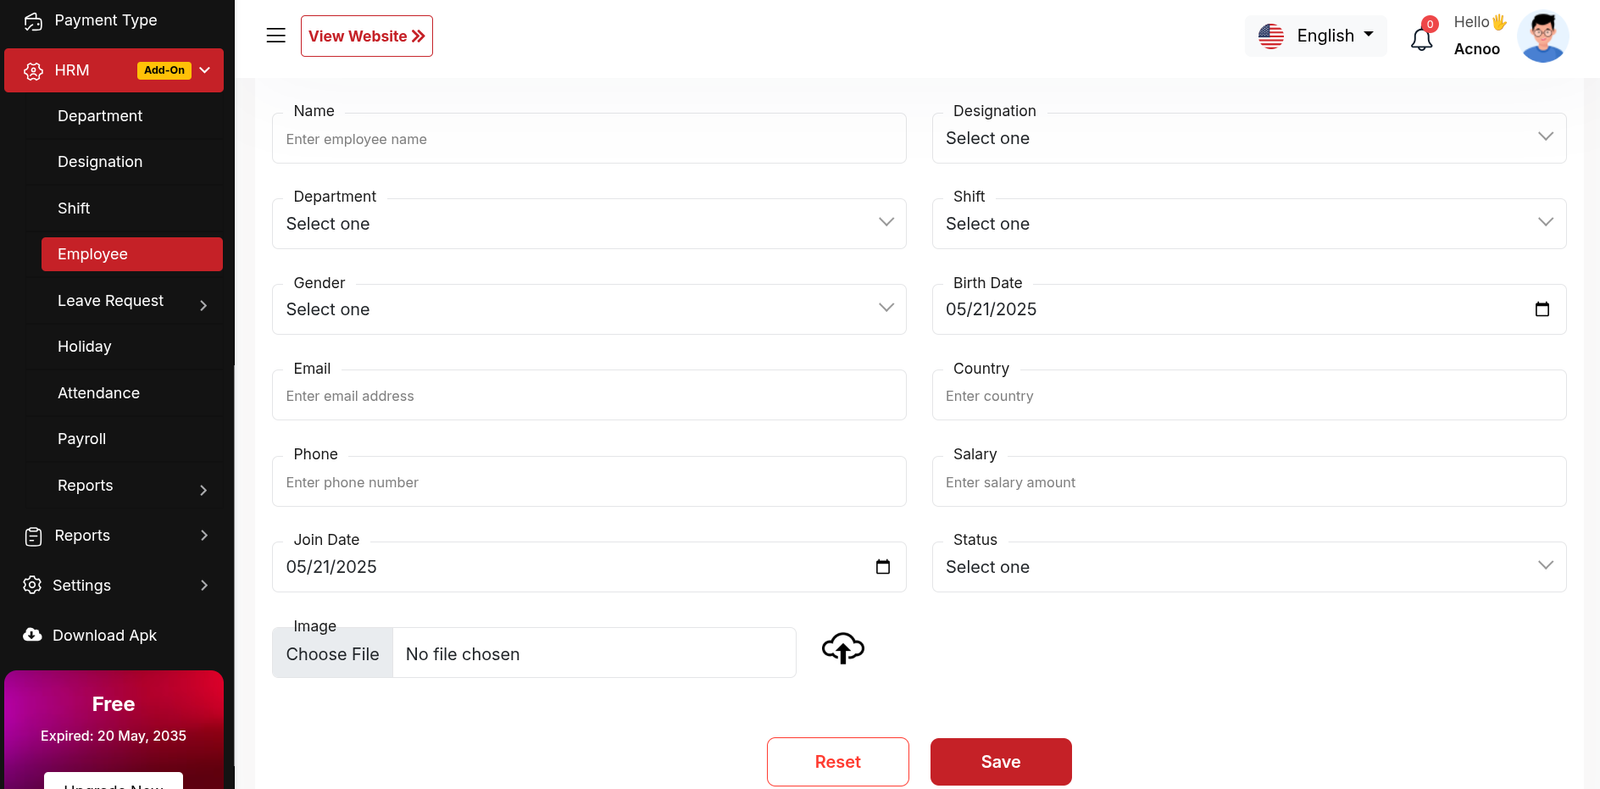
Add New Employee
Here you can create a Employee by filling the following form.
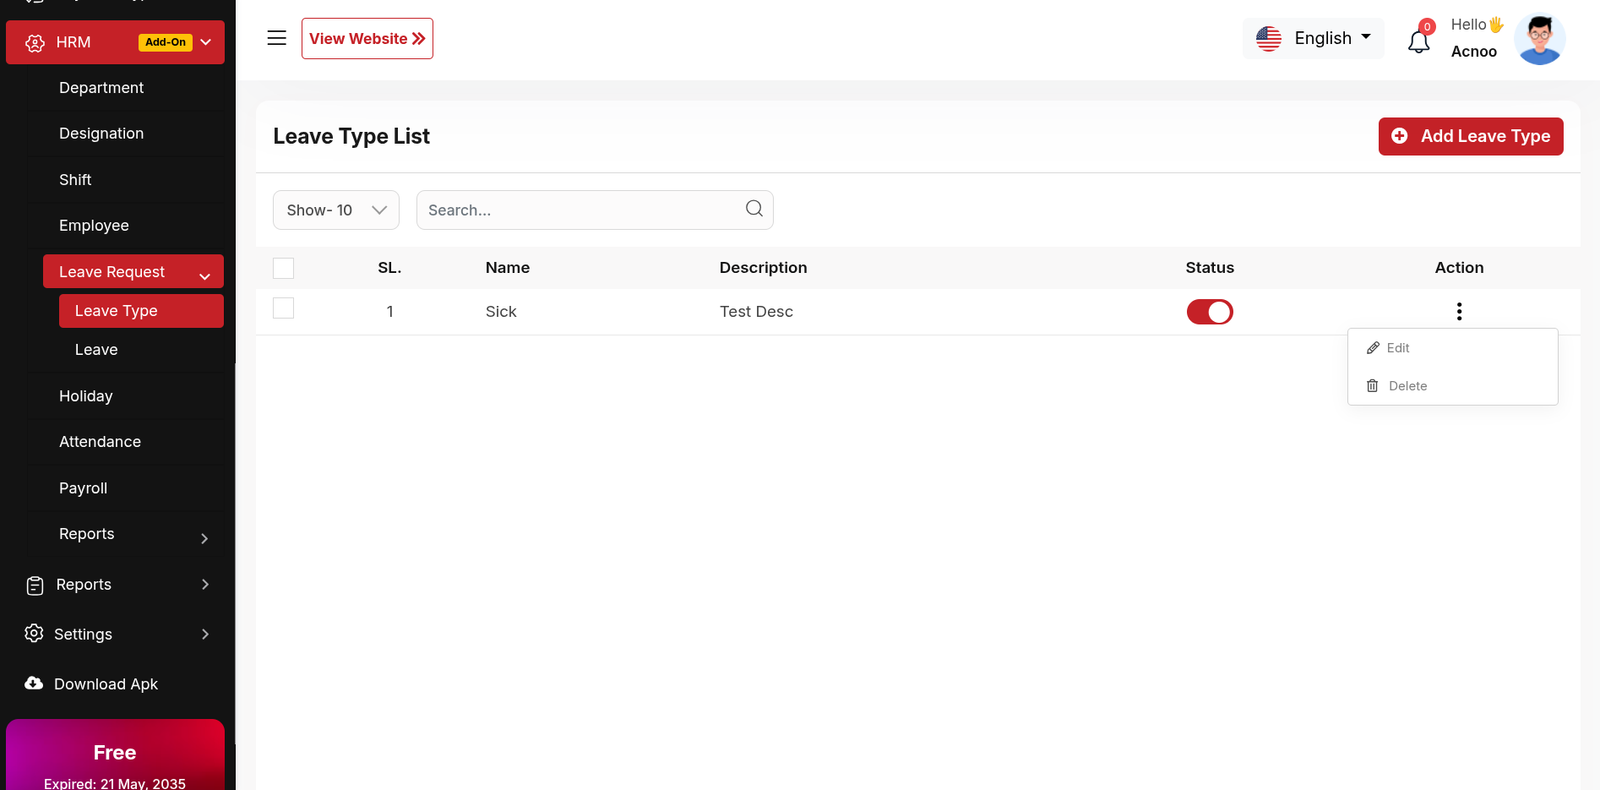
Leave Type List
The "Leave Type List" page displays a list of all defined leave types, including
their names, descriptions, and status. It provides options to manage these leave types.
Use the search bar to find specific leave types by name or description.Click the "Add New
Leave Type" button to navigate to a page or modal where you can add a new leave
type.Clicking the three dots where you can edit,delete and view for leave type.
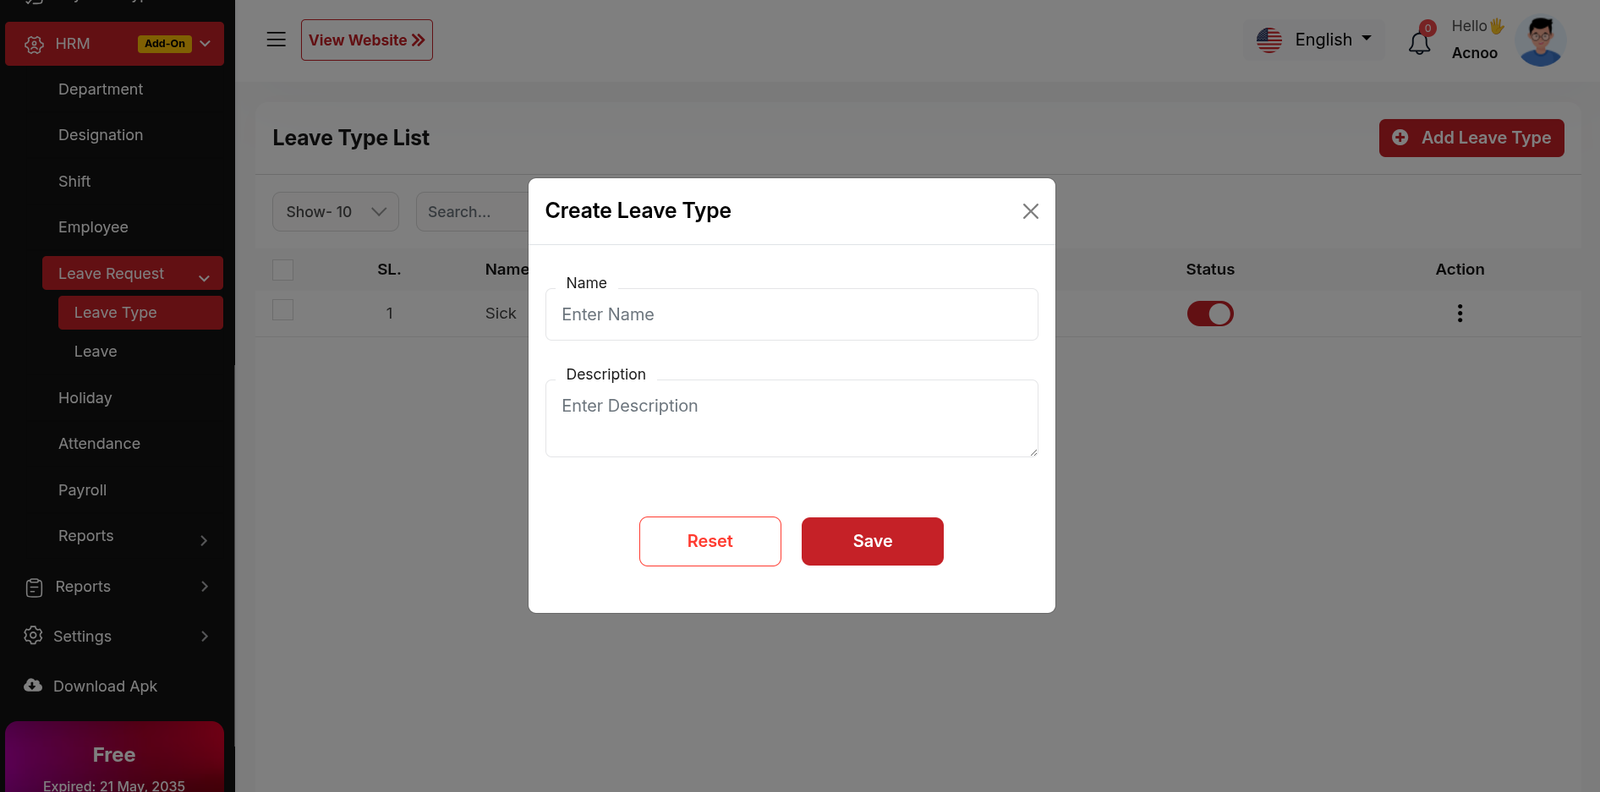
Create New leave type
The "Add New leave type" form appears as a pop-up or overlay on the "Leave Type List" page. It contains filled the following input fields.
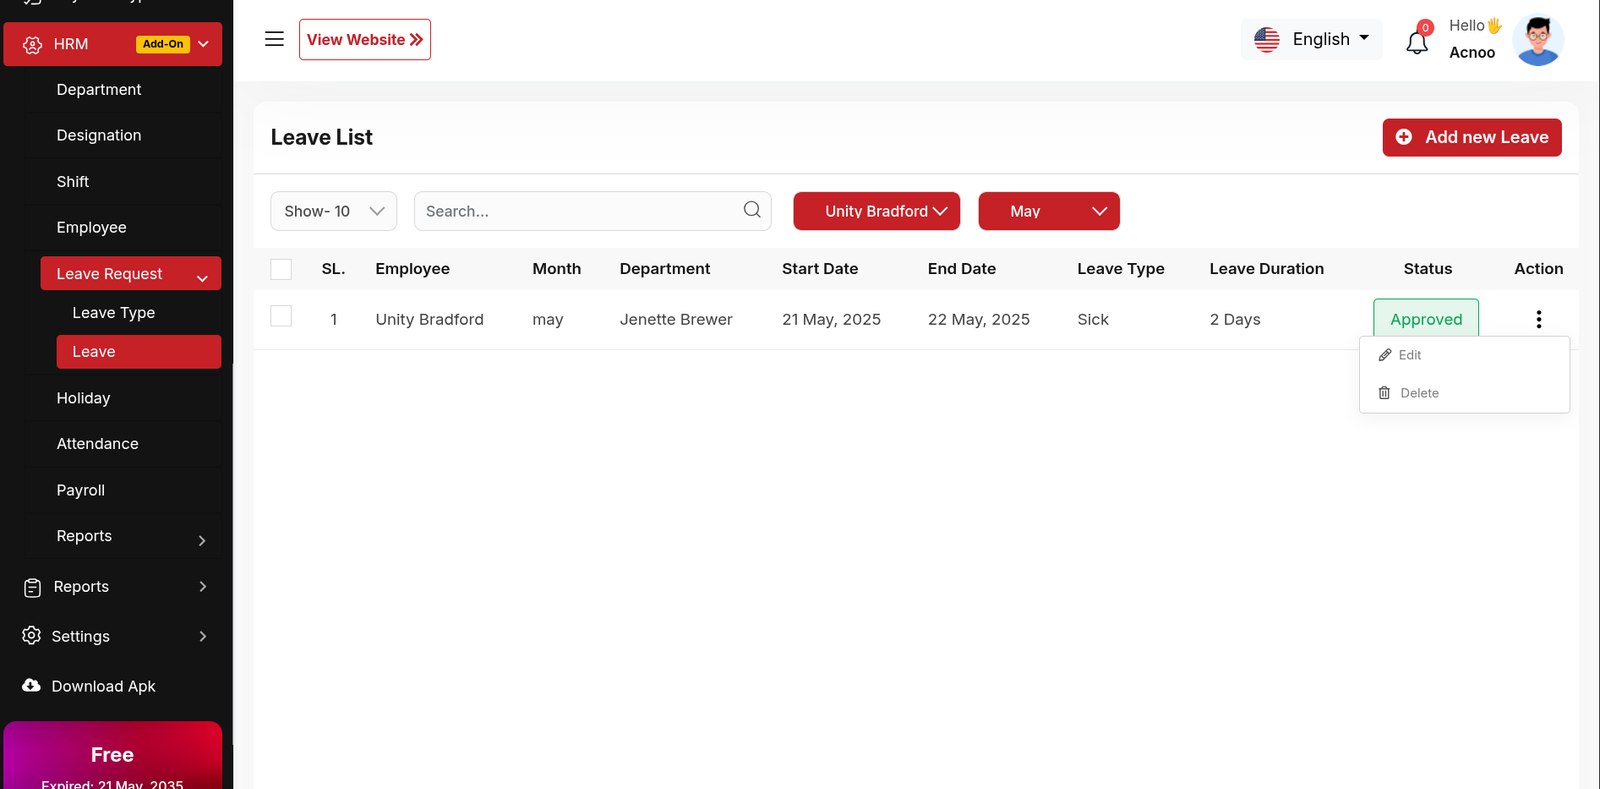
Leaves
The "Leave Employee List" page displays a list of all employee leave requests,
including relevant details such as the employee ID, name, leave type, start and end dates,
leave duration, approval status, and approver. It provides options to manage these leave
requests.
Use the search bar to find specific leave requests by employee ID, name, leave type, or
other relevant criteria.Click the "Add Now Leave" button to navigate to a page where you can
add a new leave request.Clicking the three dots in the "Action" where you can edit,delete
and view.
Status: The current status of the leave request (e.g., Pending, Approved,
Rejected).Where you can update the status.
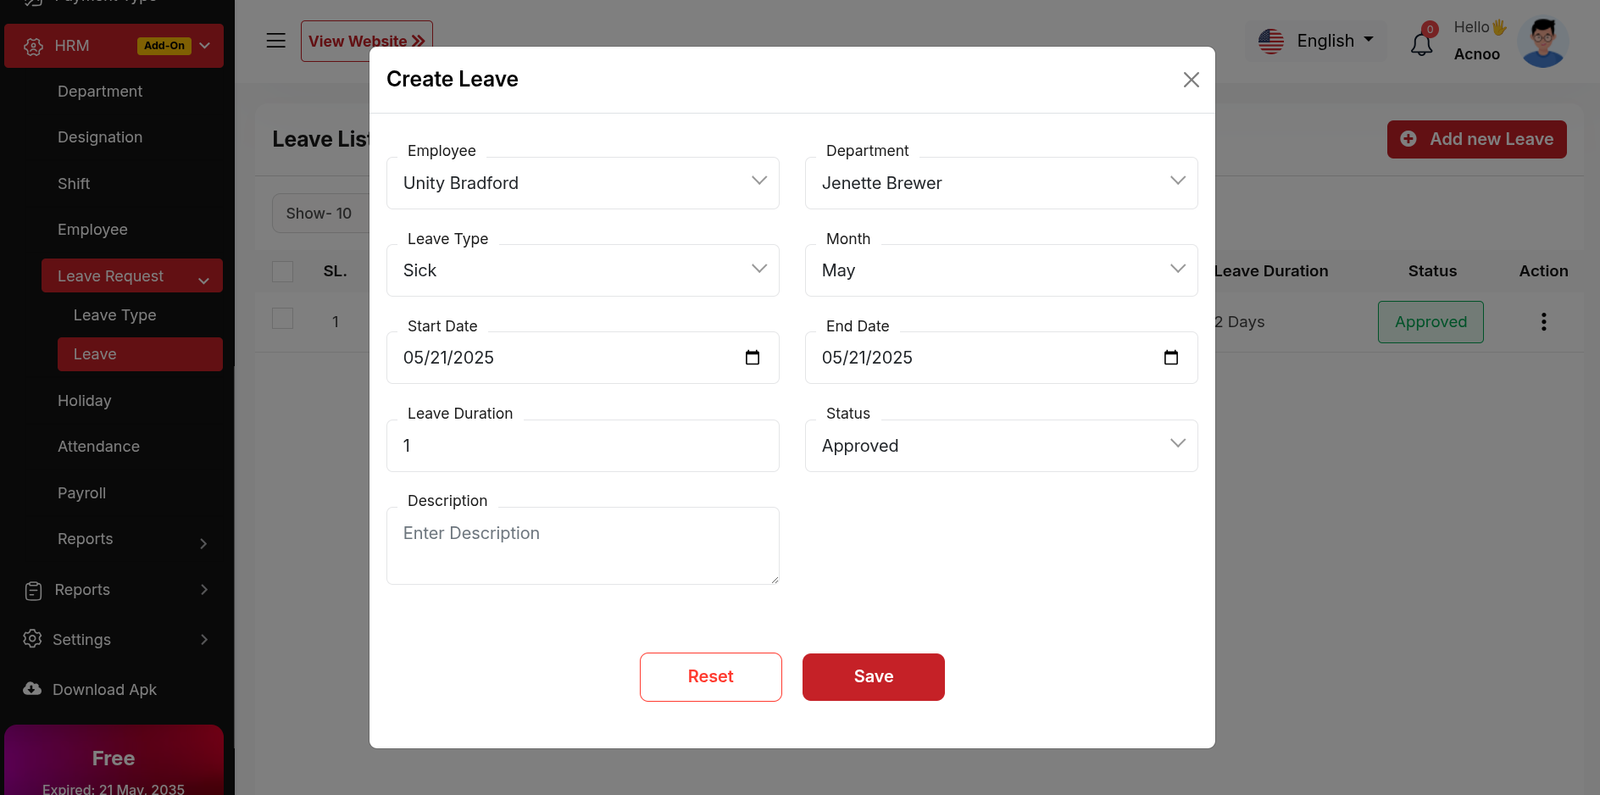
Add New Leave
The "Add New Leave" form appears as a pop-up or overlay on the "Leave Employee List" page. It contains the following fields:
Holiday List
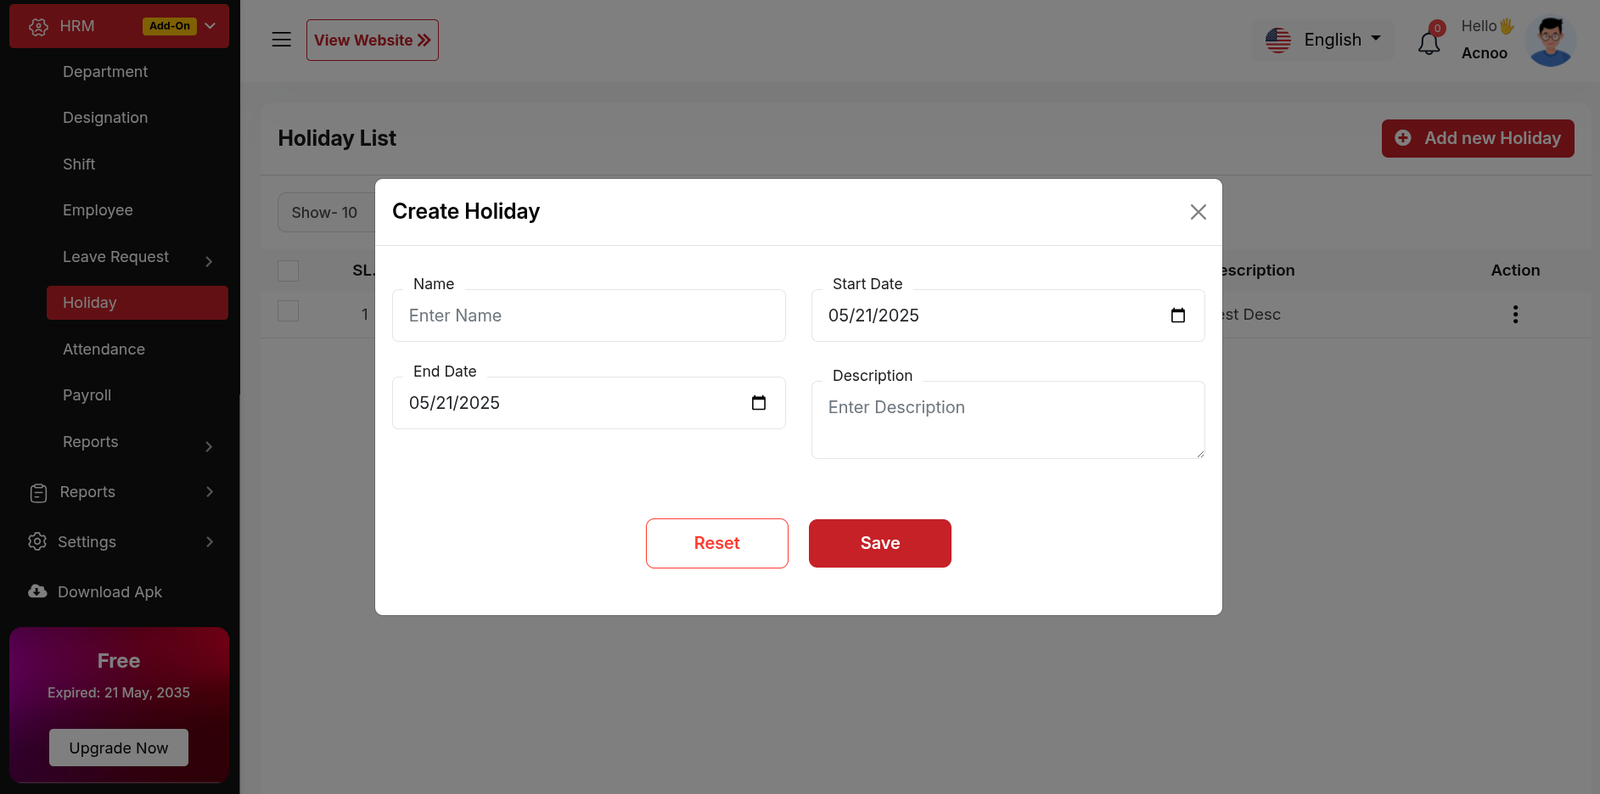
The "Holiday List" page displays a list of defined holidays with their dates, names, and descriptions. It provides options to manage these holidays.Click the "Add New Holiday" button to navigate to a modal where you can add a new holiday to the system.Clicking the three dots in the "Action" where you can edit,delete and view for holiday.

Create New Holiday
The "Add New Holidays" form appears as a pop-up or overlay on the "Holiday List" page. It contains filled the following input fields.
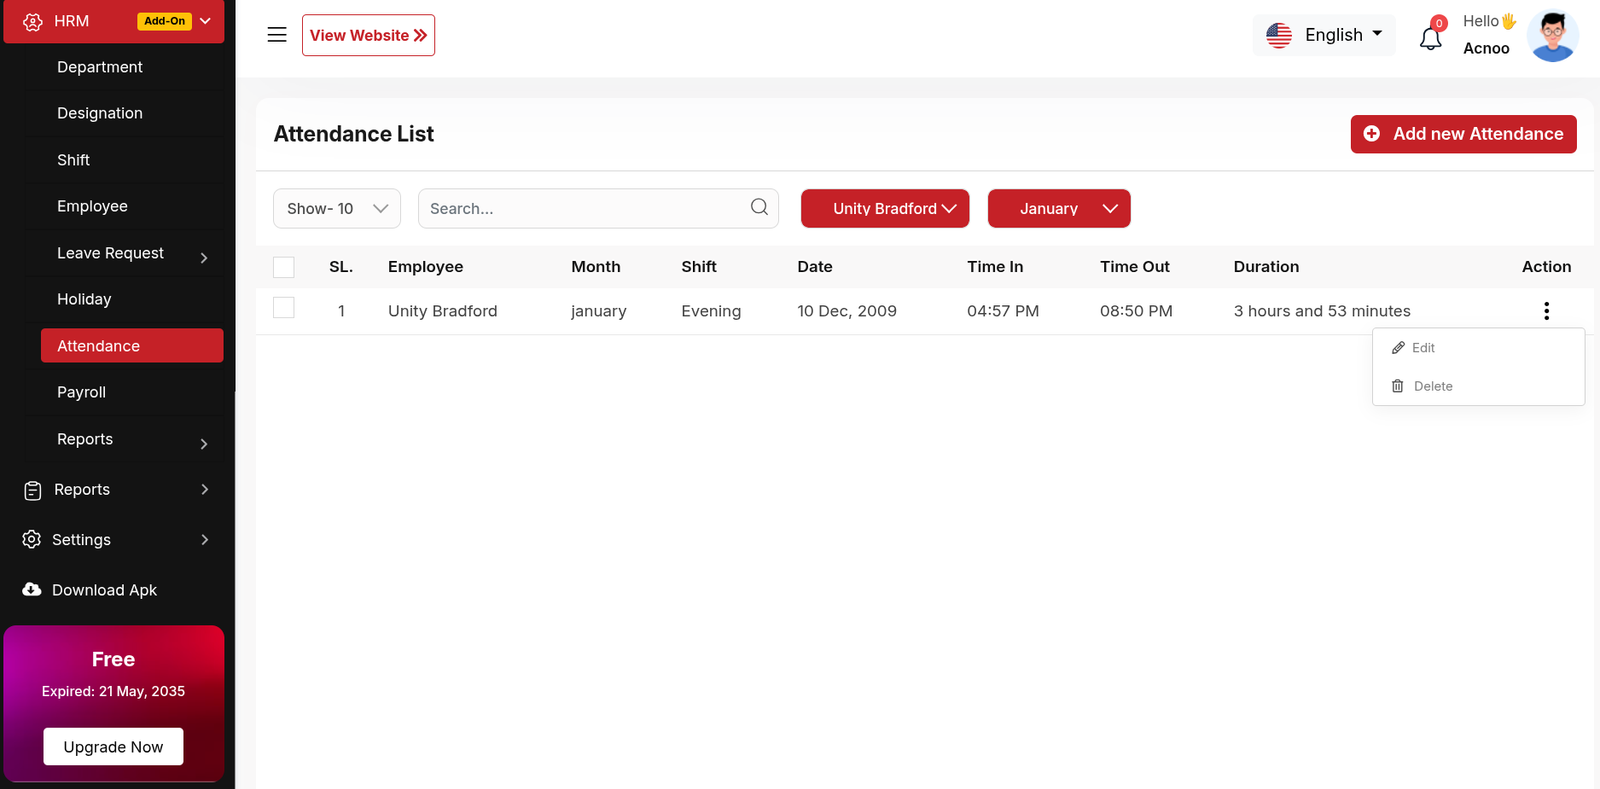
Attendance List
The image displays an attendance records of employees. The system appears to track employee attendance with timestamps and duration calculations.Click the "Add New Attendance" button to navigate to a modal where you can add a new Attendance to the system.Clicking the three dots in the "Action" where you can edit,delete and view for Attendance.
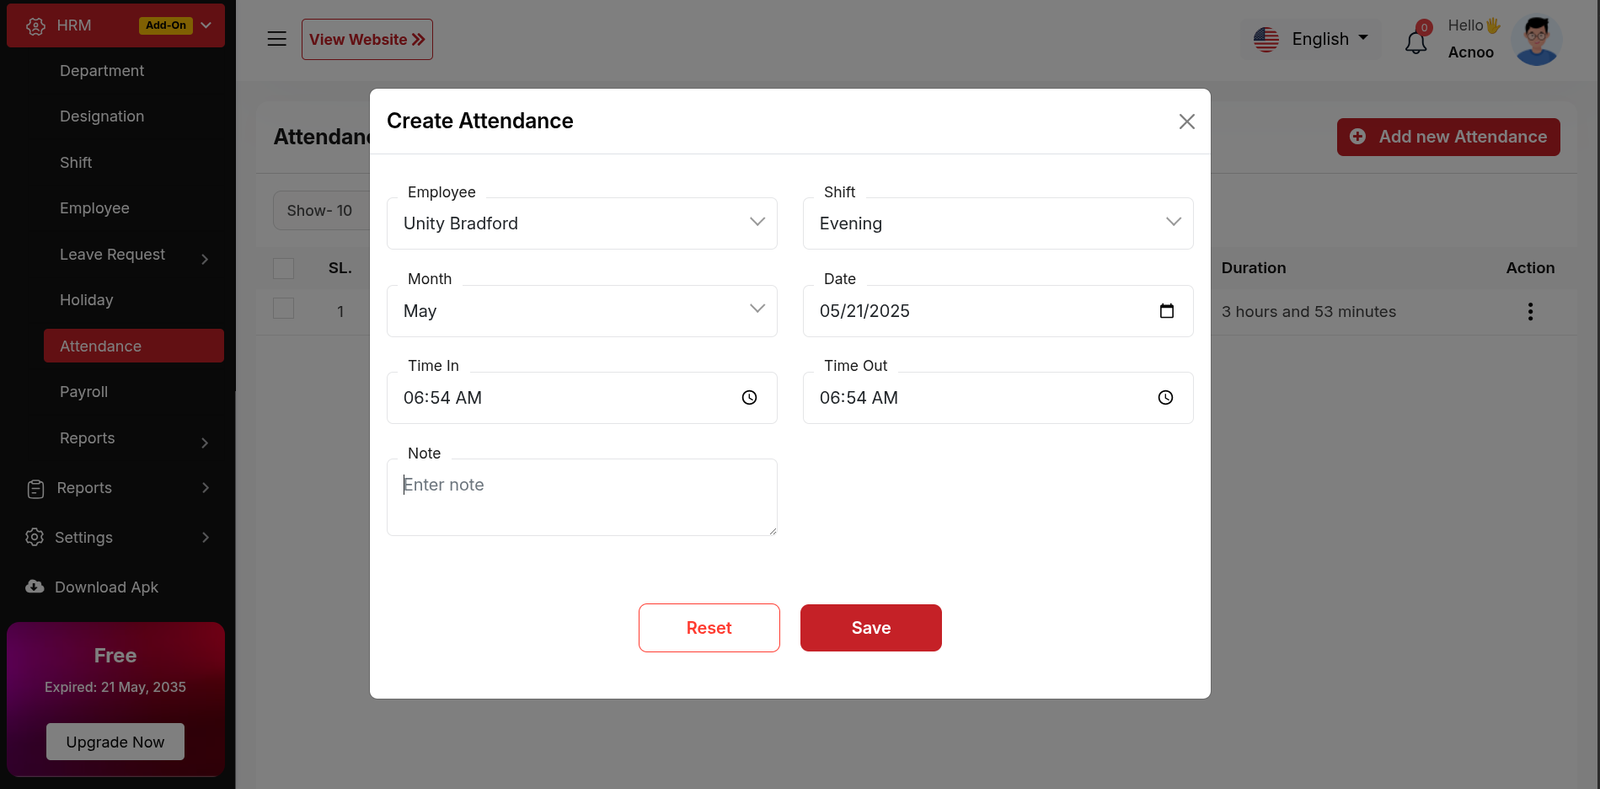
Create New Attendance
The "Add New Attendance" form appears as a pop-up or overlay on the "Attendance List" page. It contains filled the following input fields.
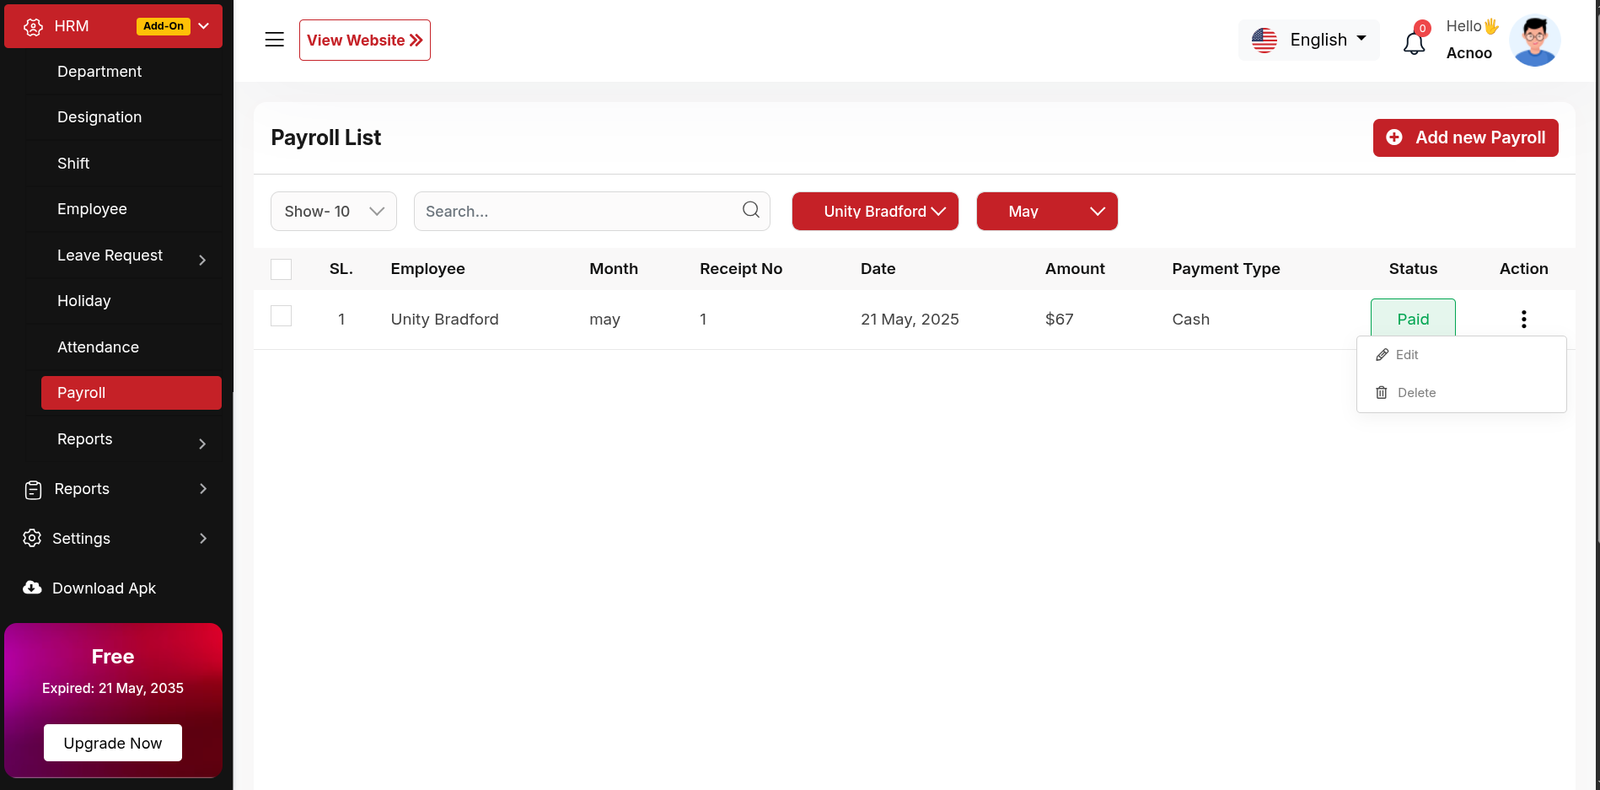
Payroll List
The Payroll List interface provides a comprehensive view of employee payroll transactions, enabling administrators to track payments, verify statuses, and manage records efficiently. This document outlines the key components, functionality, and observations from the displayed interface.Click the "Add New Payroll" button to navigate to a modal where you can add a new Payroll to the system.Clicking the three dots in the "Action" where you can edit,delete and view for Payroll.
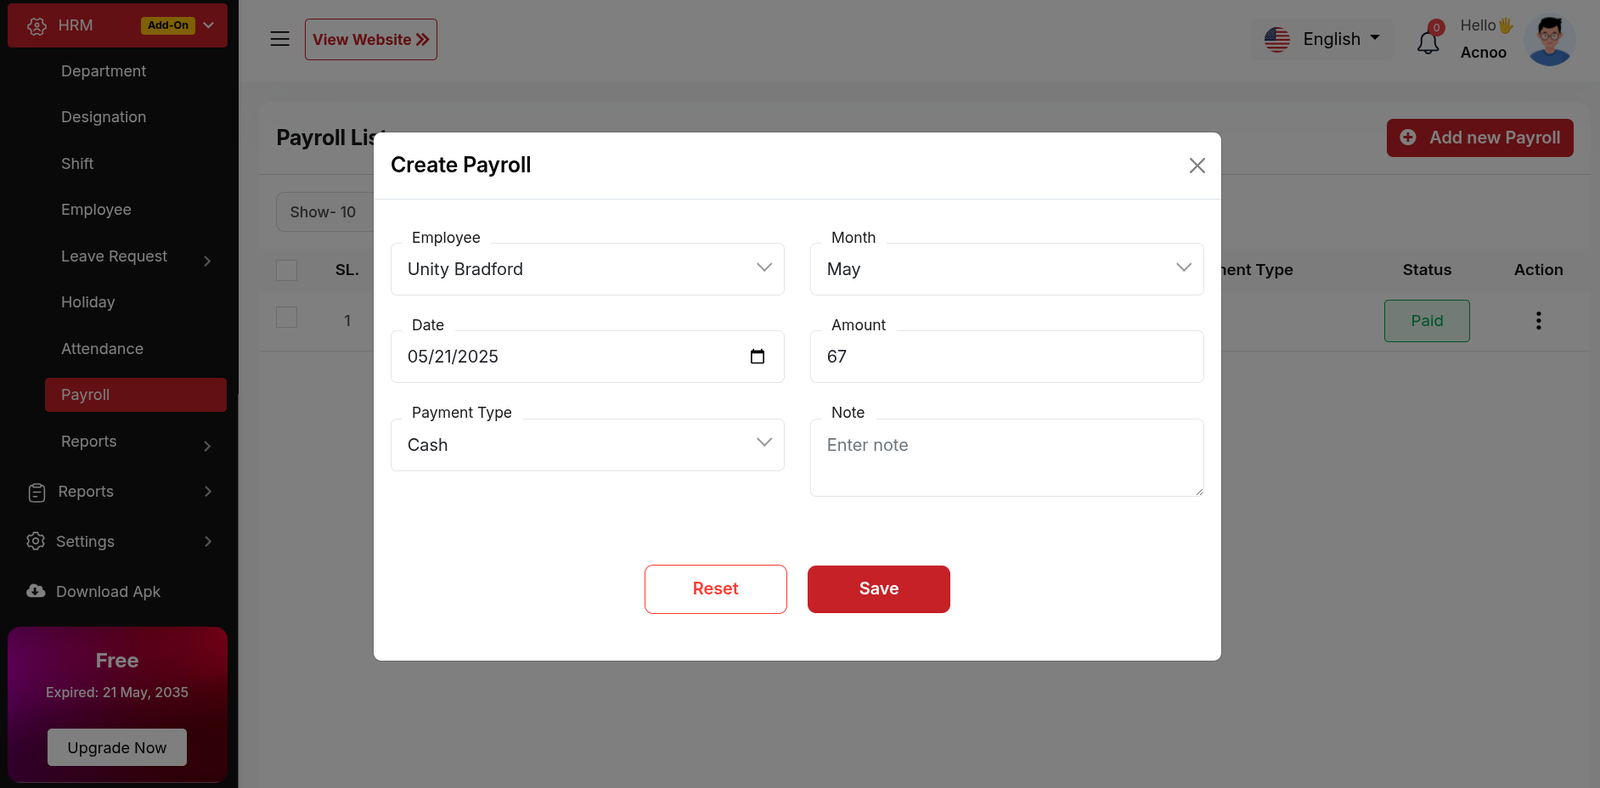
Create New Payroll
The "Add New Payroll" form appears as a pop-up or overlay on the "Payroll List" page. It contains filled the following input fields.
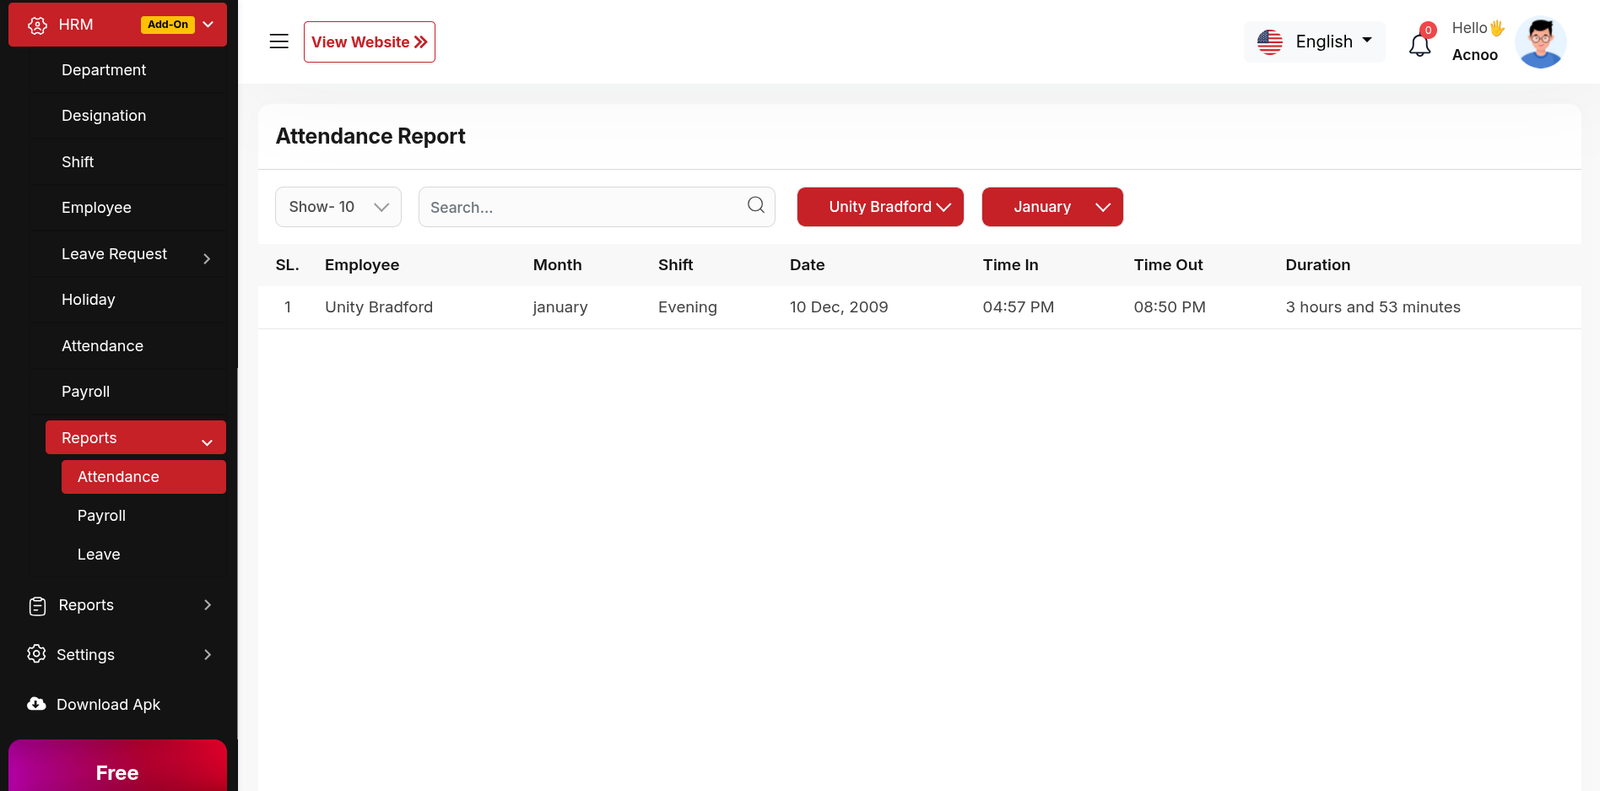
Attendance Reports
The Attendance Report module effectively tracks employee attendance with detailed shift and time data. Minor adjustments to filter logic, date formatting, and labeling would enhance accuracy and user experience.
Payroll Reports
The Payroll Report module provides a consolidated view of employee compensation data, enabling HR teams to efficiently manage, verify, and audit payroll transactions.

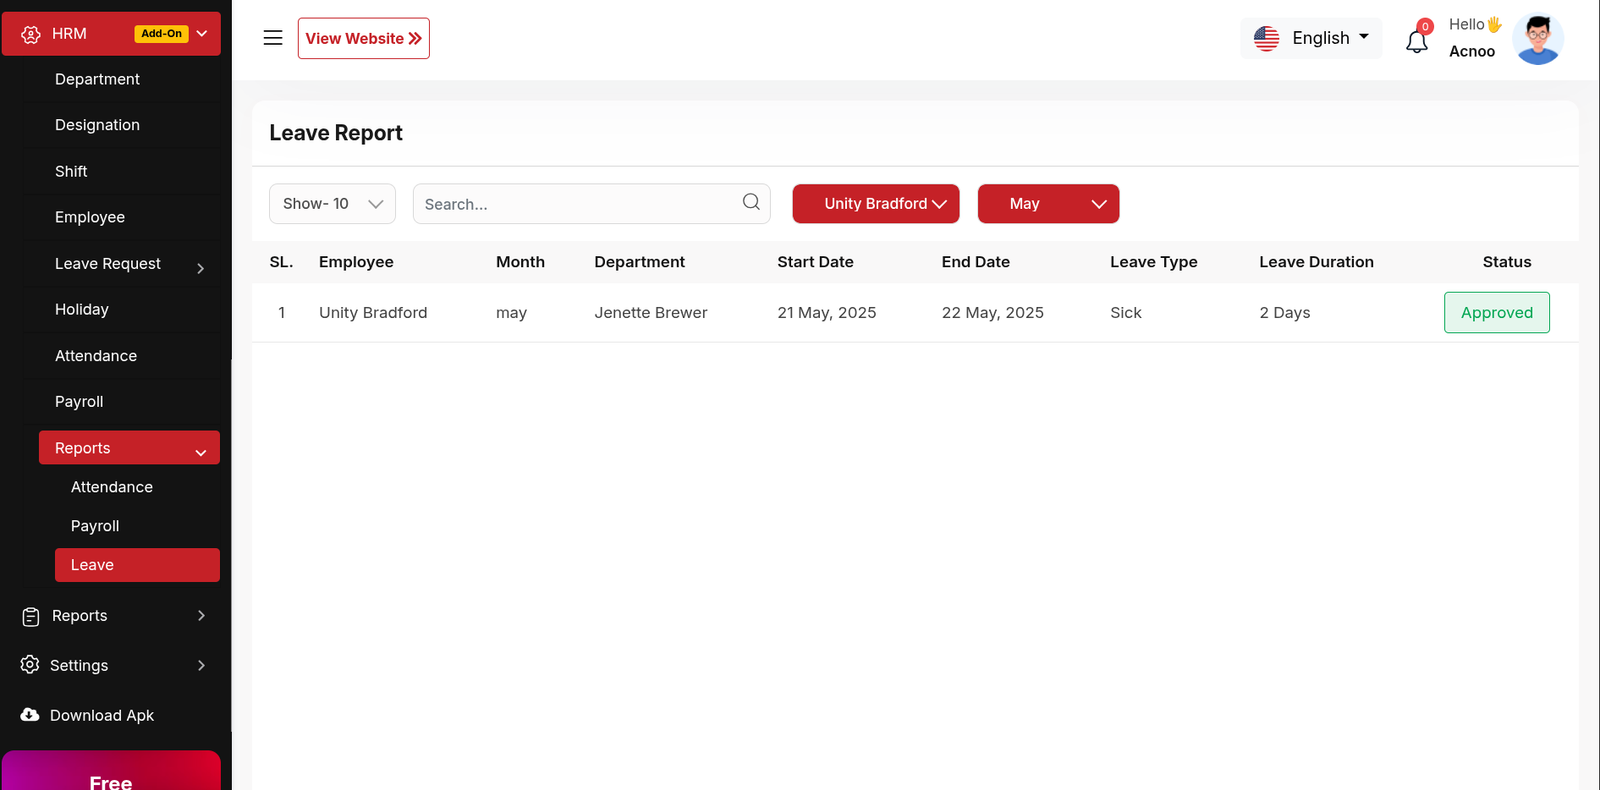
Leave Reports
The Leave Report provides a comprehensive view of employee leave requests, approvals, and tracking.
HRM Add-on Change Logs
Note: Before updating to the new version, please ensure you have a database and full project backup, and that your project is already updated to the latest version. This is extremely important!
Version: 1.2 ( 20 September 2025 )
- Layouts changed.
- System Architecture updated.
Note: Please click here to update your addon.
Note: If you face any issues with the update, please contact us.
Version: 1.1 ( 15 September 2025 )
- Added branch ID support for multiple modules such as Holidays, Attendances, Leaves, Payrolls and Employees.
- If a user logs in to a branch and creates any of these features, the system will automatically assign them to that branch.
- Branch addon must be available for this feature.
Note: Please click here to update your addon. Before updating this addon, you must first update Super-Admin.zip to version 5.5
Note: If you face any issues with the update, please contact us.
Version: 1.0.0 ( 26 May 2025 )
- Initial Release
POSpro Thermal Printer Add-on: Setup and Installation
📘 Overview:
The Thermal Printer Add-on for POS Pro is a useful extension that enables quick and efficient printing of receipts, invoices, and order tickets. This add-on supports thermal printers for faster, paper-saving, and cost-effective printing. With easy configuration, users can connect their thermal printer, customize print settings, and ensure smooth operations at the point of sale.
📦 Installation
The installation process for the Thermal Printer Add-on follows the same steps as outlined in the Business Add-on documentation.
👉 Please refer to the Business Add-on Installation Guide for detailed instructions.
📖 User Guide:
In this section, you will find all the images and step-by-step instructions needed to set up and use the thermal printer effectively.
POSpro Warehouse Add-on: Setup and Installation
📘 Overview:
The Warehouse Add-on for POS Pro is a powerful extension designed to streamline and optimize your warehouse management processes. This add-on allows users to efficiently organize and track inventory across multiple warehouses, ensuring that every product is accounted for. With real-time visibility, users can quickly check stock levels, monitor product movement, and access detailed reports on product quantities and stock values.
🔑 Key Features
📦 Centralized inventory management across multiple warehouses
📊 Real-time stock tracking and valuation for each product
🗂️ Easy categorization and organization of products and racks
📈 Detailed reports on stock movement, low stock alerts, and inventory trends
🔄 Seamless integration with POS Pro sales and product modules
🔒 Secure and reliable system, ensuring data integrity
⚡ Lightweight, user-friendly, and compatible with future POS Pro updates
📦 Installation
The installation process for the Warehouse Add-on follows the same steps as outlined in the Business Add-on documentation.
👉 Please refer to the Business Add-on Installation Guide for detailed instructions.
Warehouse
In this module, users can view a list of warehouses, along with their stock values and
quantities across all locations.
Use the search bar to find a specific warehouse by name, phone, email, or address. Per-page
filtering is also available. Click the "Add New" button to open a modal where you can enter
the required information to create a new warehouse. All mandatory fields must be completed.
Click the three dots under the "Action" column to edit, delete, or view details of a
warehouse.
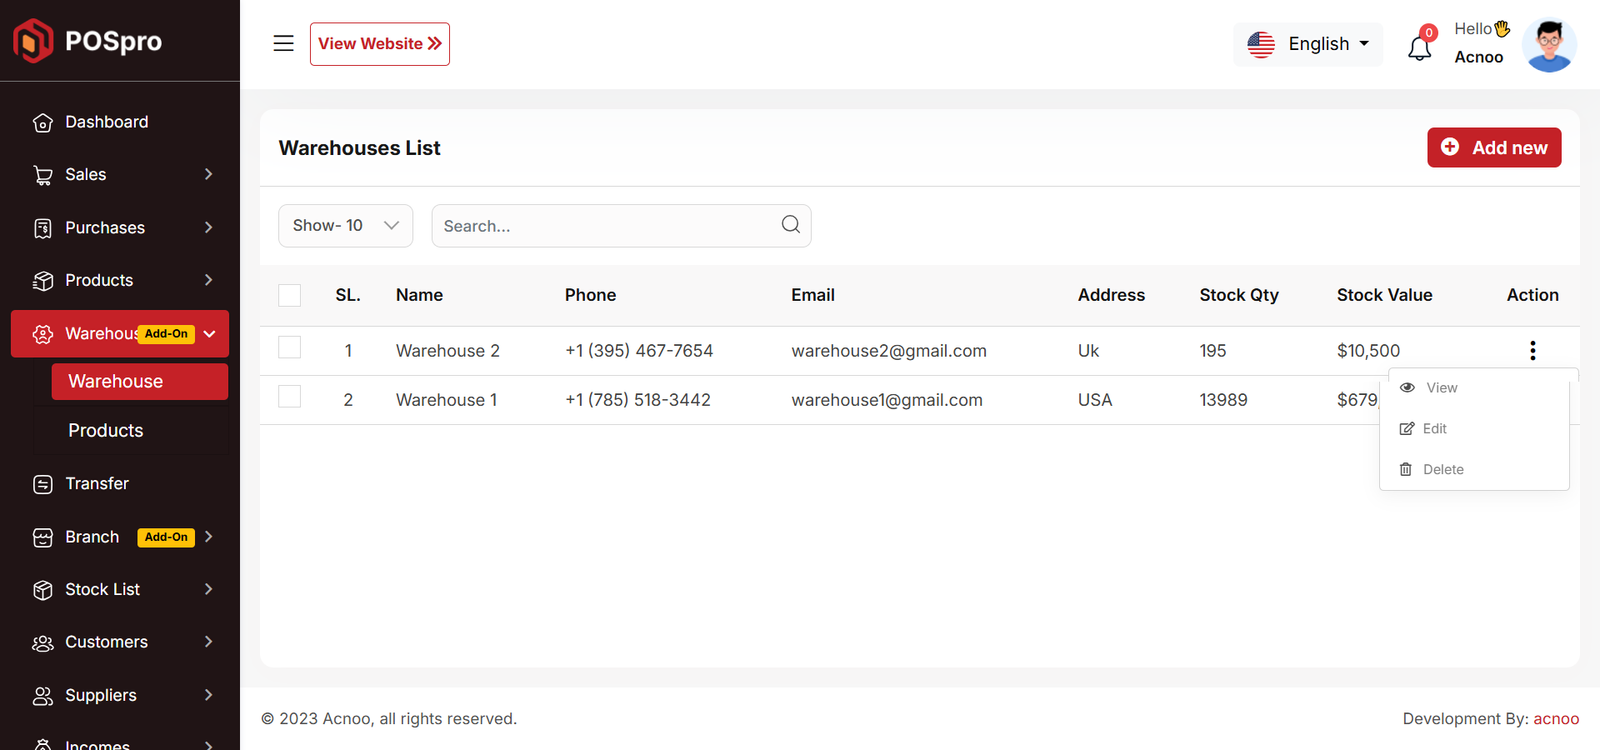
Add New
After clicking "Add New" a form will appear. Fill in the required fields and click the "Save" button. The new warehouse will be successfully added, and you will be redirected to the warehouse list.
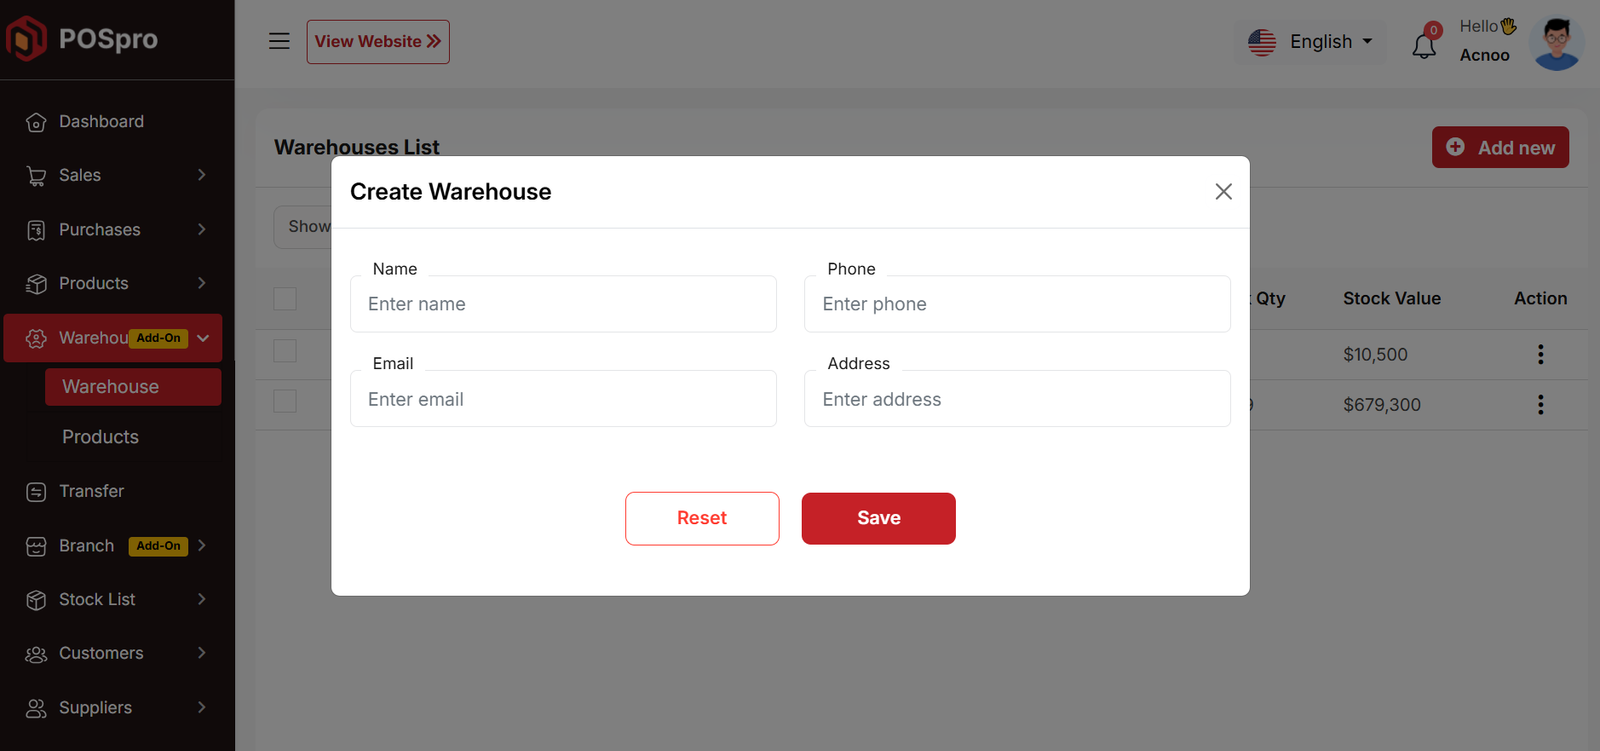
Product
The product list in this table is specific to each warehouse. Only products belonging to the selected warehouse will be displayed.You can filter the list using the input field, and per-page filtering is also available. Clicking on a product name allows you to view the stock details for that product.
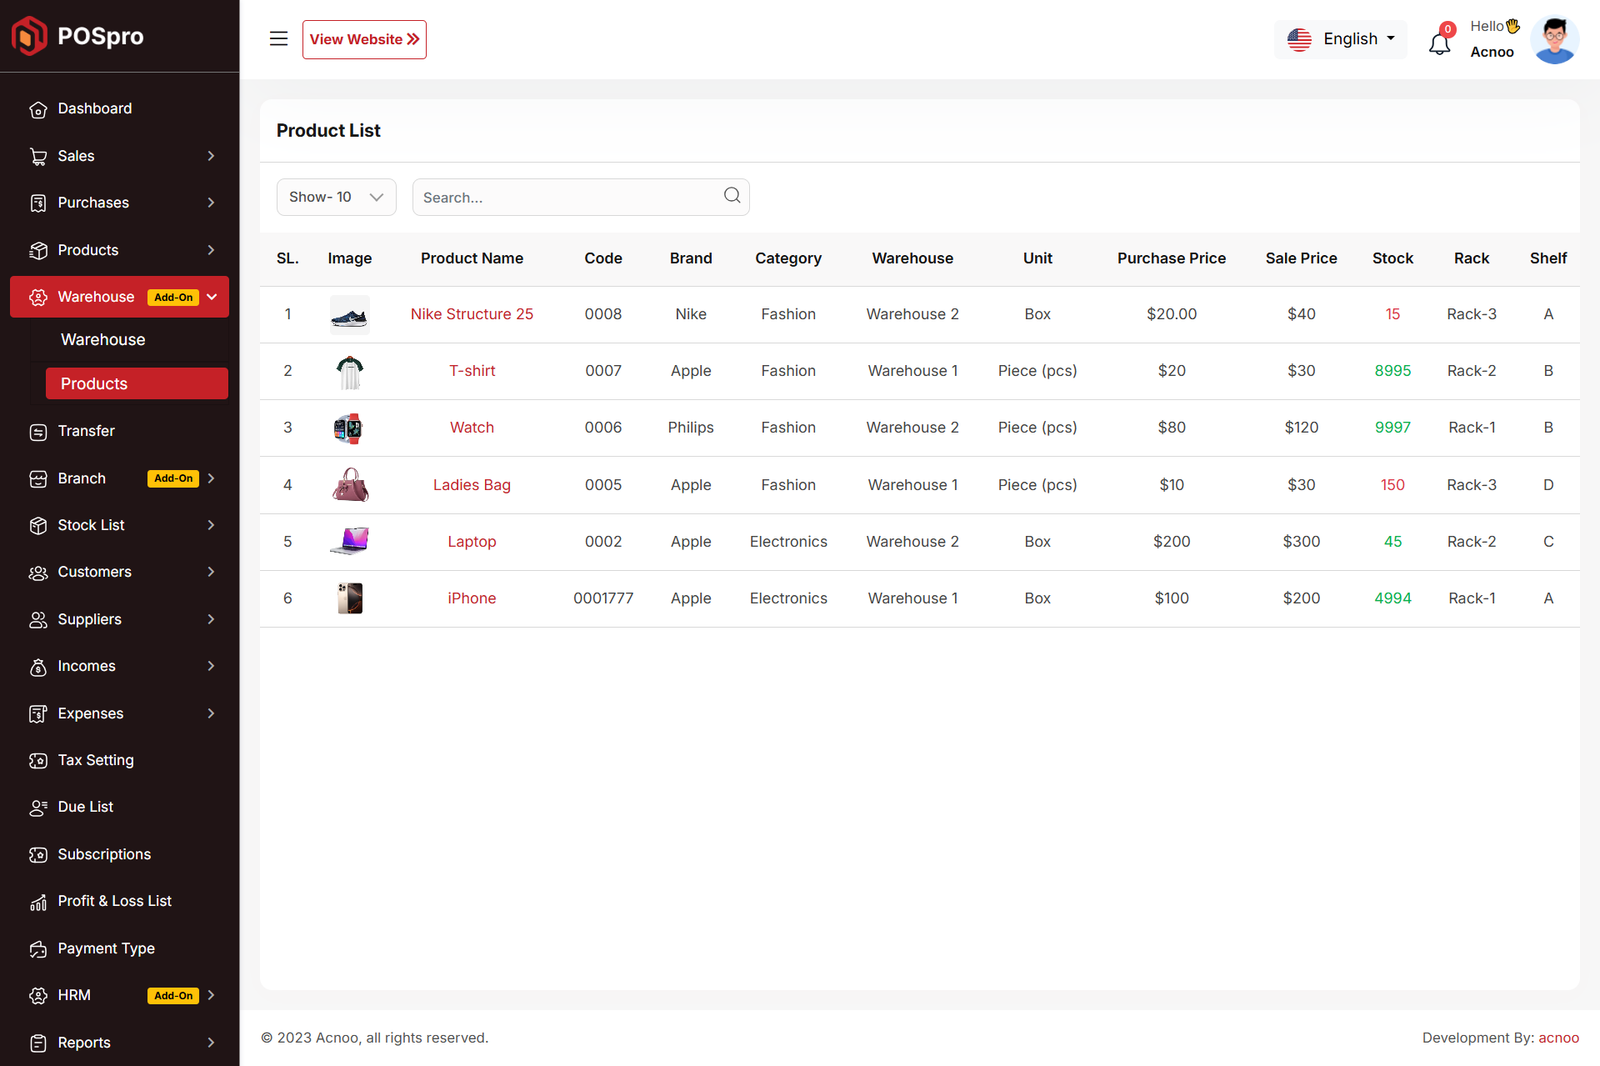
Transfer List
Here, you will see the complete transfer list. The branch column will be visible only if the MultiBranch Add-on is installed. In the listing, you can filter transfers using the search input field or adjust the number of entries displayed per page. From here, you can also add a new transfer, edit or delete a transfer, or perform a multi-delete. Please note that transfers with a status of "Pending" cannot be edited. The Edit page works the same way as the Create page, except that in the status section, an additional "Cancel" option will be available.
Create Page
If you have installed the MultiBranch Add-on, you will be able to see the "Branch" field. It will also check whether you are logged in to a branch. Otherwise, only warehouse-to-warehouse transfers will be available.
If you are not logged in under any branch, you will get the option to transfer
products from one branch to another.
* You can transfer products from one branch to another branch.
* You can transfer products from one warehouse to another warehouse.
* You can also transfer products from a warehouse in one branch to a warehouse in another
branch.
Once the transfer is completed, product stock will be automatically updated (increased or
decreased) based on the transfer.
When login into a branch
If you are logged in to a branch, you do not need to select a "from branch" because
you are already under a branch.
* You can transfer products from your branch to another branch.
* You can transfer products from a warehouse to another warehouse in your branch.
Once the transfer is completed, product stock will be automatically updated (increased or
decreased) based on the transfer.
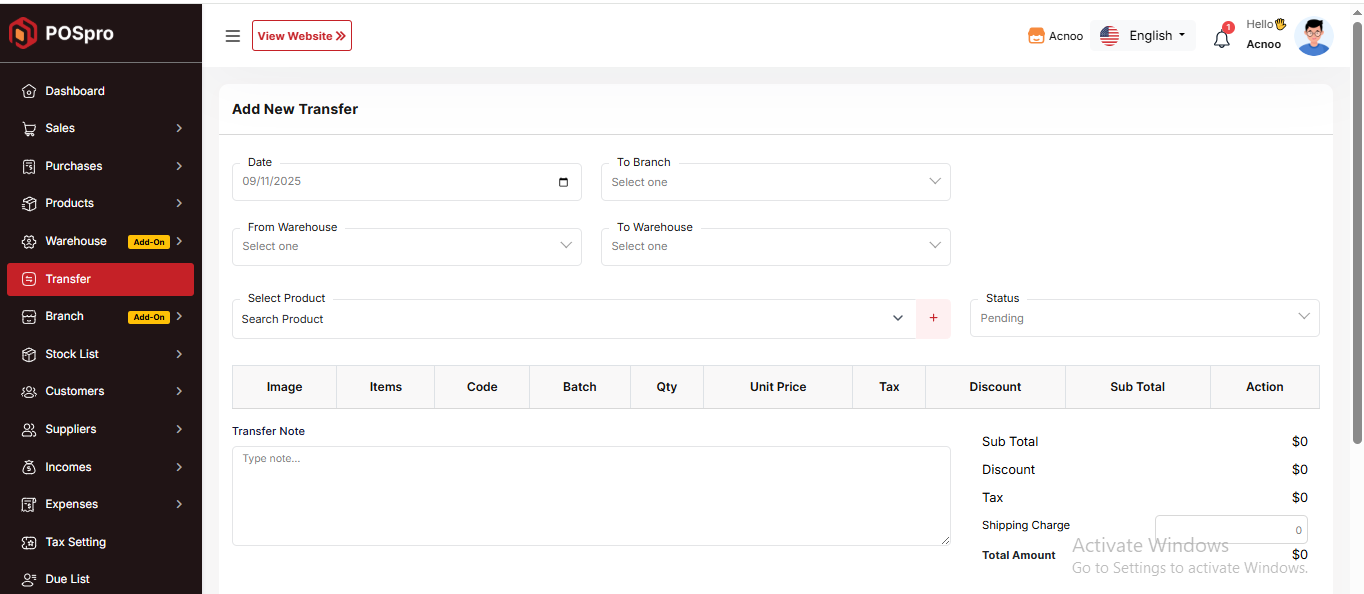
Warehouse Add-on Change Logs
Note: Before updating to the new version, please ensure you have a database and full project backup, and that your project is already updated to the latest version. This is extremely important!
Version: 1.1 ( 20 September 2025 )
- Layouts changed.
- System Architecture updated.
Note: Please click here to update your addon.
Note: If you face any issues with the update, please contact us.
Version: 1.0.0 ( 15 september 2025 )
- Initial Release
Note: Please click here to update your addon.Before updating this addon, you must first update Before updating this addon, you must first update Super-Admin.zip to version 5.5
Note: If you face any issues with the update, please contact us.
POSpro Multi-Branch Add-on: Setup and Installation
Get Started:
After installing the MultiBranch Add-on from the admin panel, it will automatically appear in the Business Add-on list. You only need to configure the Branch credentials to start using it. If you have branches, you must login to a branch to create sales, purchases, sale-purchase returns, products, or expenses. If you have the HRM Module, you must login to a branch to add employees. Additionally, if you are logged in to a specific branch, only that branch's data will be displayed. If you are not logged in to any branch, data from all branches will be shown.
📦 Installation
The installation process for the MultiBranch Add-on follows the same steps as outlined in the Business Add-on documentation.
👉 Please refer to the Business Add-on Installation Guide for detailed instructions. After installing the MultiBranch Add-on from the admin panel, you can enable or disable Multibranch in the Subscription Plan as per your requirement. If a plan does not allow multibranch, then you will not see branches in the Business panel.
Subscription Plan
You can allow or disallow multibranch when creating or updating a plan.
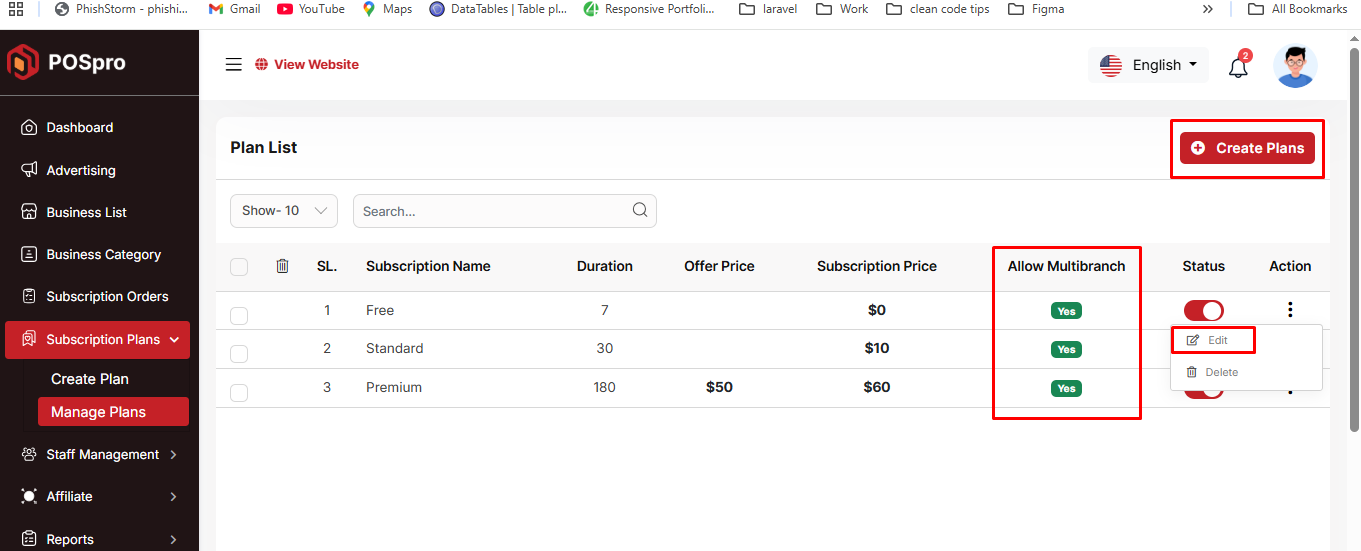
Create Page
An example of the create page is shown below.
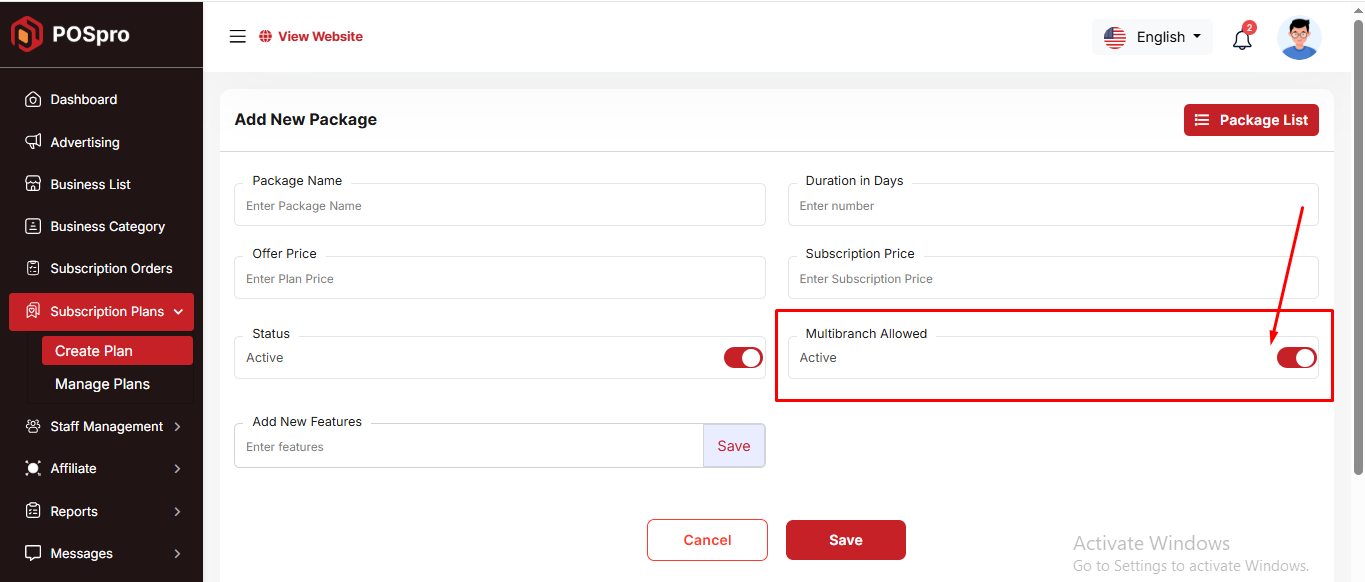
Overview
Here, you can view an overview of all branches. The revenue statistics are displayed, and you can select a year to dynamically update the chart for the chosen period. A pie chart shows profit and loss, with a yearly dropdown available for selection. Similarly, you can view branch-wise sales and purchase lists. The system also displays the quantity of expired products in each branch, as well as an employee overview showing the number of employees per branch.
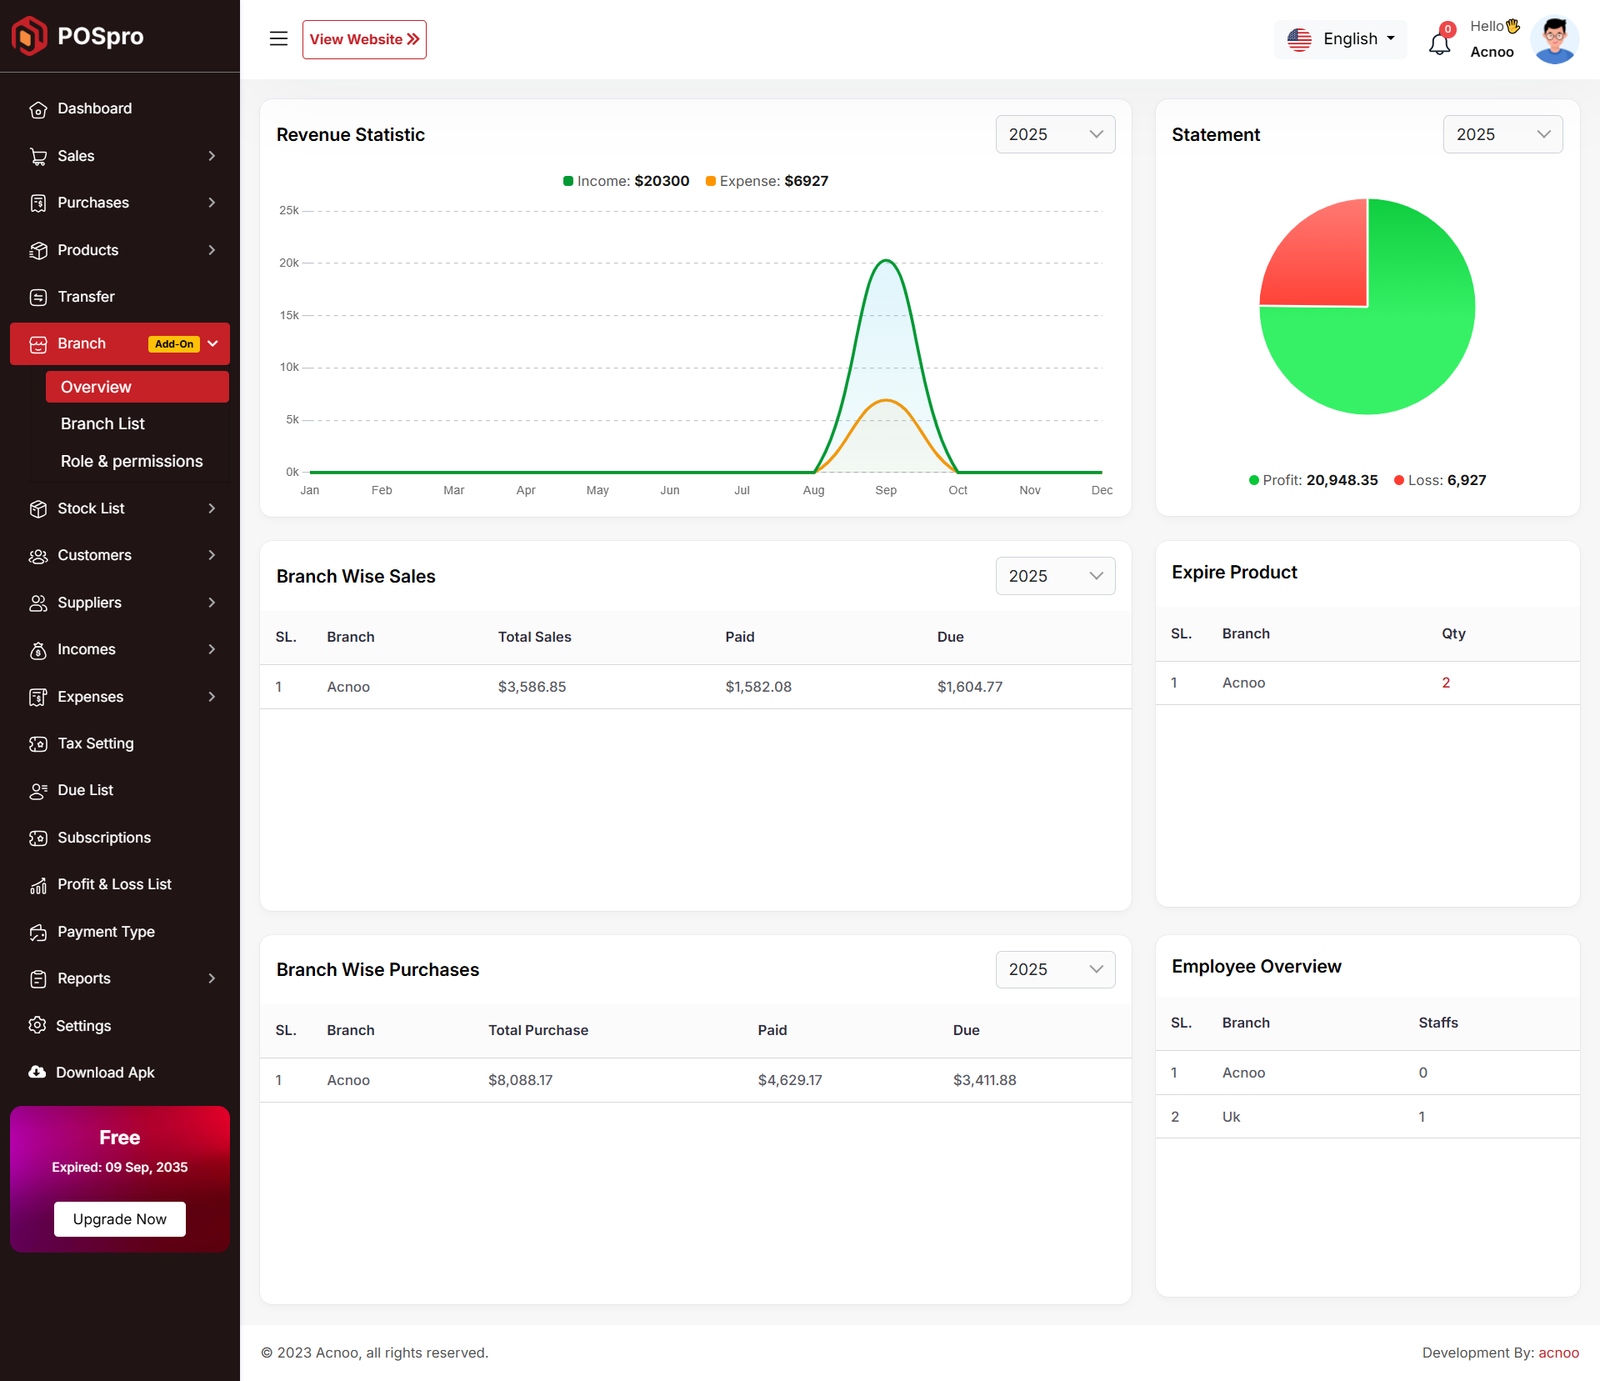
Branch List
Here, you can view a list of all branches, including the first branch. At the top of the
table, instructions are provided on how to create a branch. When creating a new branch, the
system will automatically generate it (if it does not already exist), and relevant data will
be moved to the new branch. For example, when a branch is created, the new branch will be
generated automatically using the business name. Note that the first branch cannot be
deleted.
In the listing, you can filter branches using the search input field or adjust the number of
entries displayed per page. From here, you can also add a new branch, edit or delete
branches, or perform a multi-delete. Additionally, by click on business name, also have the
"Login" button allows you to log in directly to the selected branch.
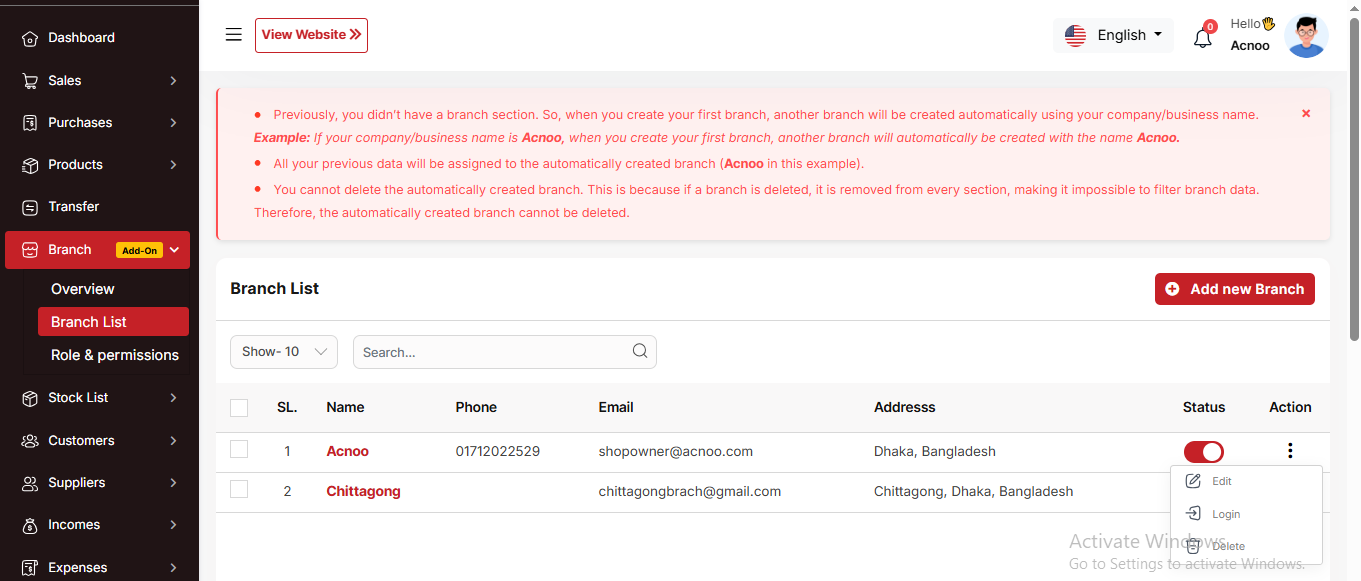
Create New
After clicking on "Add New Branch" a modal will open where you need to fill in the required information. Once completed, click the "Save" button. The new branch will be created successfully, and you will be redirected to the branch list. If you are logged in to a branch, the name of that branch will be displayed in the header.
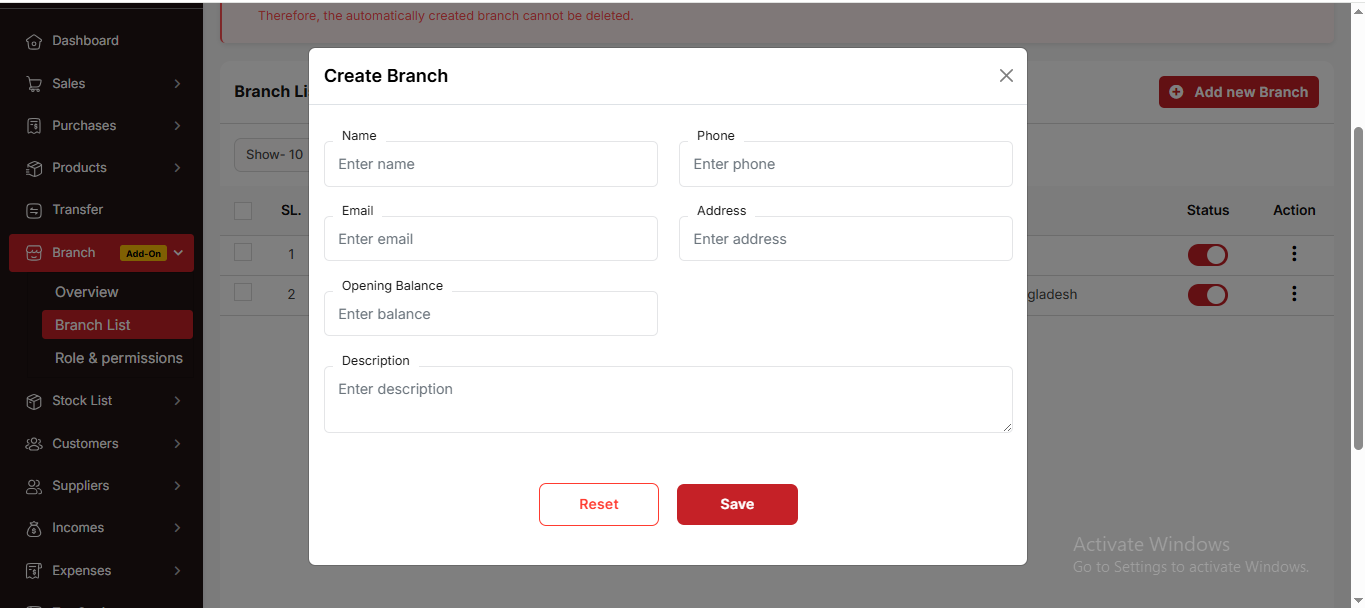
Profile
If you are logged in to a branch, you will see the Branch Opening/Remaining Balance. Otherwise, the Shop Opening/Remaining Balance will be displayed
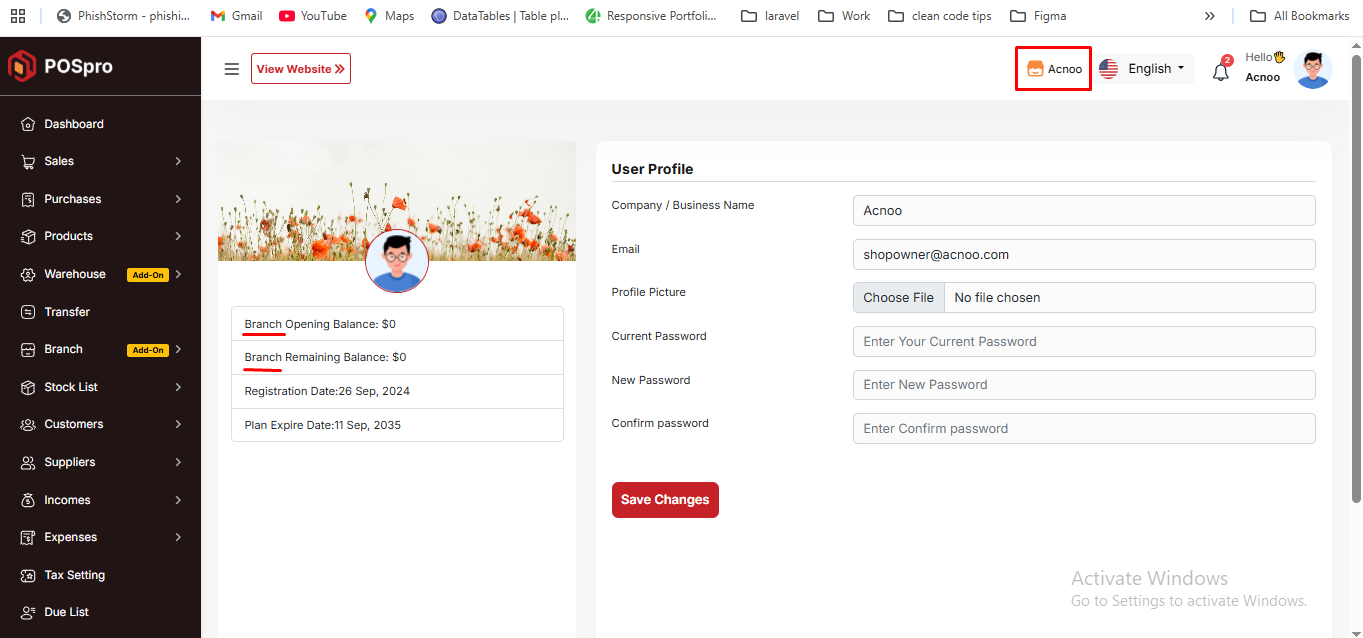
Role & Permission List
Here, you can view a list of roles and permissions. The list displays name along with the number of features accessible to users. You can filter the list using the search input field or the per-page filter option. From here, you can also add a new user role, edit an existing role, or delete one. Multi-delete functionality is also available.
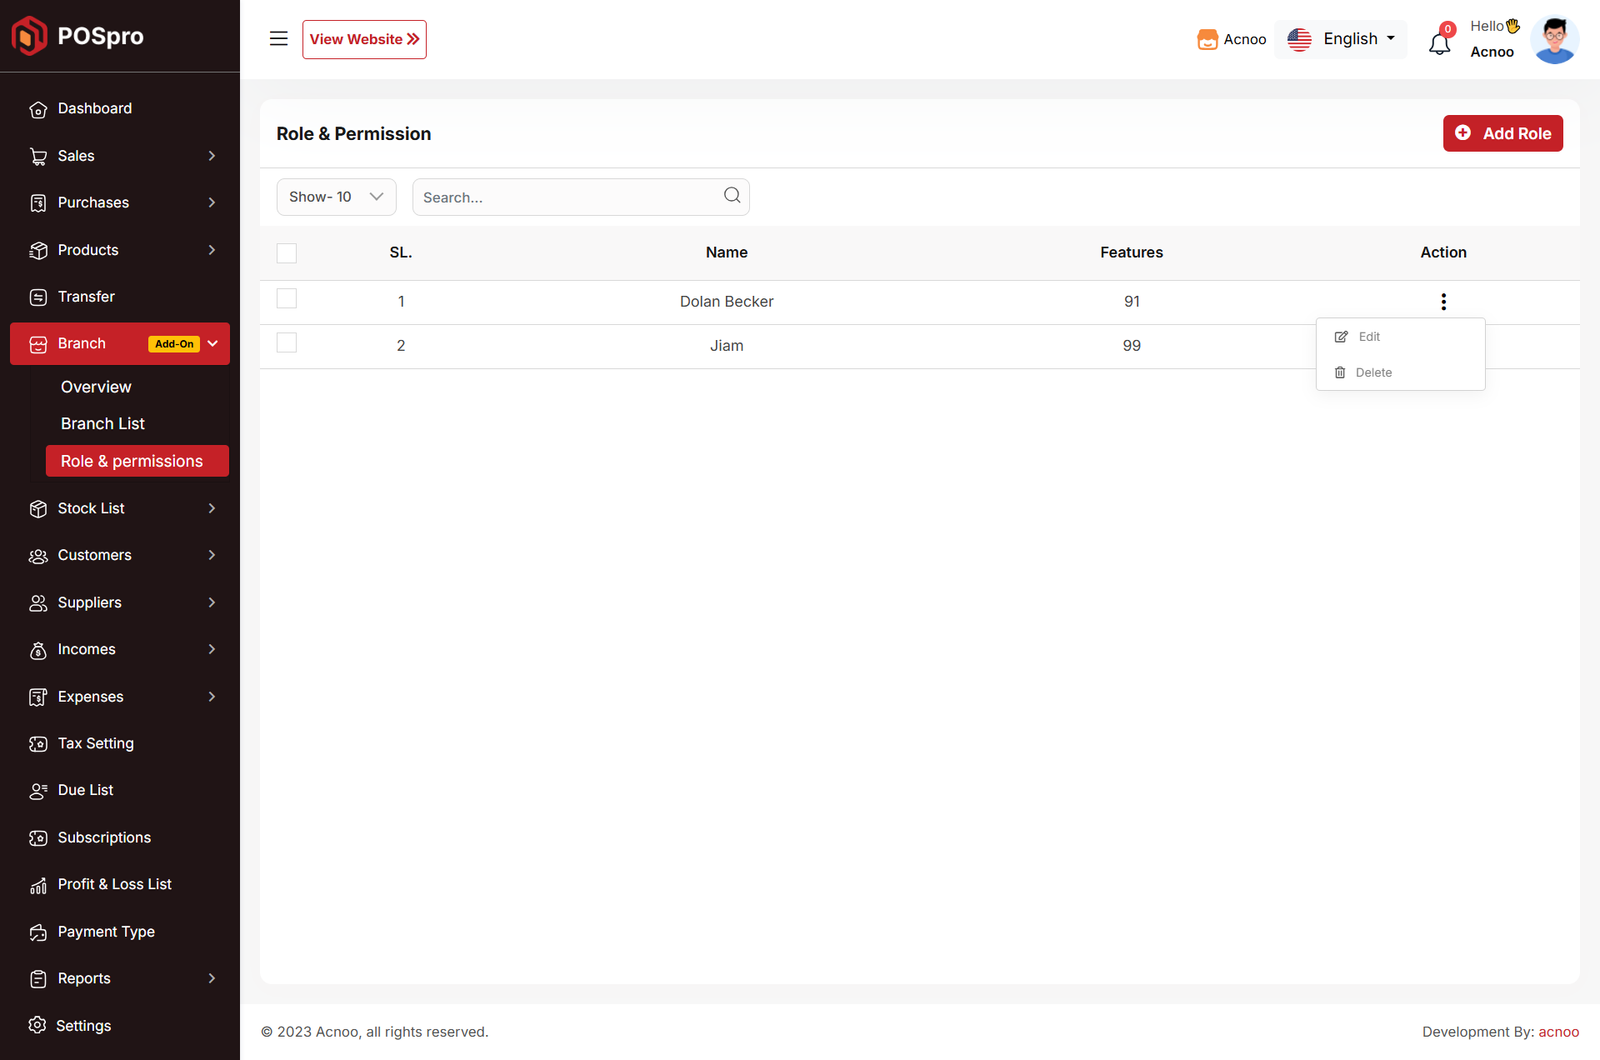
Add Role
After clicking on "Add Role," you will be redirected to the create page, where you need to fill in the required information. Once completed, click the "Save" button. The new user role will be created successfully, and you will be redirected back to the user role list. If you are not under any branch, a new field will appear where you can select the branch for which you want to assign the role and permissions.
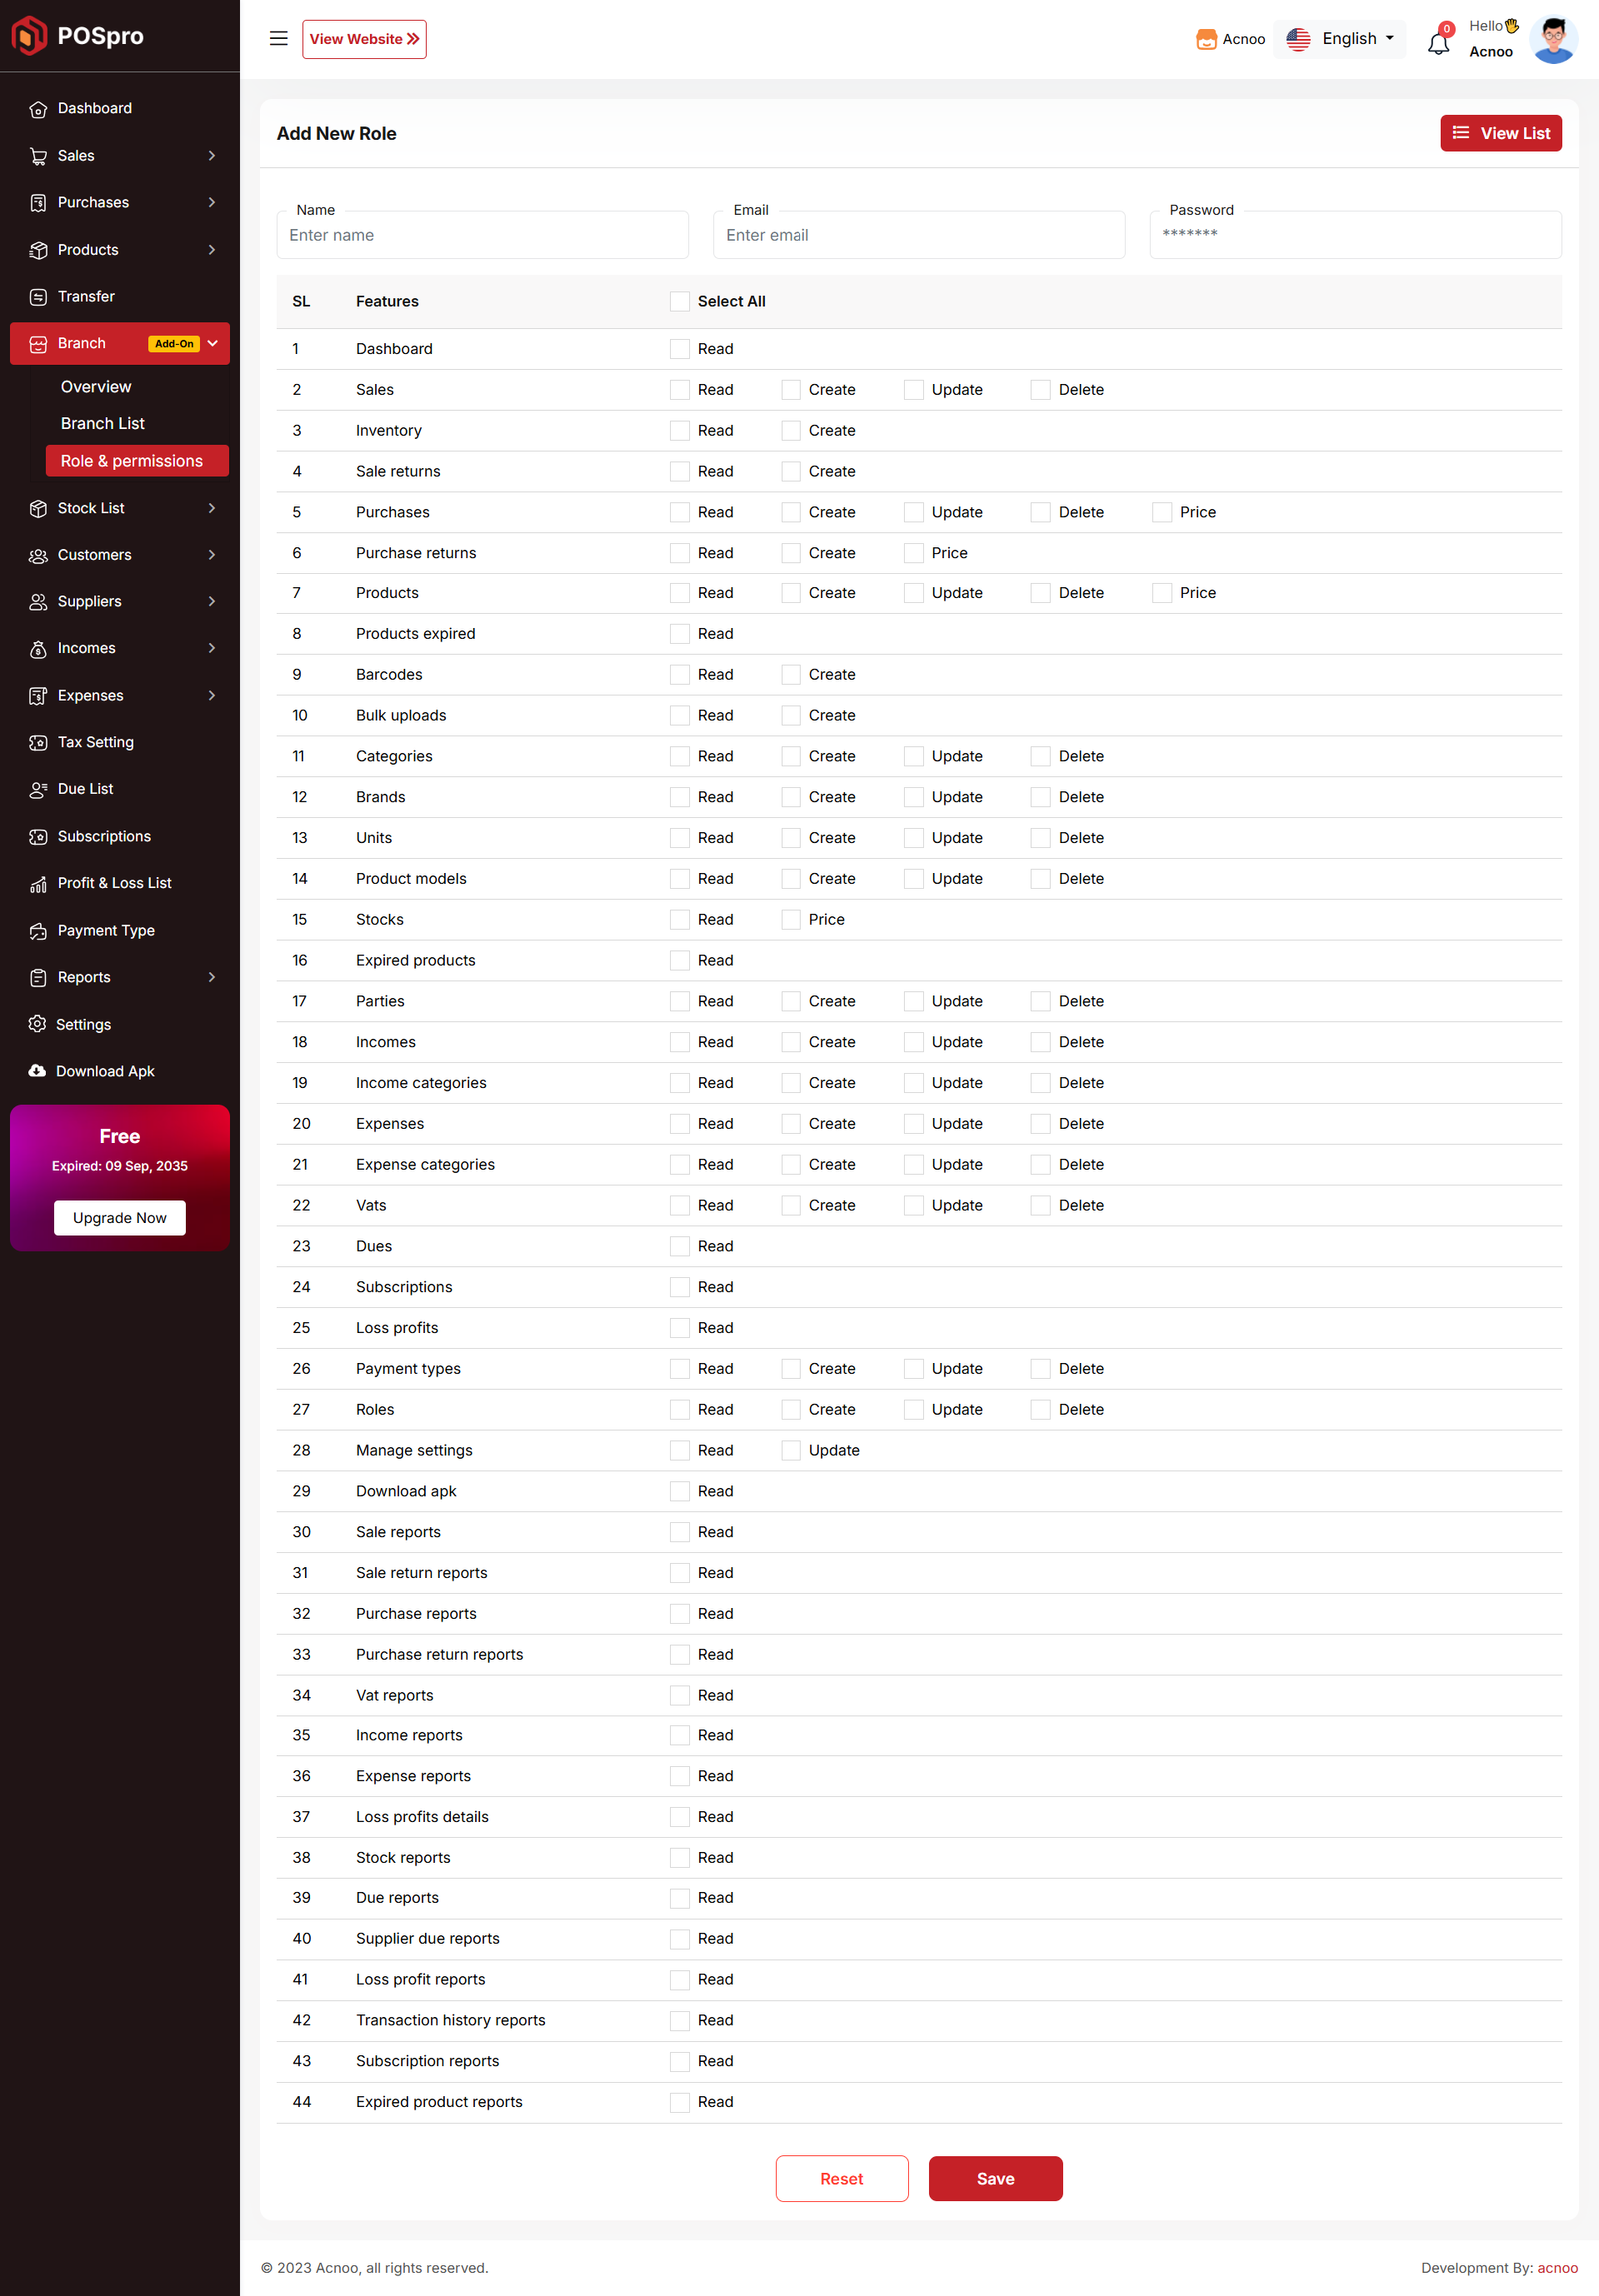
Transfer List
Here, you will see the complete transfer list. The warehouse column will be visible only if the Warehouse Add-on is installed. In the listing, you can filter transfers using the search input field or adjust the number of entries displayed per page. From here, you can also add a new transfer, edit or delete a transfer, or perform a multi-delete. Please note that transfers with a status of "Pending" cannot be edited. The Edit page works the same way as the Create page, except that in the status section, an additional "Cancel" option will be available.
Create Page
If you are not logged in under any branch, you will get the option to transfer
products from one branch to another. If the Warehouse Add-on is installed, you can also
transfer products between warehouses.
* You can transfer products from one branch to another branch.
* You can transfer products from one warehouse to another warehouse.
* You can also transfer products from a warehouse in one branch to a warehouse in another
branch.
Once the transfer is completed, product stock will be automatically updated (increased or
decreased) based on the transfer.
When login into a branch
If you are logged in to a branch, you do not need to select a "from branch" because
you are already under a branch. If the Warehouse Add-on is installed, you can also transfer
products between warehouses.
* You can transfer products from your branch to another branch.
* You can transfer products from a warehouse to another warehouse in your branch.
Once the transfer is completed, product stock will be automatically updated (increased or
decreased) based on the transfer.
Collect Due
In the Due List section, when you click "Collect Due," you will be taken to the page below. If you are logged in under an active branch, you can only collect dues from the selected invoices. The invoices will be filtered according to your branch, and the balance will be updated from the branch to which the invoice belongs. If you are not under any branch, you can collect dues without selecting invoices. In this case, the due will be adjusted from the shop's overall balance. If you collect dues along with invoices, the balance of the branch to which each invoice belongs will be updated accordingly.
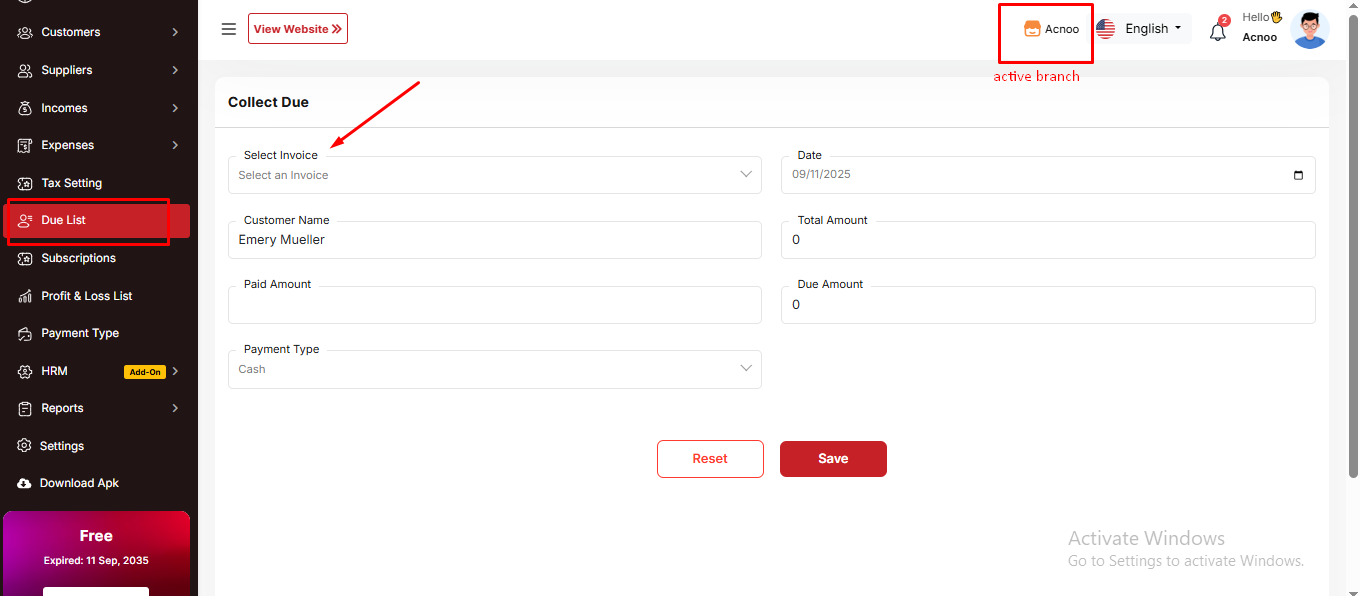
Multi Branch Add-on Change Logs
Note: Before updating to the new version, please ensure you have a database and full project backup, and that your project is already updated to the latest version. This is extremely important!
Version: 1.1 ( 20 September 2025 )
- Layouts changed.
- System Architecture updated.
Note: Please click here to update your addon.
Note: If you face any issues with the update, please contact us.
Version: 1.0.0 ( 15 september 2025 )
- Initial Release
Note: Please click here to update your addon. Before updating this addon, you must first update Super-Admin.zip to version 5.5
Note: If you face any issues with the update, please contact us.
POSpro Bkash Add-on: Setup and Installation
Get Started:
After installing the bKash Add-on from the admin panel, it will automatically appear in the Payment Gateway list. You only need to configure the bKash credentials to start using it.
📦 Installation
The installation process for the Bkash Add-on follows the same steps as outlined in the Business Add-on documentation.
👉 Please refer to the Business Add-on Installation Guide for detailed instructions.
🔐 Bkash Gateway Credentials Setup
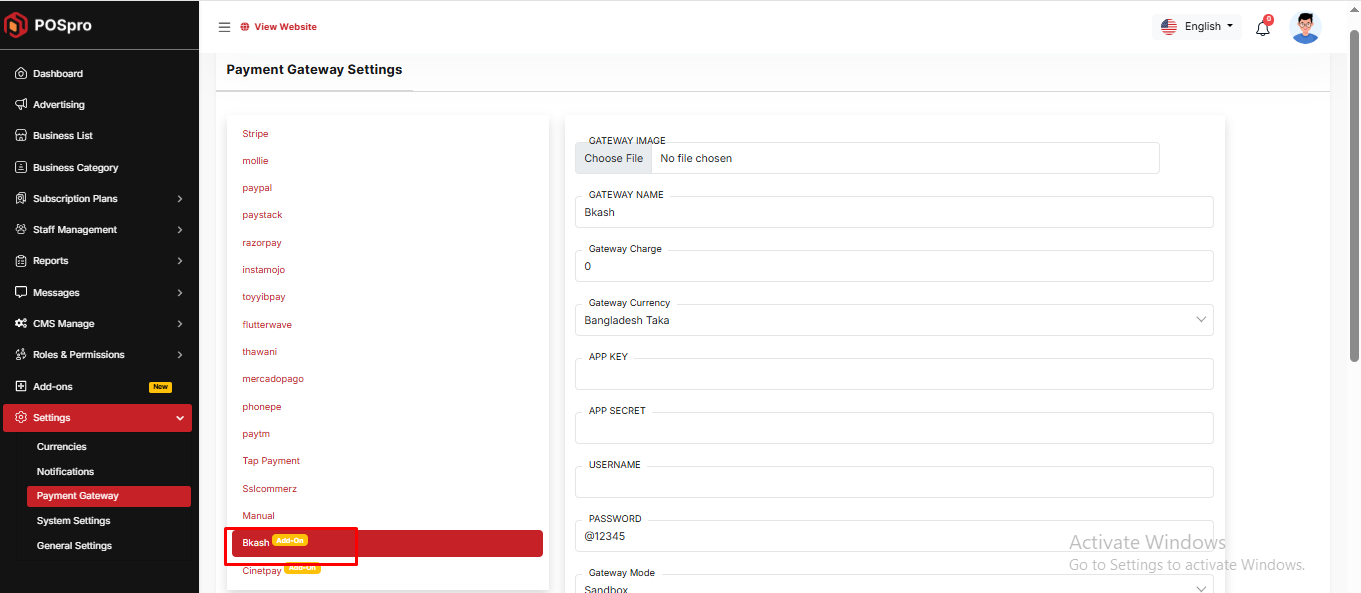
POSpro Social Login Add-on: installation instruction
📘 Overview:
The Social Login Add-on for POSpro provides a seamless and user-friendly authentication system that allows users to log in using their existing social media accounts. This add-on simplifies the registration and login processes by integrating popular platforms such as Google, Facebook reducing friction and enhancing user experience. With this integration, users no longer need to remember another username and password, while administrators benefit from improved user acquisition and retention.
🔑 Key Features
🔐 Google and Facebook Login Integration
🧩 Easy integration with the existing POSpro authentication system
🔄 Automatic user account creation on first social login
🔧 Configurable from the admin panel (.env or System Settings)
📦 Lightweight, secure, and easy to maintain
📊 Compatible with future updates of POSpro
📦 Installation
The installation process for the Social Login Add-on follows the same steps as outlined in the Business Add-on documentation.
👉 Please refer to the Business Add-on Installation Guide for detailed instructions.
🔐 Social Login Credentials Setup
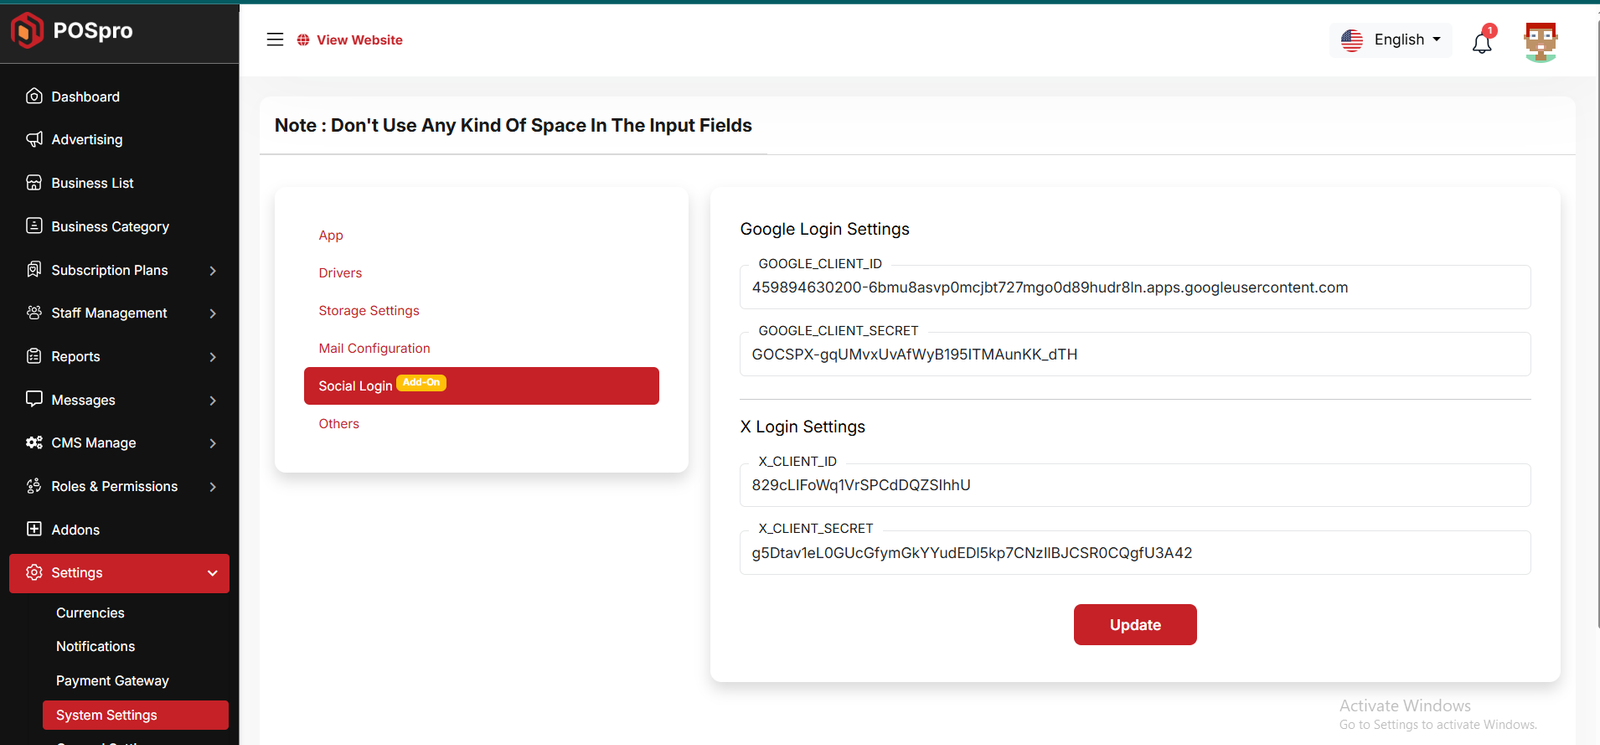
To enable Google and Twitter login in POSpro, you must obtain OAuth credentials (Client ID and Client Secret) from each platform and configure them in the Admin Panel > Settings > System Settings > Social Login tab.
⚠️ Important: Avoid using any spaces in the input fields to prevent authentication issues.
✅ Google Login Credentials
Step 1. Visit the Google Cloud Console.
Step 2. Create or select an existing project.
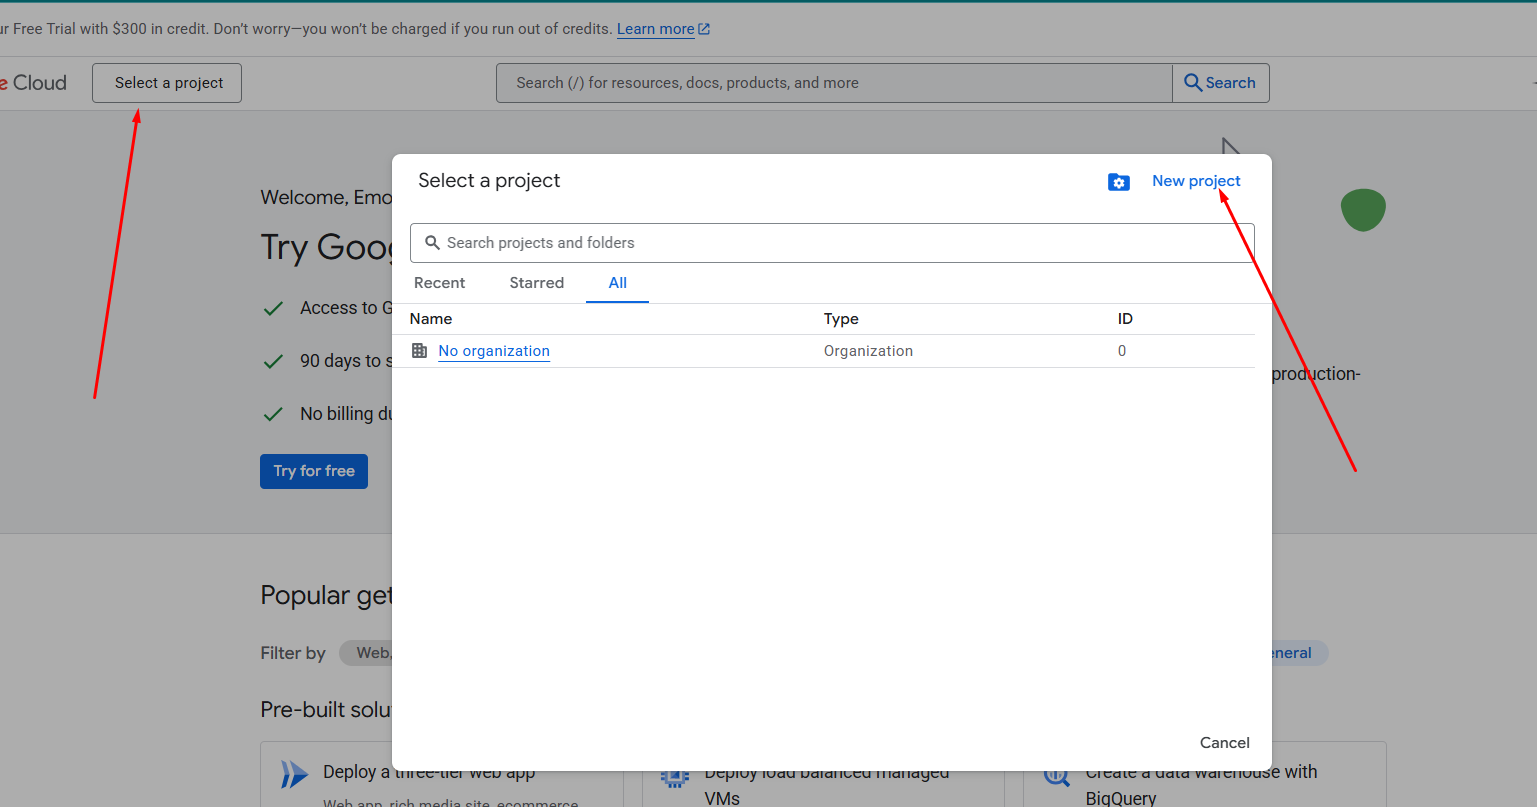
Step 3. Enter a project name and select a organization and click on Create.
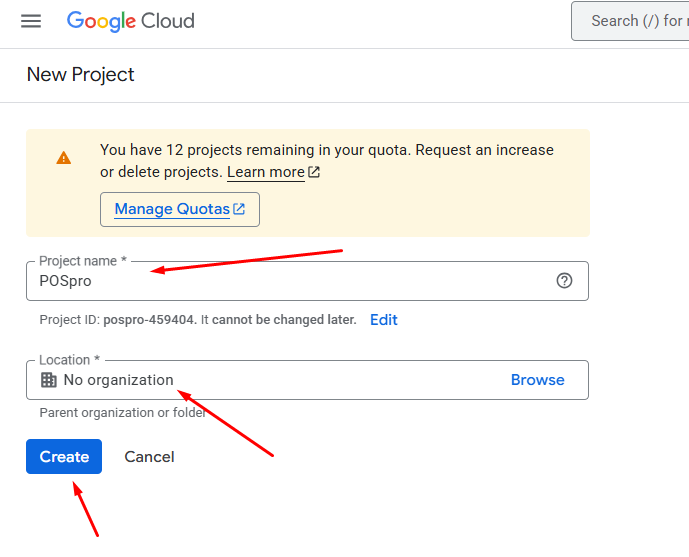
Step 4. Select the newly created project.
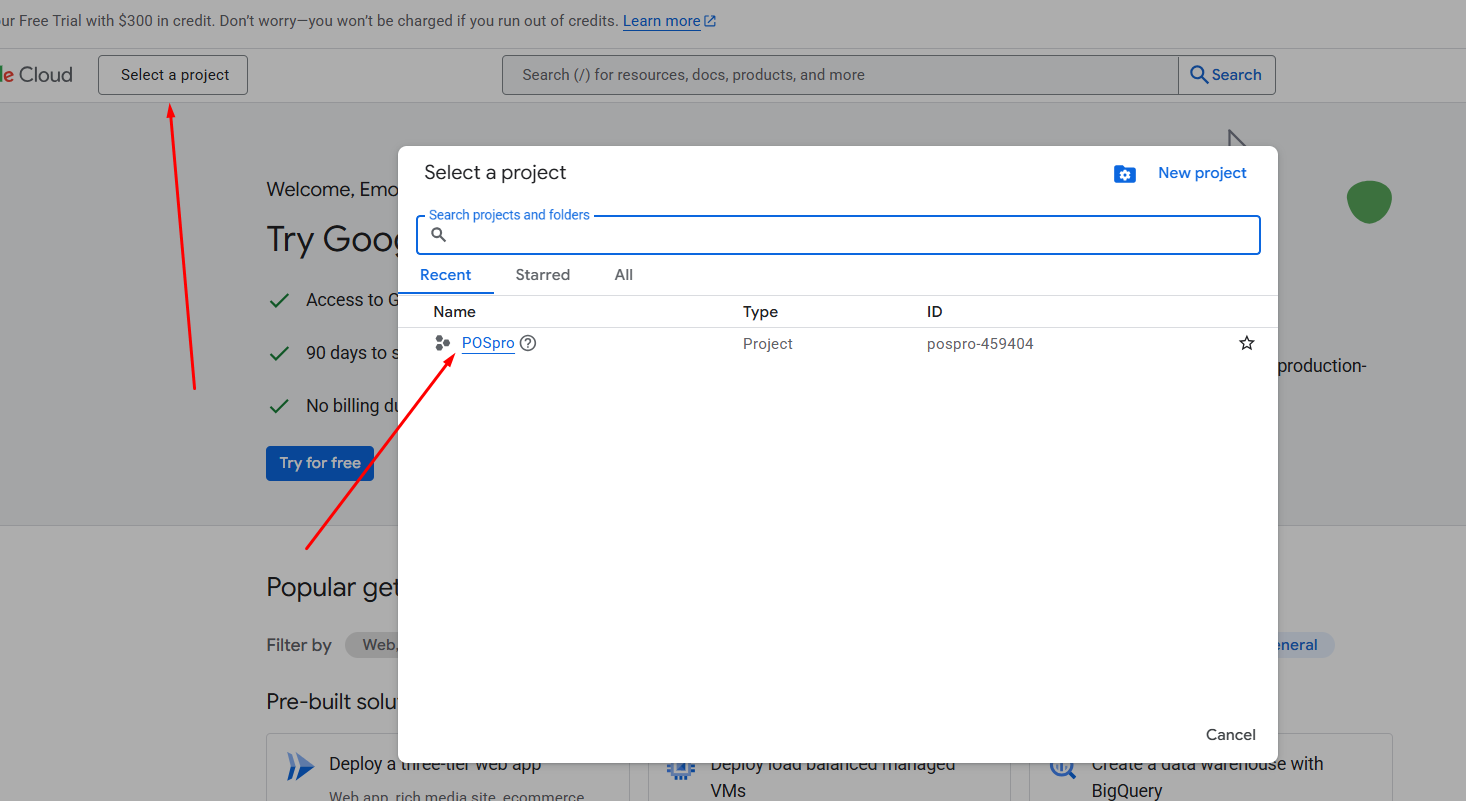
Step 5. Search for "APIs and Services" and navigate to the APIs & Services > Credentials.
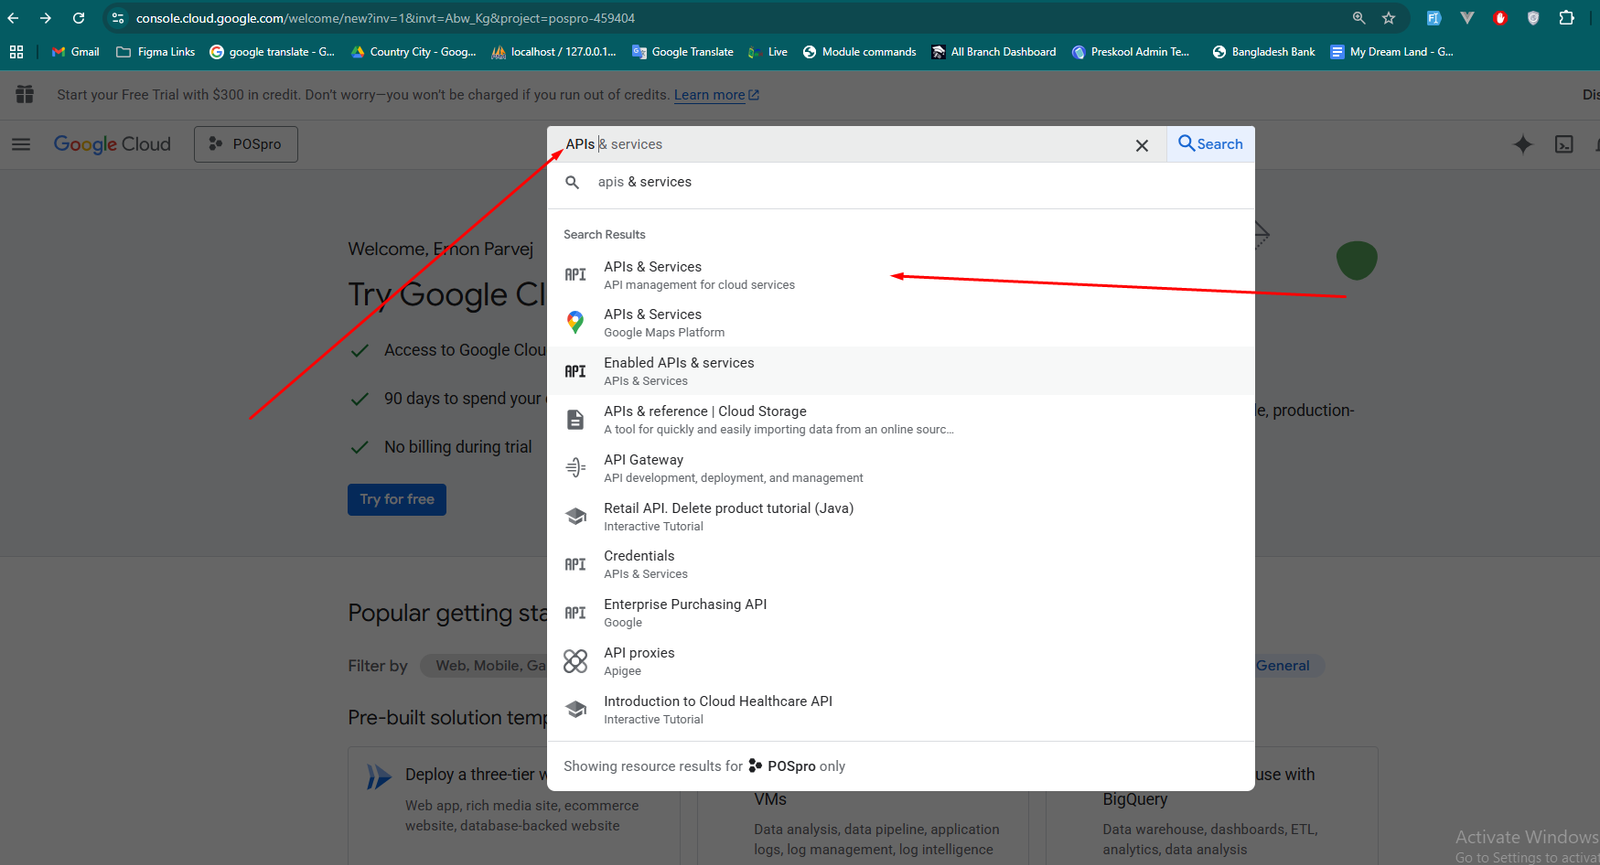
Step 6. Click on Create Credentials and click on "OAuth client ID".
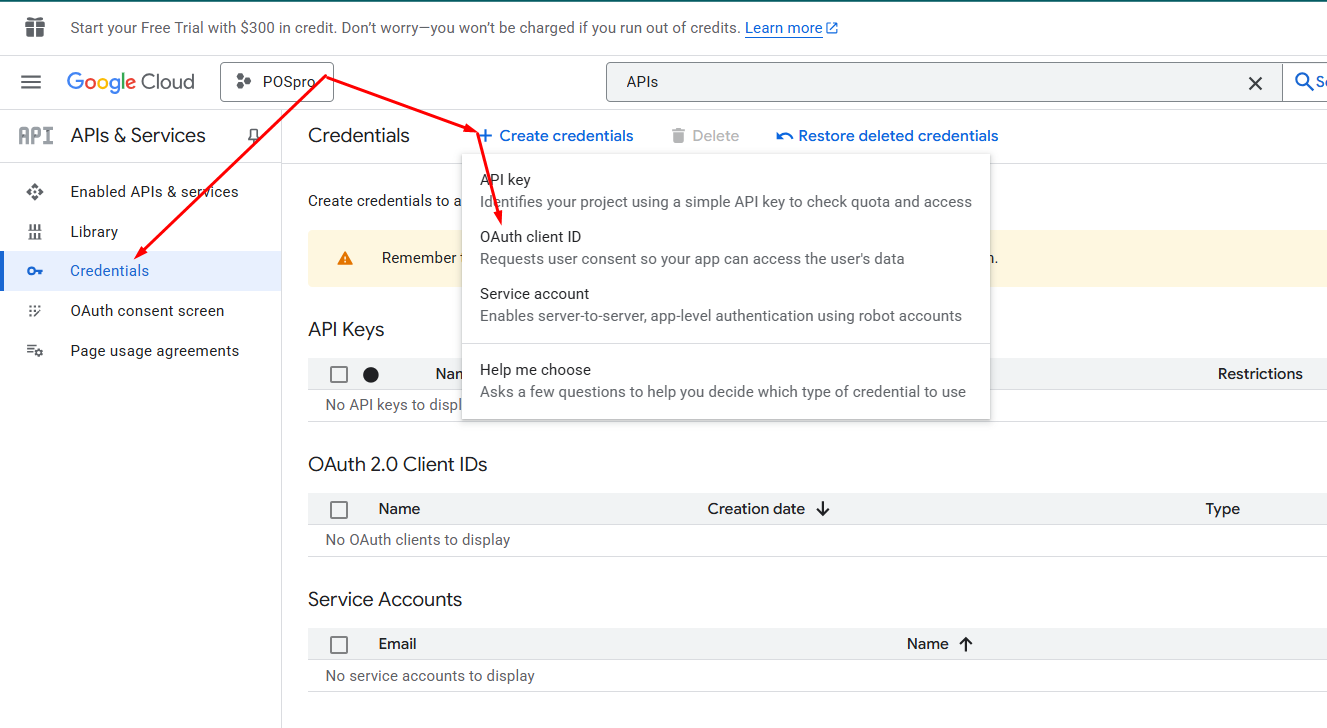
Step 7. To create an OAuth client ID you've to configure your consent screen please click on "Configure consent screen" and then click on "Get started".
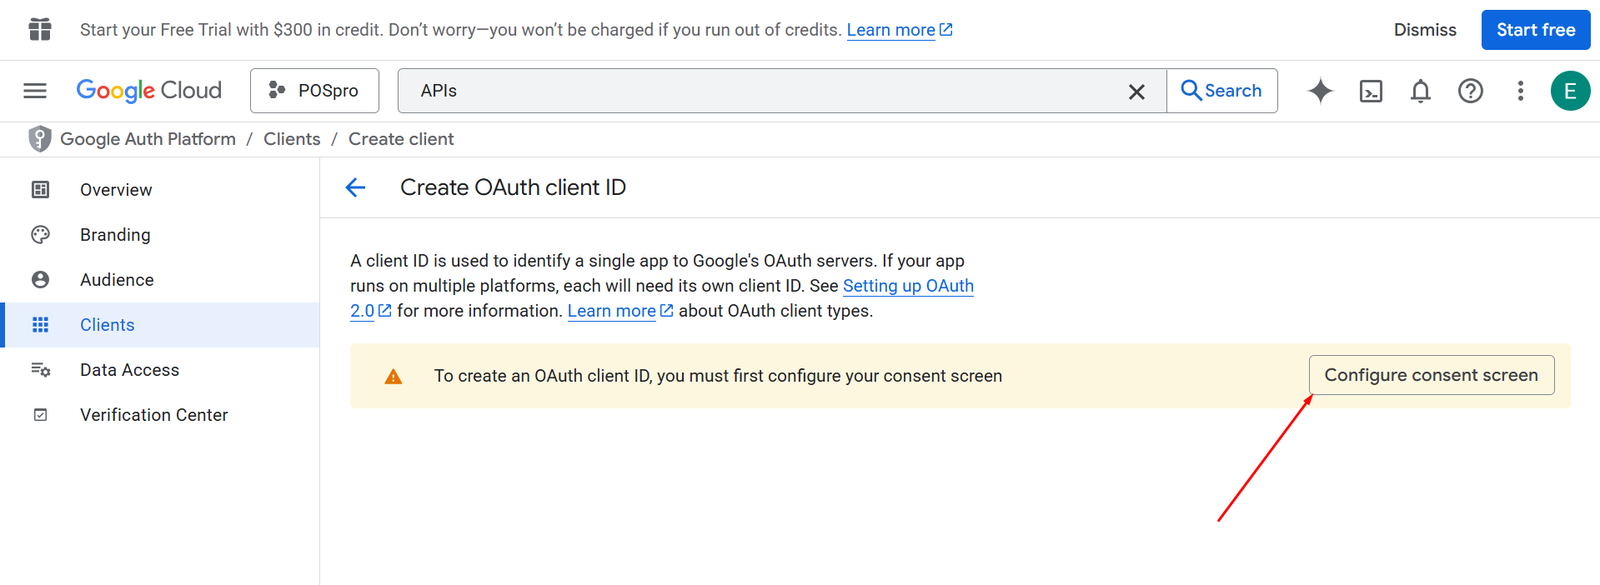
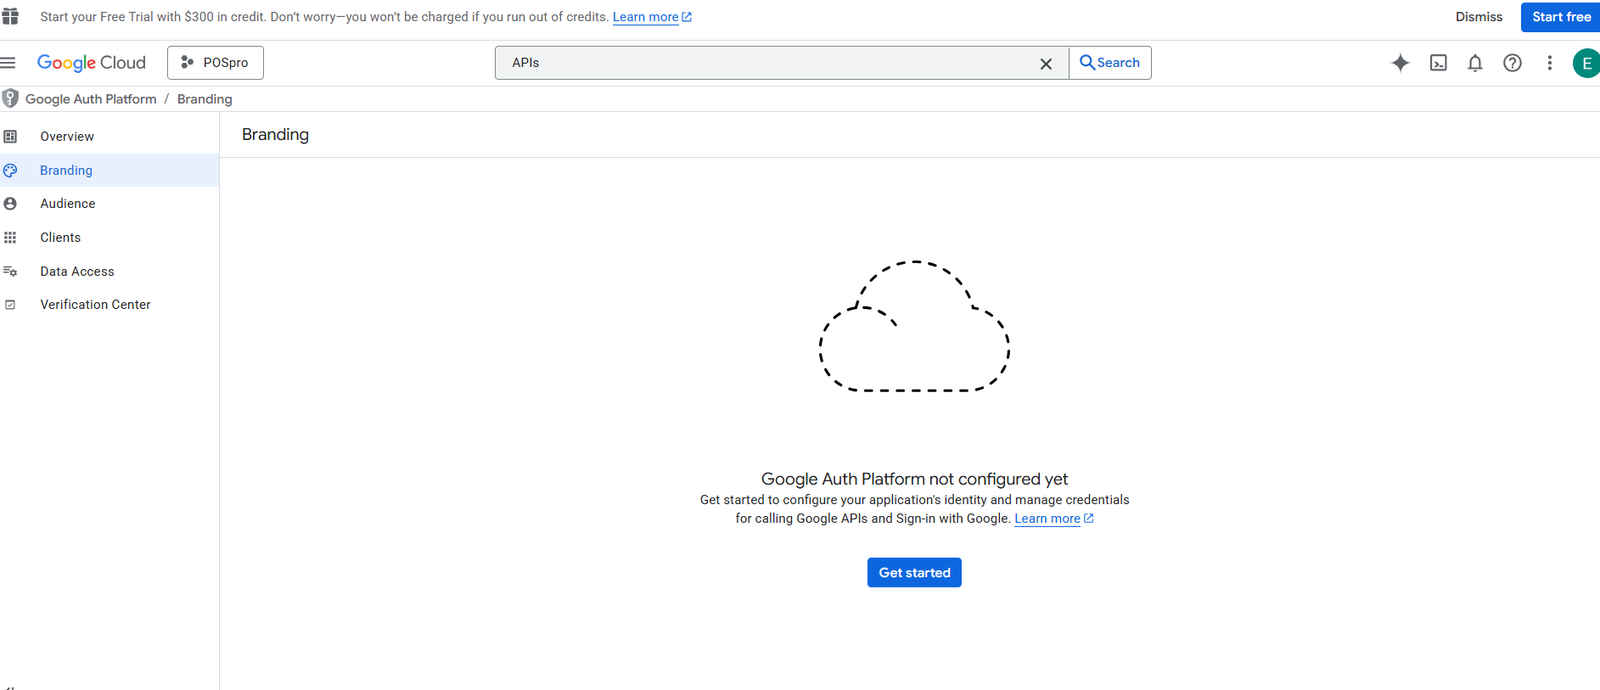
Step 8. Enter App Information, Audience -> External, Contact Information, Finish and then click on "Create".
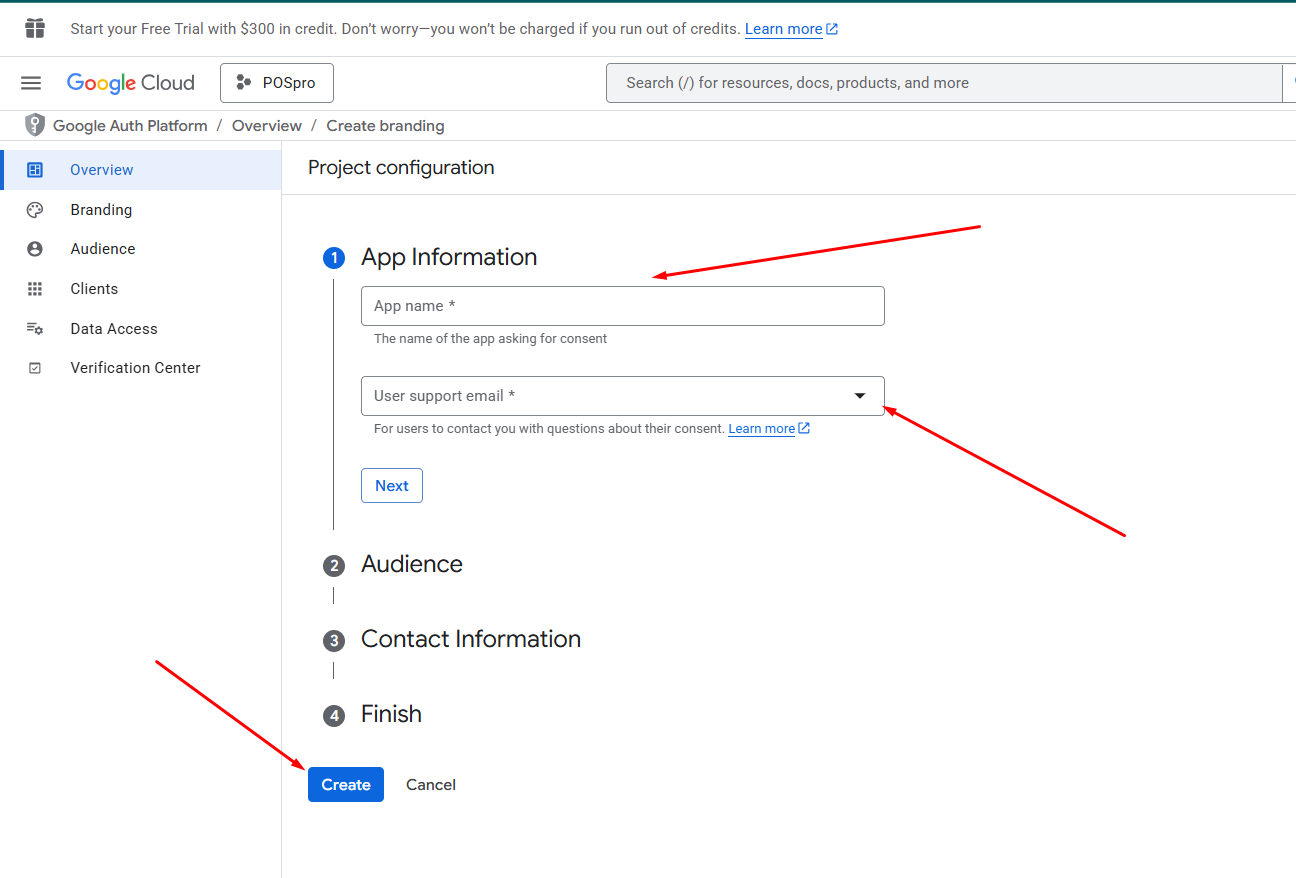
Step 9. Click on "Create OAuth client", and then select "Web application", Enter name and then set the Authorized redirect URIs to: https://yourdomain.com/login/google/callback.
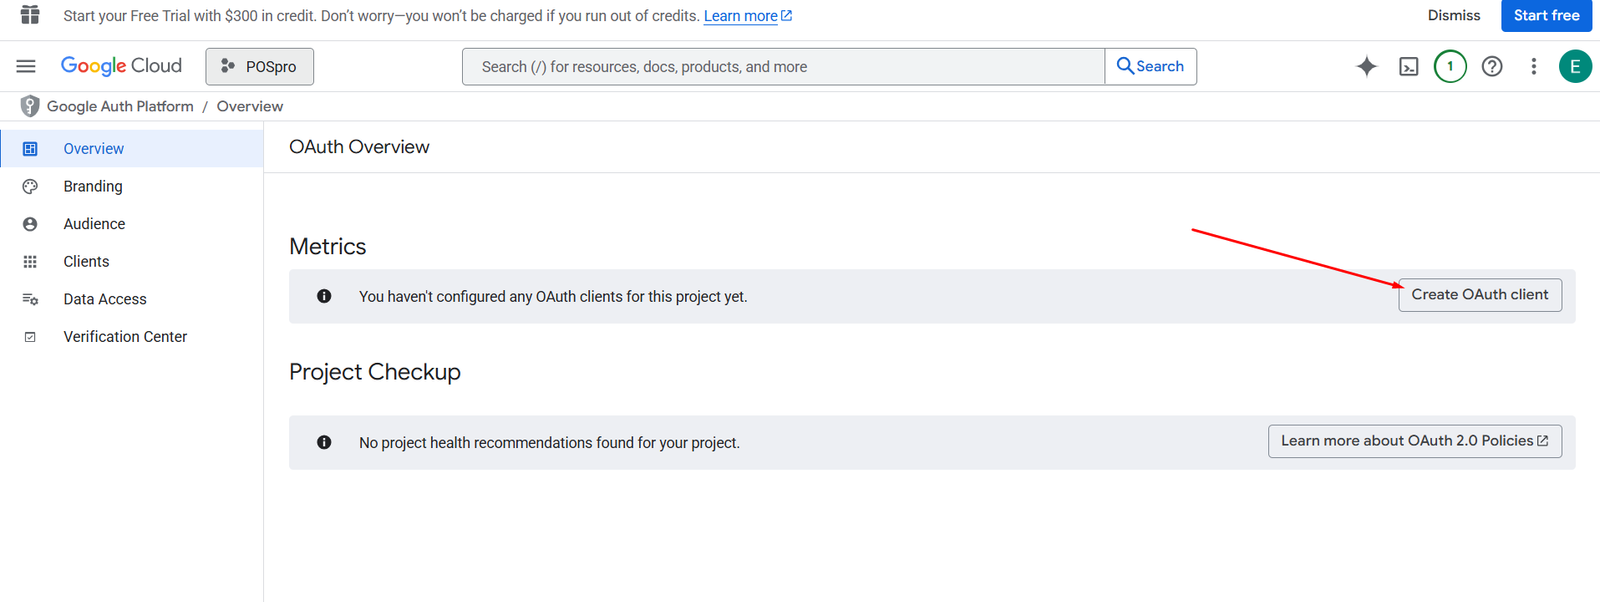
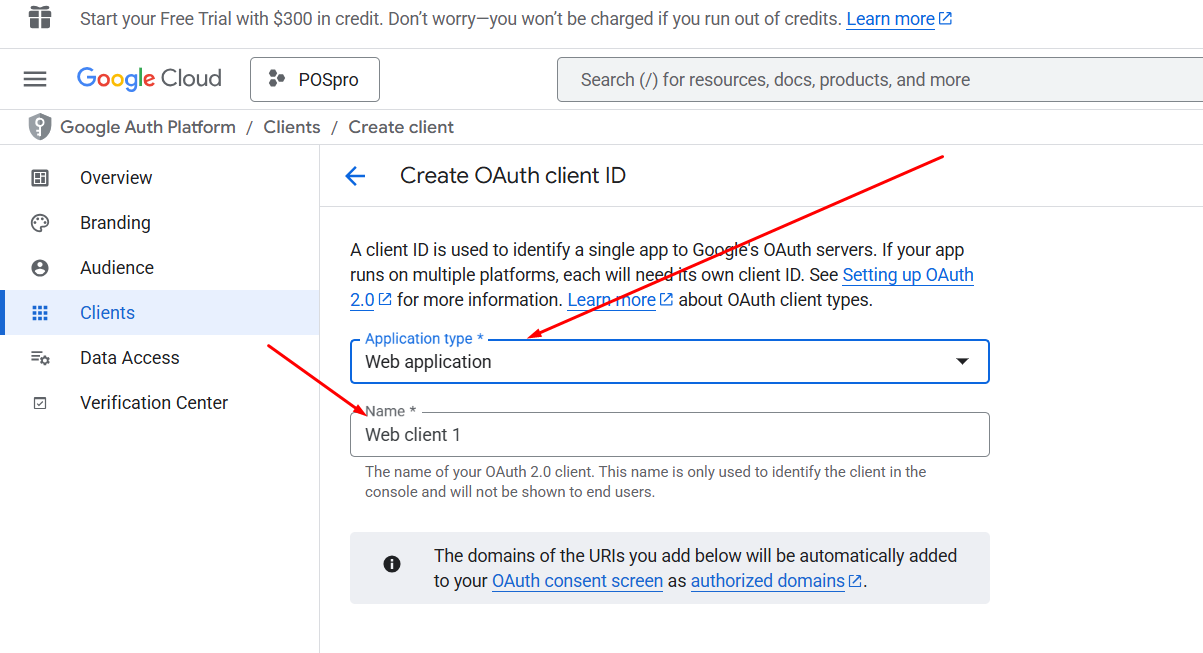

Replace yourdomain.com with your actual domain.
Step 10. After creation, copy the Client ID and Client Secret and paste them into the relevant Google fields in the Social Login settings.
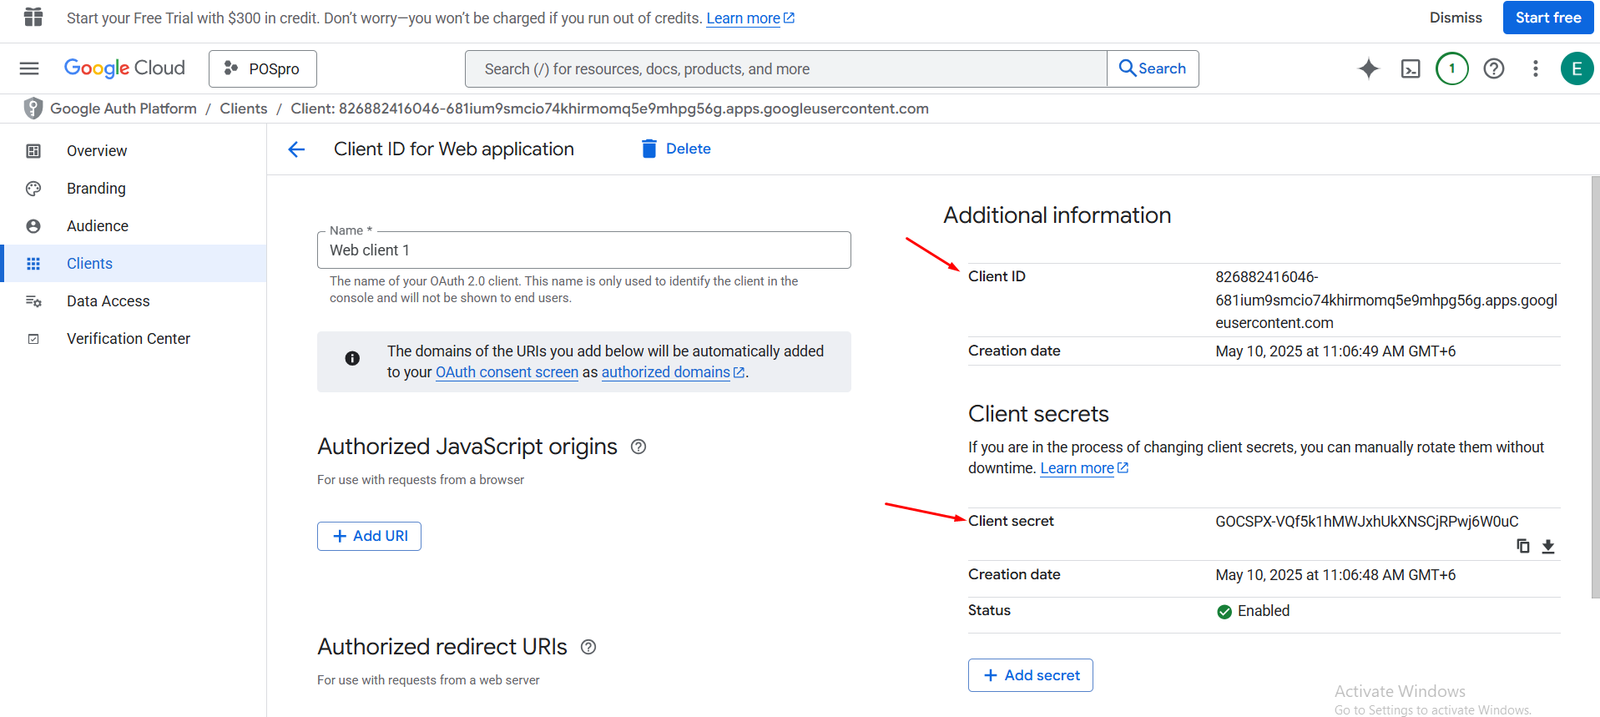
✅ X Login Credentials
Step 1. Go to the X Developer Portal.
Step 2. Click on the Developer Portal and sign up for a developer account by providing the required information.
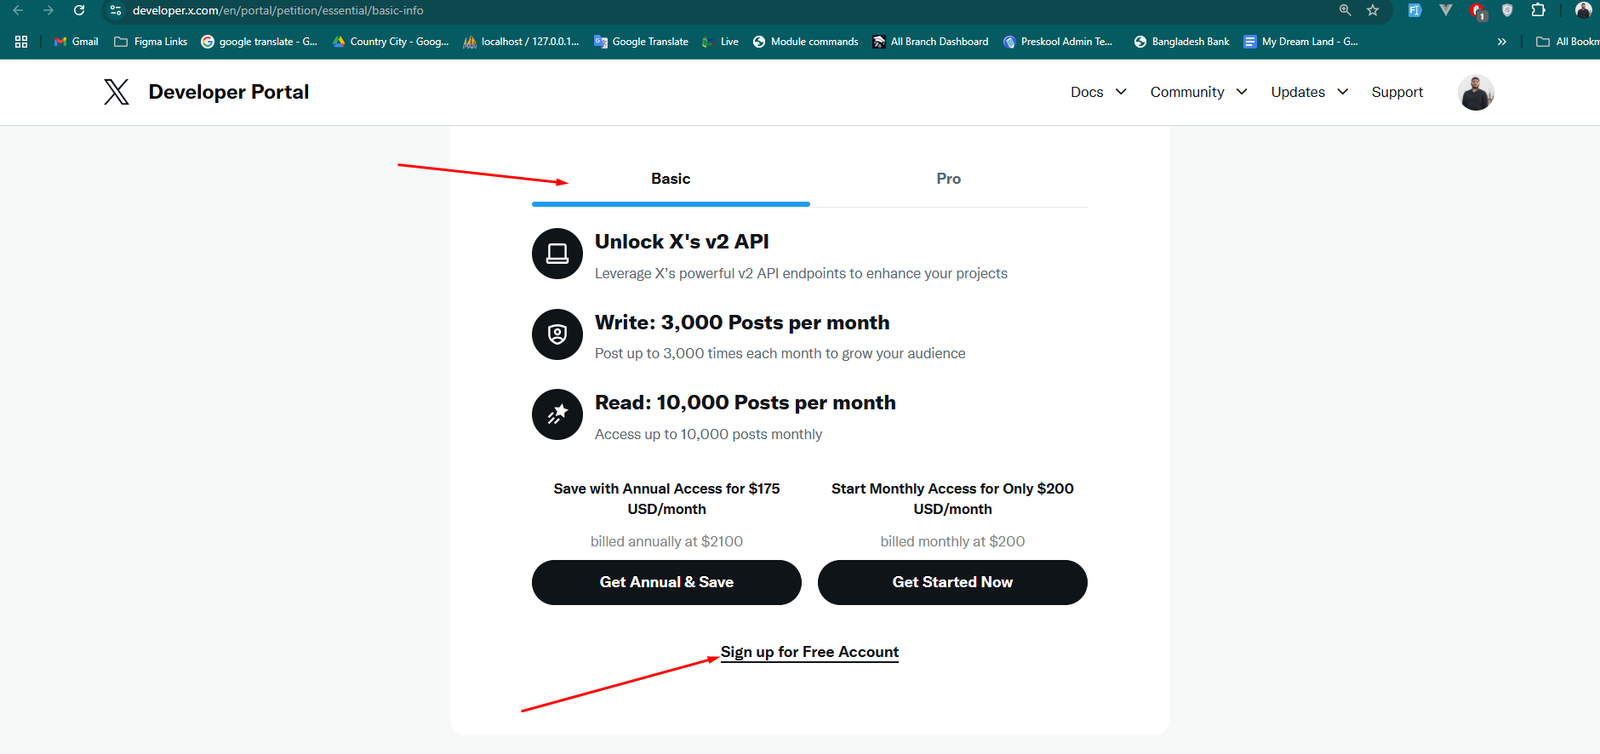
Step 3. After compliting the sign up process, you will be redirected to the Developer Dashboard, Please click on the settings button.
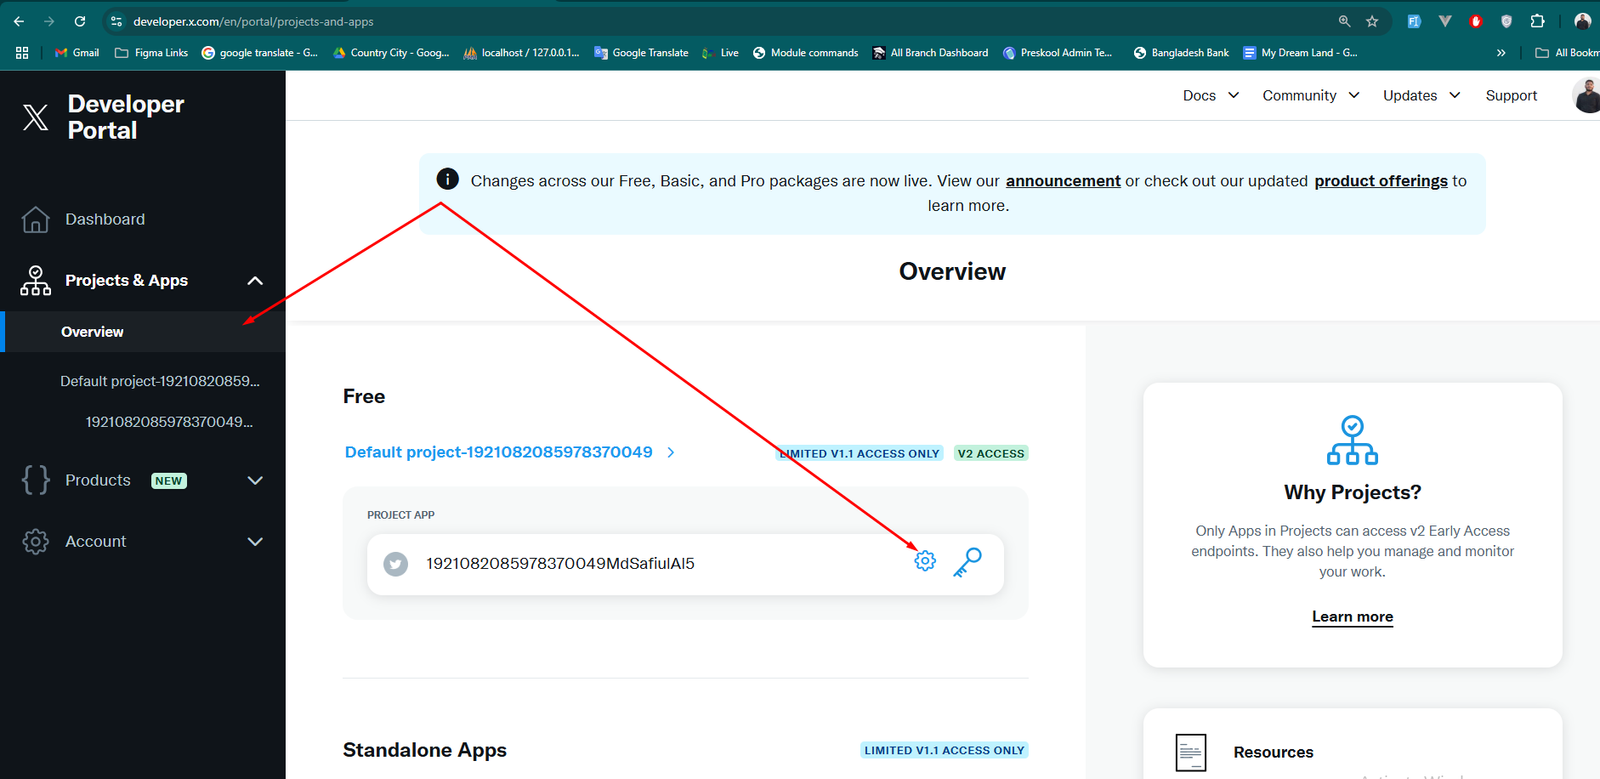
Step 4. Click on setup button and select App permissions -> Read, Type of App -> Web App, Automated App or Bot, Enter Callback URI / Redirect URL -> https://yourdomain.com/login/x/callback, enter Website URL -> https://yourdomain.com and click on "Save".
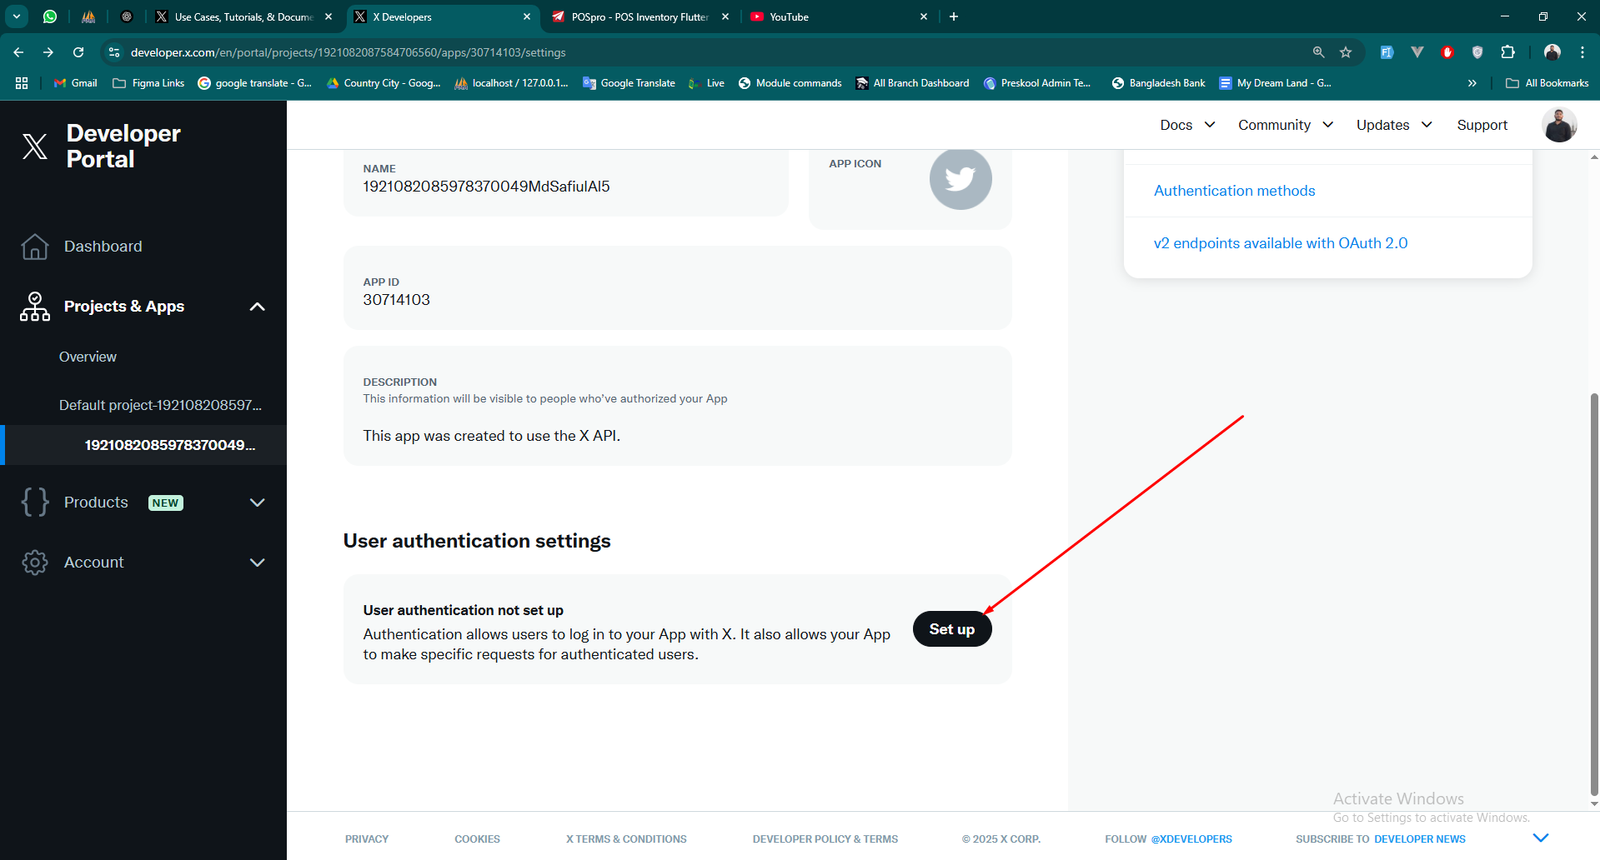
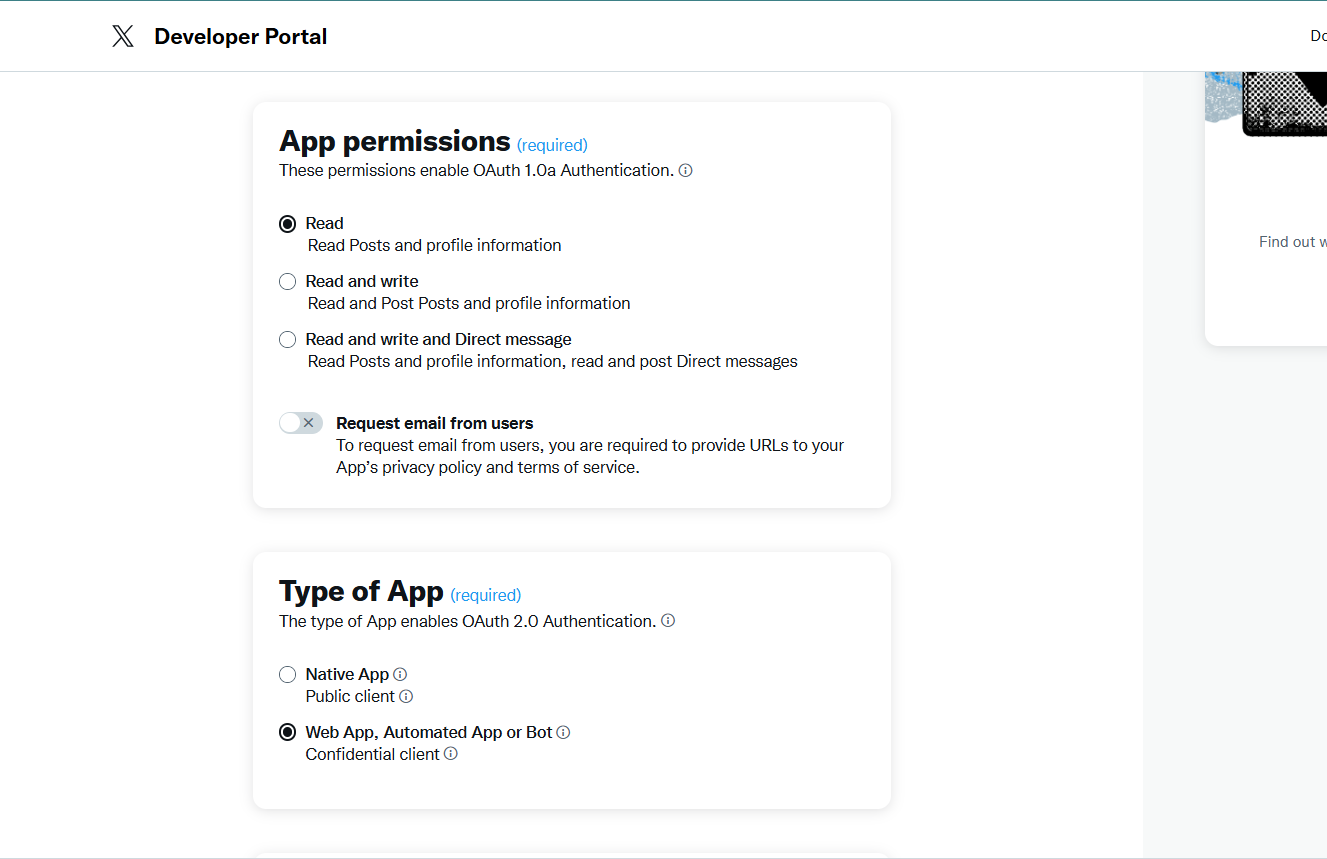
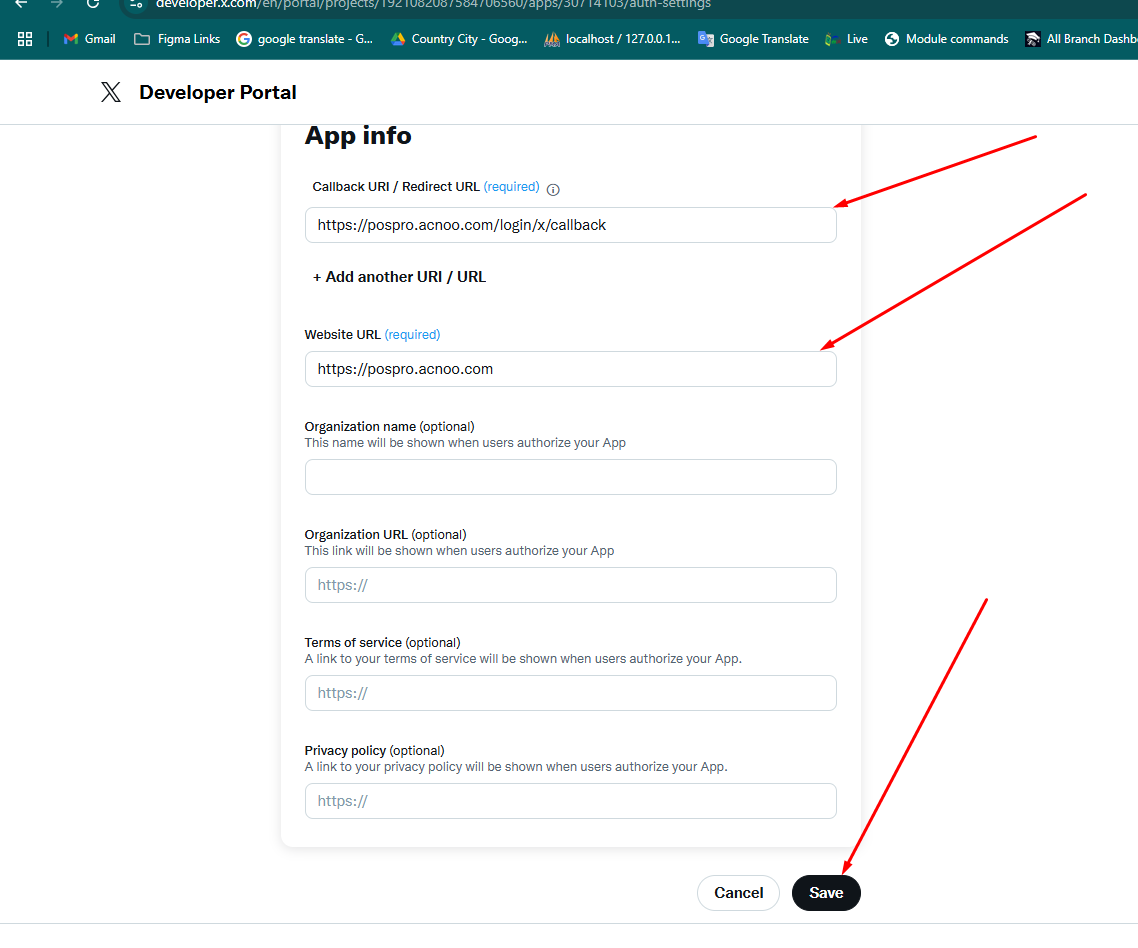
Step 5. Click on Keys and tokens and then click on Regenerate button, you will get a alert modal Please click on "Yes, regenerate" button, after confirmation you will get the keys.
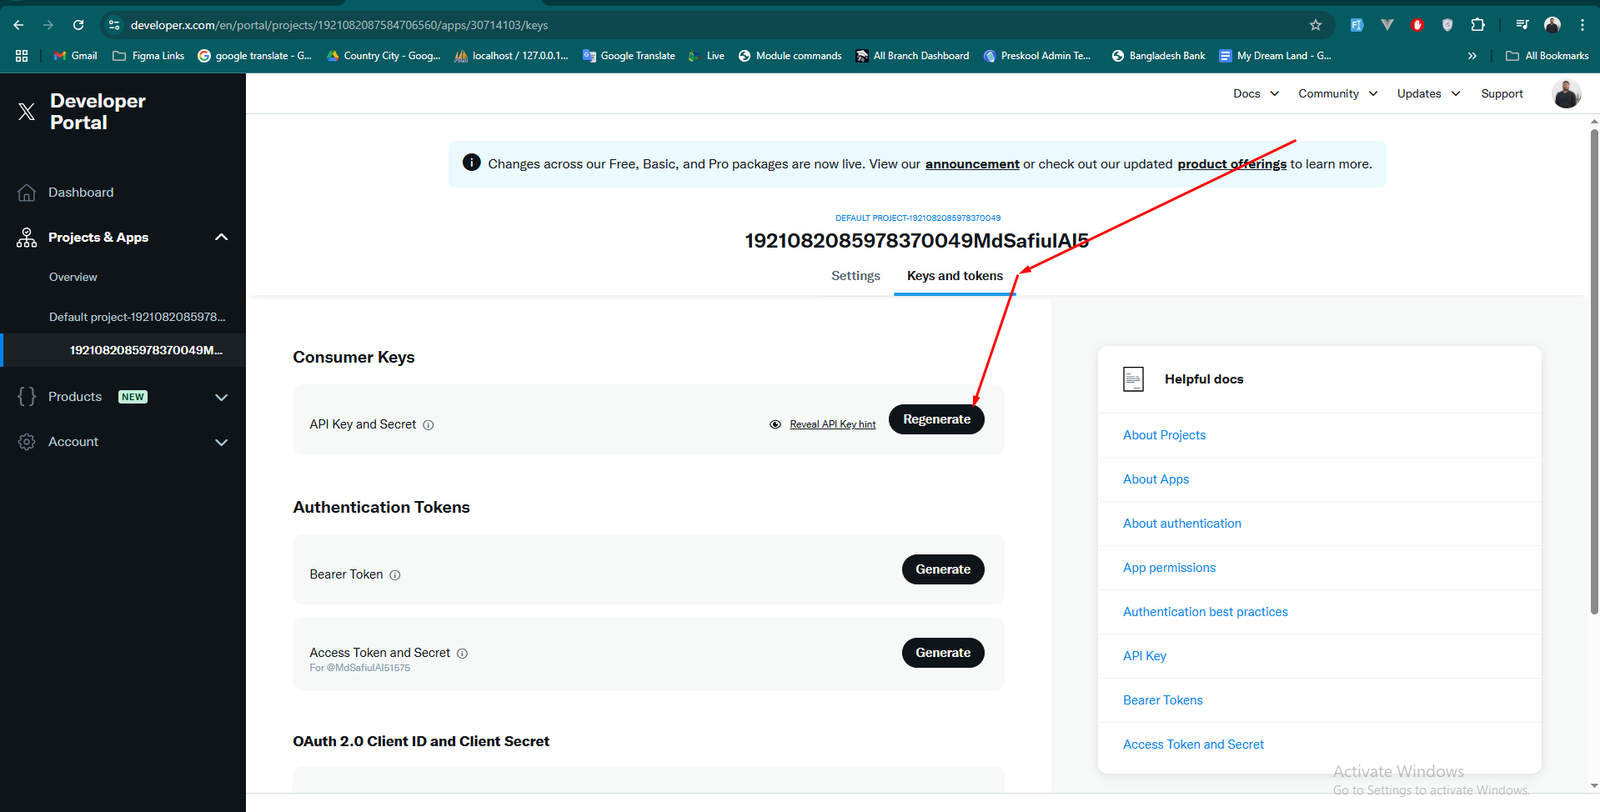
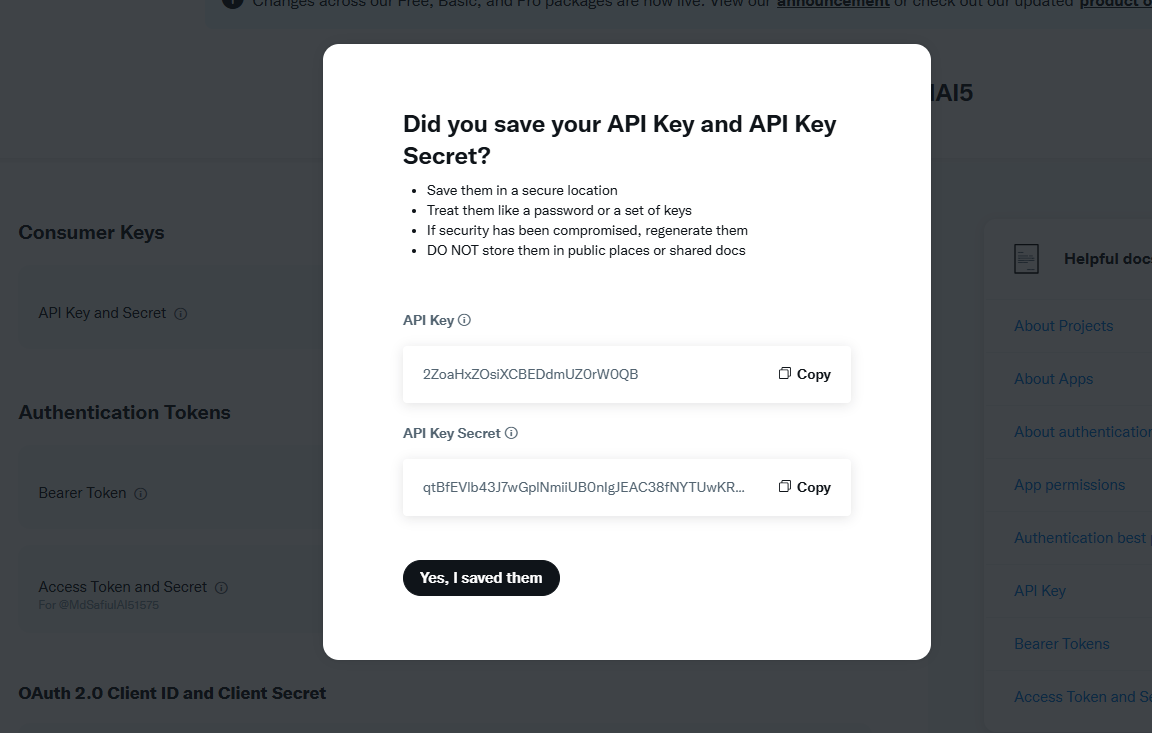
Step 6. Copy the API Key and API Key Secret and paste them into the relevant X fields in the Social Login settings.
POSpro Cinetpay Add-on: Setup and Installation
Get Started:
After installing the CinetPay Add-on from the admin panel, it will automatically appear in the Payment Gateway list. You only need to configure the CinetPay credentials to start using it.
📦 Installation
The installation process for the CinetPay Add-on follows the same steps as outlined in the Business Add-on documentation.
👉 Please refer to the Business Add-on Installation Guide for detailed instructions.
🔐 CinetPay Gateway Credentials Setup
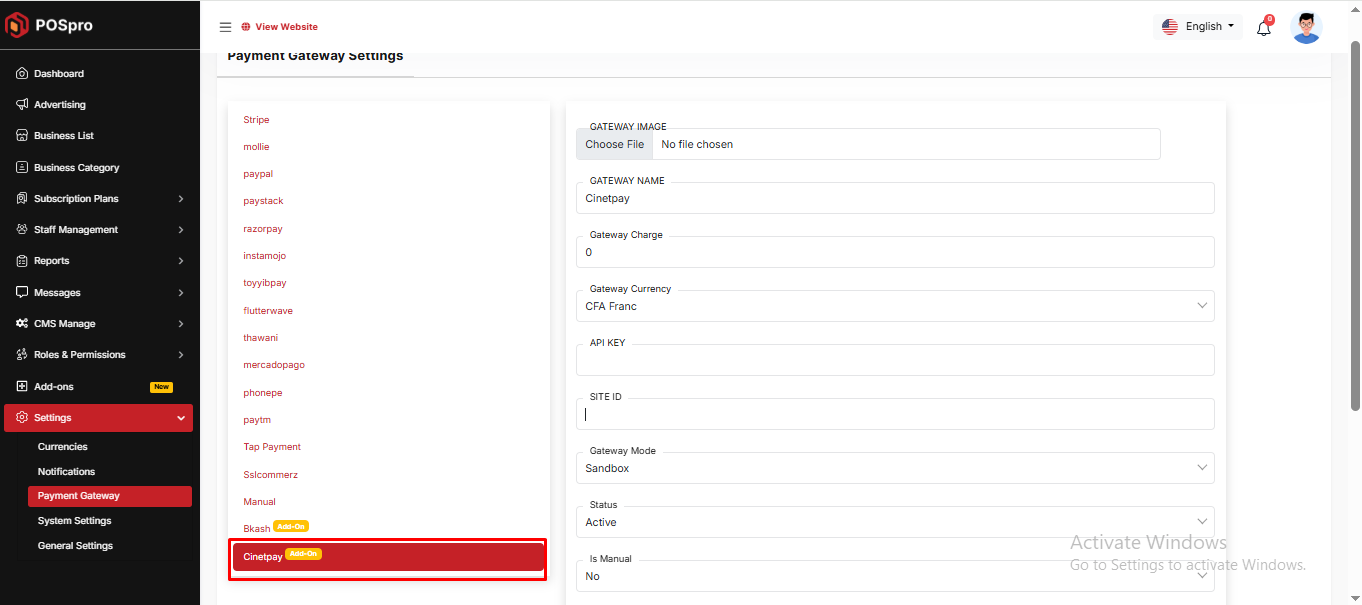
📌 Custom Domain Add-on: Setup and Installation
🚀 Why You Need This Add-On
After installing this add-on, you will unlock Subdomain and Custom Domain features for your customers (businesses).
-
After installing this add-on, two new options will be available in your Subscription Plan: Custom Domain Limit and Subdomain Limit.
You can configure how many custom domains and subdomains each plan will allow, giving you full control over your subscription tiers.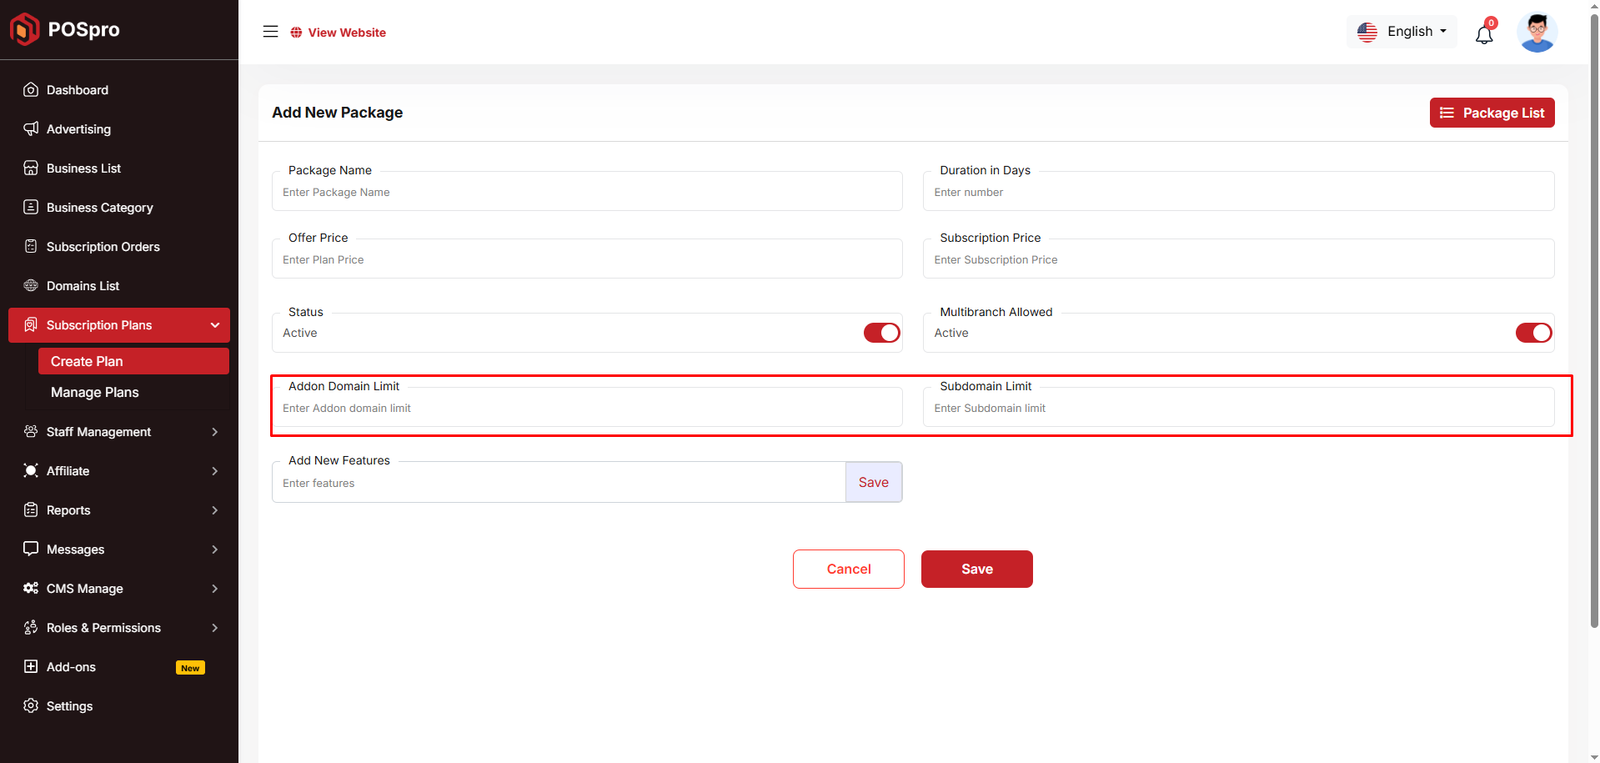
-
A new section will also appear in the Settings page, where you can configure how domain requests will be handled.
You may choose to approve requests automatically or review them manually before activation.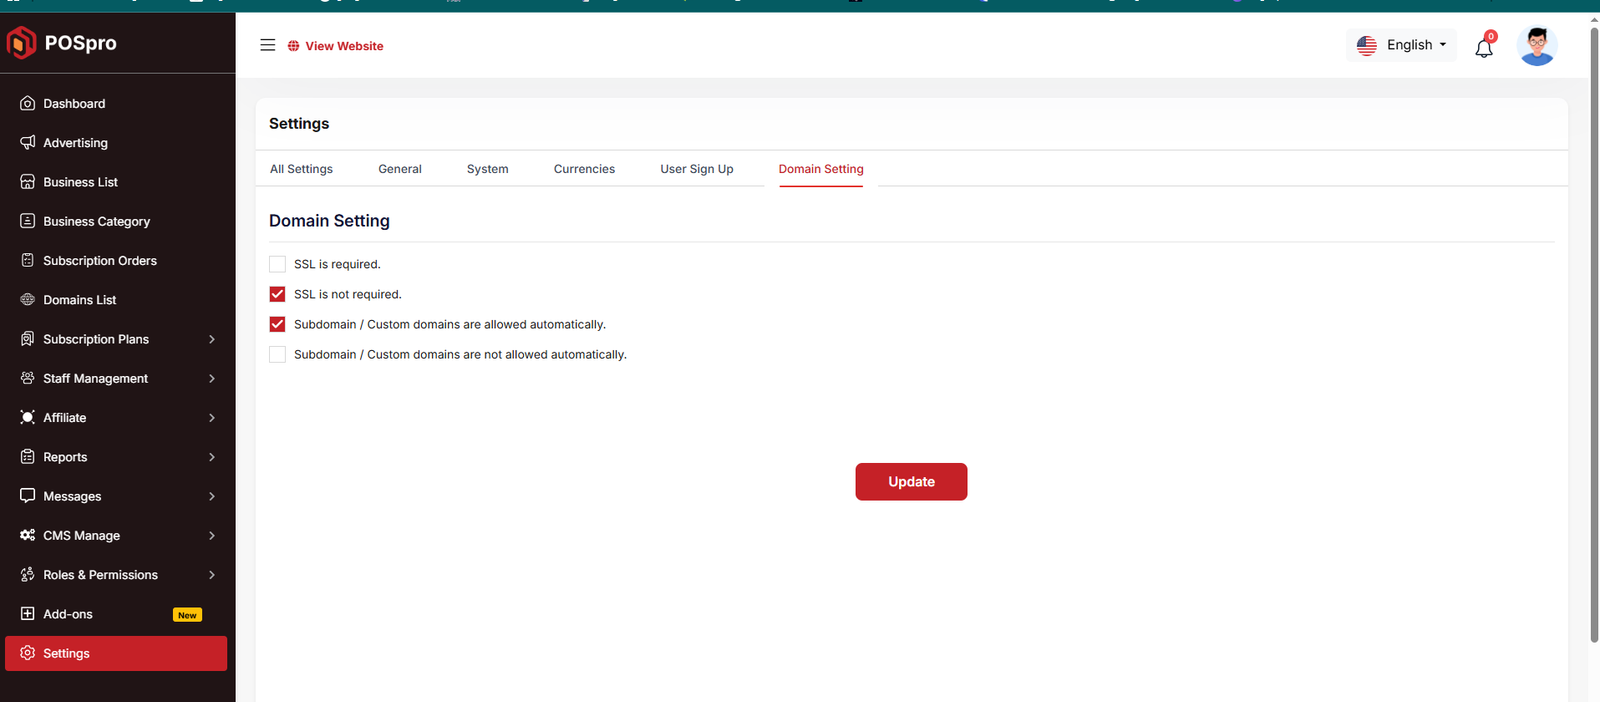
-
Each business can create and manage multiple Subdomains (e.g.,
yourbusiness.yourdomain.com) and Custom Domains (e.g.,yourbusiness.com), depending on the limits defined in their Subscription Plan.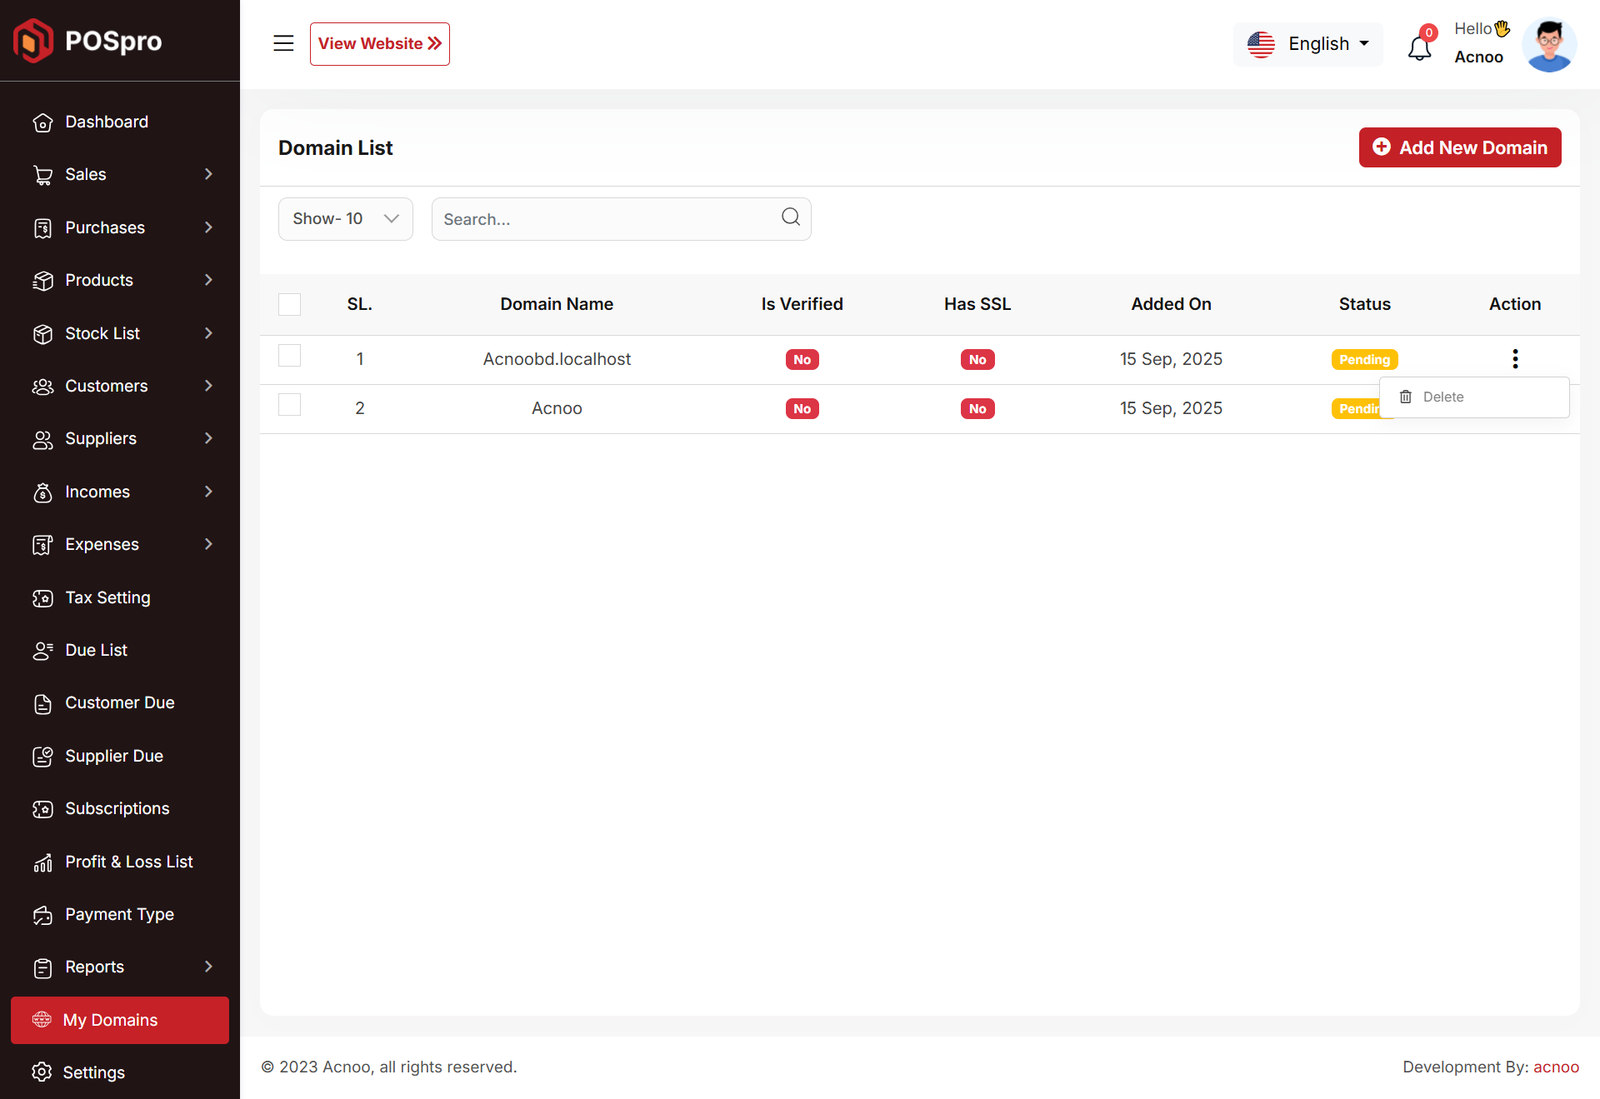
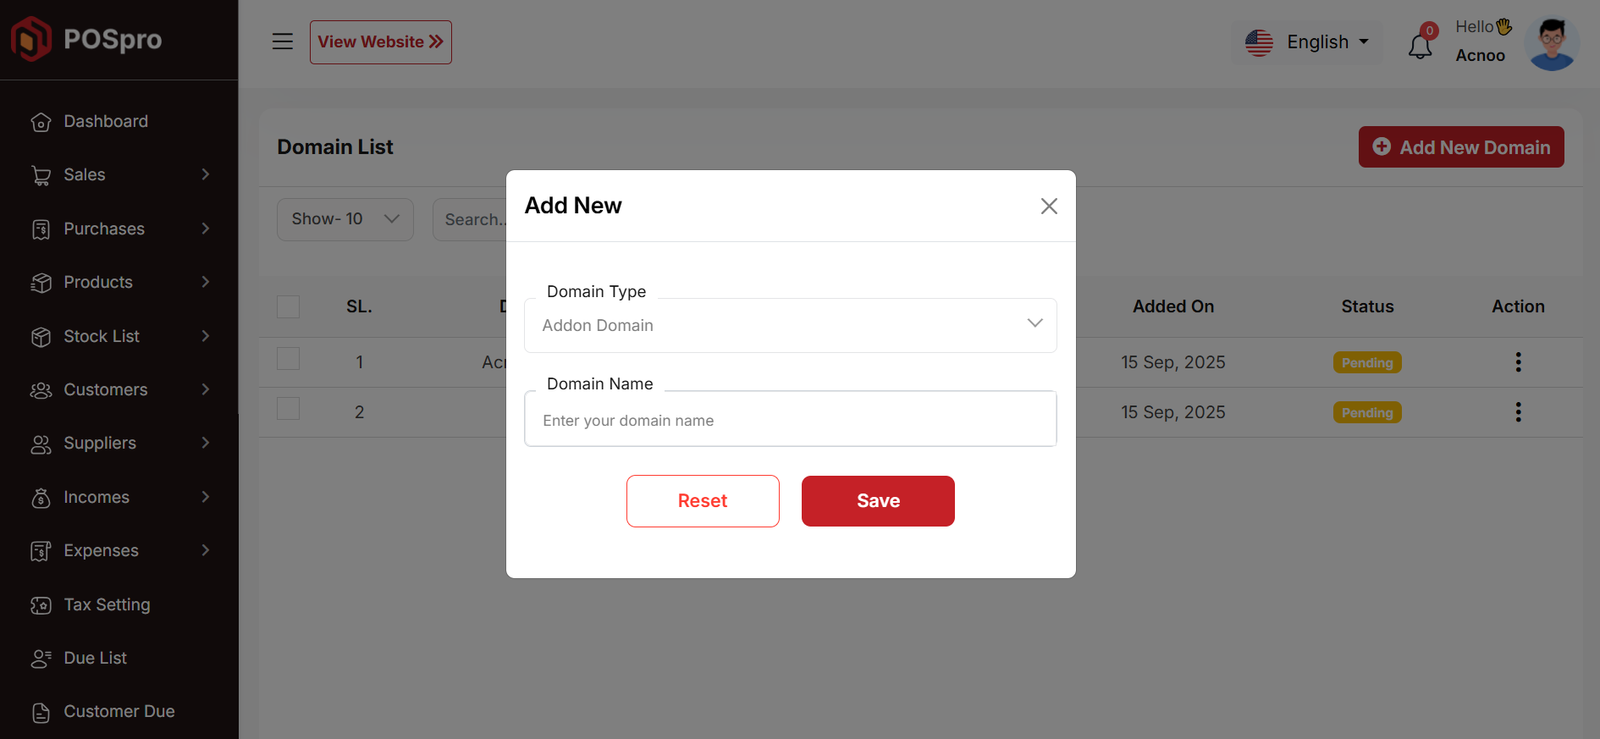
-
These features are seamlessly integrated with your subscription plans, ensuring businesses enjoy premium branding options as part of their plan without extra setup.
-
By enabling subdomains and custom domains, you boost professionalism, strengthen brand identity, and make your POS Pro platform more flexible and appealing for businesses of all sizes.
📦 Installation
The installation process for the Custom Domain Add-on follows the same steps as outlined in the Business Add-on documentation.
👉 Please refer to the Business Add-on Installation Guide for detailed instructions.
⚙️ Domain Setup Instructions
🌐 cPanel Setup
- Login to your cPanel account
- Go to
Domains → Addon Domains - Enter your new domain (e.g.,
pospro.com) - Leave the auto-generated subdirectory and FTP as default
- Click Add Domain
- Update your domain’s DNS to point to your cPanel nameservers
SSL/TLS in cPanel and issue a
certificate
(Let’s Encrypt is free).
🌐 hPanel (Hostinger) Setup
- Login to your hPanel account
- Go to
Websites → Managefor your hosting plan - Click Domains → Add Website / Add Domain
- Enter your domain name (e.g.,
pospro.com) - Choose the directory (or keep default)
- Click Add Domain
- Update DNS to point to Hostinger nameservers
Websites → Manage → SSL and activate
free
SSL (Let’s Encrypt).
⚙️ Apache VPS Setup
Create a config file in /etc/apache2/sites-available/:
<VirtualHost *:80>
    ServerName default
    ServerAlias *
    DocumentRoot /var/www/your_project/public
    DirectoryIndex index.php

    <Directory /var/www/your_project/public>
        AllowOverride All
        Require all granted
    </Directory>
</VirtualHost>
Enable site & reload Apache:
sudo a2ensite your_conf.confsudo systemctl reload apache2
example.com,
and use Certbot for SSL.
⚙️ Nginx VPS Setup
Create a config file in /etc/nginx/sites-available/:
server {
    listen 80;
    server_name _;
    root /var/www/your_project/public;

    index index.php index.html;

    location / {
        try_files $uri $uri/ /index.php?$query_string;
    }

    location ~ \.php$ {
        include snippets/fastcgi-php.conf;
        fastcgi_pass unix:/var/run/php/php8.1-fpm.sock;
    }
}
Enable site & reload Nginx:
sudo ln -s /etc/nginx/sites-available/your_config /etc/nginx/sites-enabled/sudo nginx -t && sudo systemctl reload nginx
example.com, and use Certbot for SSL.
Custom Domain Add-on Change Logs
Note: Before updating to the new version, please ensure you have a database and full project backup, and that your project is already updated to the latest version. This is extremely important!
Version: 1.1 ( 20 September 2025 )
- Layouts changed.
- System Architecture updated.
Note: Please click here to update your addon.
Note: If you face any issues with the update, please contact us.
Version: 1.0.0 ( 16 september 2025 )
- Initial Release
Note: Please click here to install your add-on. Before installing this add-on, you must first update the base project (Super-Admin.zip) to version 5.5
Note: If you face any issues with the update, please contact us.
Flutter App Installation Setup Start
Tools & Setup
Prerequisite
- Android Studio: 2023.3.1
- Flutter: 3.22.1
- Flutter & Dart SDK
- Anyone IDE Android Studio (Recommended), Visual Studio Code or IntelliJ IDEA
- To edit this project you must have Flutter and Dart installed and configured successfully on your computer.
- Set up your editor - Install the Flutter and Dart plugins.
- If you have got Android SDK installed and configured, to install Flutter you
only need
to:
- Download Flutter SDK from official website and extract it.
- Add path to previously extracted SDK to your PATH variable
- Run flutter doctor tool to check if everything is configured correctly.
- All above steps are mentioned here: https://flutter.dev/docs/get-started/install/
Android Studio – Windows
- Download Android Studio - https://developer.android.com/studio/
- Get the Flutter SDK - https://flutter.dev/docs/get-started/install
- Learn more about Android Studio - https://developer.android.com/studio/intro/
Step 1 : Get the Flutter SDK
- Download the following installation bundle to get the latest stable release of the Flutter SDK:
- Extract the zip file and place the contained flutter in the desired installation location for the Flutter SDK (for example, C:\src\flutter; do not install Flutter in a directory like C:\Program Files\ that requires elevated privileges)
Step 2 : Update your path
If you wish to run Flutter commands in the regular Windows console, take these steps to add Flutter to the PATH environment variable: From the Start search bar, enter ‘env’ and select Edit environment variables for your account. Under User variables check if there is an entry called Path:
- If the entry exists, append the full path to flutter\bin using ; as a separator from existing values.
- If the entry doesn’t exist, create a new user variable named Path with the full path to flutter\bin as its value
Important
Note that you have to close and reopen any existing console windows for these changes to take effect. You are now ready to run Flutter commands in the Flutter Console!
Step 3 : Run flutter doctor
From a console window that has the Flutter directory in the path (see above), run the following command to see if there are any platform dependencies you need to complete the setup:
Android Studio – macOS
- Download Android Studio - https://developer.android.com/studio/
- Download Xcode - https://apps.apple.com/us/app/xcode/id497799835?mt=12
- Get the Flutter SDK - https://flutter.dev/docs/get-started/install
- Learn more about Android Studio - https://developer.android.com/studio/intro/
Step 1 : Get the Flutter SDK
- Download the following installation bundle to get the latest stable release of the Flutter SDK:
- Download SDK and extract downloaded file, just double click on that. and just copy extracted folder and paste it to your desired location (for example, Documents\flutter).
Step 2 : Update your path
Important
Path variable needs to be updated to access “flutter” command from terminal. you can just update path variable for current terminal window only. and if you want to access flutter commands from anywhere in terminal, we need to update SDK path permanently.
To update PATH variable, we need to open terminal.
To update PATH variable for current terminal window only, then enter this command "export PATH="$PATH:`pwd`/flutter/bin"" and hit enter key.
To update PATH variable permanently, then Open or create .bash_profile file.
to open
or
create that file, then enter "sudo open -e $HOME/.bash_profile" and hit enter
key.Append
below line to bash_profile file at bottom of all other content. "export
PATH="$PATH:
[PATH_TO_FLUTTER_GIT_DIRECTORY]/flutter/bin"" as
[PATH_TO_FLUTTER_GIT_DIRECTORY] is actual path of SDK folder.
Run this command on terminal "source $HOME/.bash_profile" to refresh PATH variables.
Then check whether our SDK is successfully installed or not.
You are now ready to run Flutter commands in the Flutter Console!
Run "flutter doctor" into terminal, If you are getting check list of flutter sdk requirements, it means SDK is successfully installed on your machine. and you can start building flutter apps on your machine.
Android Studio – Linux
- Download Android Studio - https://developer.android.com/studio/
- Get the Flutter SDK - https://flutter.dev/docs/get-started/install/linux
- Learn more about Android Studio - https://developer.android.com/studio/intro/
Step 1 : Get the Flutter SDK
- Download the following installation bundle to get the latest stable release of the Flutter SDK:
- Download SDK and extract downloaded file, just double click on that. and just copy extracted folder and paste it to your desired location (for example, Documents\flutter).
Step 2 : Update your path
Important
Path variable needs to be updated to access “flutter” command from terminal. you can just update path variable for current terminal window only. and if you want to access flutter commands from anywhere in terminal, we need to update SDK path permanently.
You’ll probably want to update this variable permanently, so you can run
flutter
commands in any terminal session. To update PATH variable, we need to open terminal.
- Run
source $HOME/.to refresh the current window, or open a new terminal window to automatically source the file. - Verify that the
flutter/bindirectory is now in your PATH by running:
GETTING STARTED (BUILD & RUN)
Important
All below steps are must be followed to build and run application
Download Project
Download and find the your project folder, use your preferred IDE (Android Studio / Visual Studio Code / IntelliJ IDEA) to run the project
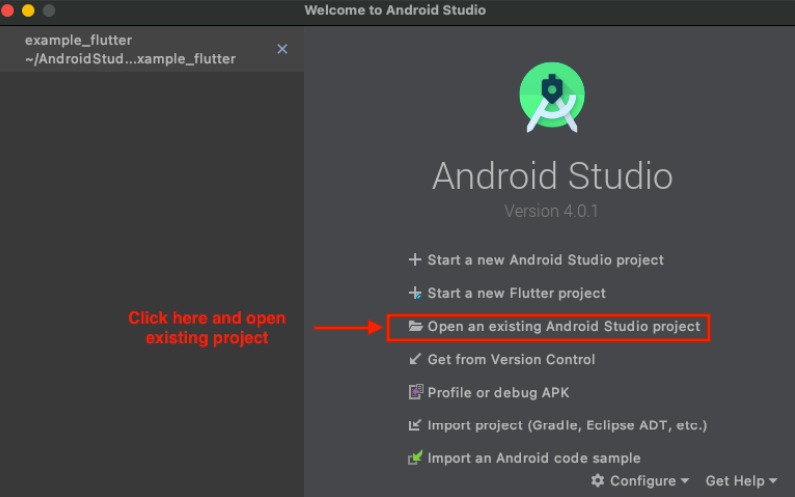
Get Dependencies
After you loaded project successfully, run the following command in the
terminal
to install
all the dependencies listed in the pubspec.yaml file in the project's
root
directory or just
click on Pub get in pubspec.yaml file if you don't want to use command.
Important
All below steps are must be followed to build and run application

Build and Run App
- Locate the main Android Studio toolbar.
- In the target selector, select an Android device for running the app. If none are listed as available, select Tools > Android > AVD Manager and create one there. For details, see Managing AVDs
- Click the run icon in the toolbar, or invoke the menu item Run > Run.
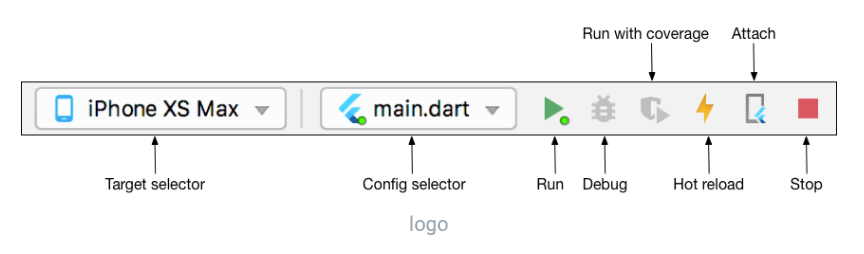
After the app build completes, you’ll see the app on your device.
If you don’t use Android Studio or IntelliJ you can use the command line to run your application using the following command
Important
Below step requires flutter path to be set in your Environment variables. See https://flutter.dev/docs/get-started/install/windows
You will see below like screen after you have build your app successfully.
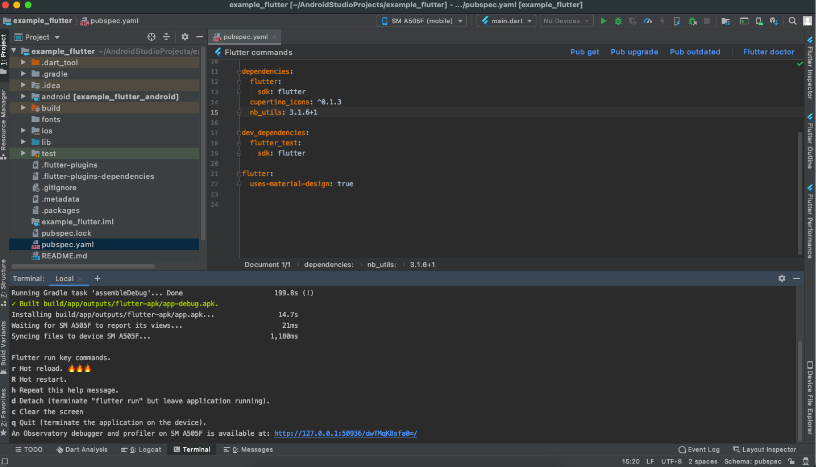
Try hot reload
Flutter offers a fast development cycle with Stateful Hot Reload, the ability to reload the code of a live running app without restarting or losing app state. Make a change to app source, tell your IDE or command-line tool that you want to hot reload, and see the change in your simulator, emulator, or device.
Important
Do not stop your app. let your app run.
PROJECT STRUCTURE & FEATURES
- images: apps/widgets/snippets images as well as appIcon are stored here.
- lib: Application main file and folder are located here.
- Screens: Full Apps UI Code can be found here.
- Conts: Api configuration can be found here
- Constant: All constant value are located here
- Main: All the routes are been declared here.
- Pubspec.yaml: Application name and other project dependencies can be found here
Application Features
- Clean Code and a well structured project
- Single code base for both Android & iOS
- 60 FPS Support for both Android & iOS
- Fully responsive UI
- Best UI & UX
- Great animation
- Easy to customize
- Free life time updates & stunning customer support
- Easy to integrate in your project
Mobile Application Setup:
Unzip the downloaded zip file from envato and check the mobile app folder. Unzip it and open android studio.Click open and select the unzipped folder inside mobile app folder from your downloaded zip.
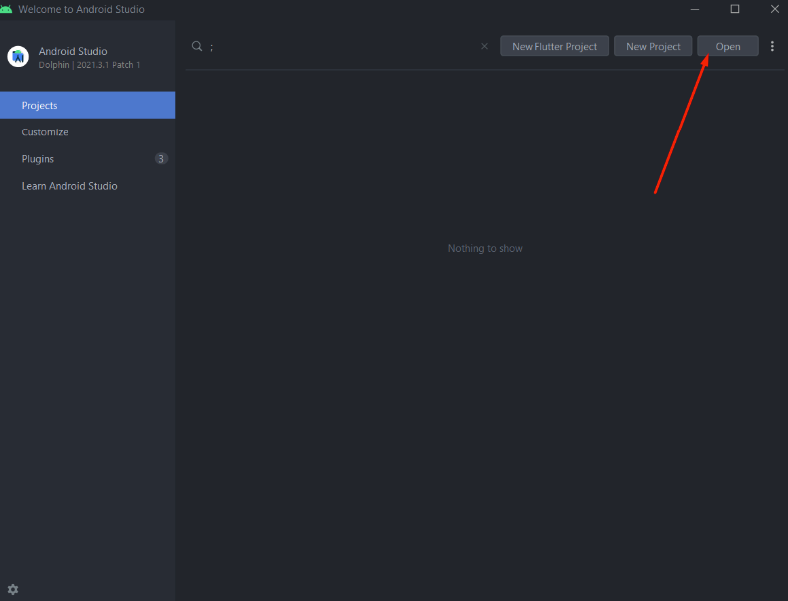
Choose the POS Pro app directory and open it. It is located at download or the folder you selected when it downloaded from the marketplace. This will open the application source code in android studio.
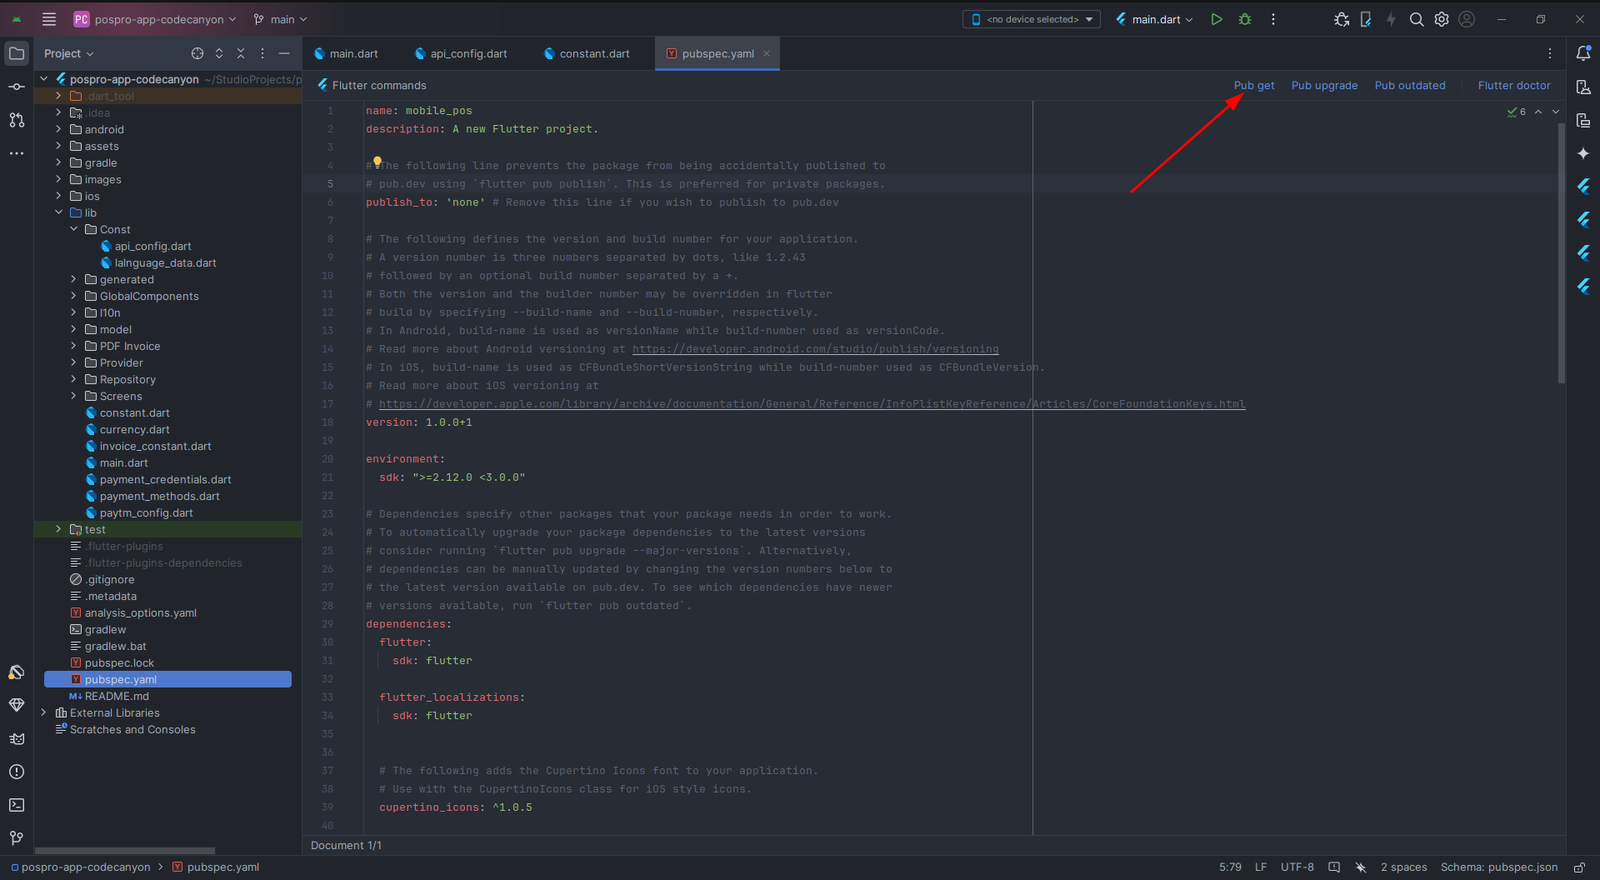
Then go to "pubspec.yaml" file and click on "pub get" button at the top. As shown in the image.
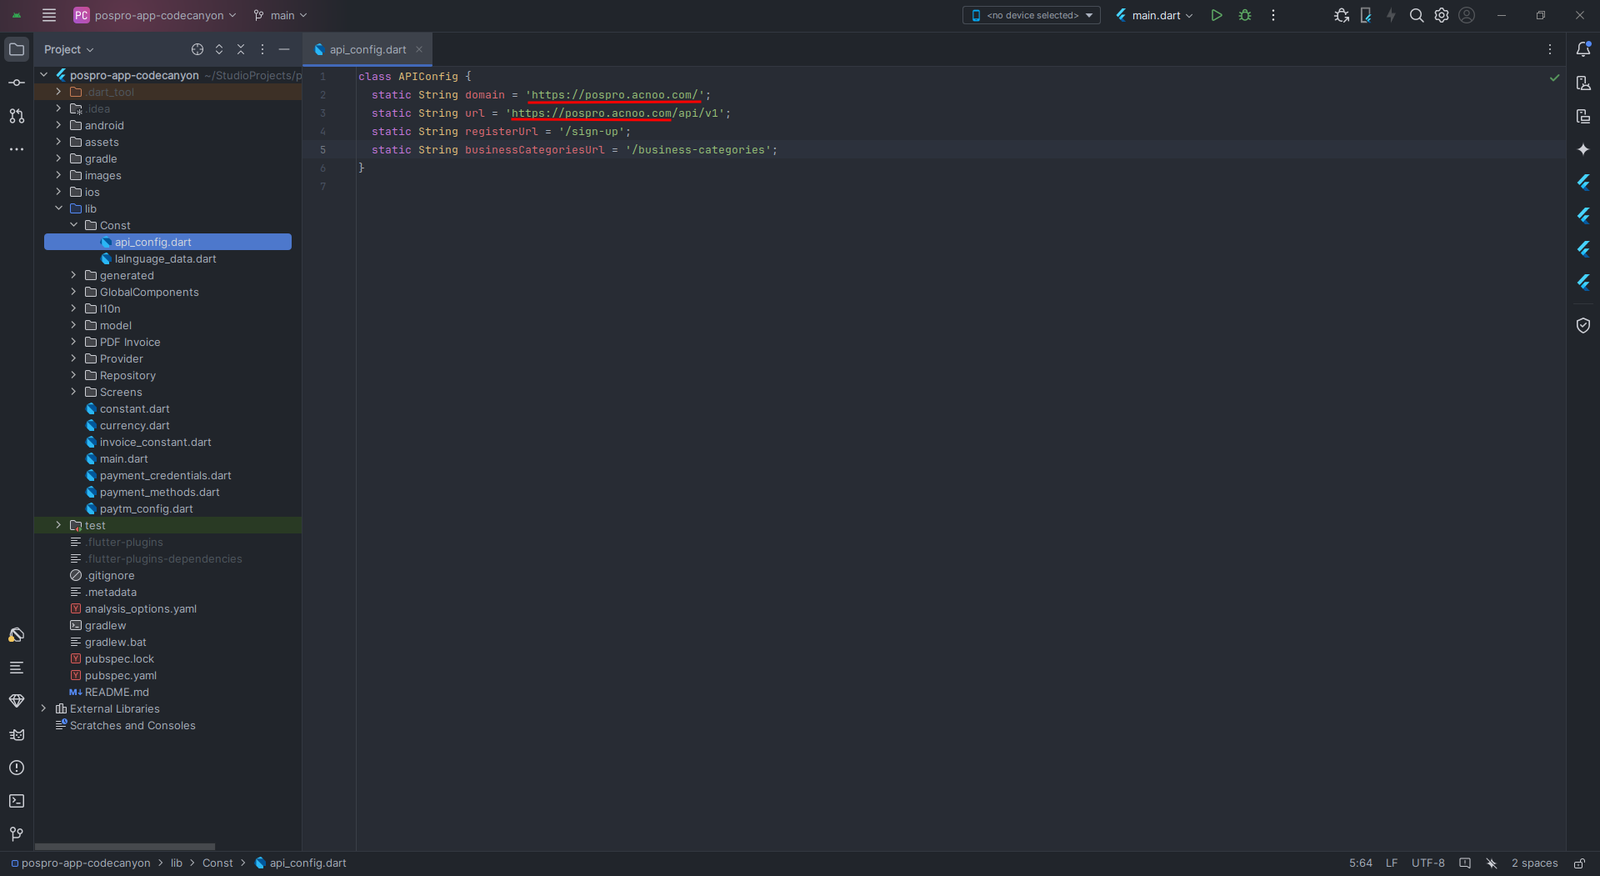
Then go to lib > Const > api_config.dart and replace the domain & url with your domain and url.Keep in mind here you have to change just the base url (https://pospro.acnoo.com). Just replace your base URL instead of https://pospro.acnoo.com or others.
Update Your Purchase Code
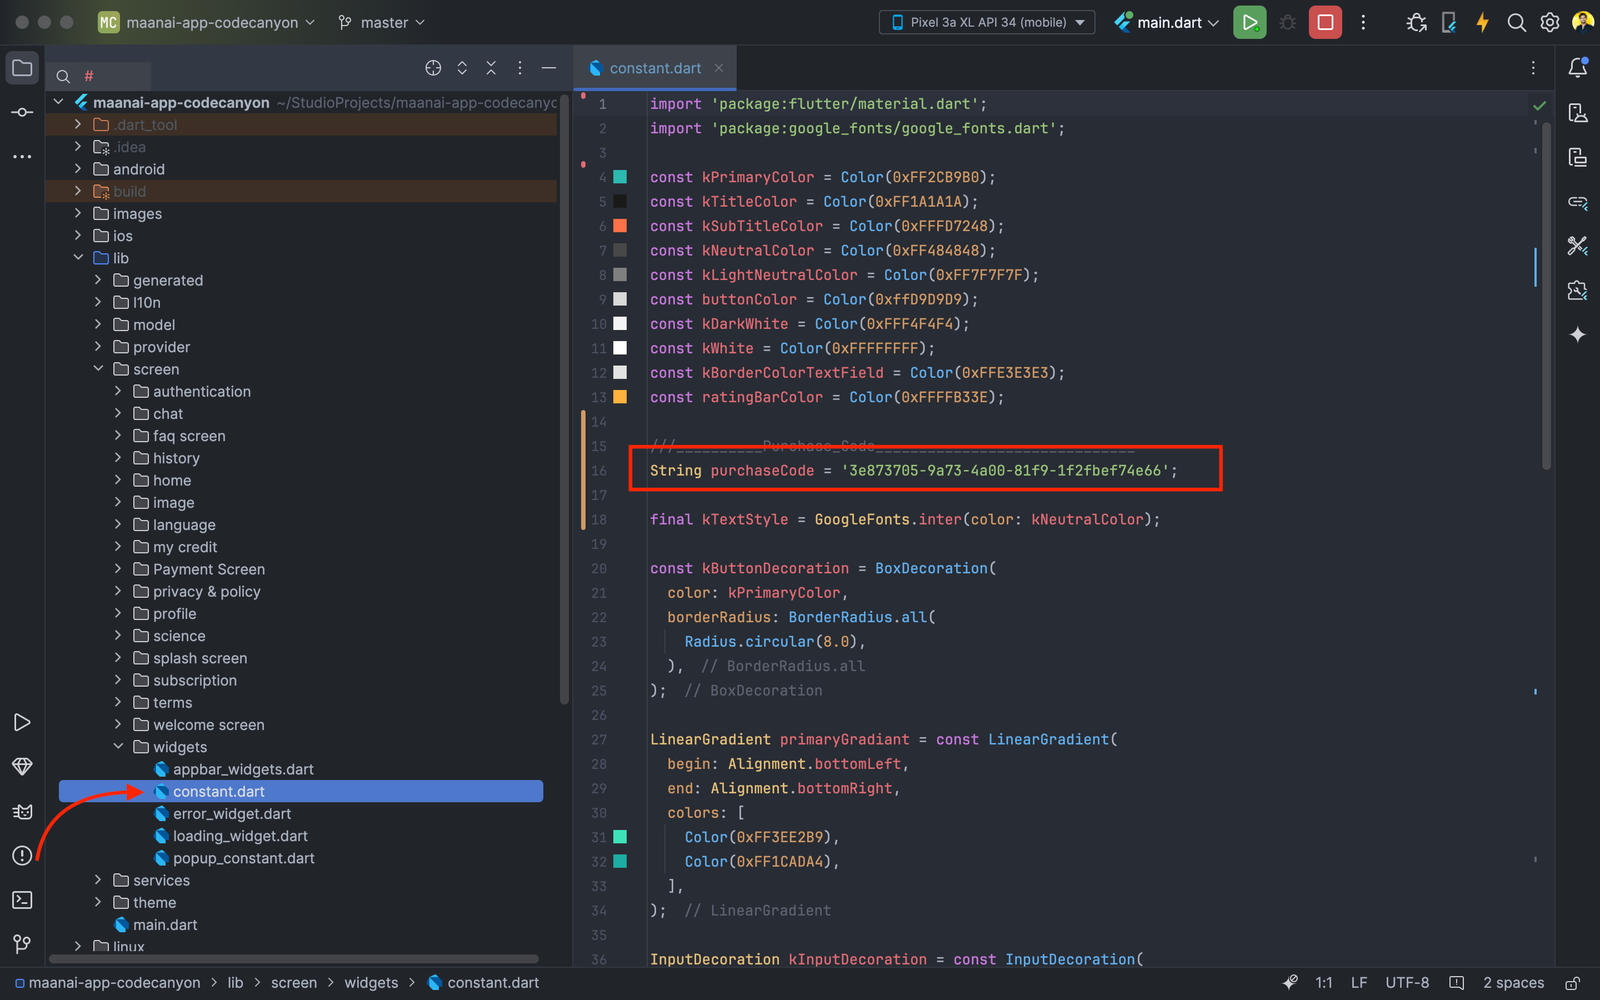
- Navigate to lib/constants.dart.
- Locate the purchaseCode variable.
- Replace its value with your Envato Purchase Code.
Important: Only update the value of purchaseCode. Changing anything else may cause issues.
Change App Name
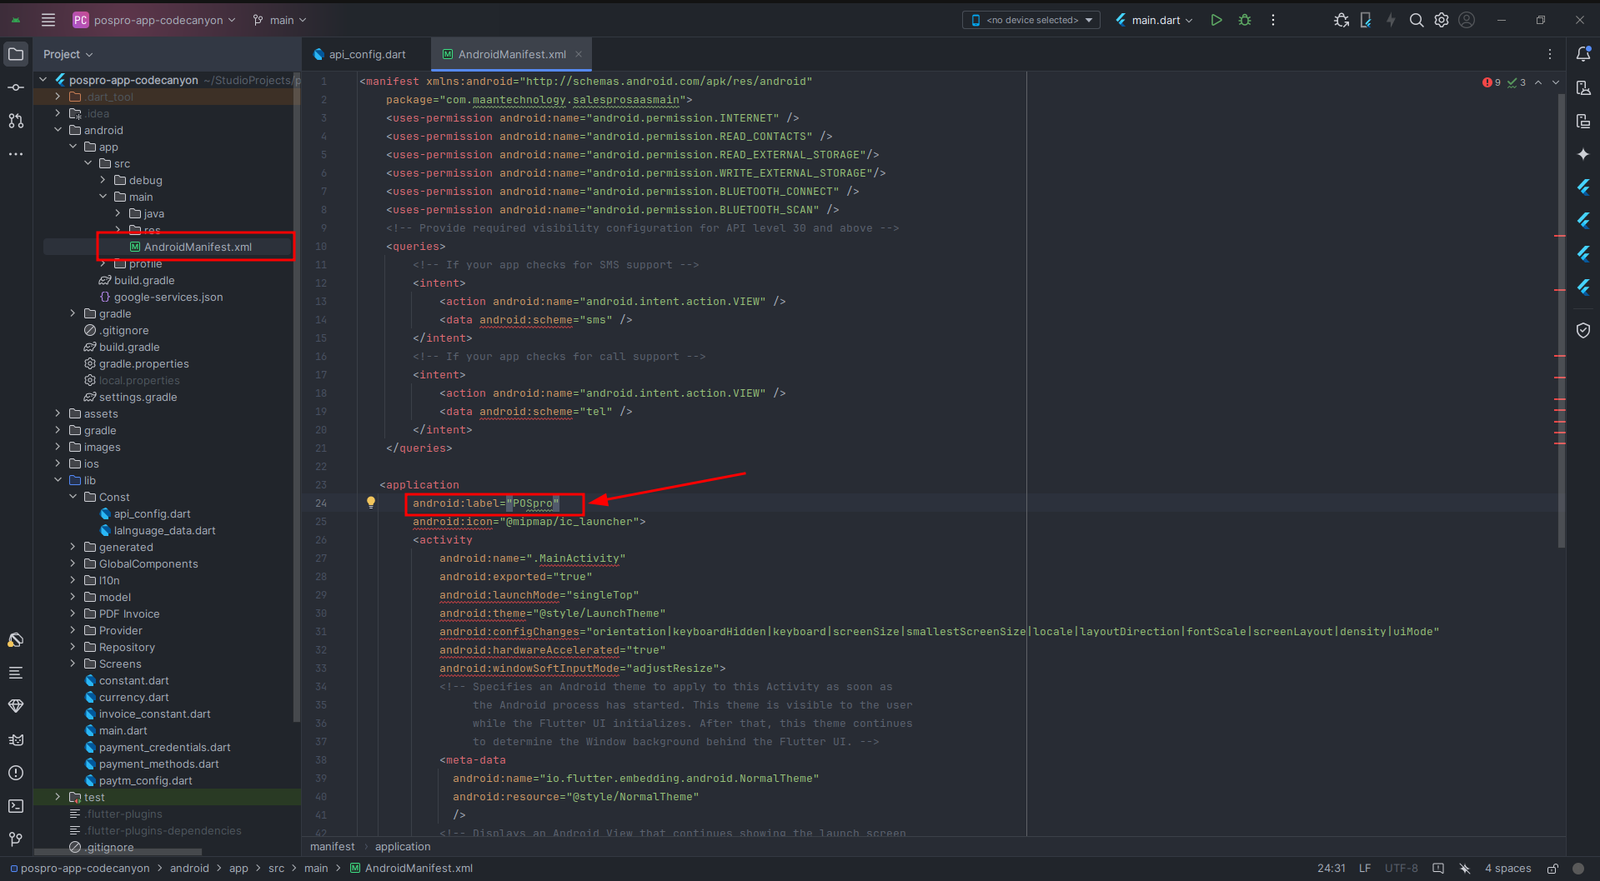
To change the app name you have to go android > app > src > main > AndroidManifest.xml. After opening the file, change the android:label =”AppName” & build the app. The App name will be changed.
Change splah screen logo & onboard images and Name
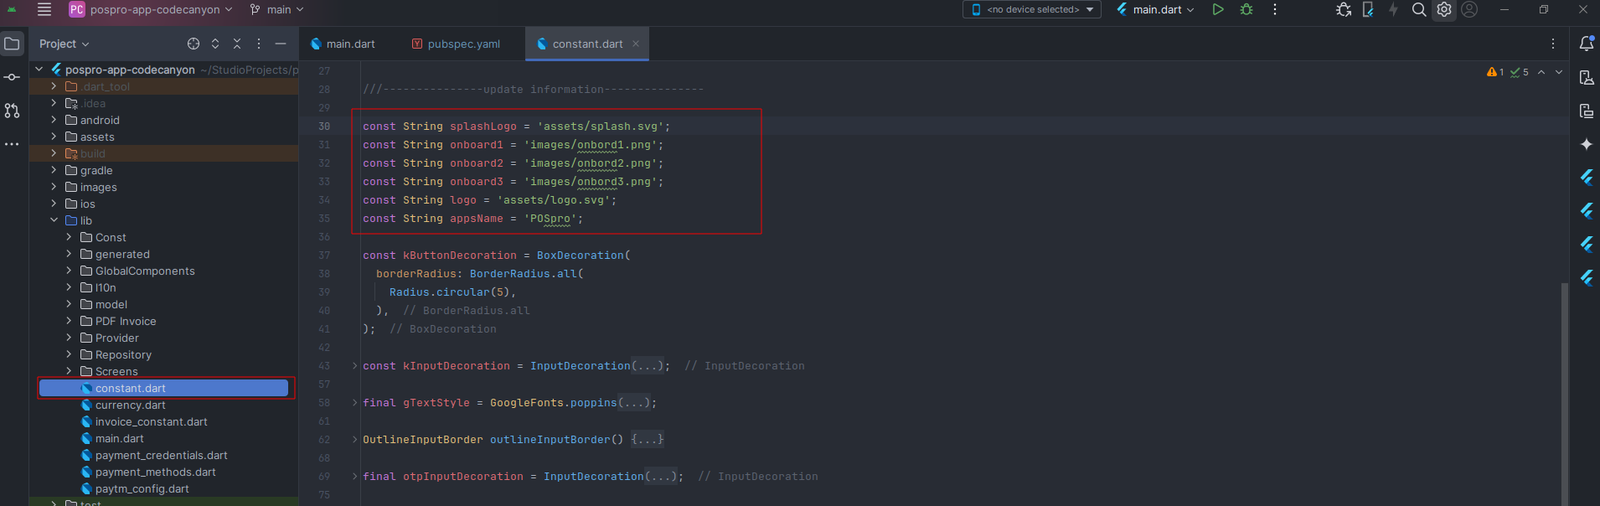
To change the splash screen logo and onboard images you have to go lib > constant.dart directory. Now to change the splashLogo, import the logo to the "assets" directory with name "splash.png". For onboard screen import images to the "images" directory named as sequencely "onbord1.png","onbord2.png","onbord3.png". And change the "appsName" here to change the name inside the app.
Change package name

Step 1: Find and Replace the Package Name in Android Studio. Open your Flutter project in Android Studio. Use the Find and Replace feature: Press Ctrl + Shift + R (Windows/Linux) or Cmd + Shift + R (Mac) to open the "Find in Path" dialog. In the "Find" field, enter the old package name: "com.acnoo.pospro". In the "Replace" field, enter the new package name: "your package name". Make sure the scope is set to "Project" to include all files. Click "Replace All" to update all instances of the old package name in the project.
Change App Icon
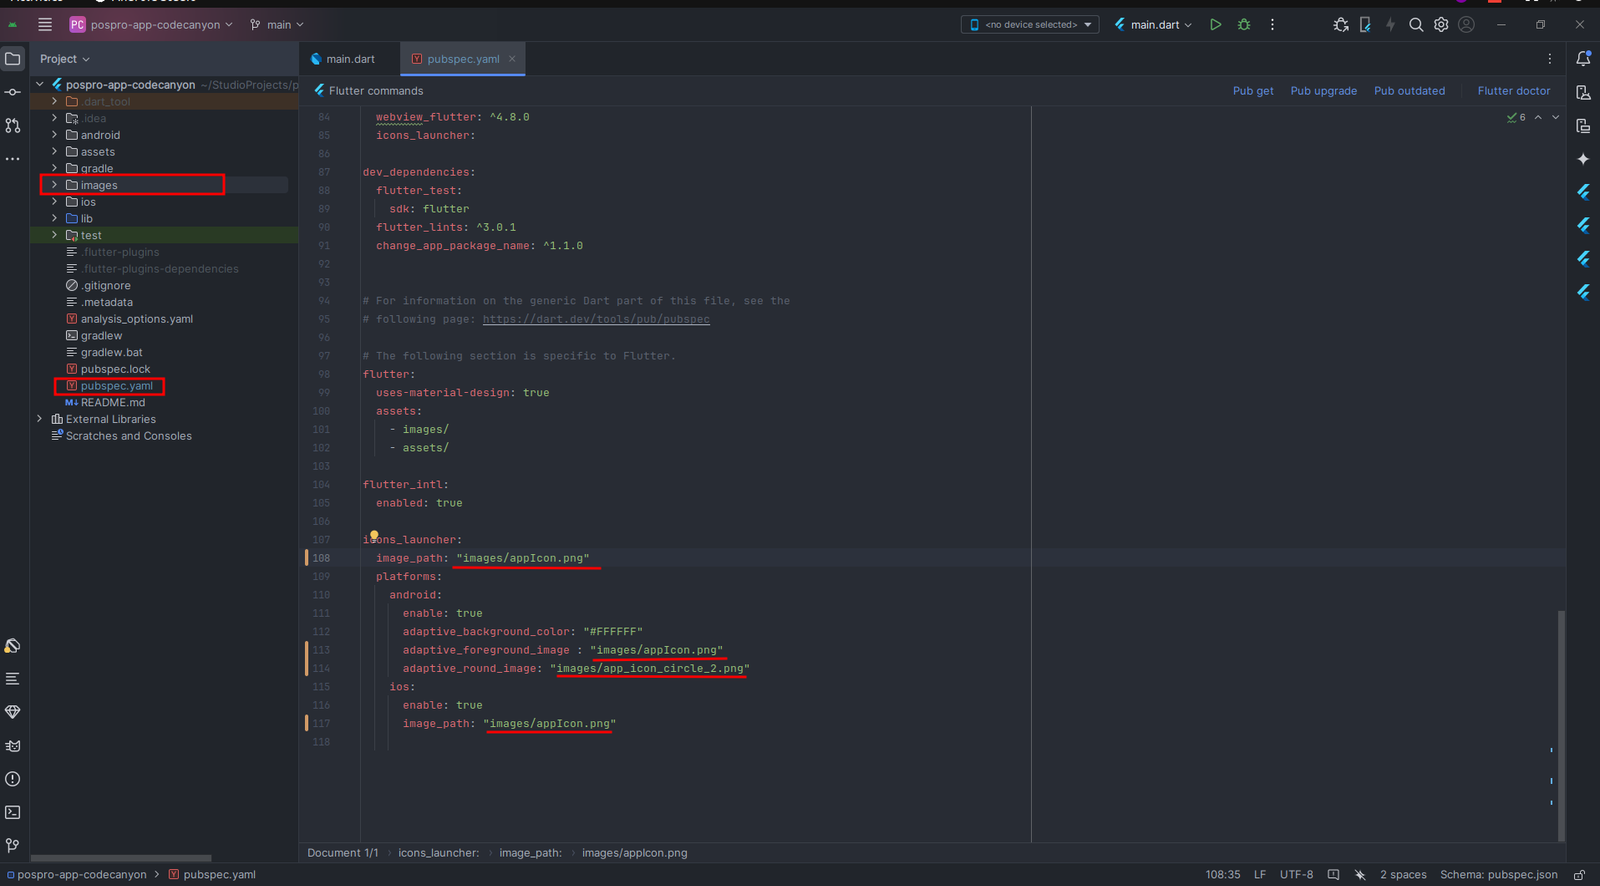
First of all open the "images" directory and import the image you want to make as icon. Then go to "pubspec.yaml" and replace the "appIcon.png" marked with red color with your icon which imported to images directory. Otherwise first rename your icon as "appIcon.png" and then import it to the images directory.
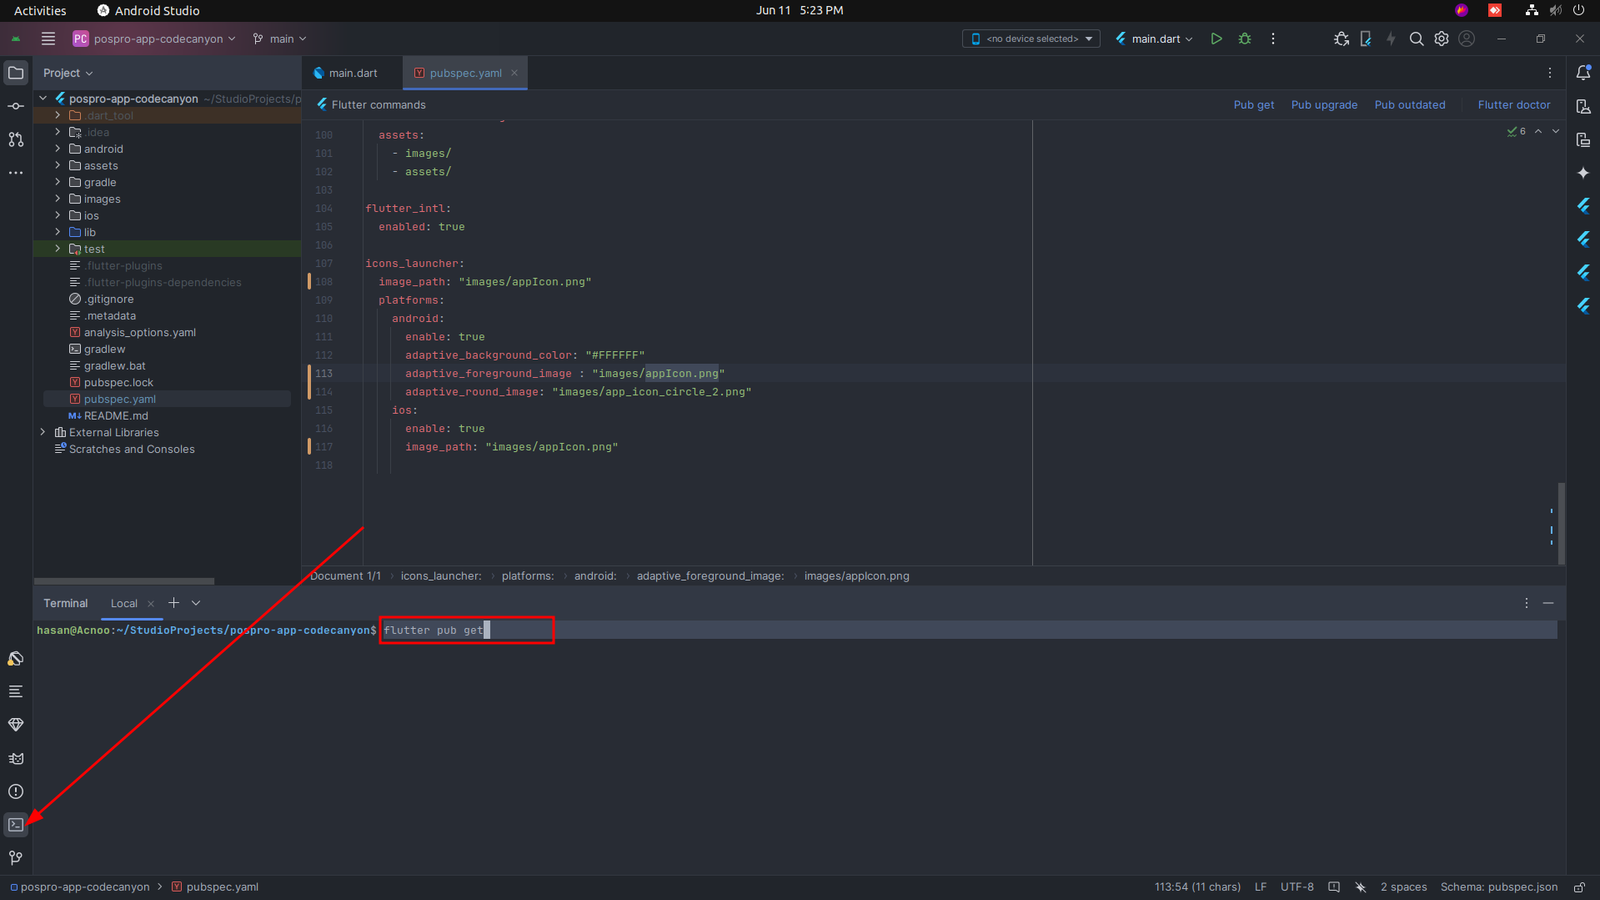
Now open the terminal from your editor and first type the command "flutter pub get" and press enter.
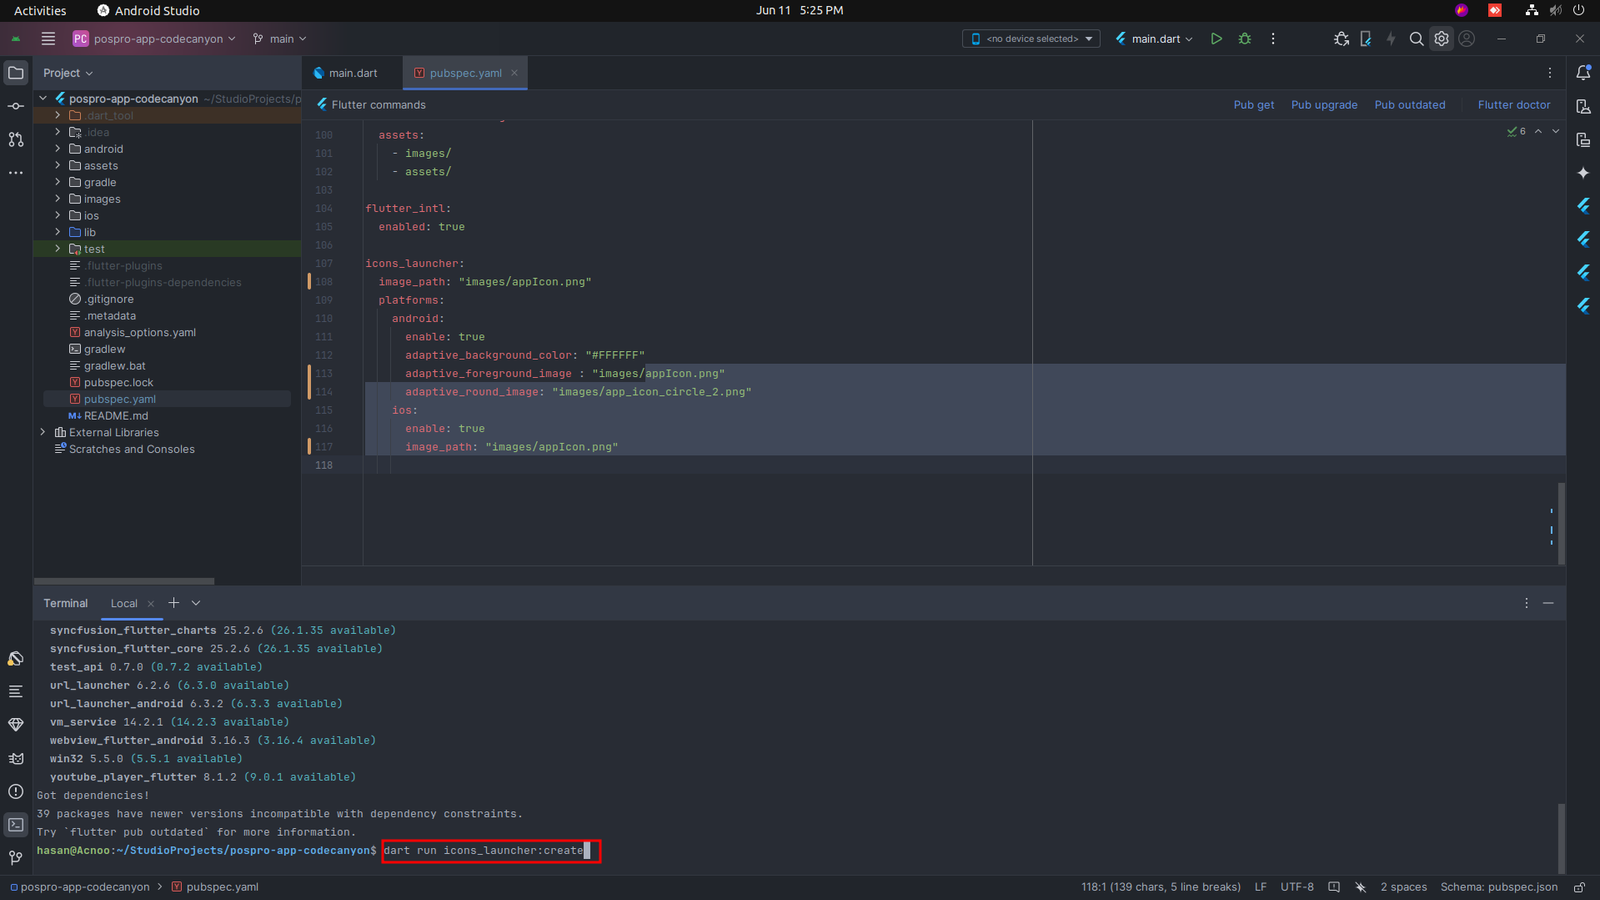 Again type "dart run icons_launcher:create" and press enter. It will change the app
icon.
Now build the app again you can see the new icon.
Again type "dart run icons_launcher:create" and press enter. It will change the app
icon.
Now build the app again you can see the new icon.
Build release apk
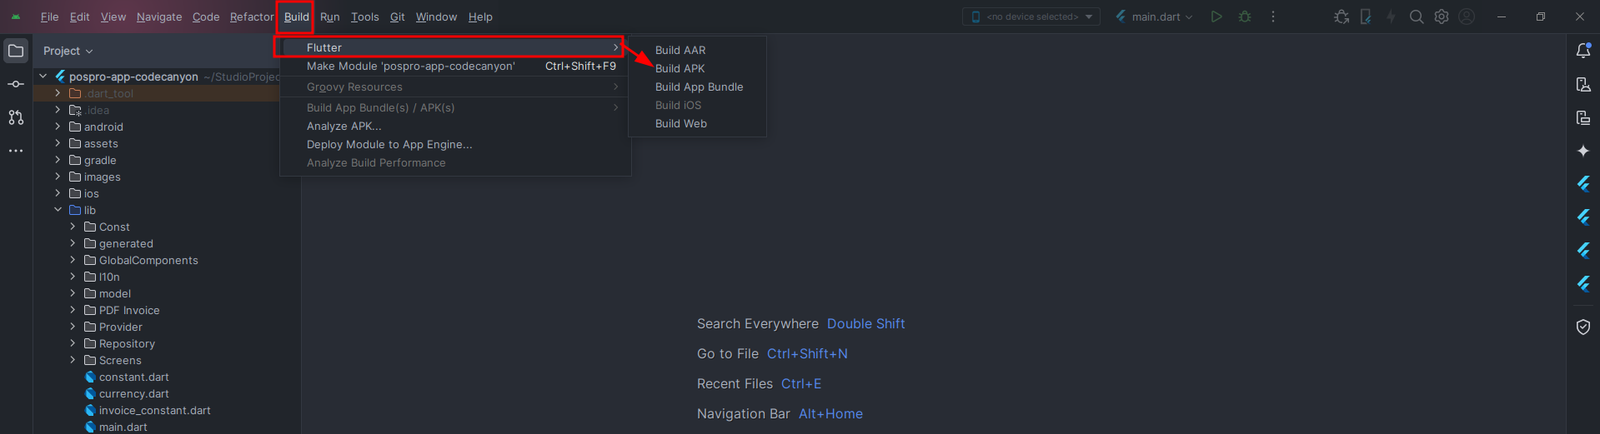
To build an APK, go to the menu section of your environment, then select the Build section and move the cursor on Flutter and then select the Build APK. That's all. After some time it will build a release APK file. For windows click on the main menu option (Four line) from top left, you will see the same toolbar list.
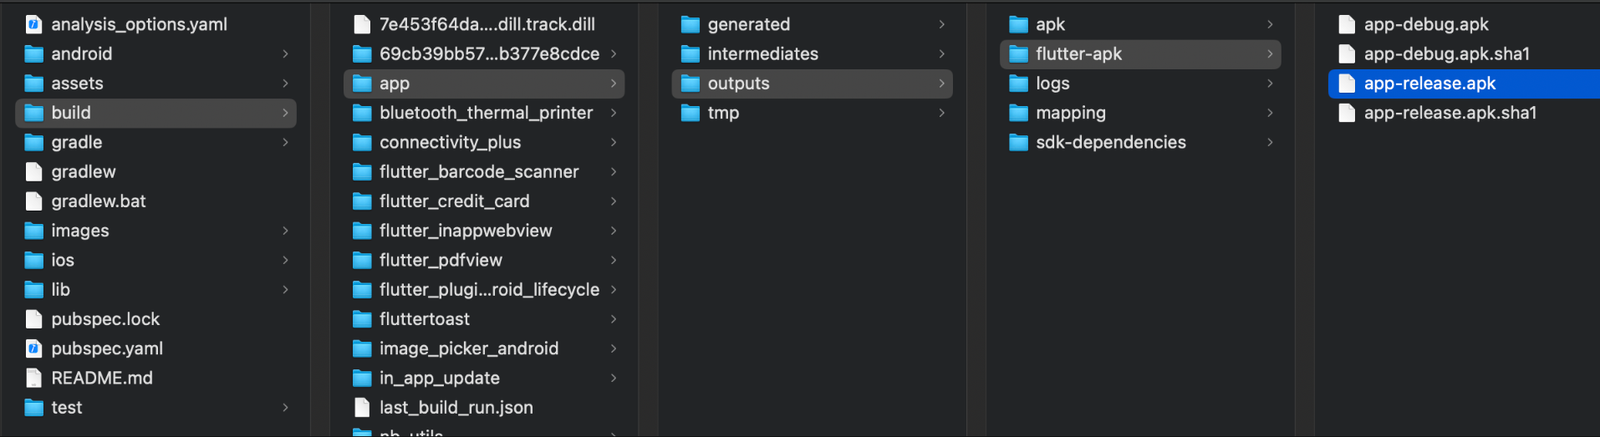
After completing the build process, go to the build directory of the main project directory. It will build a new release apk file named "app-release.apk". path: build > app > outputs > flutter-apk
HELP & SUPPORT
Free support policy includes troubleshooting, technical assistance with the product only. It does not include any customization, additional features integration or concerns about third- party plugins compatibility. But, support is applied to plugin(s) we have developed and integrated ourselves. We appreciate your understanding!
If you need assistance and information on purchased product that is not covered in documentation, mail them on our support at
You can expect answer within 24-48 hours, usually as soon as possible in the order they were received.
Additionally, if any email has no response from the item owner for more than 7 days, that support email will be archived by default. However, if you need further assistance, you can mail us again.